
Introduction
This page contains is a description of the process of making a pair of kolti (temple pendants) and diadem inspired by historical finds from medieval Kyivan Rus culture. The coronet/diadem is based on the Sakhnivka diadem, and the kolti are patterned after a set that are currently housed in the Metropolitan Museum of Art. During the process of designing and making the kolti and diadem I learned a lot, both historical and practical, and wanted to share these learnings with anyone who is interested.
Historical inspiration:
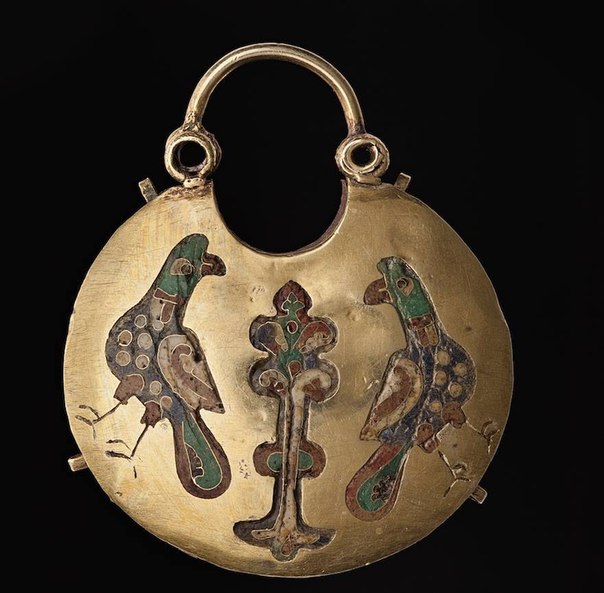
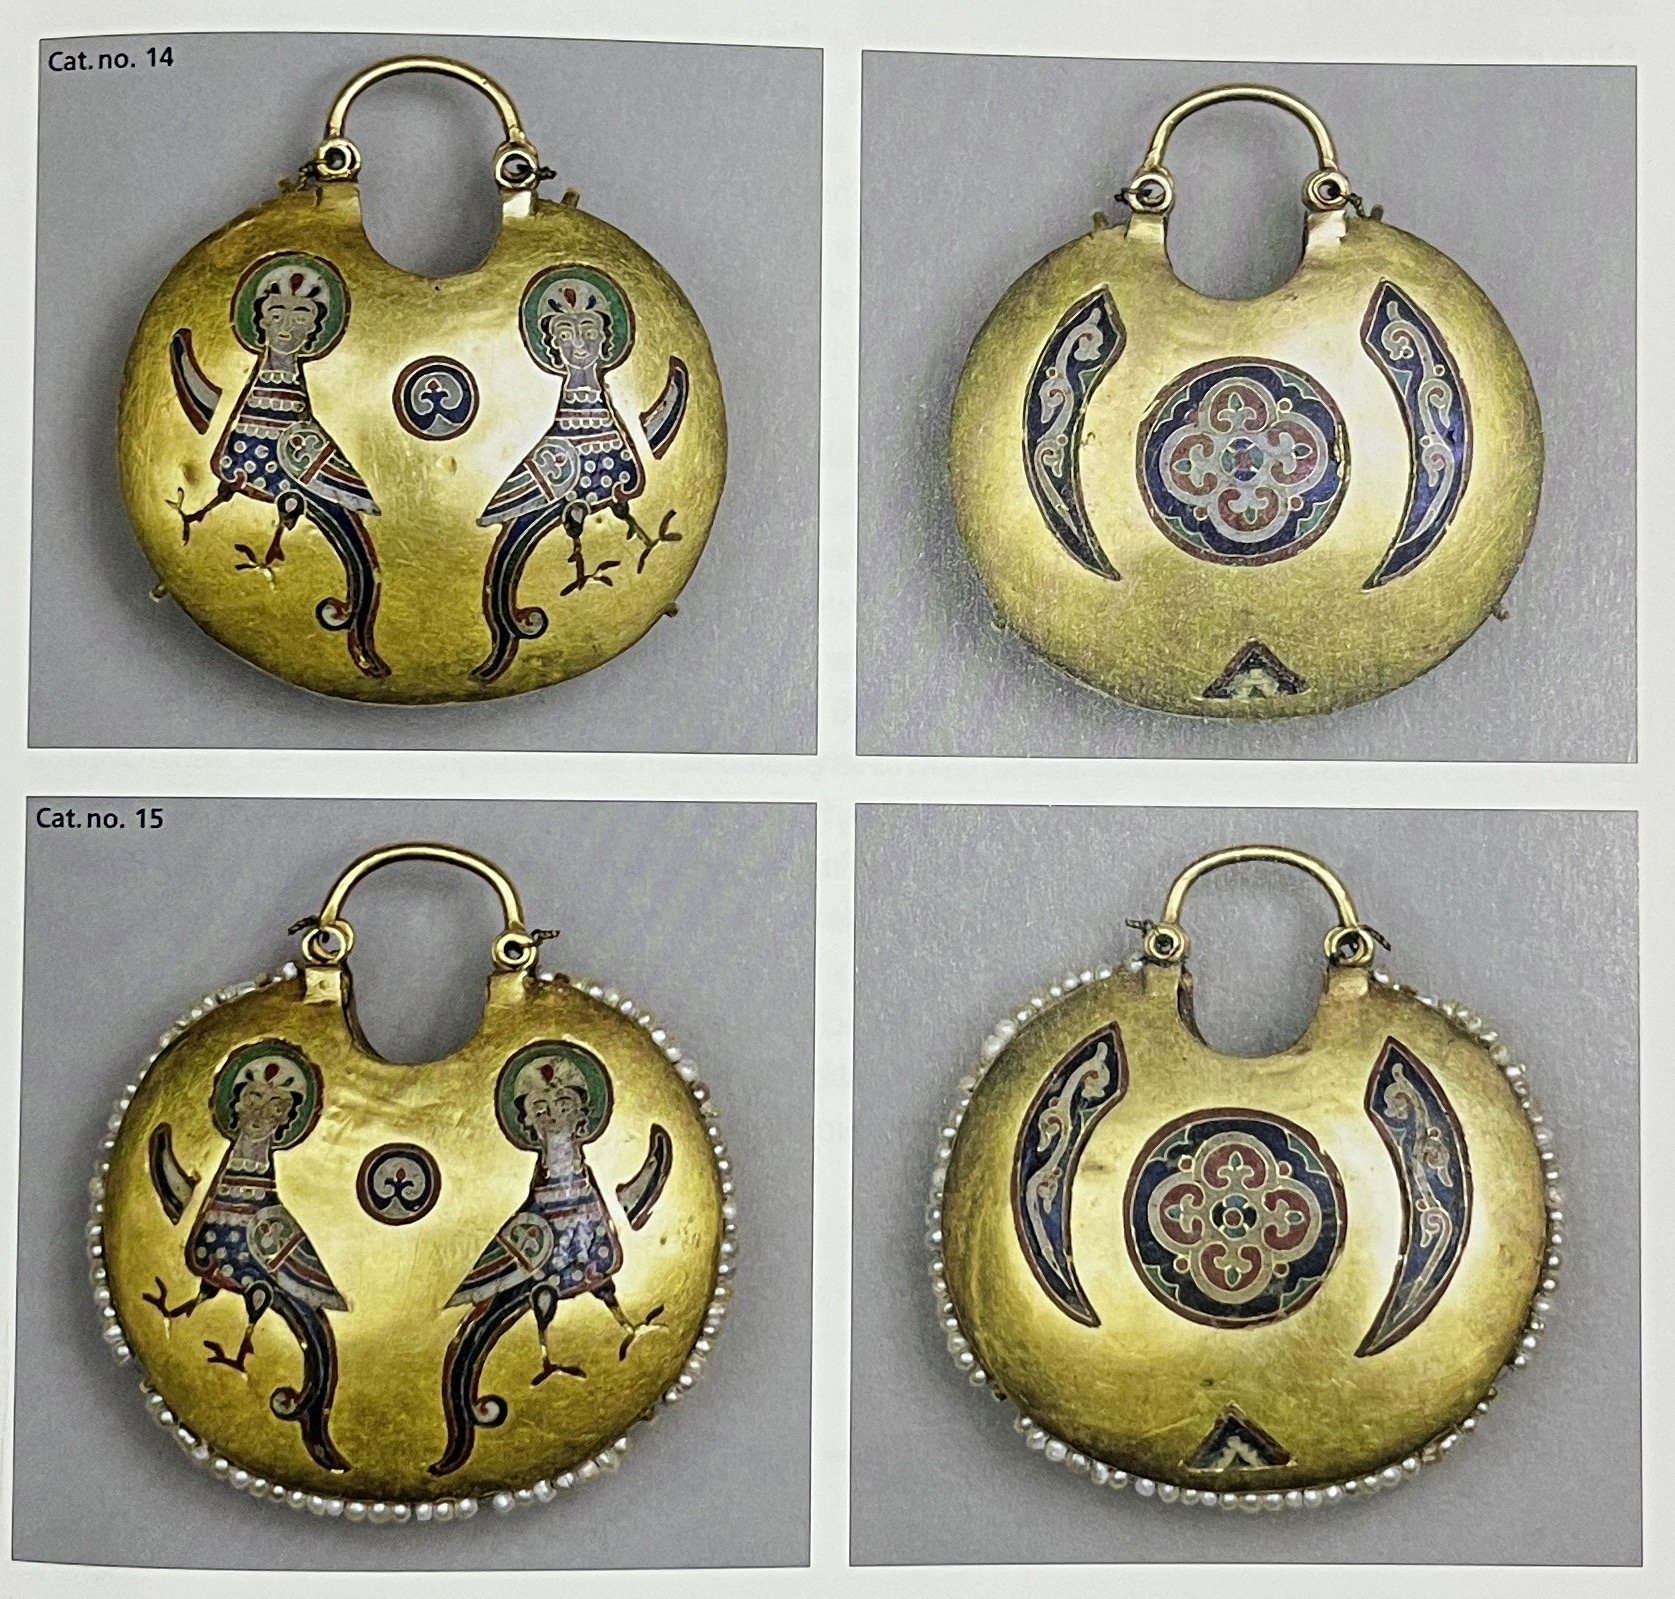
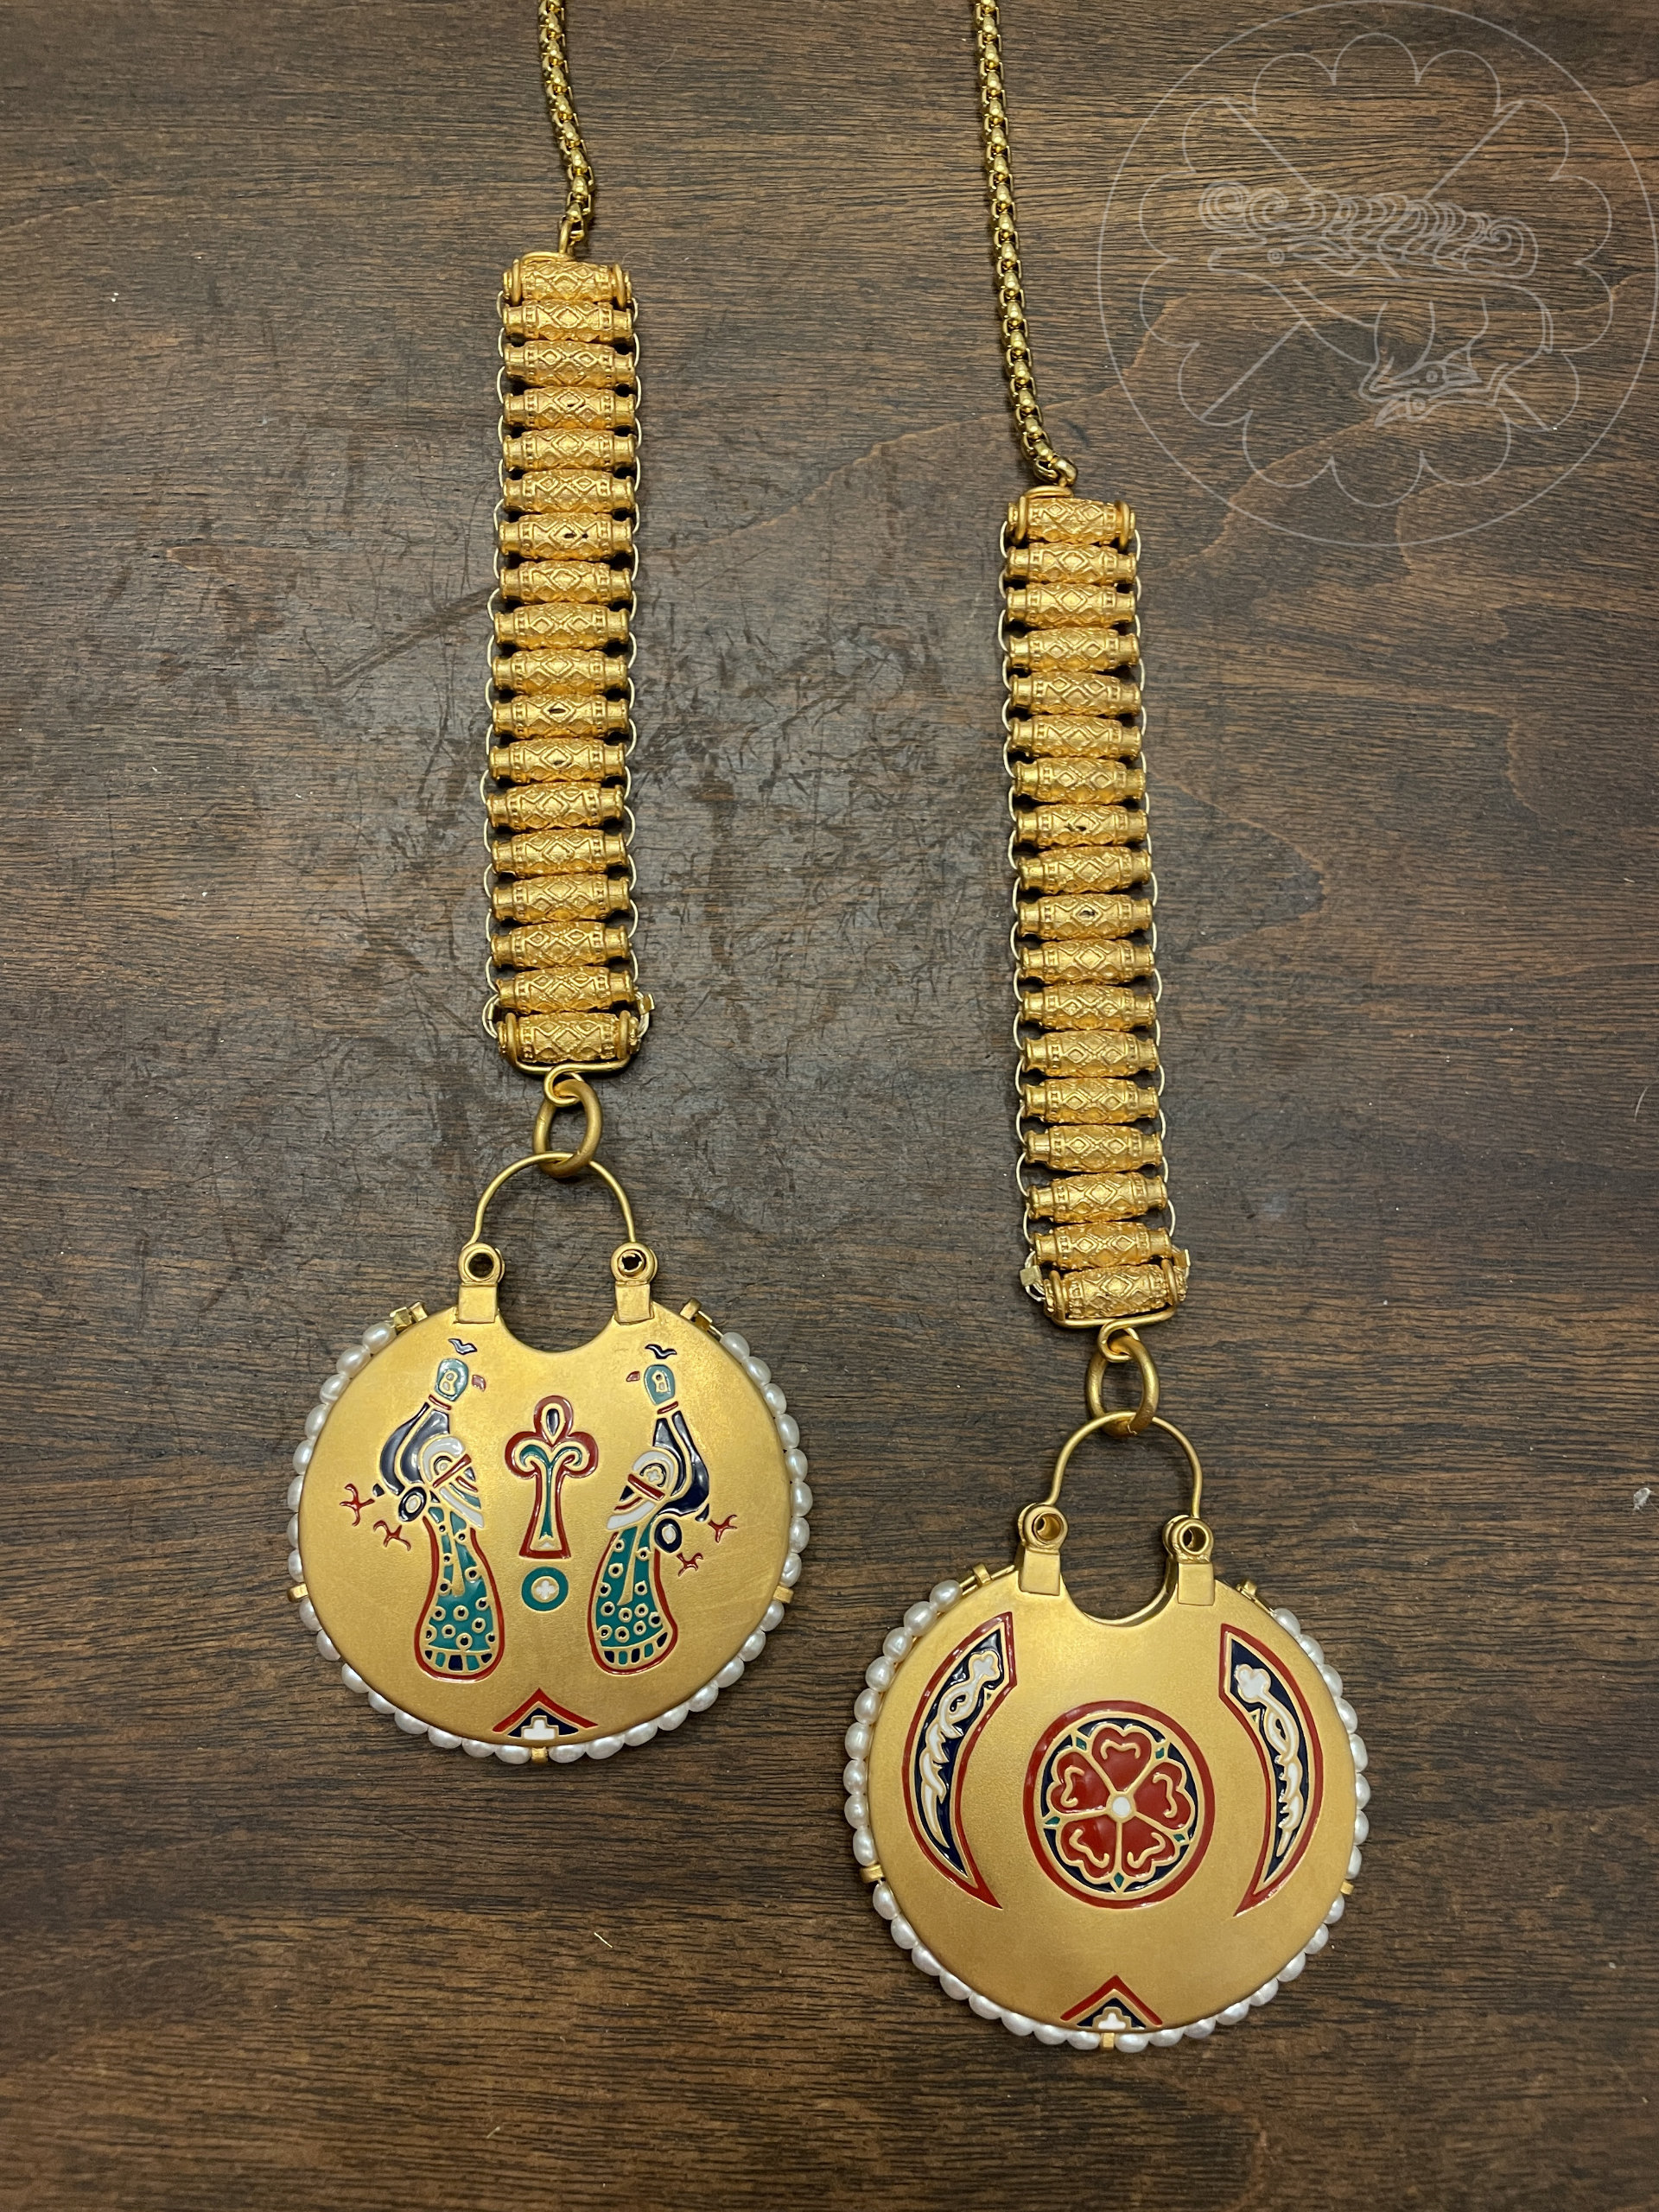
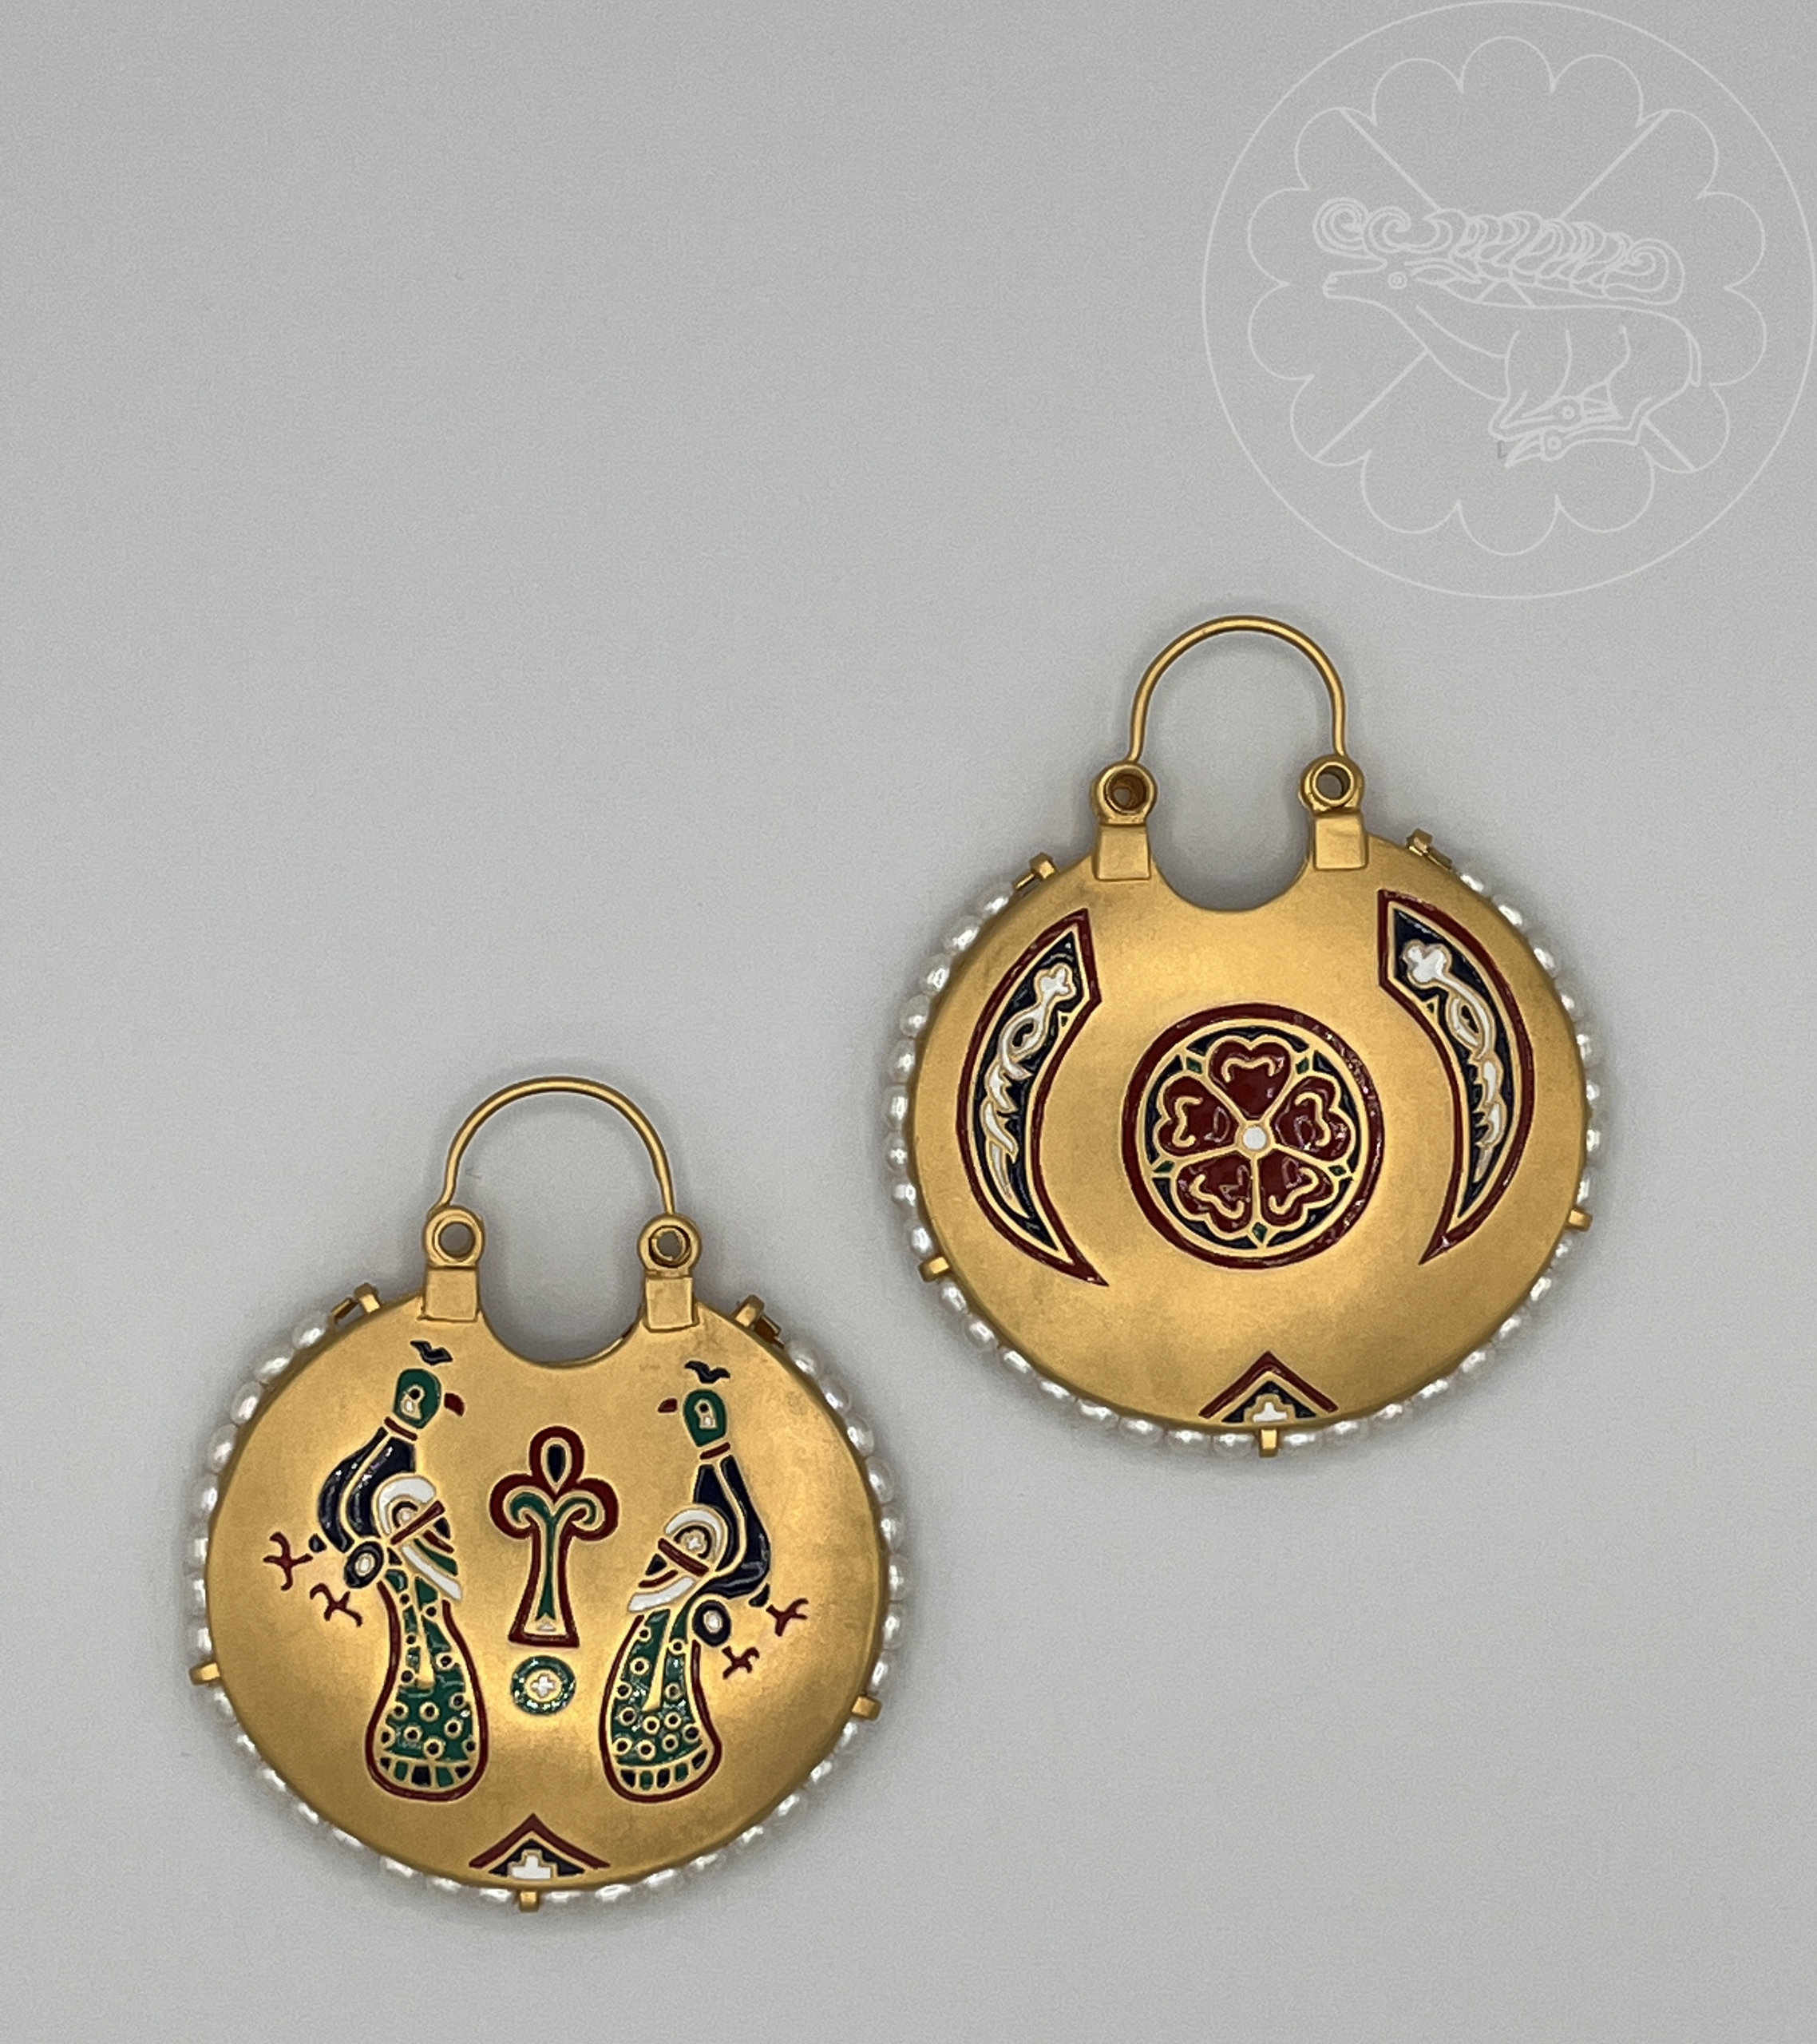
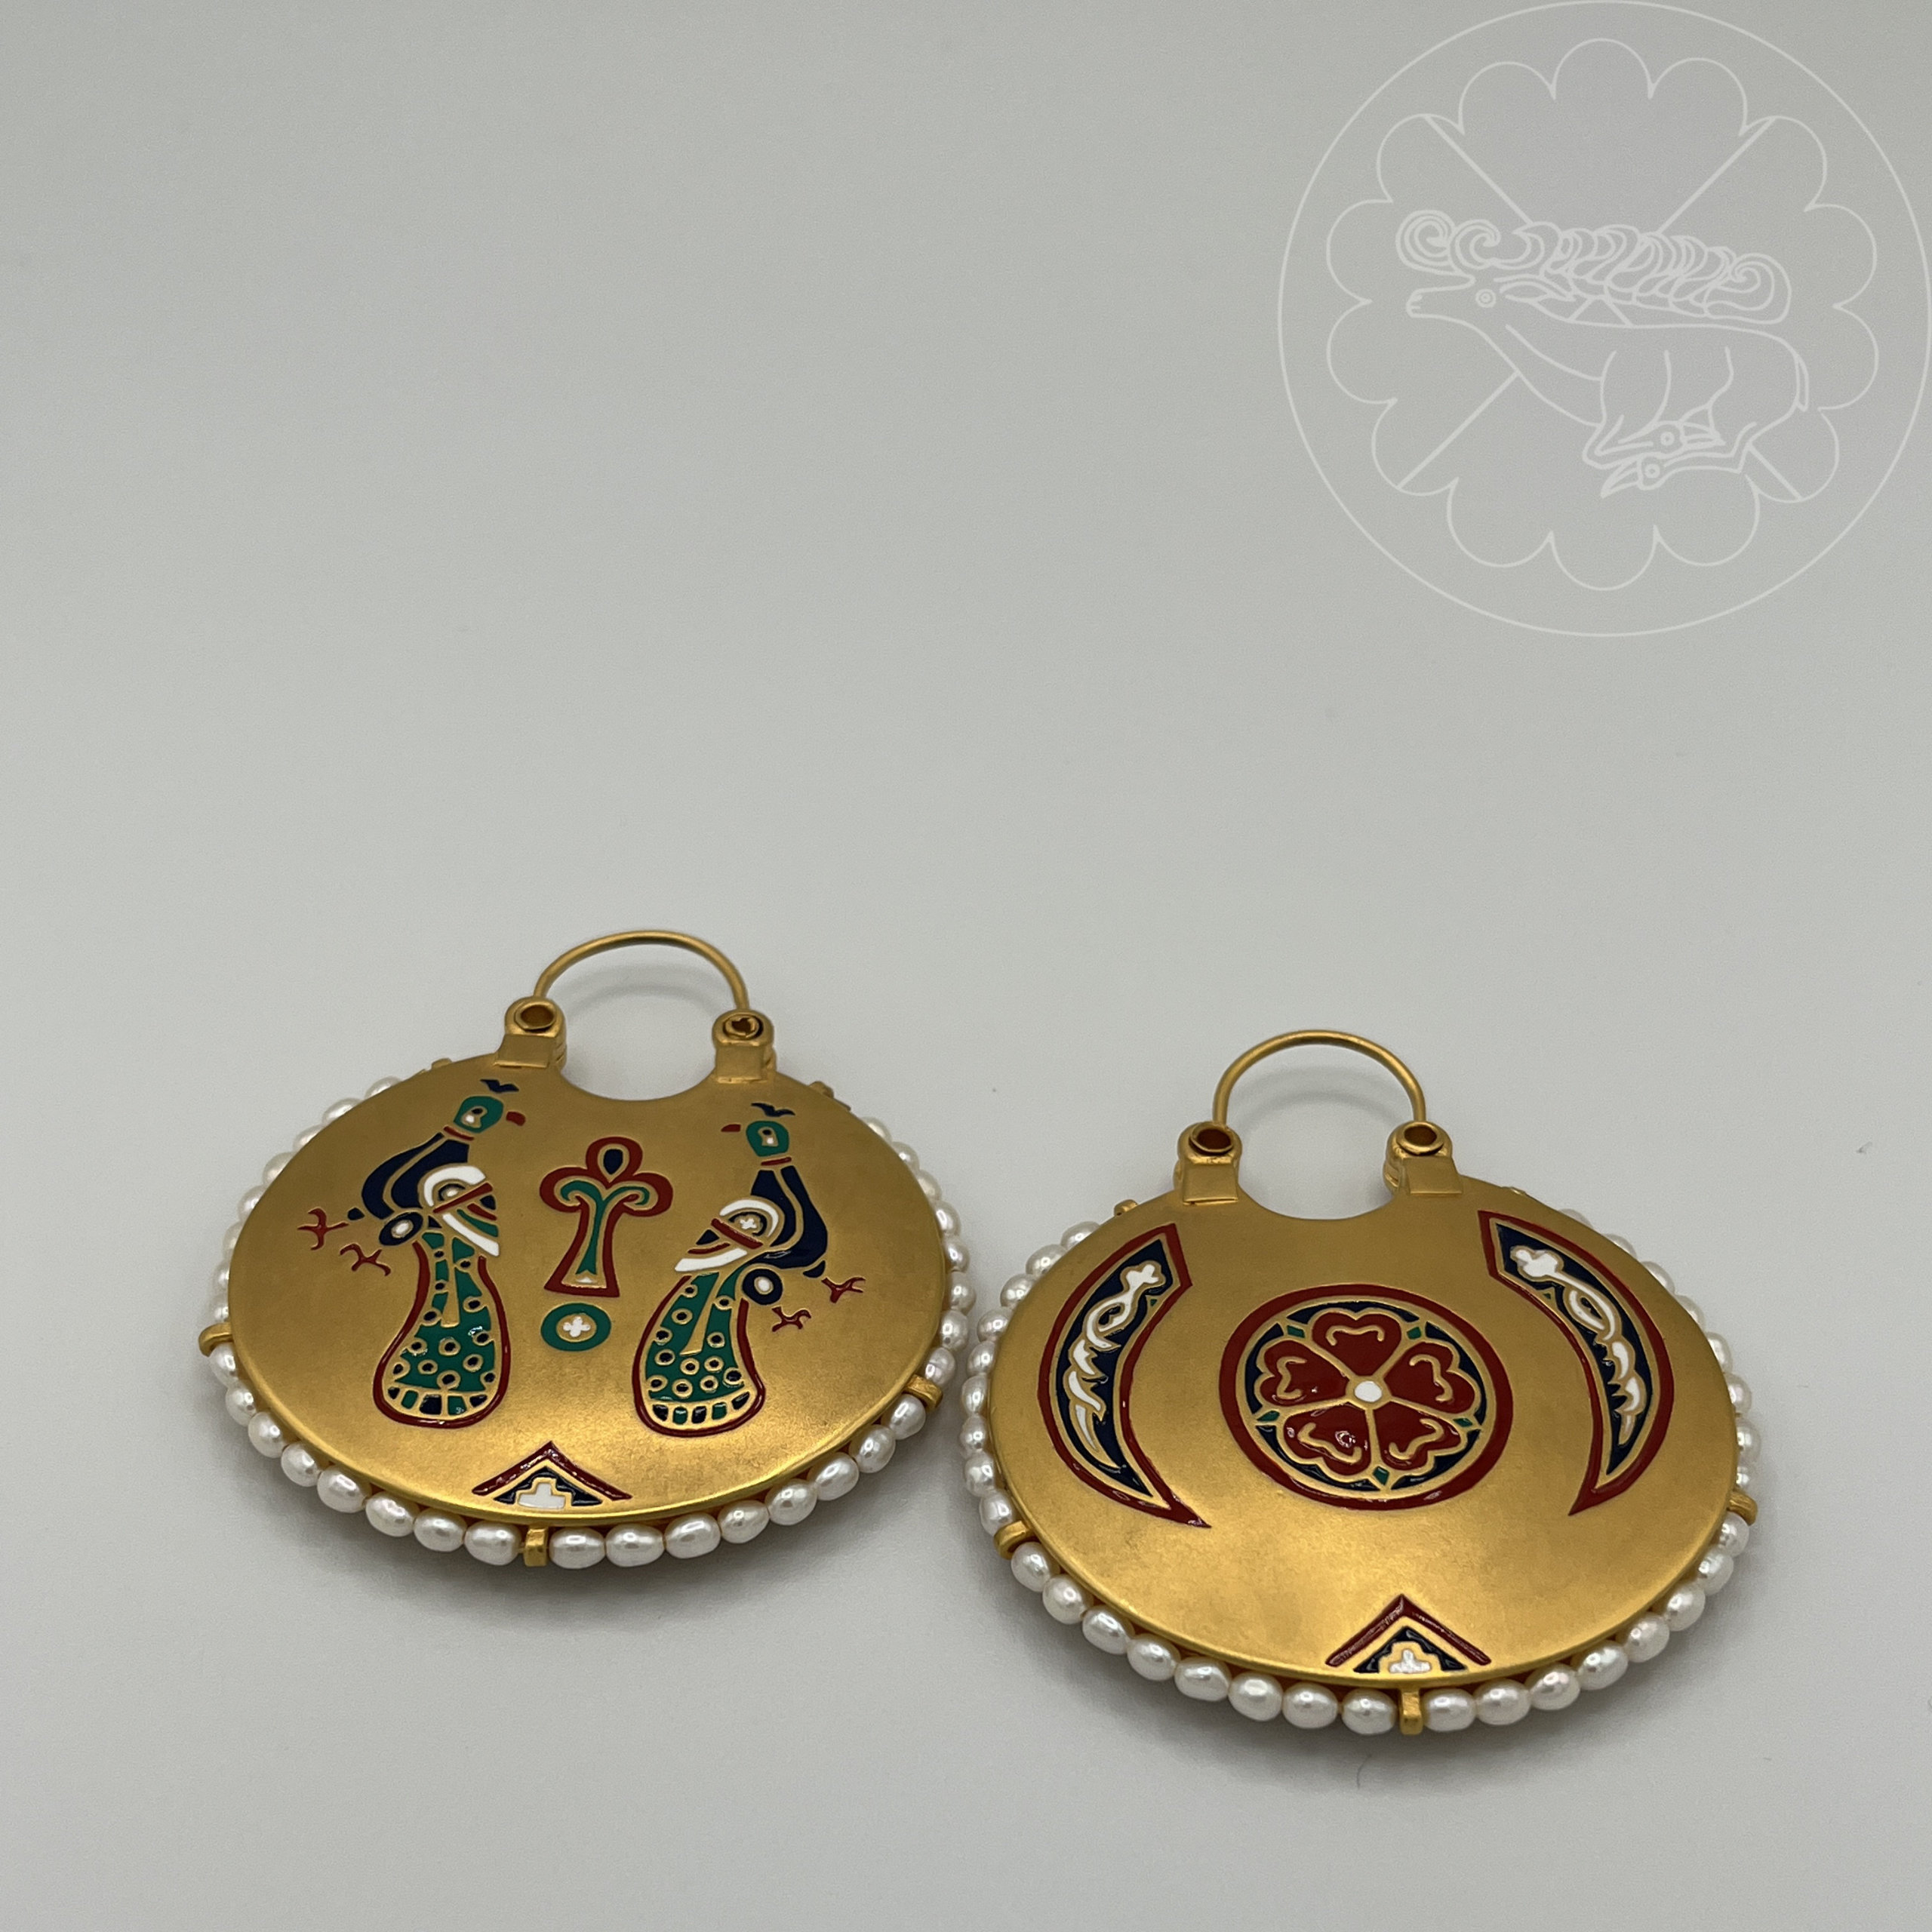
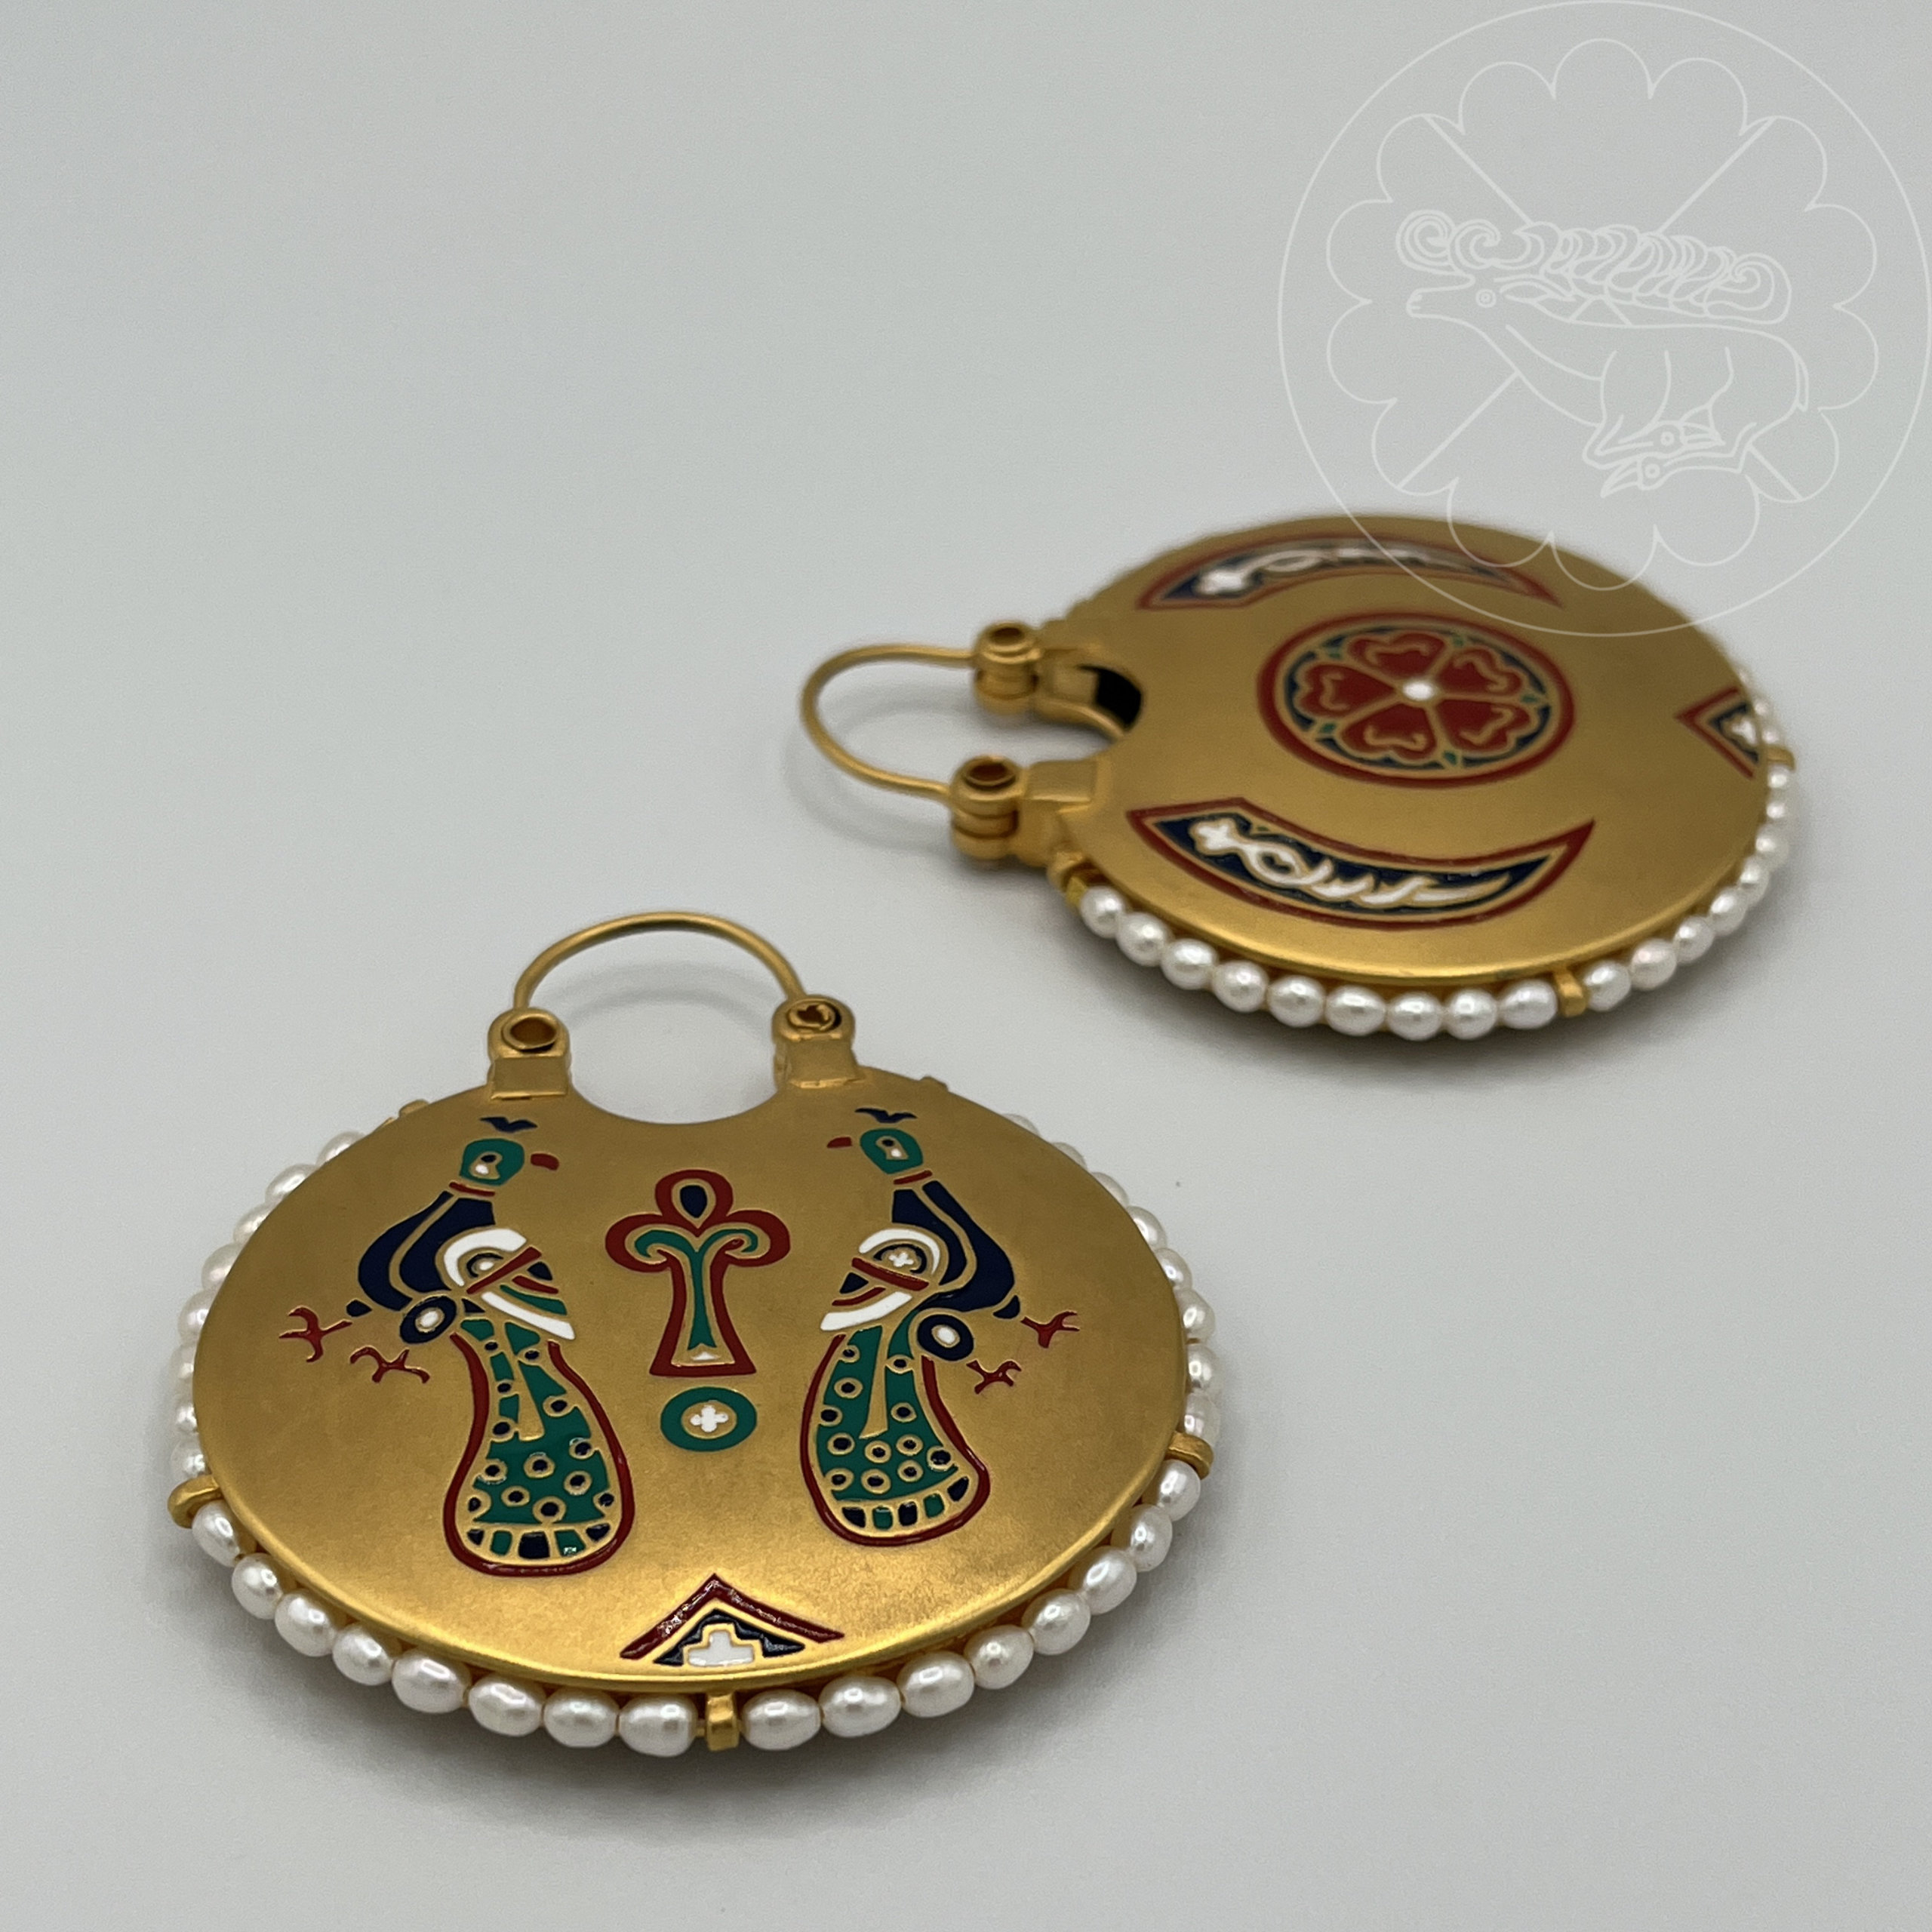
Kolti – Kolti (plural, also spelled kolty, колти, singular kolt, колт) were a fashionable ornaments worn as temporal pendants as a sign of wealth in Kyivan Rus culture in the 11-13th centuries. While they bear some similarities to Slavic temple rings and temporal pendants from Byzantine cultures, they are unique and distinct in appearance from both. Most basically they consist of a pair of convex discs attached together and suspended by a hoop at the top with a cutout area underneath it, creating a hollow pendant.
Some kolti are more ornate with radial projections, and some were constructed of silver using different decorative techniques such as niello,
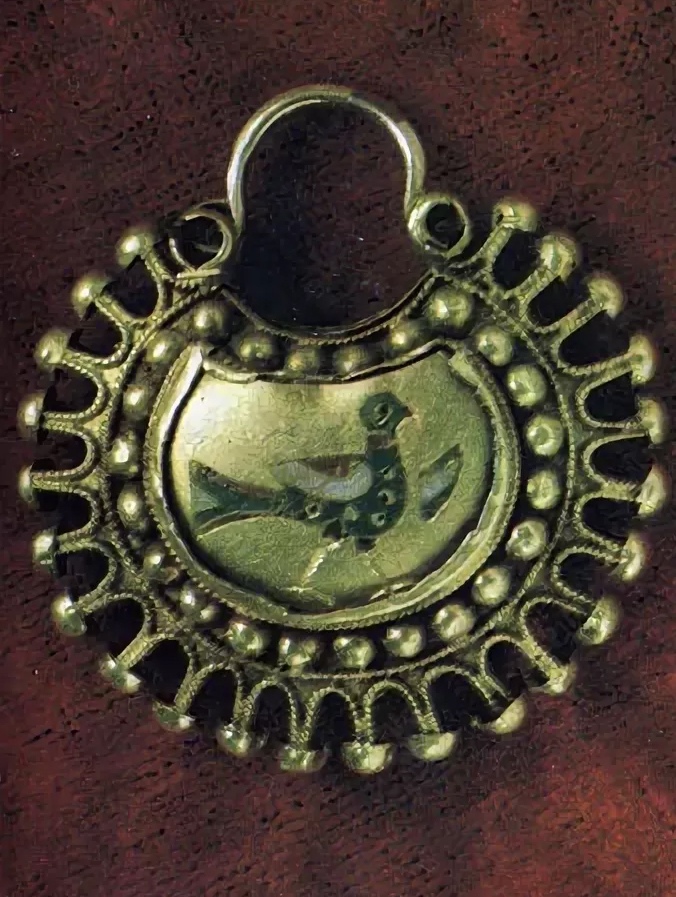
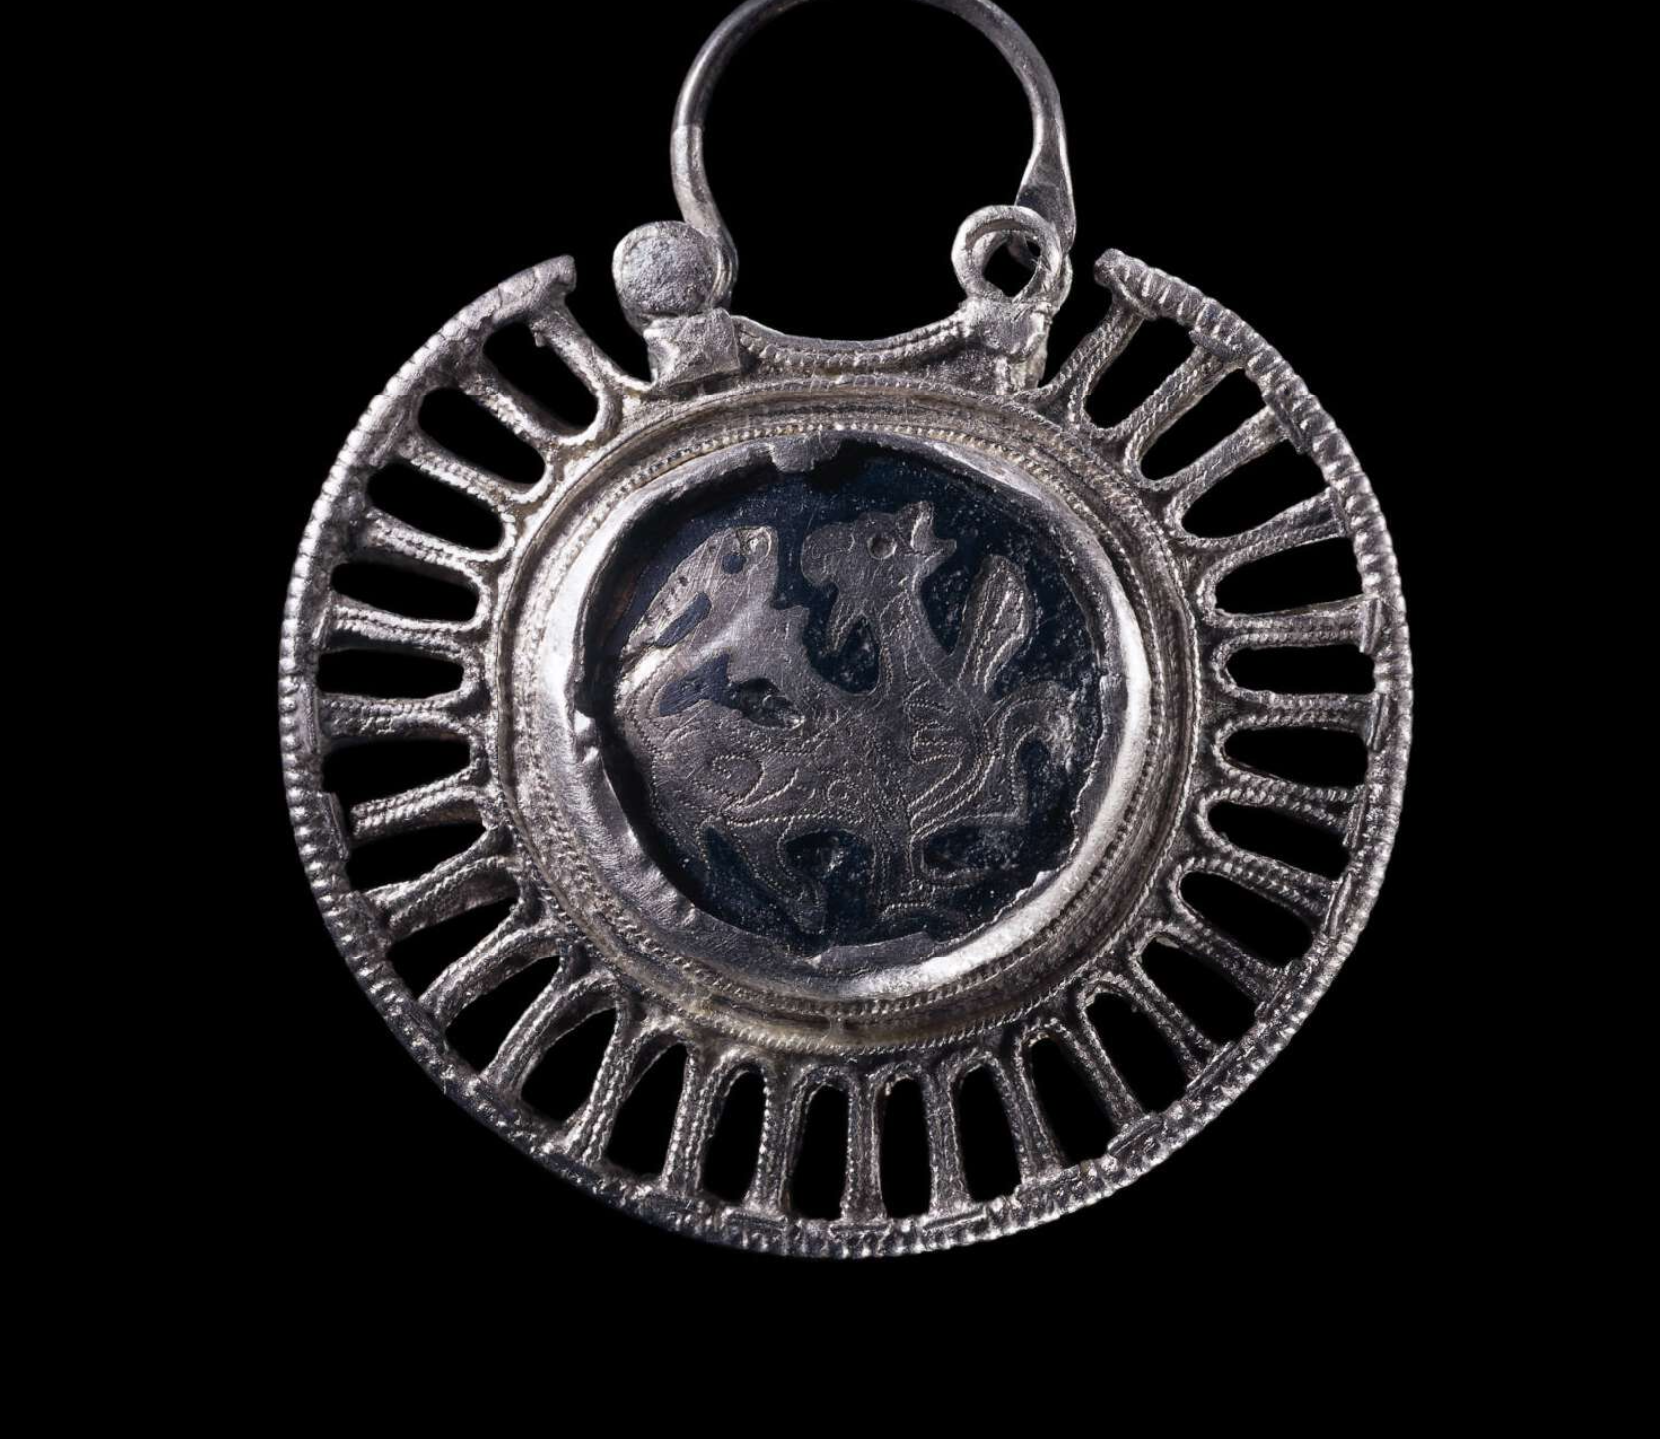
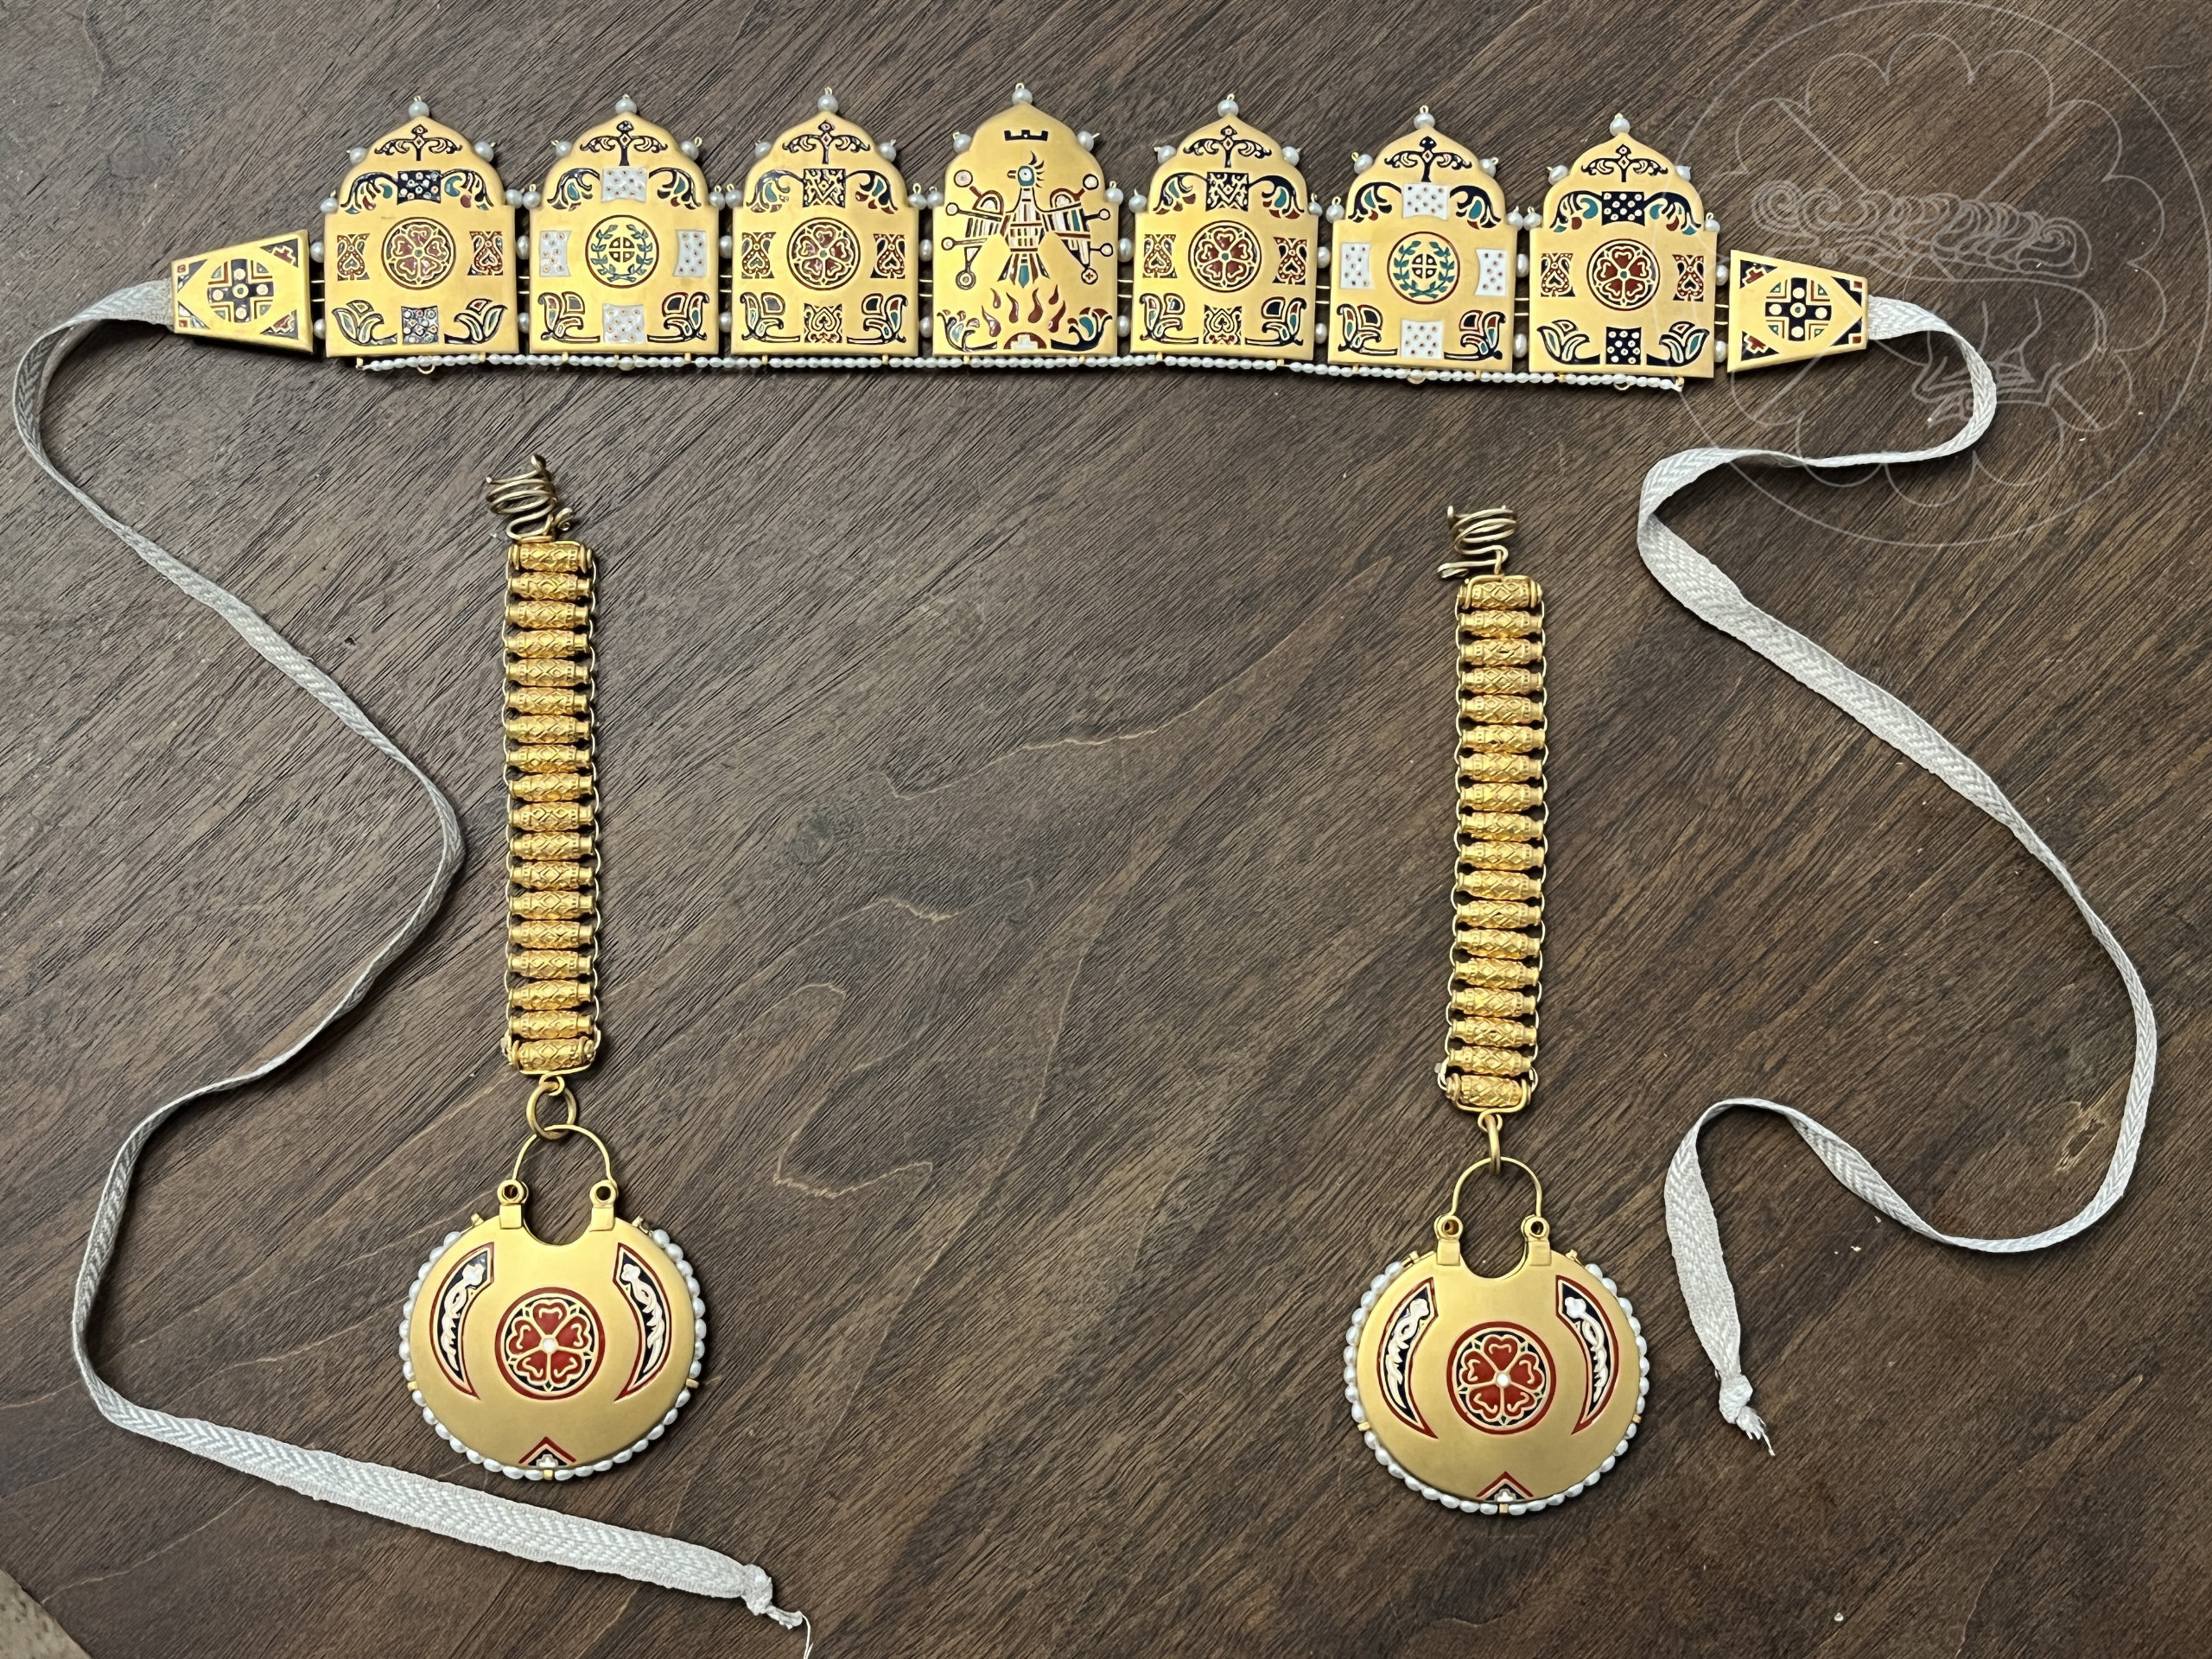
but most were constructed of gold or electrum decorated with cloisonné enamel with small wire hoops along their edges to support a string of pearls or beads for decoration around the outer edge [PIC]. There are numerous extant examples from Kyiv and surrounding regions, being mostly round (some slightly oblong) varying in diameter from. ~4 cm for the smallest pieces to ~6.4 cm in for the largest.
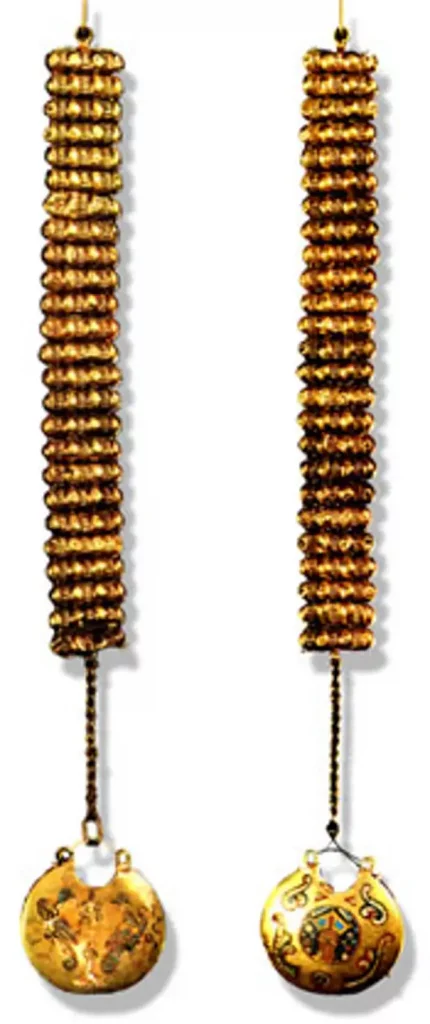
They are believed to have been worn suspended from the temples or from a headdress, with or without ryasni (also spelled ryasny Russian рясны – chains or strands of bead-like pieces from which kolti are suspended)
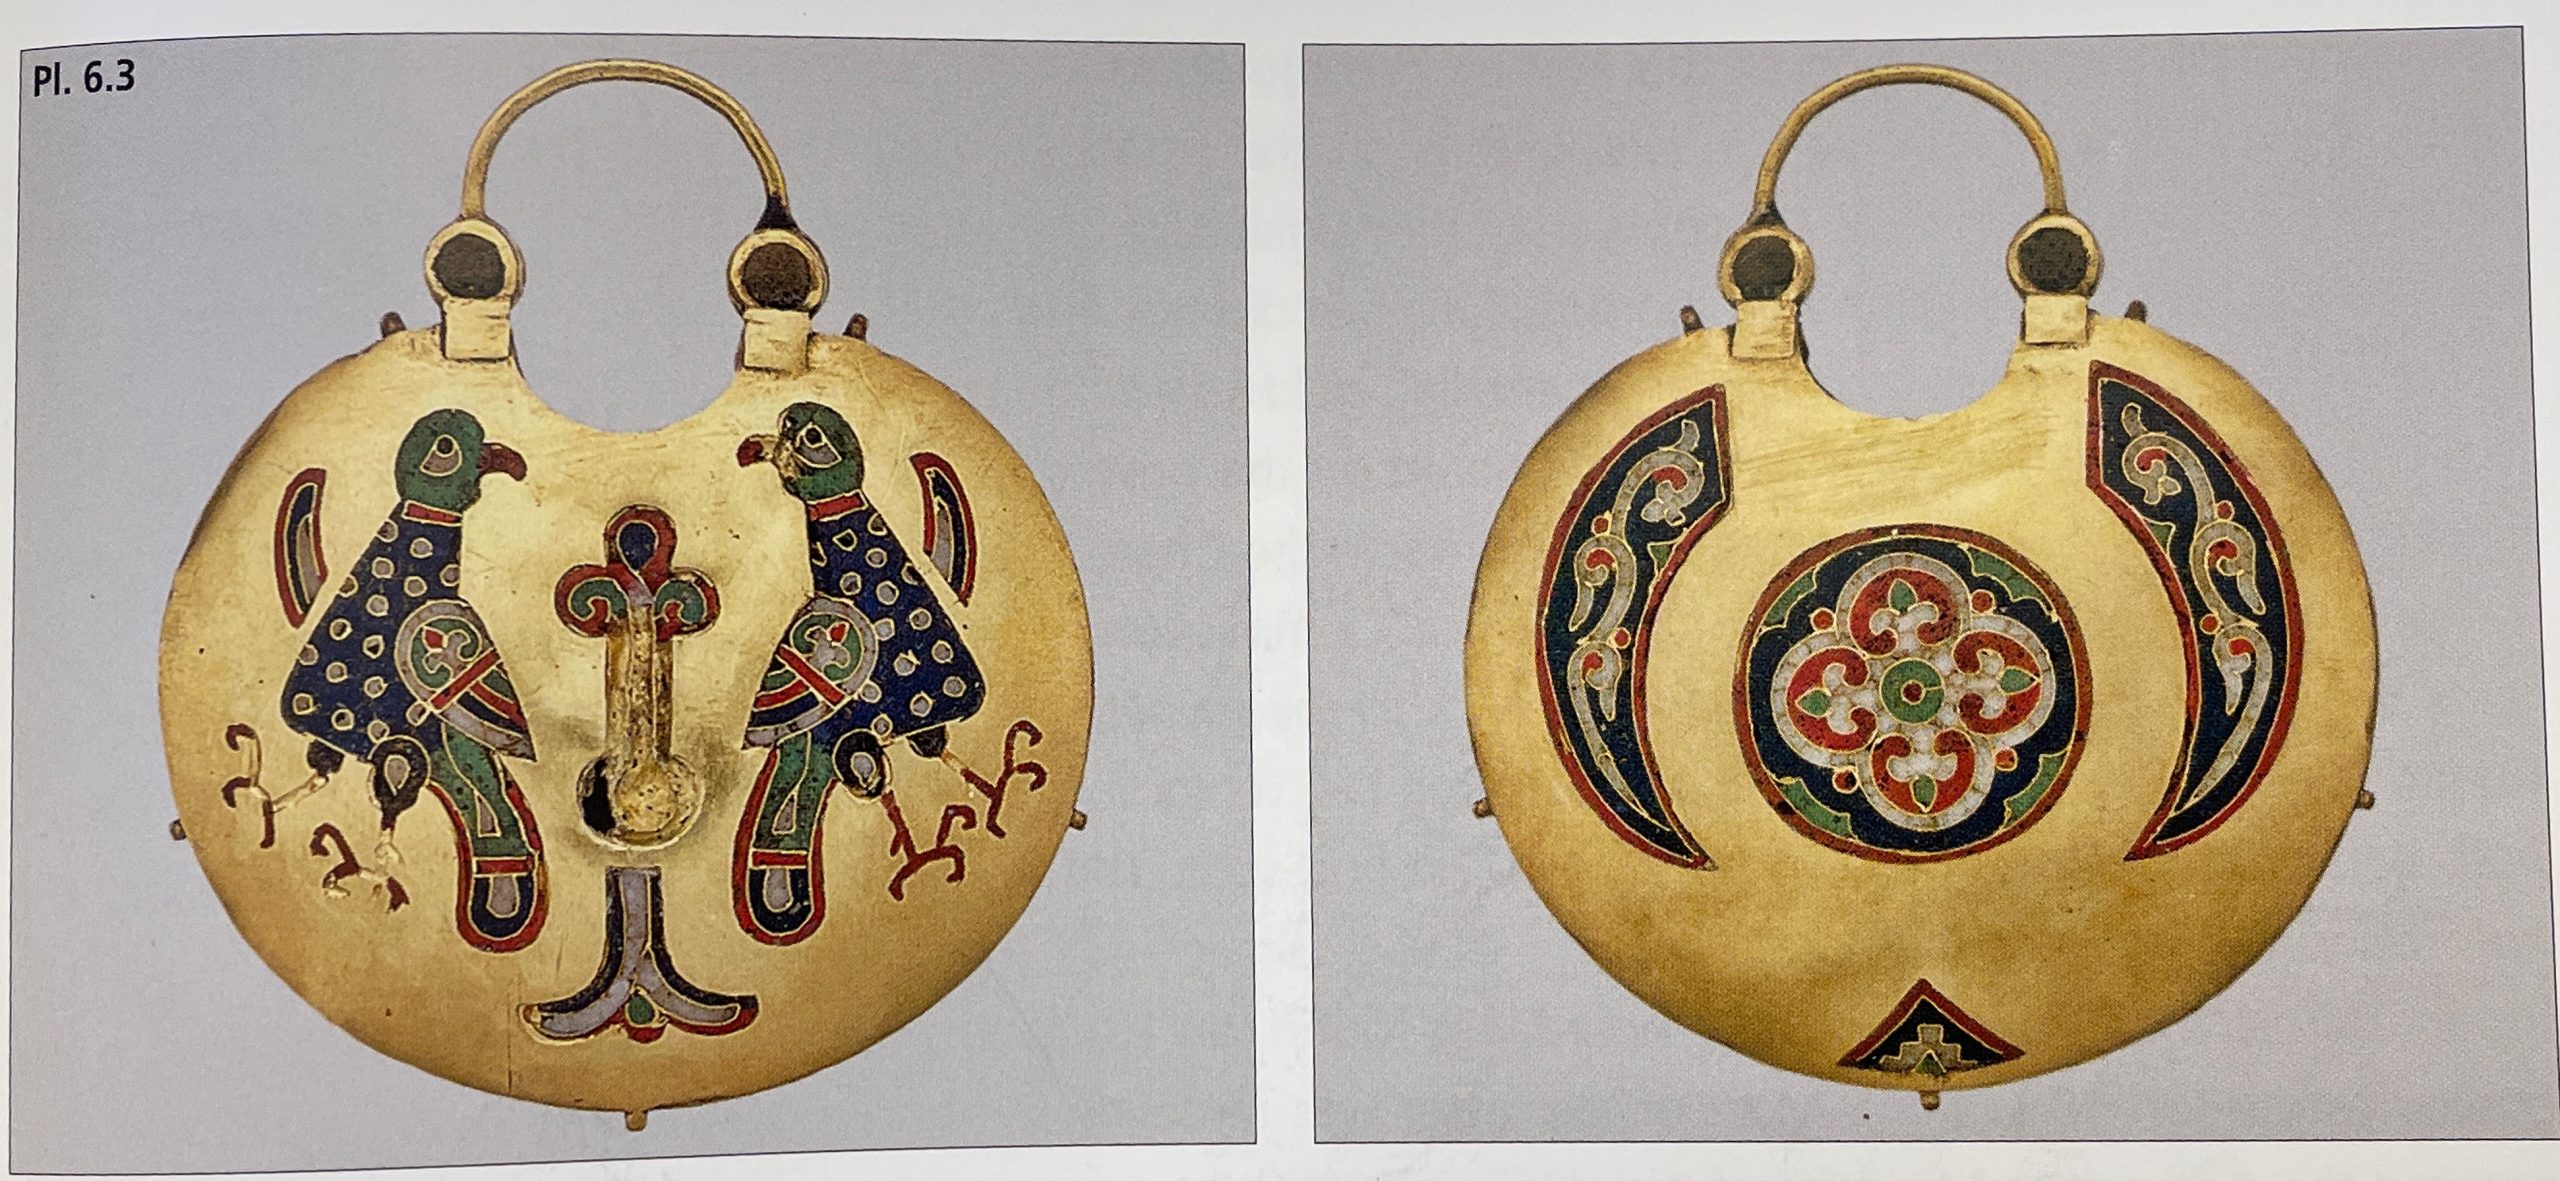
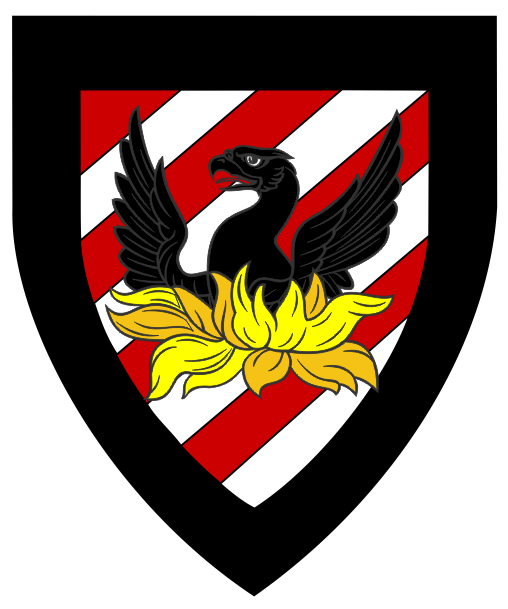
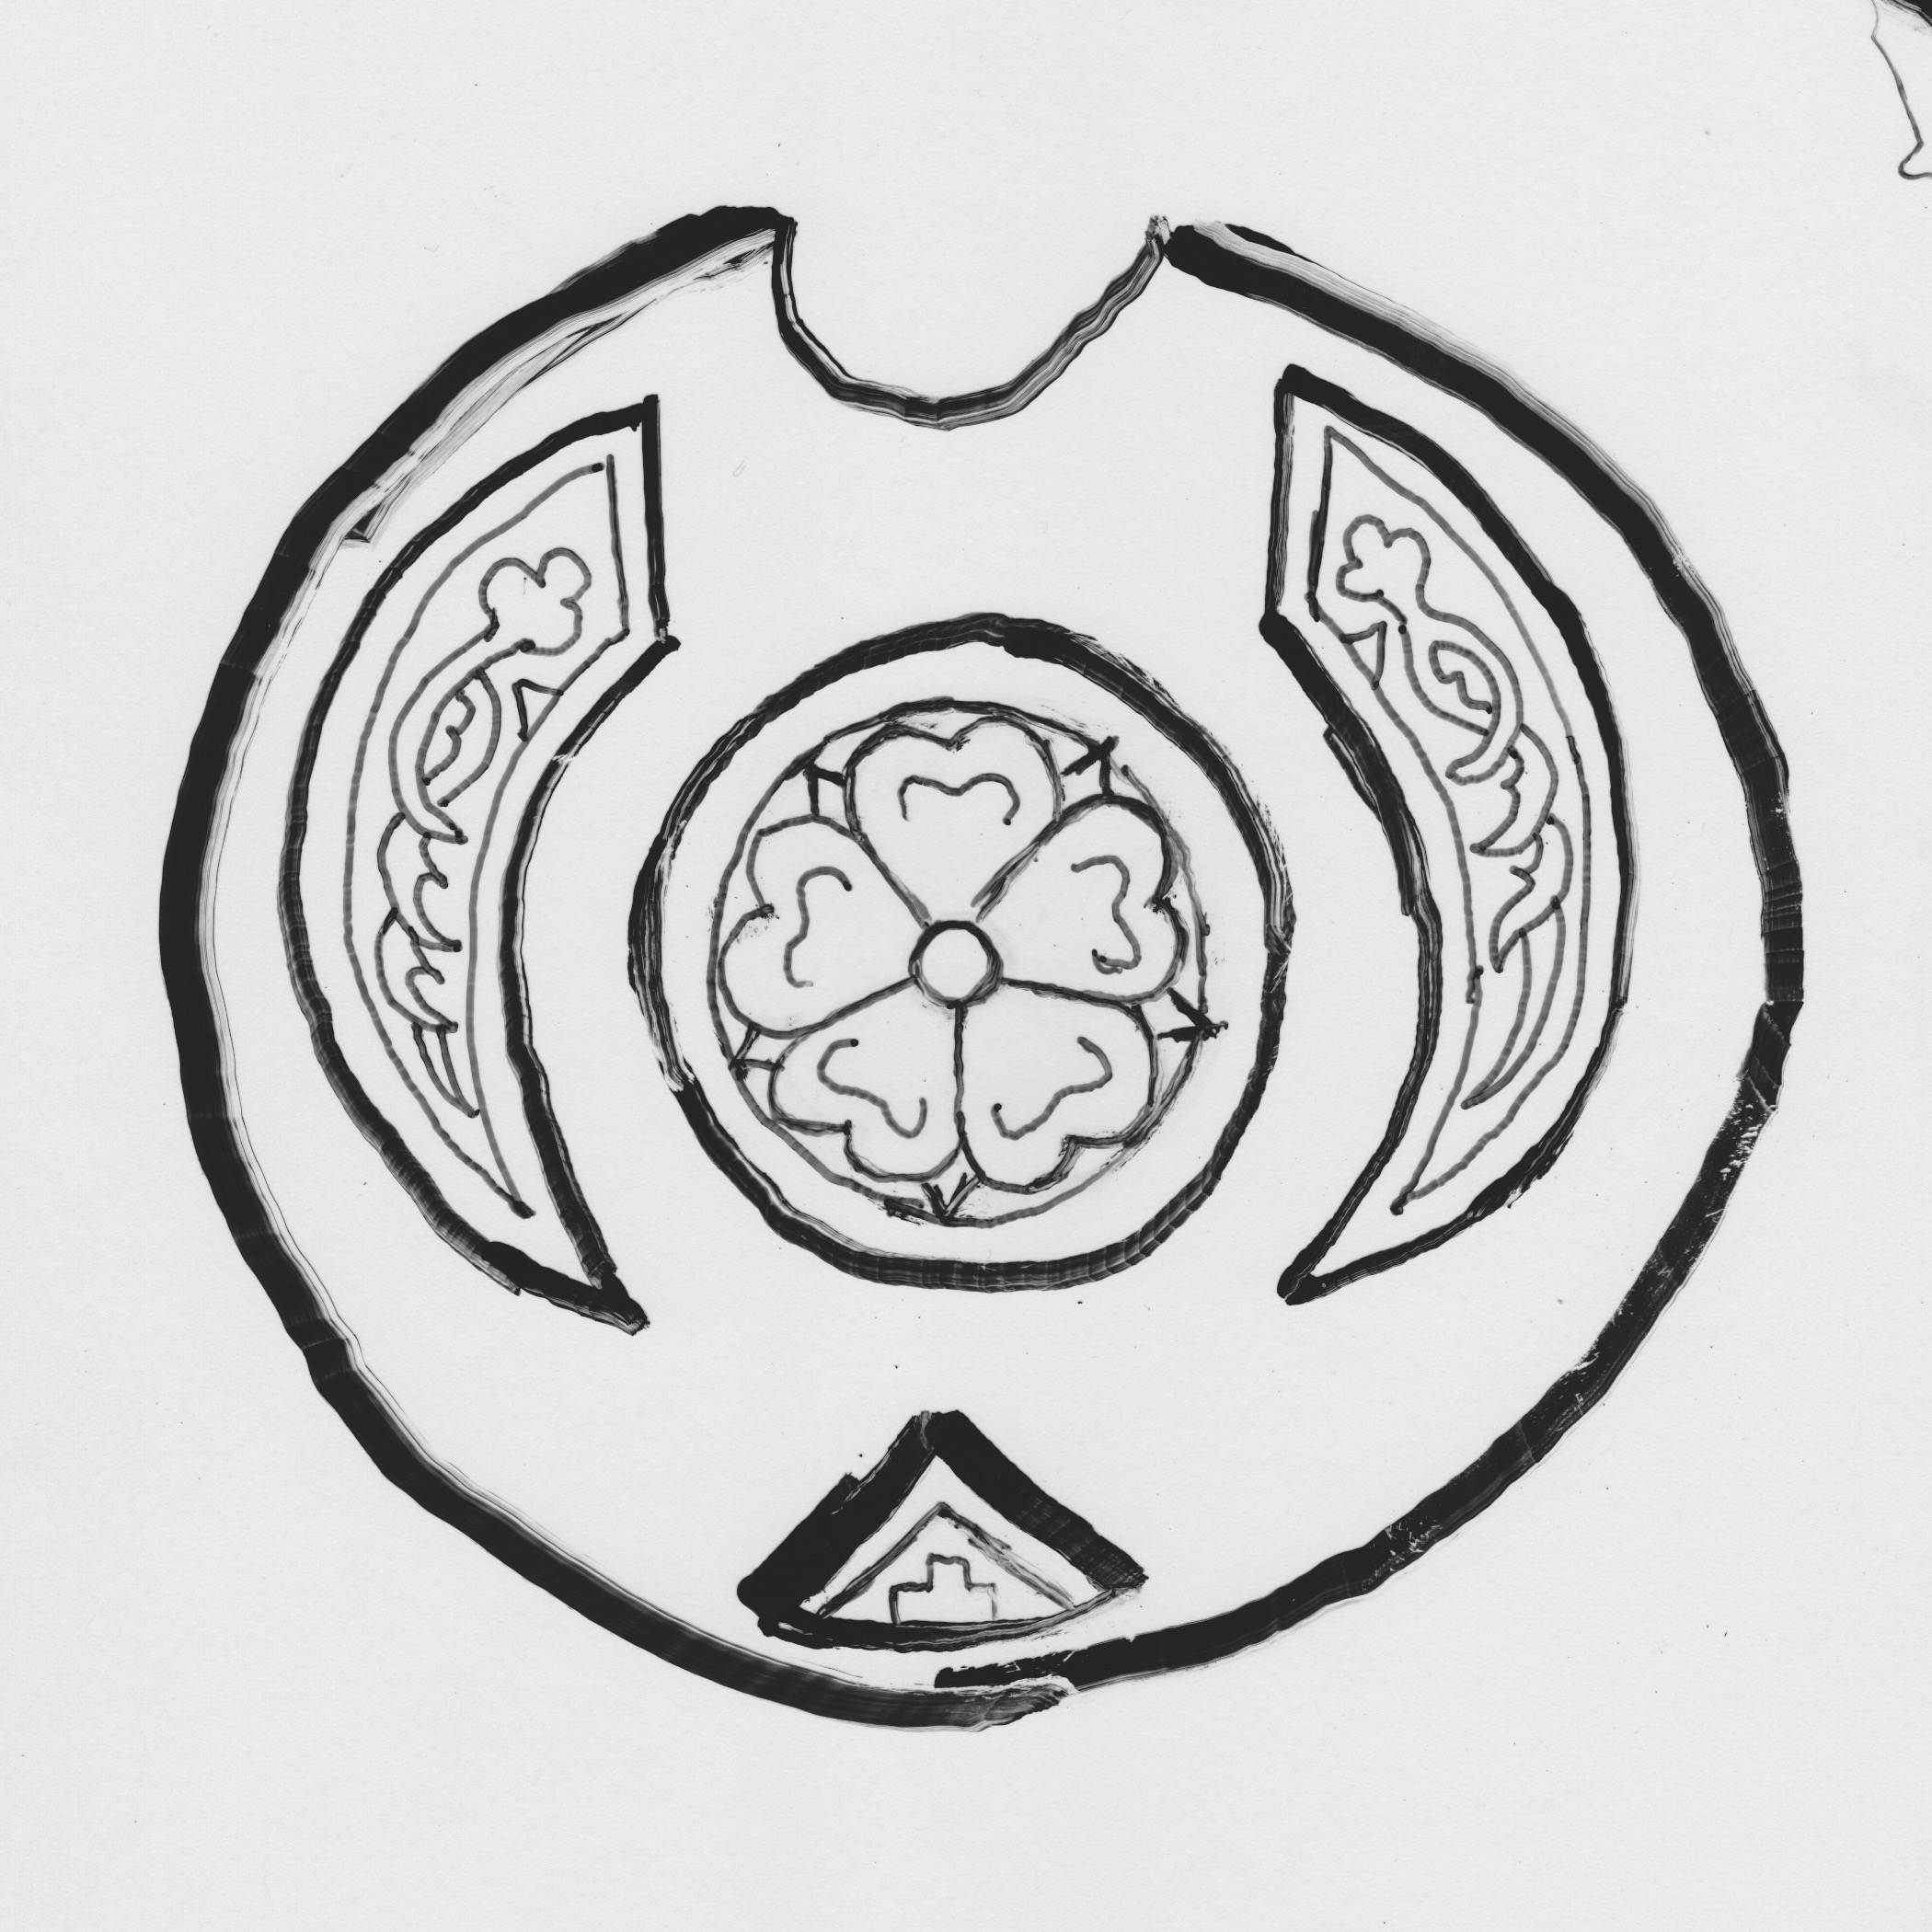
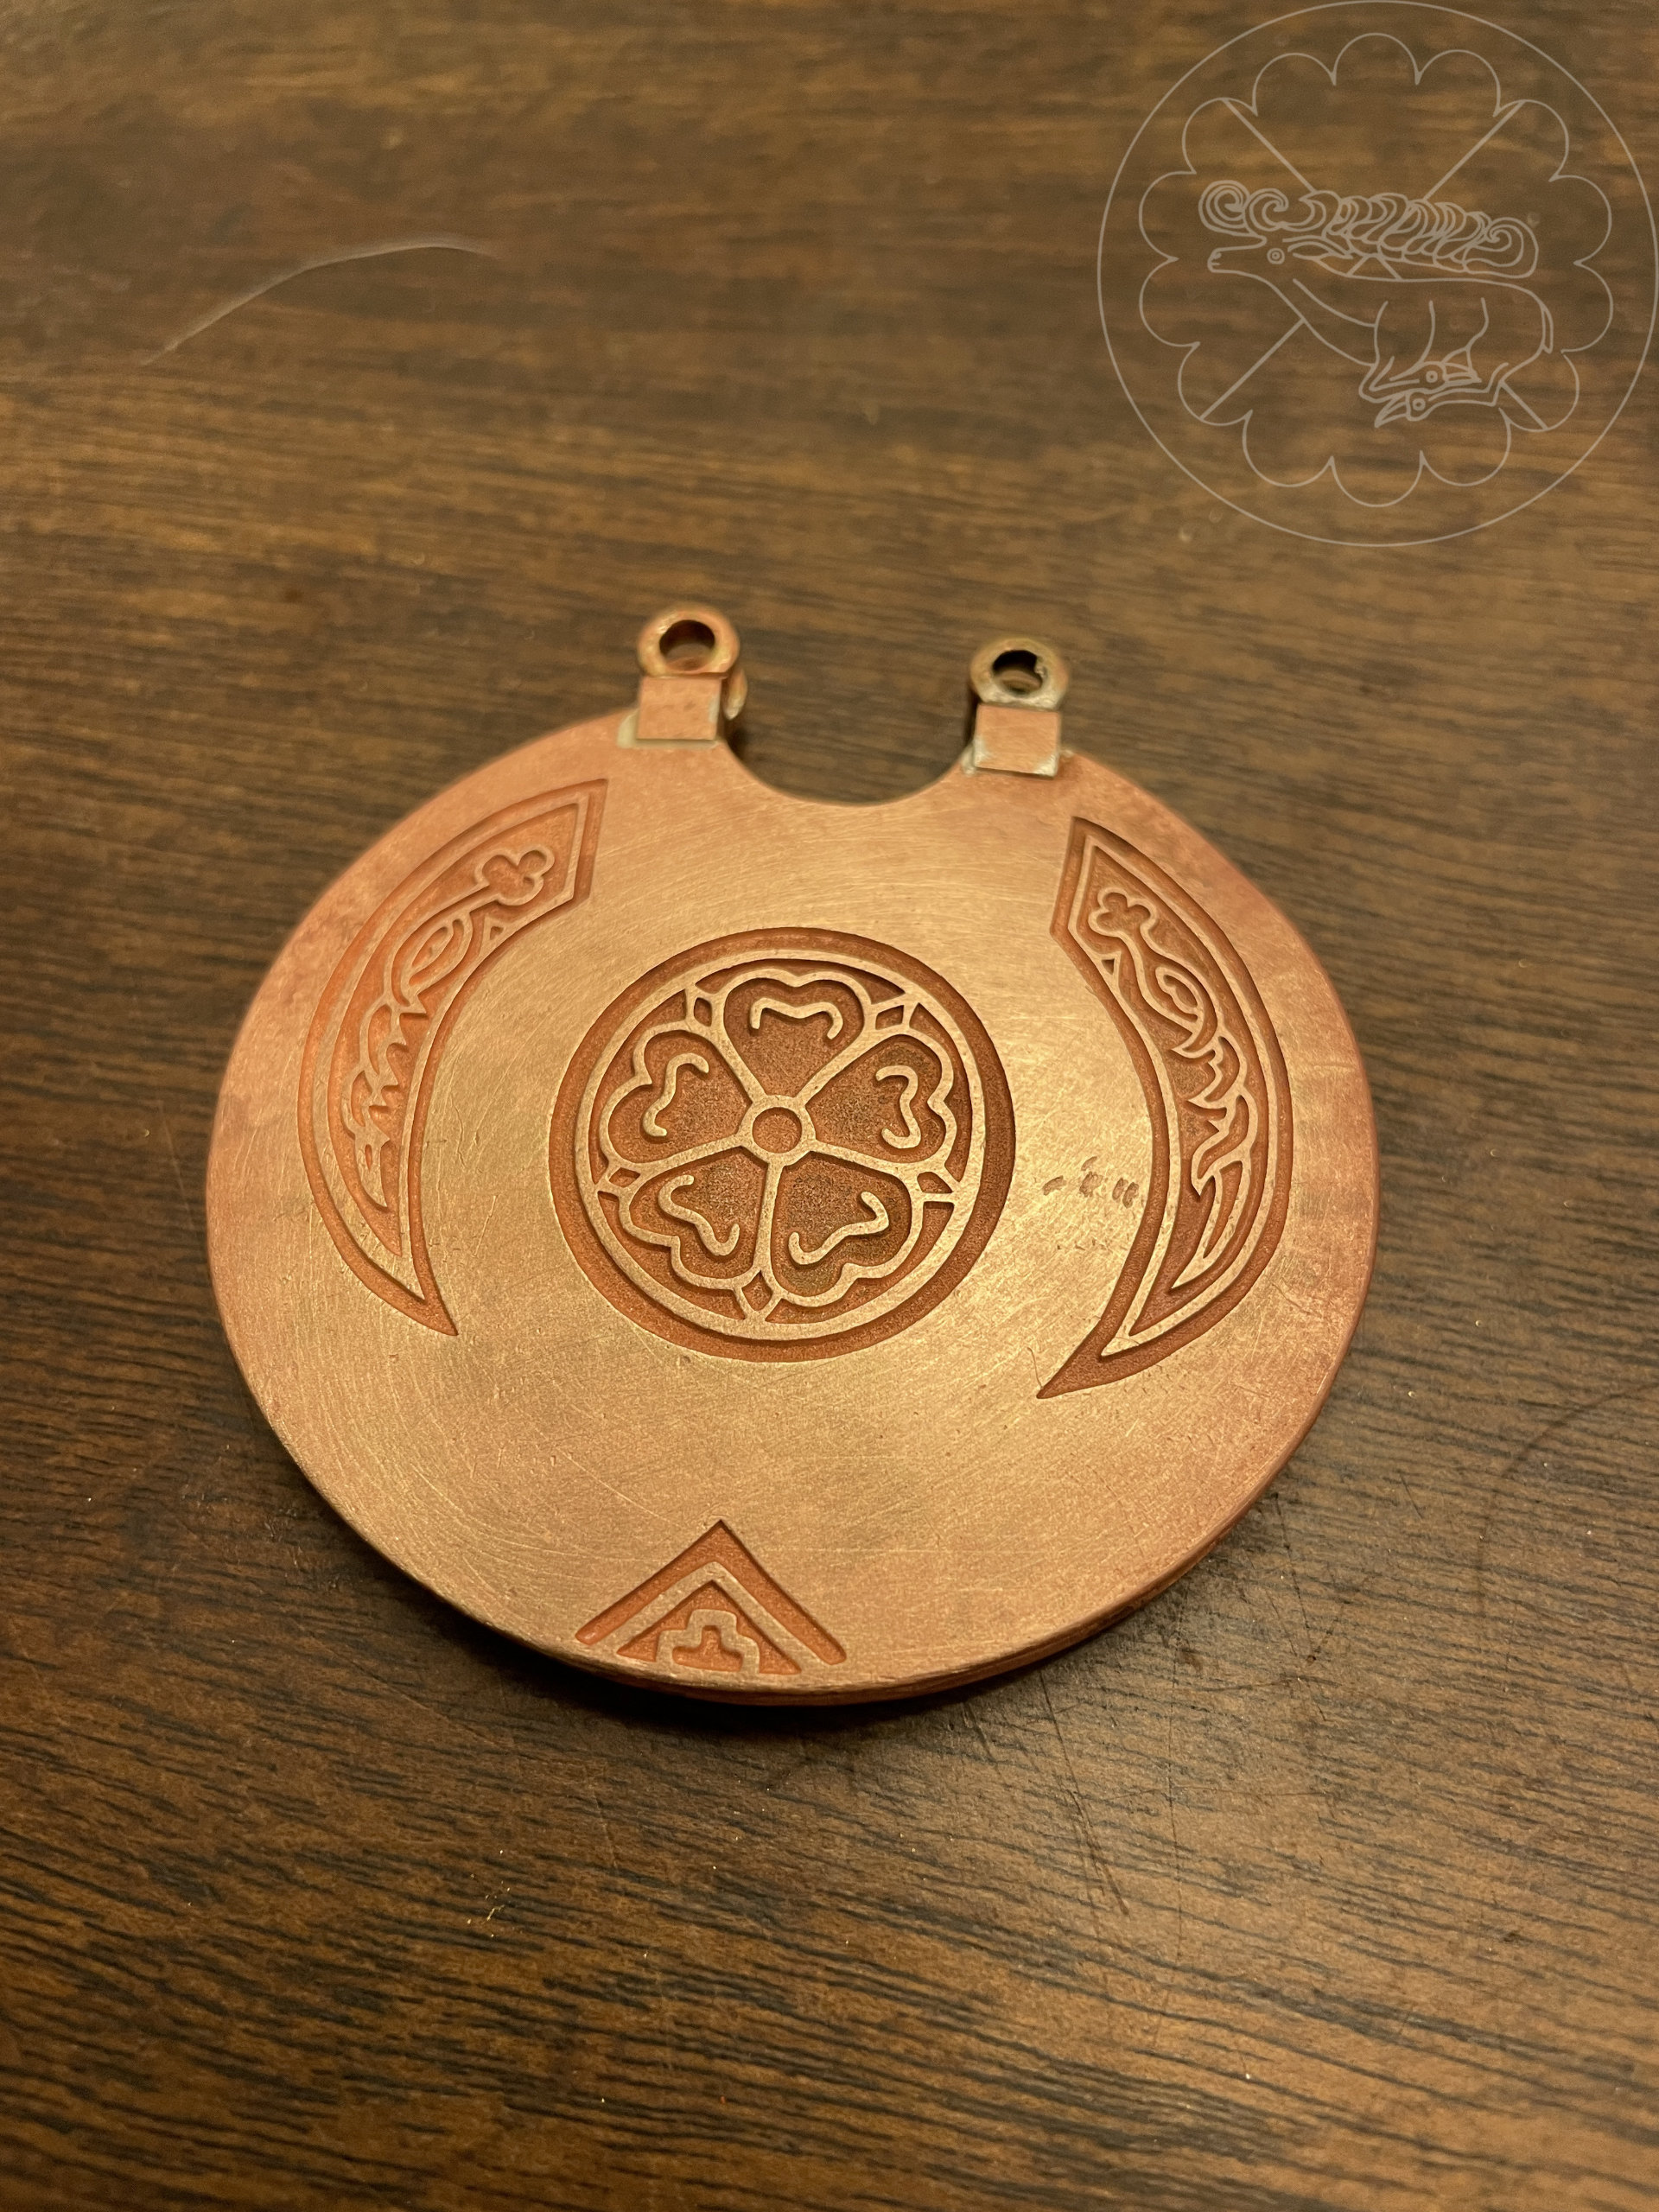
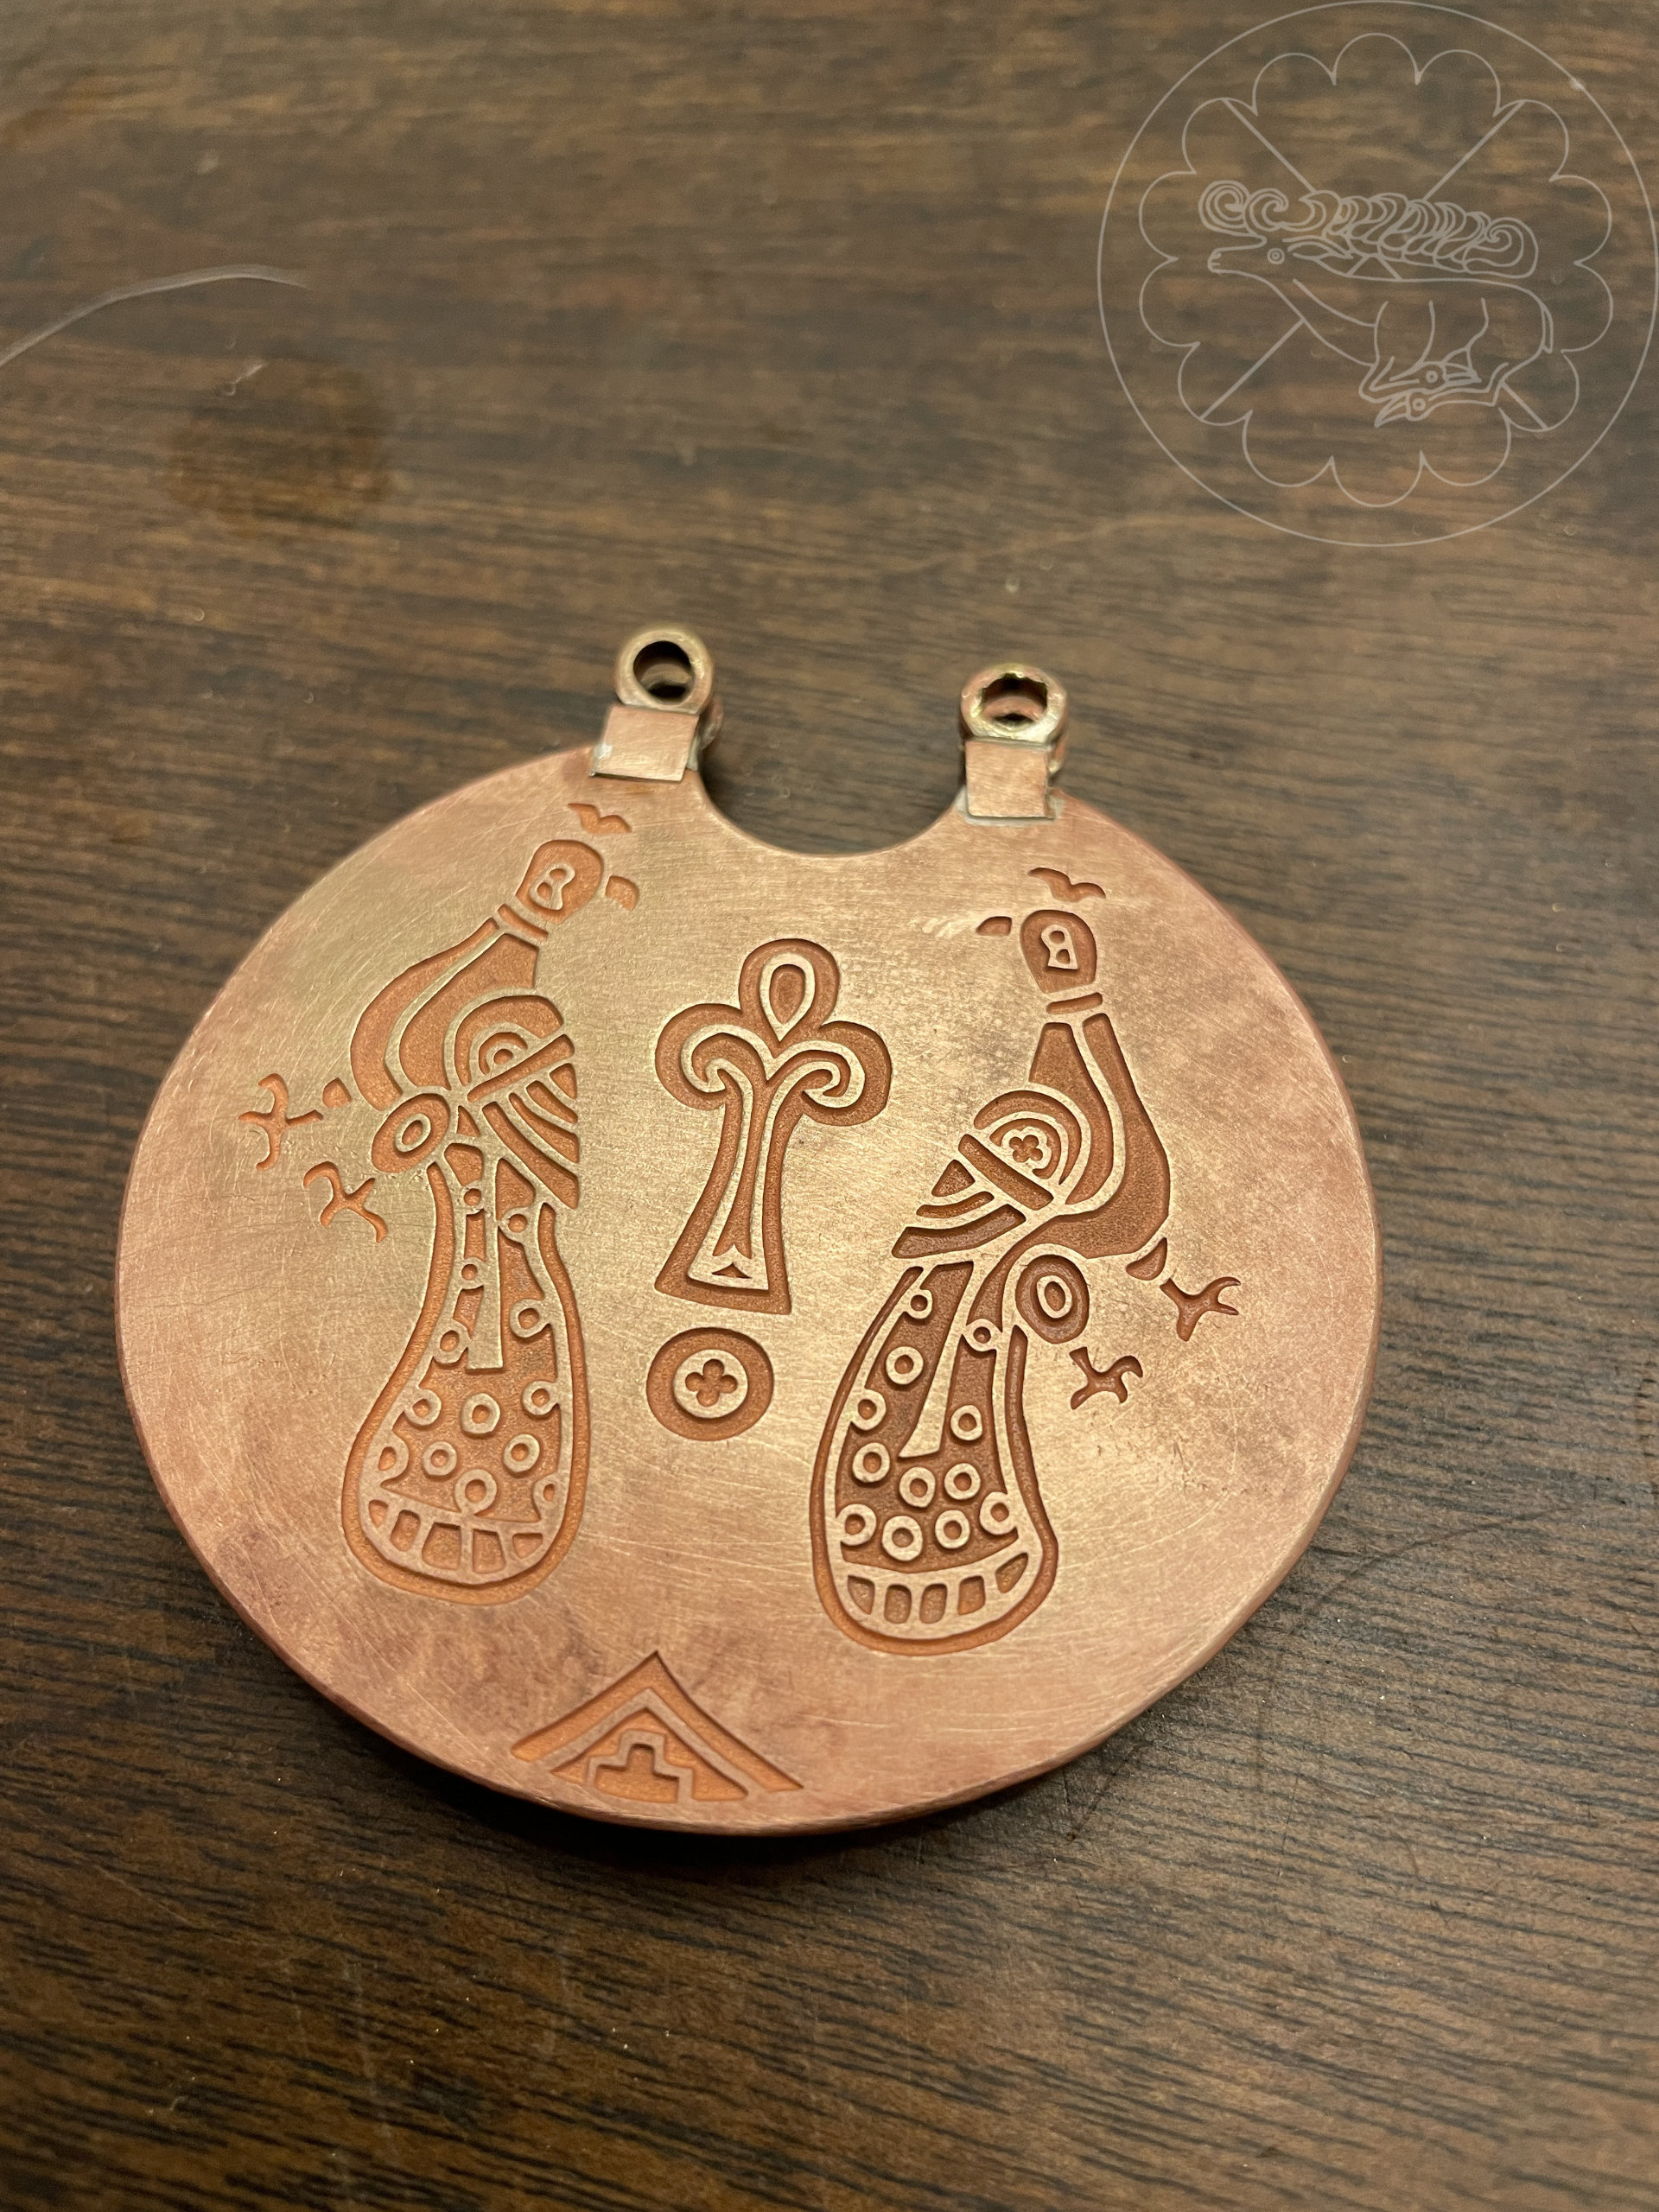
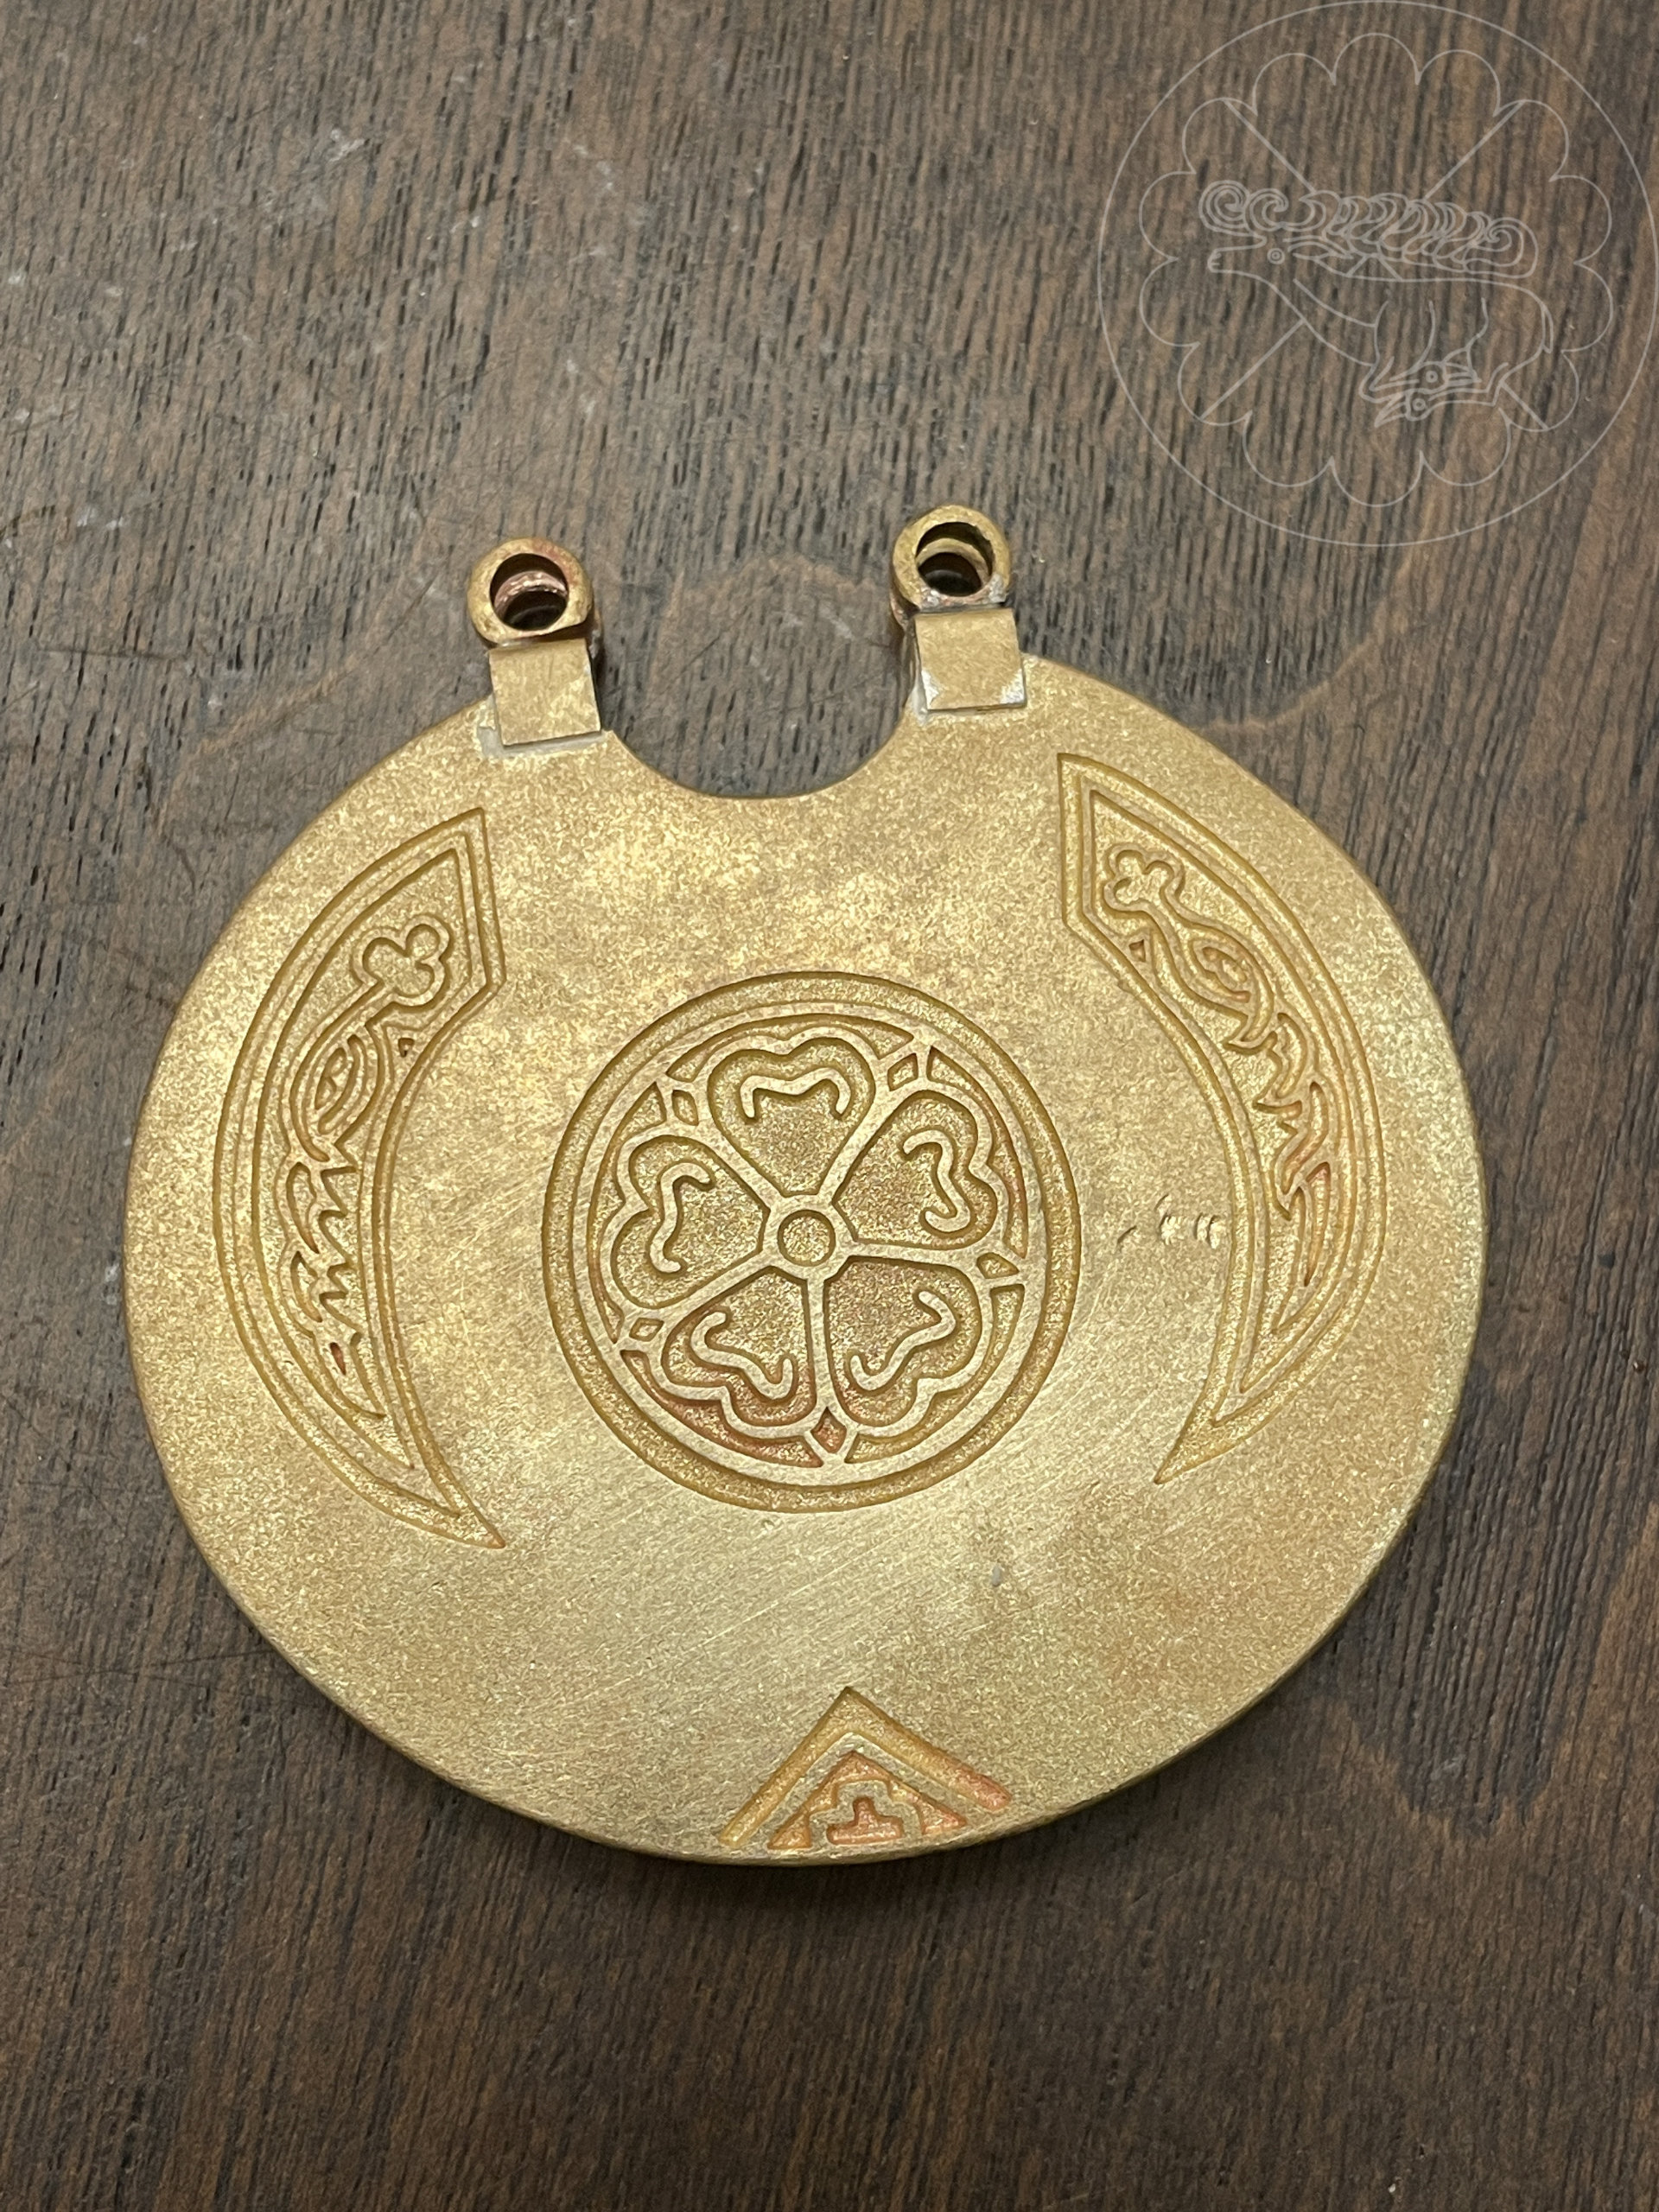
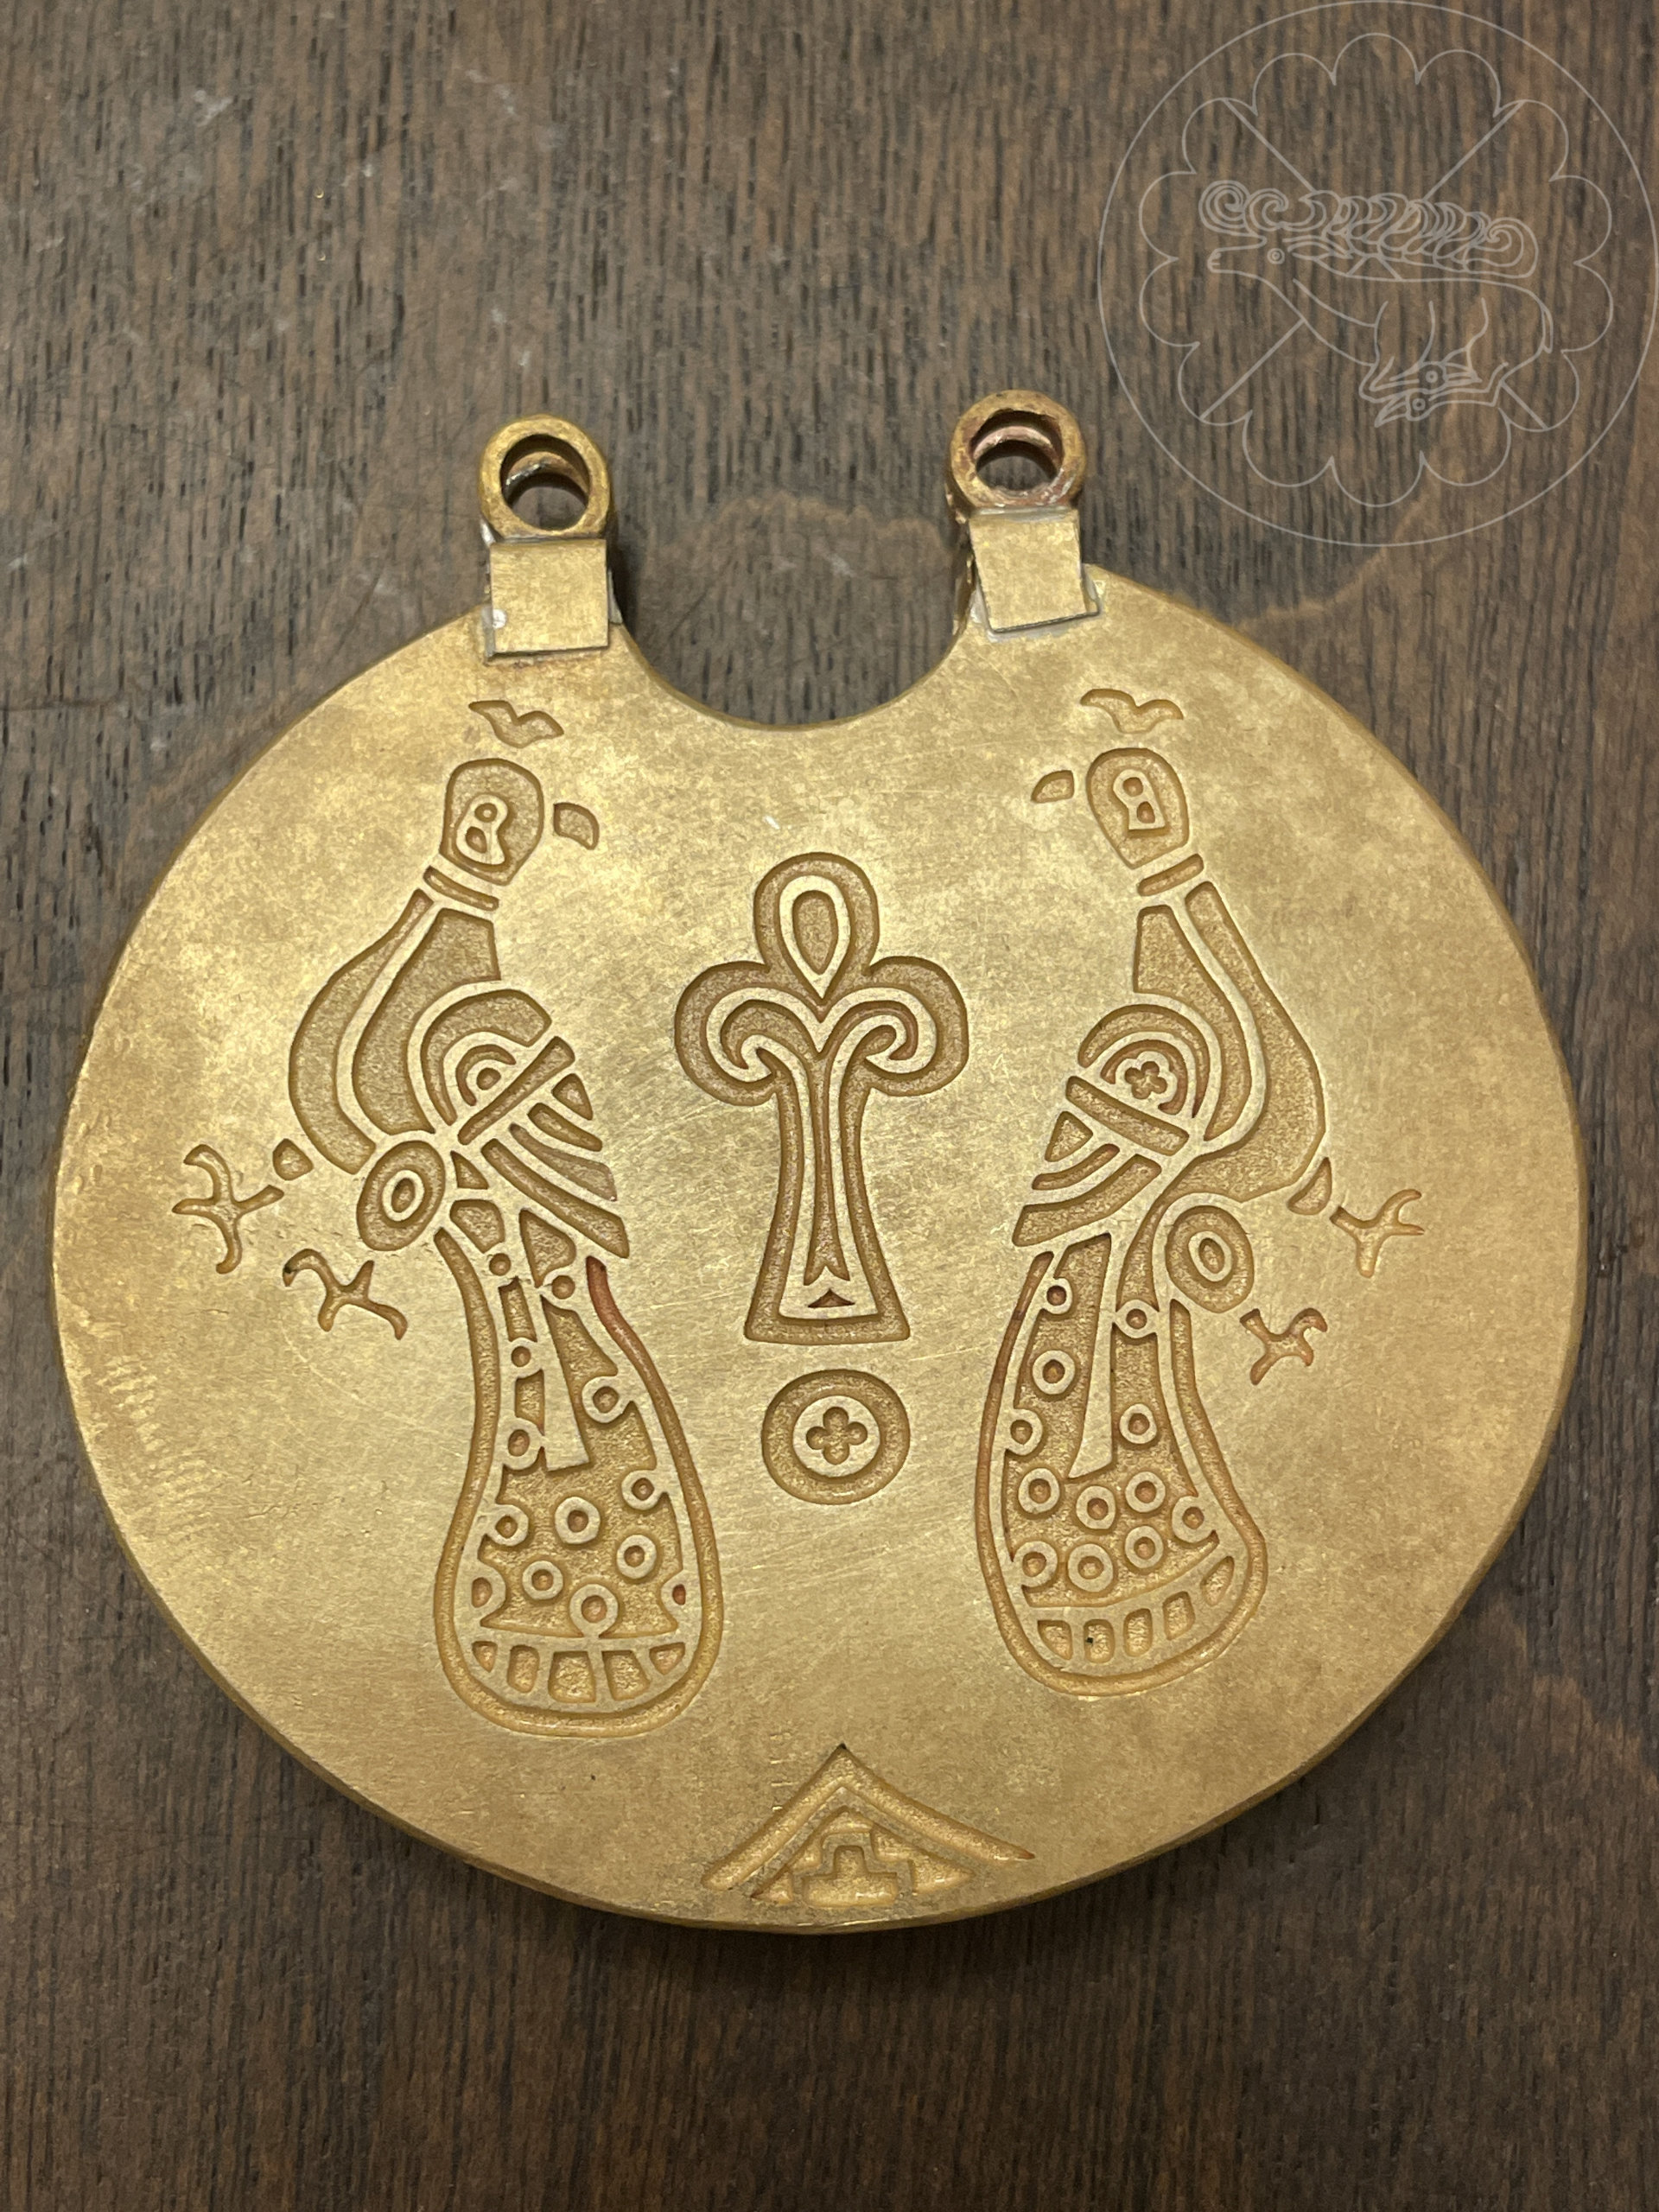
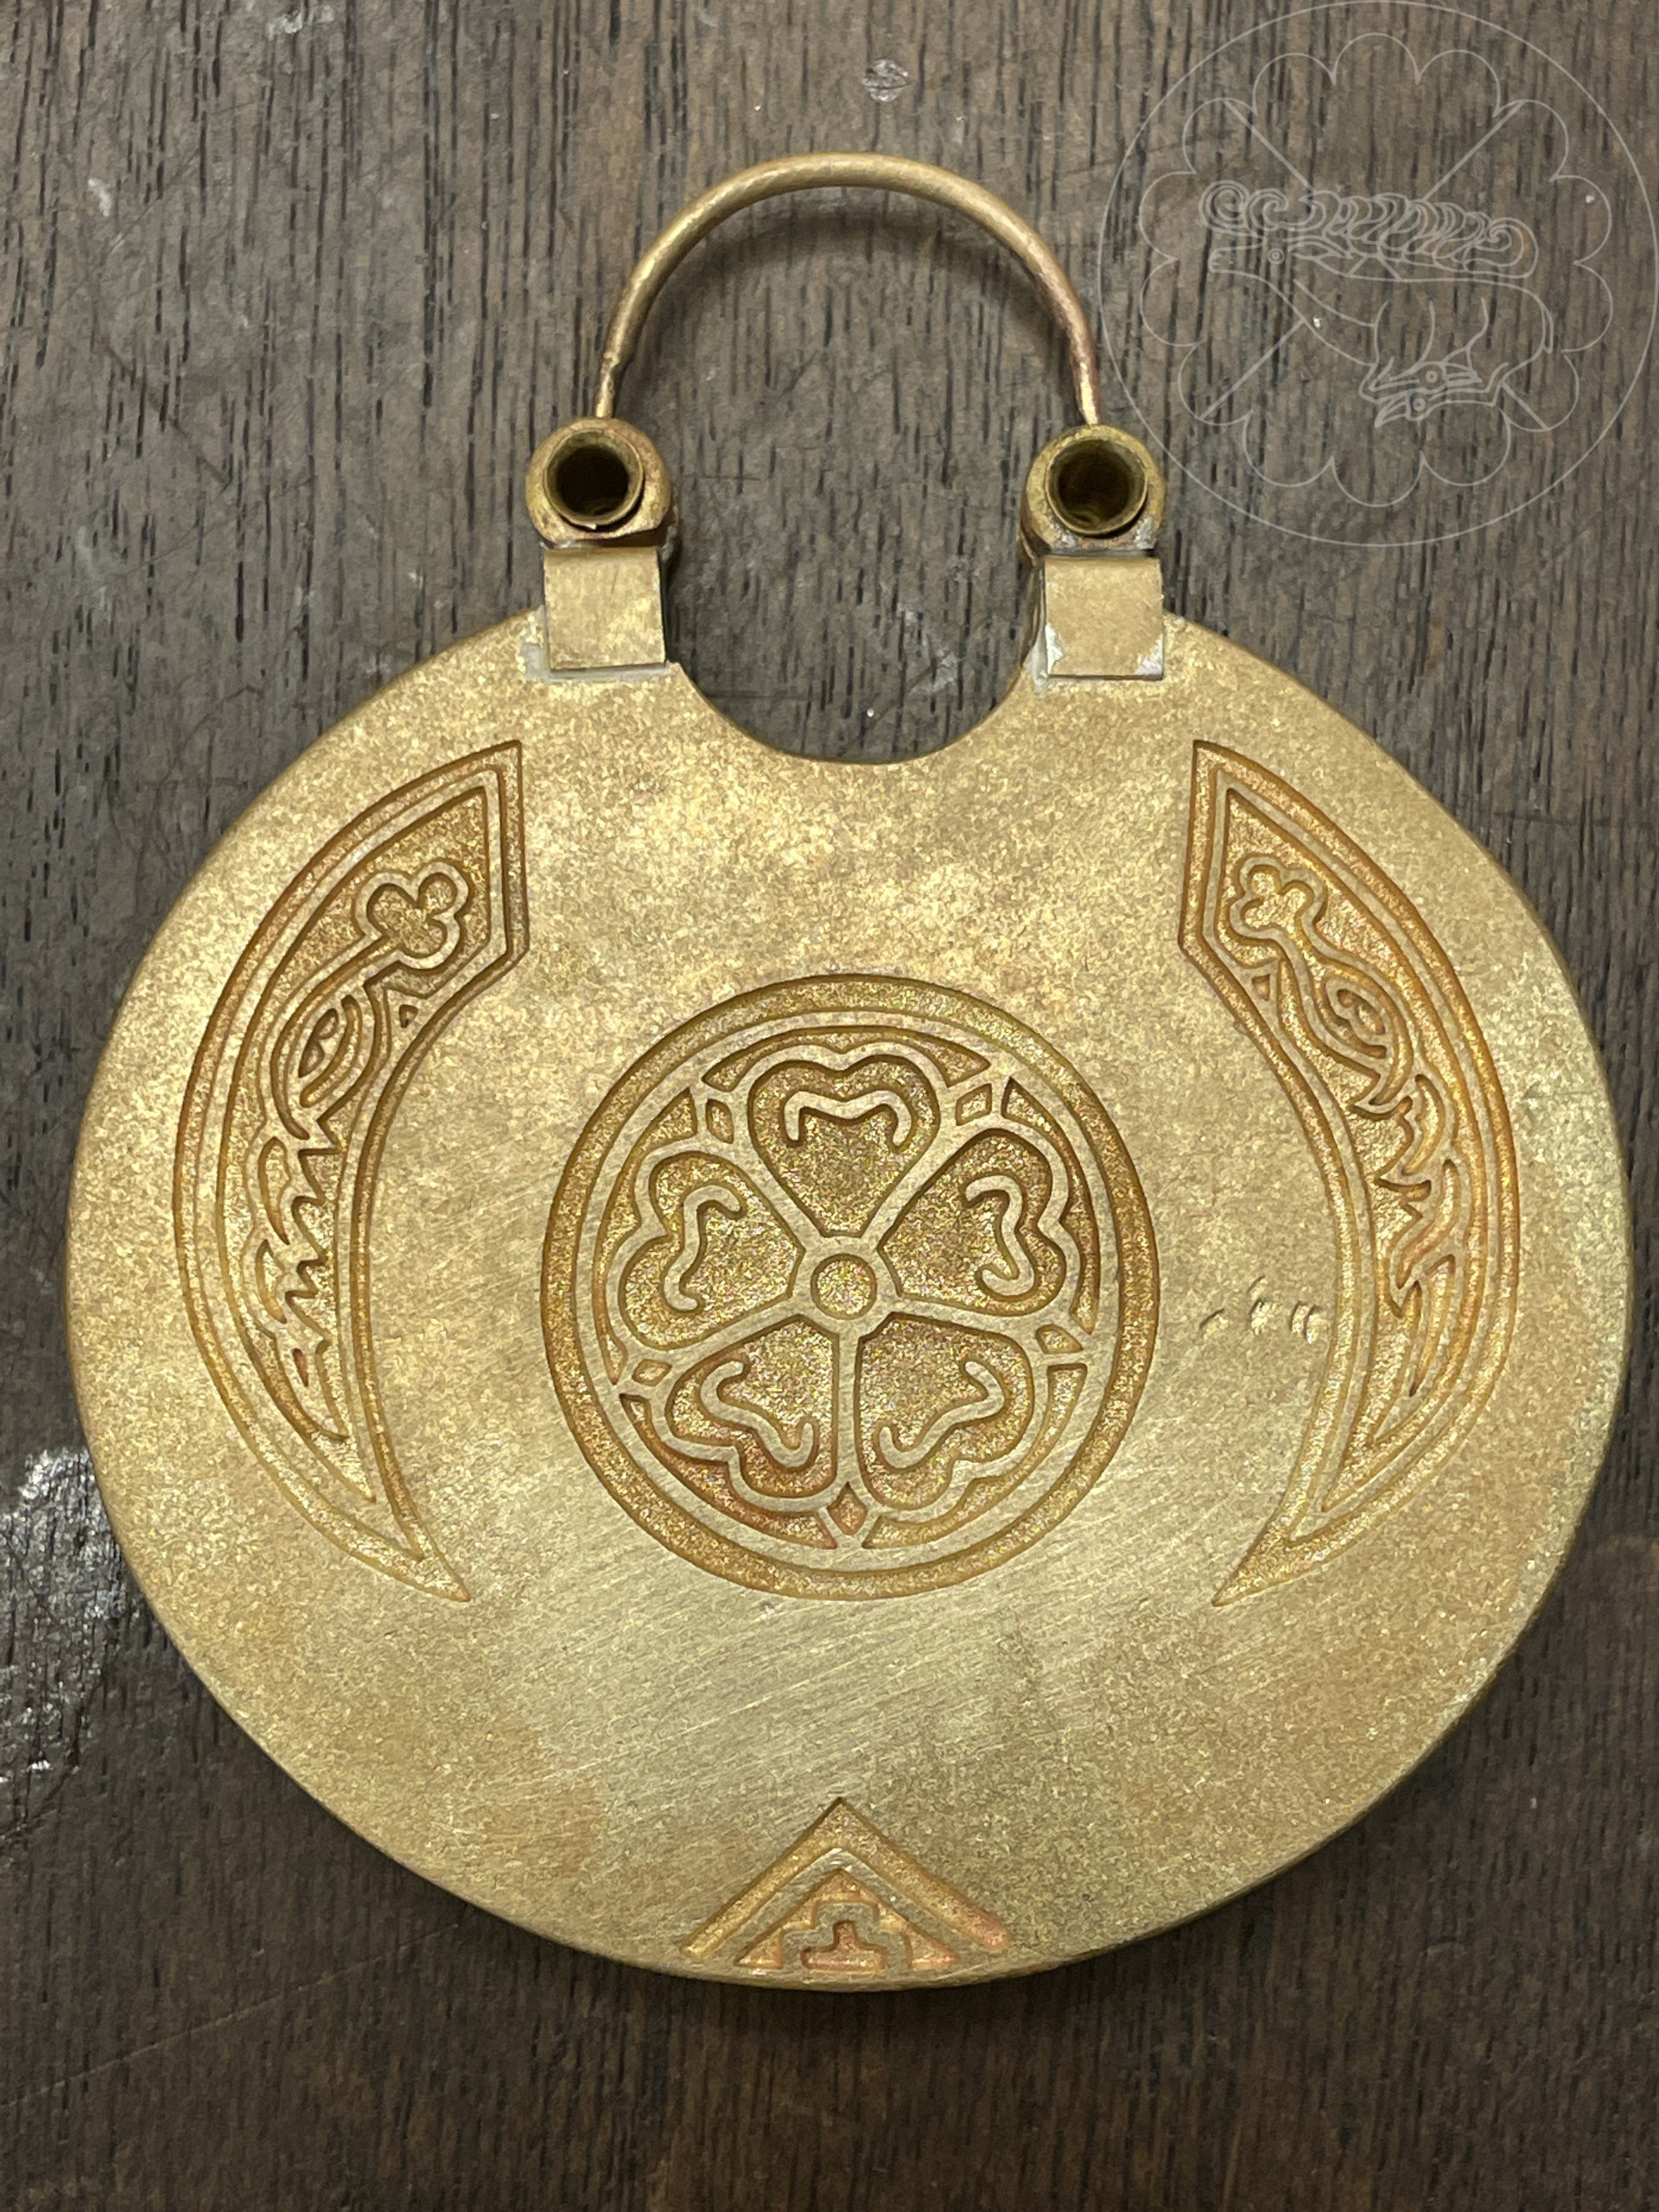
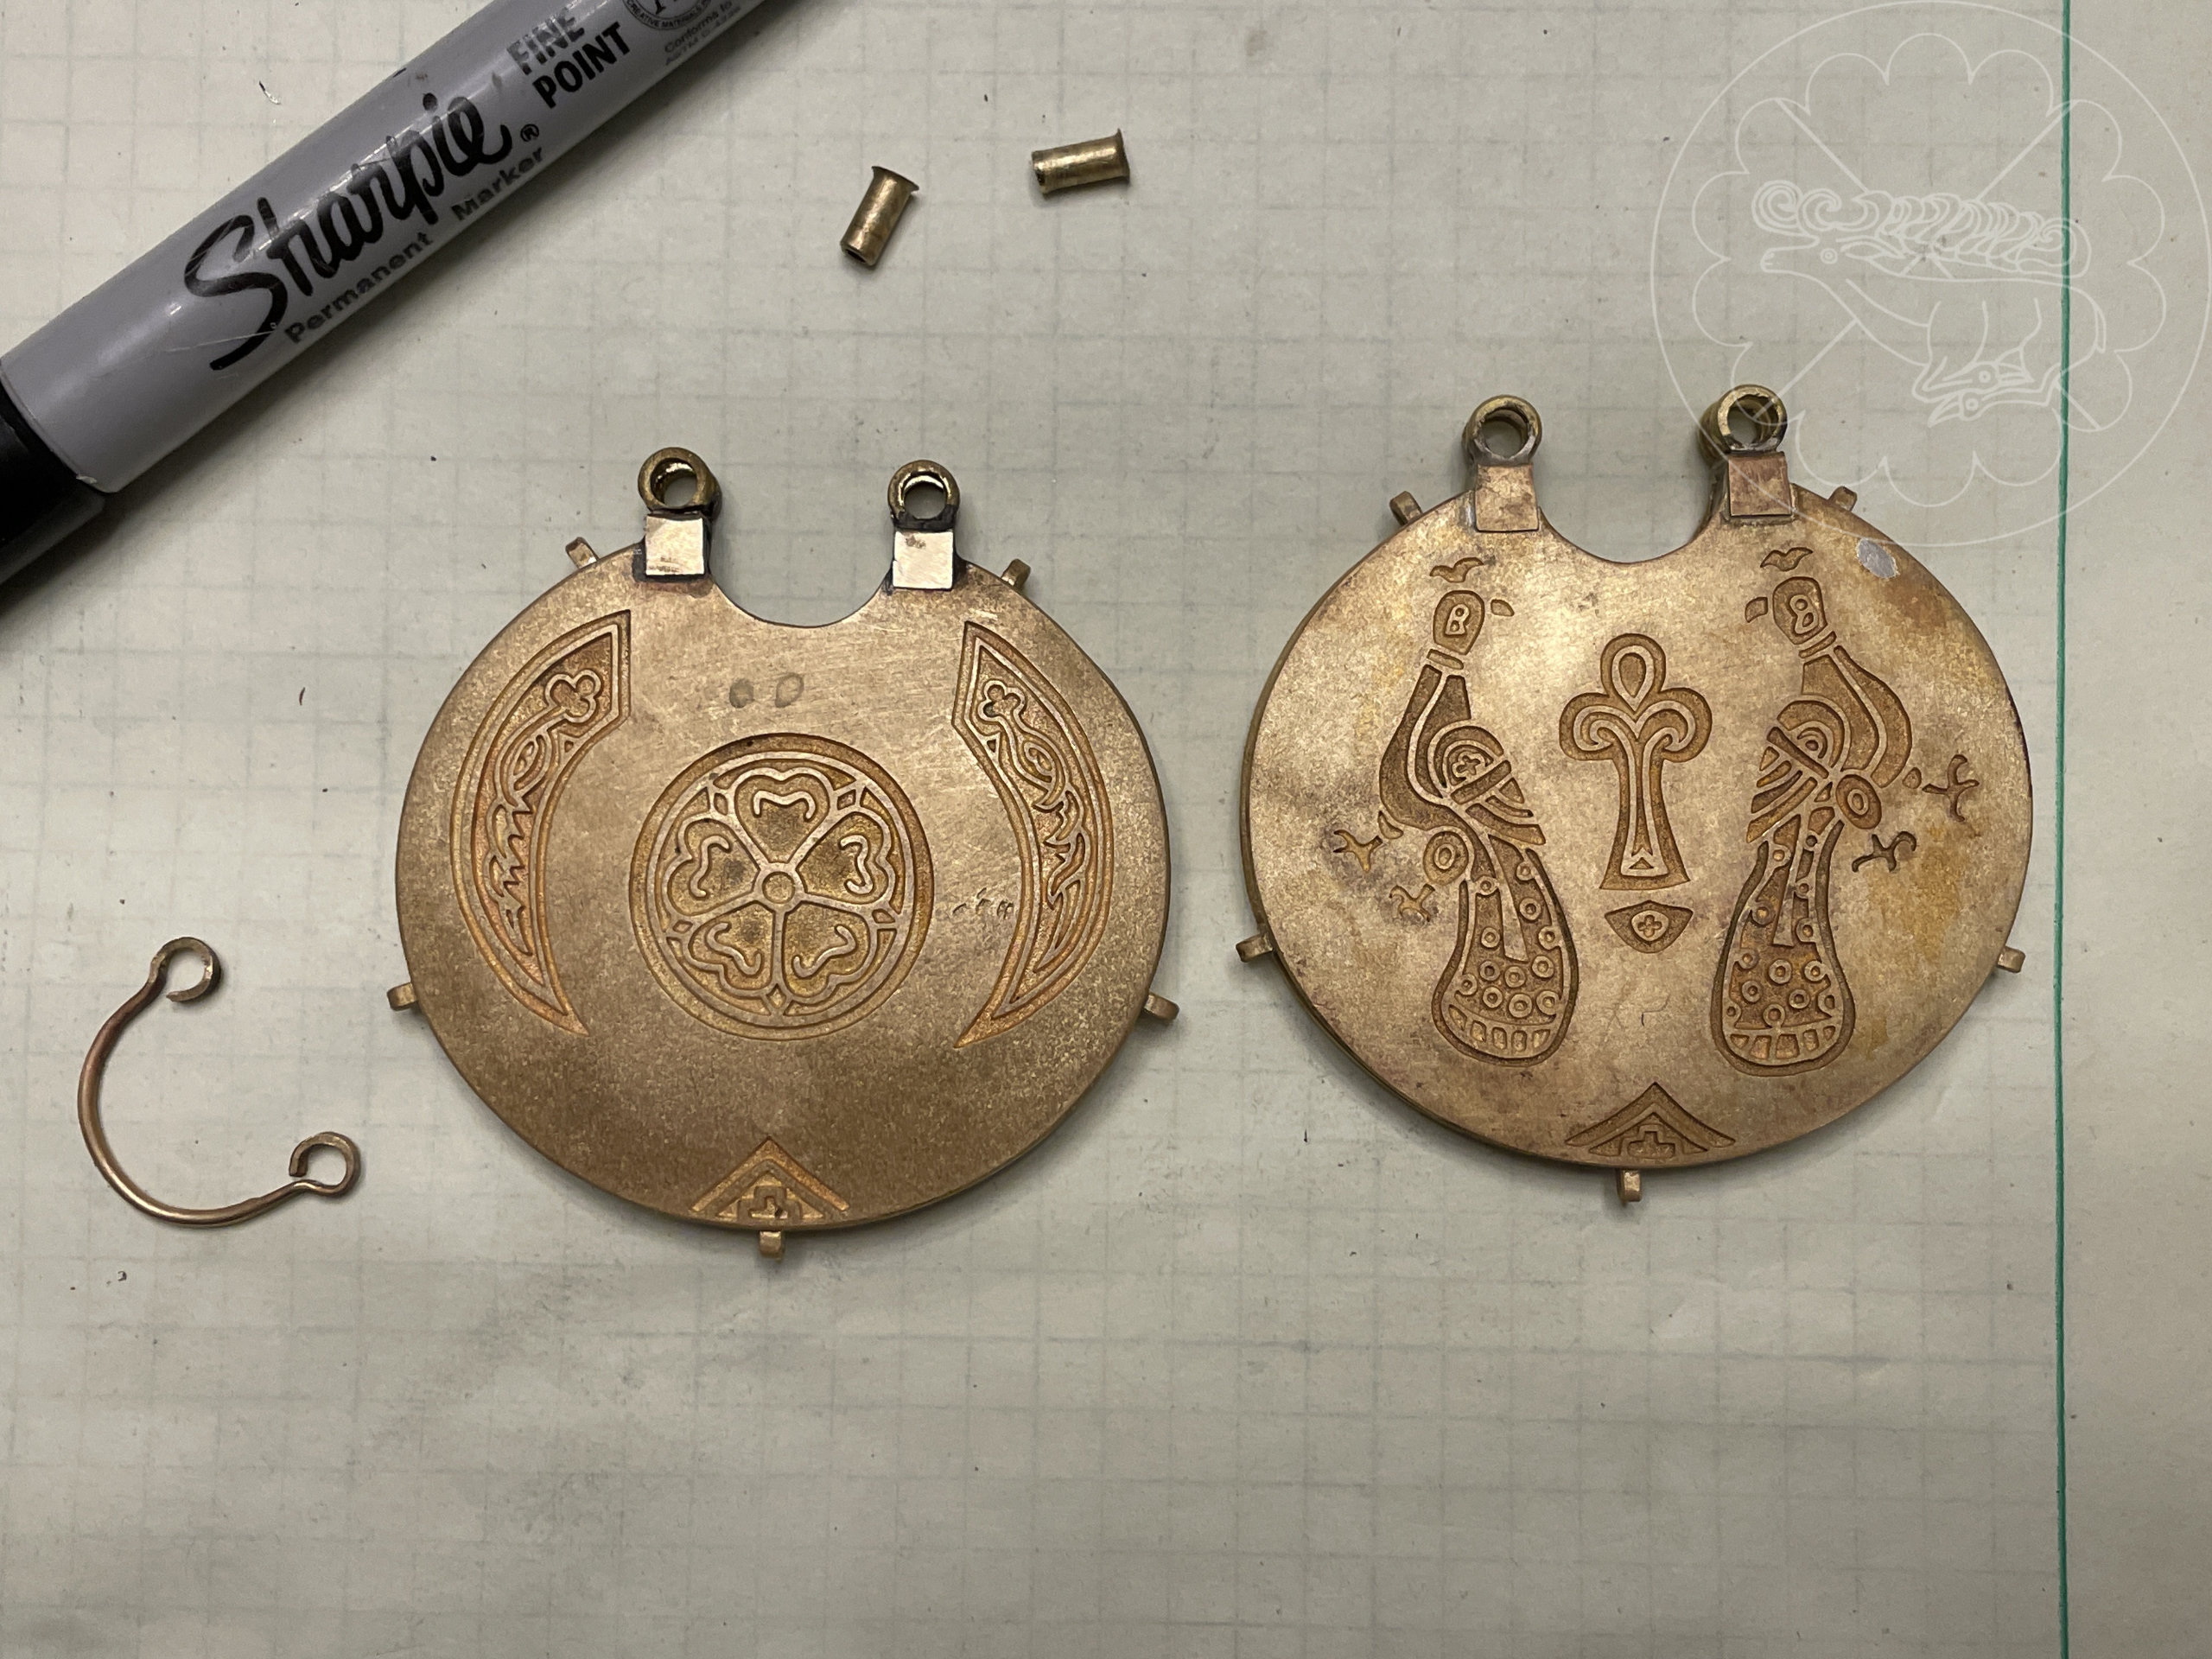
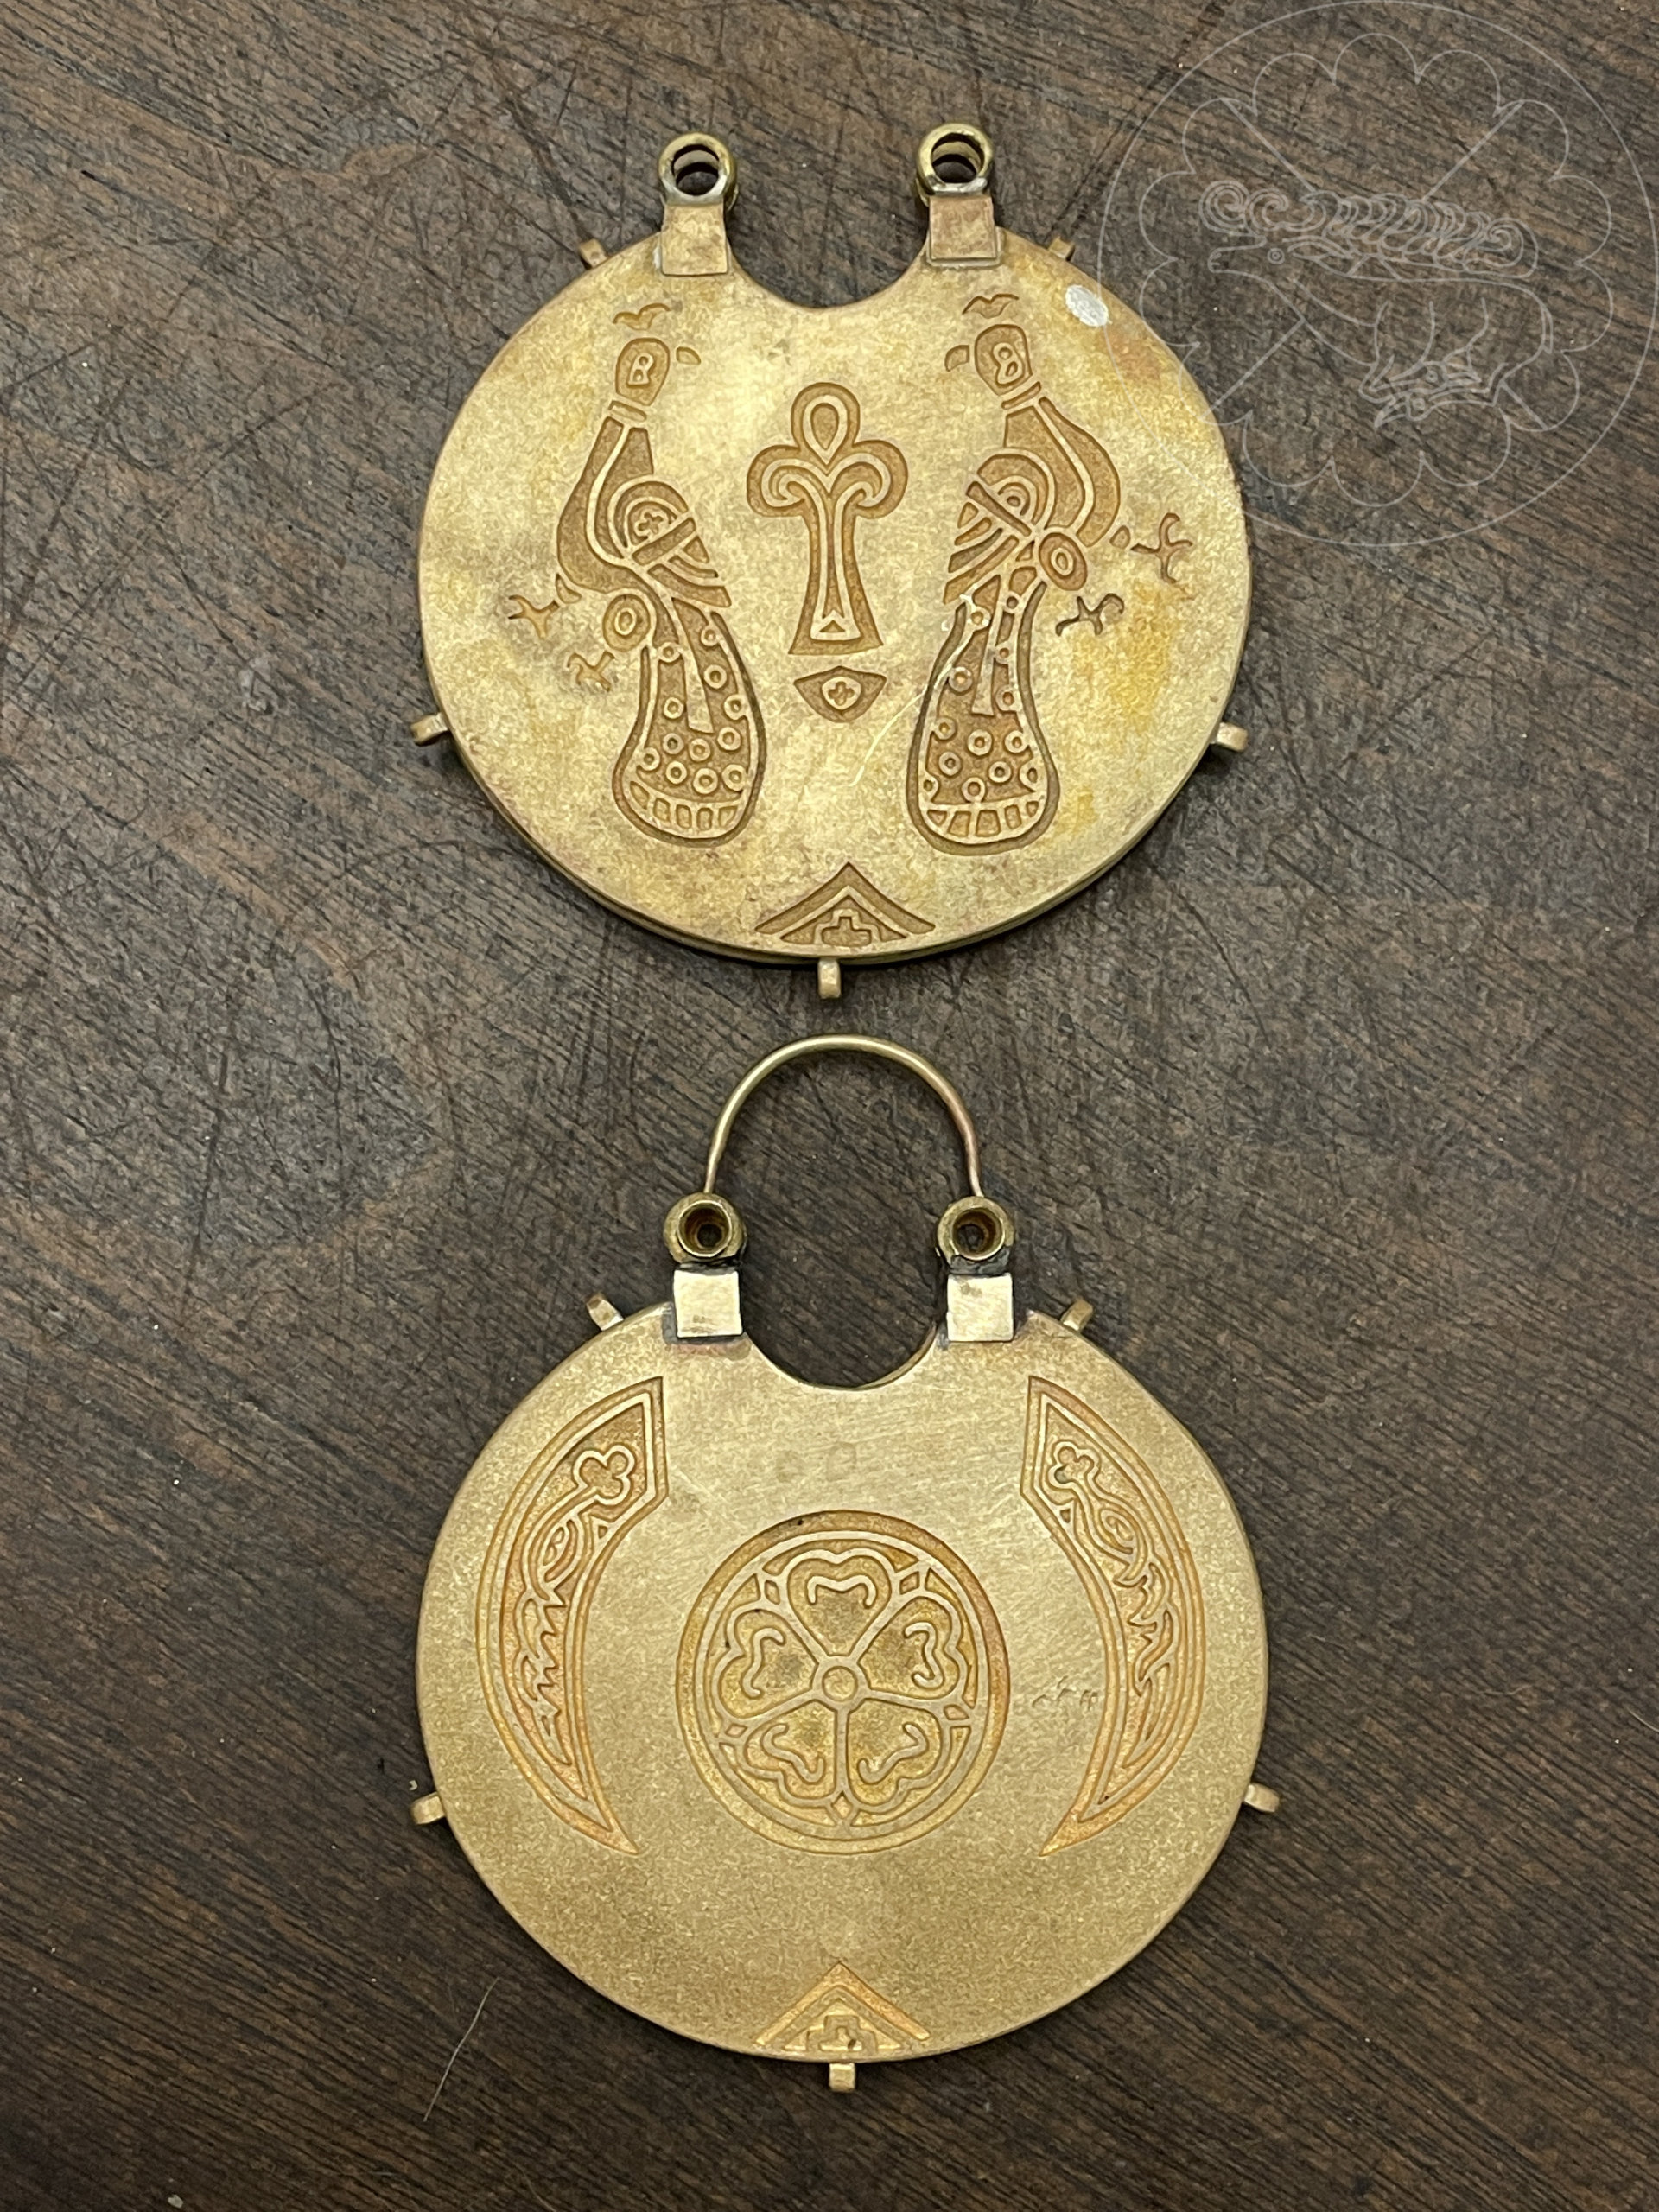
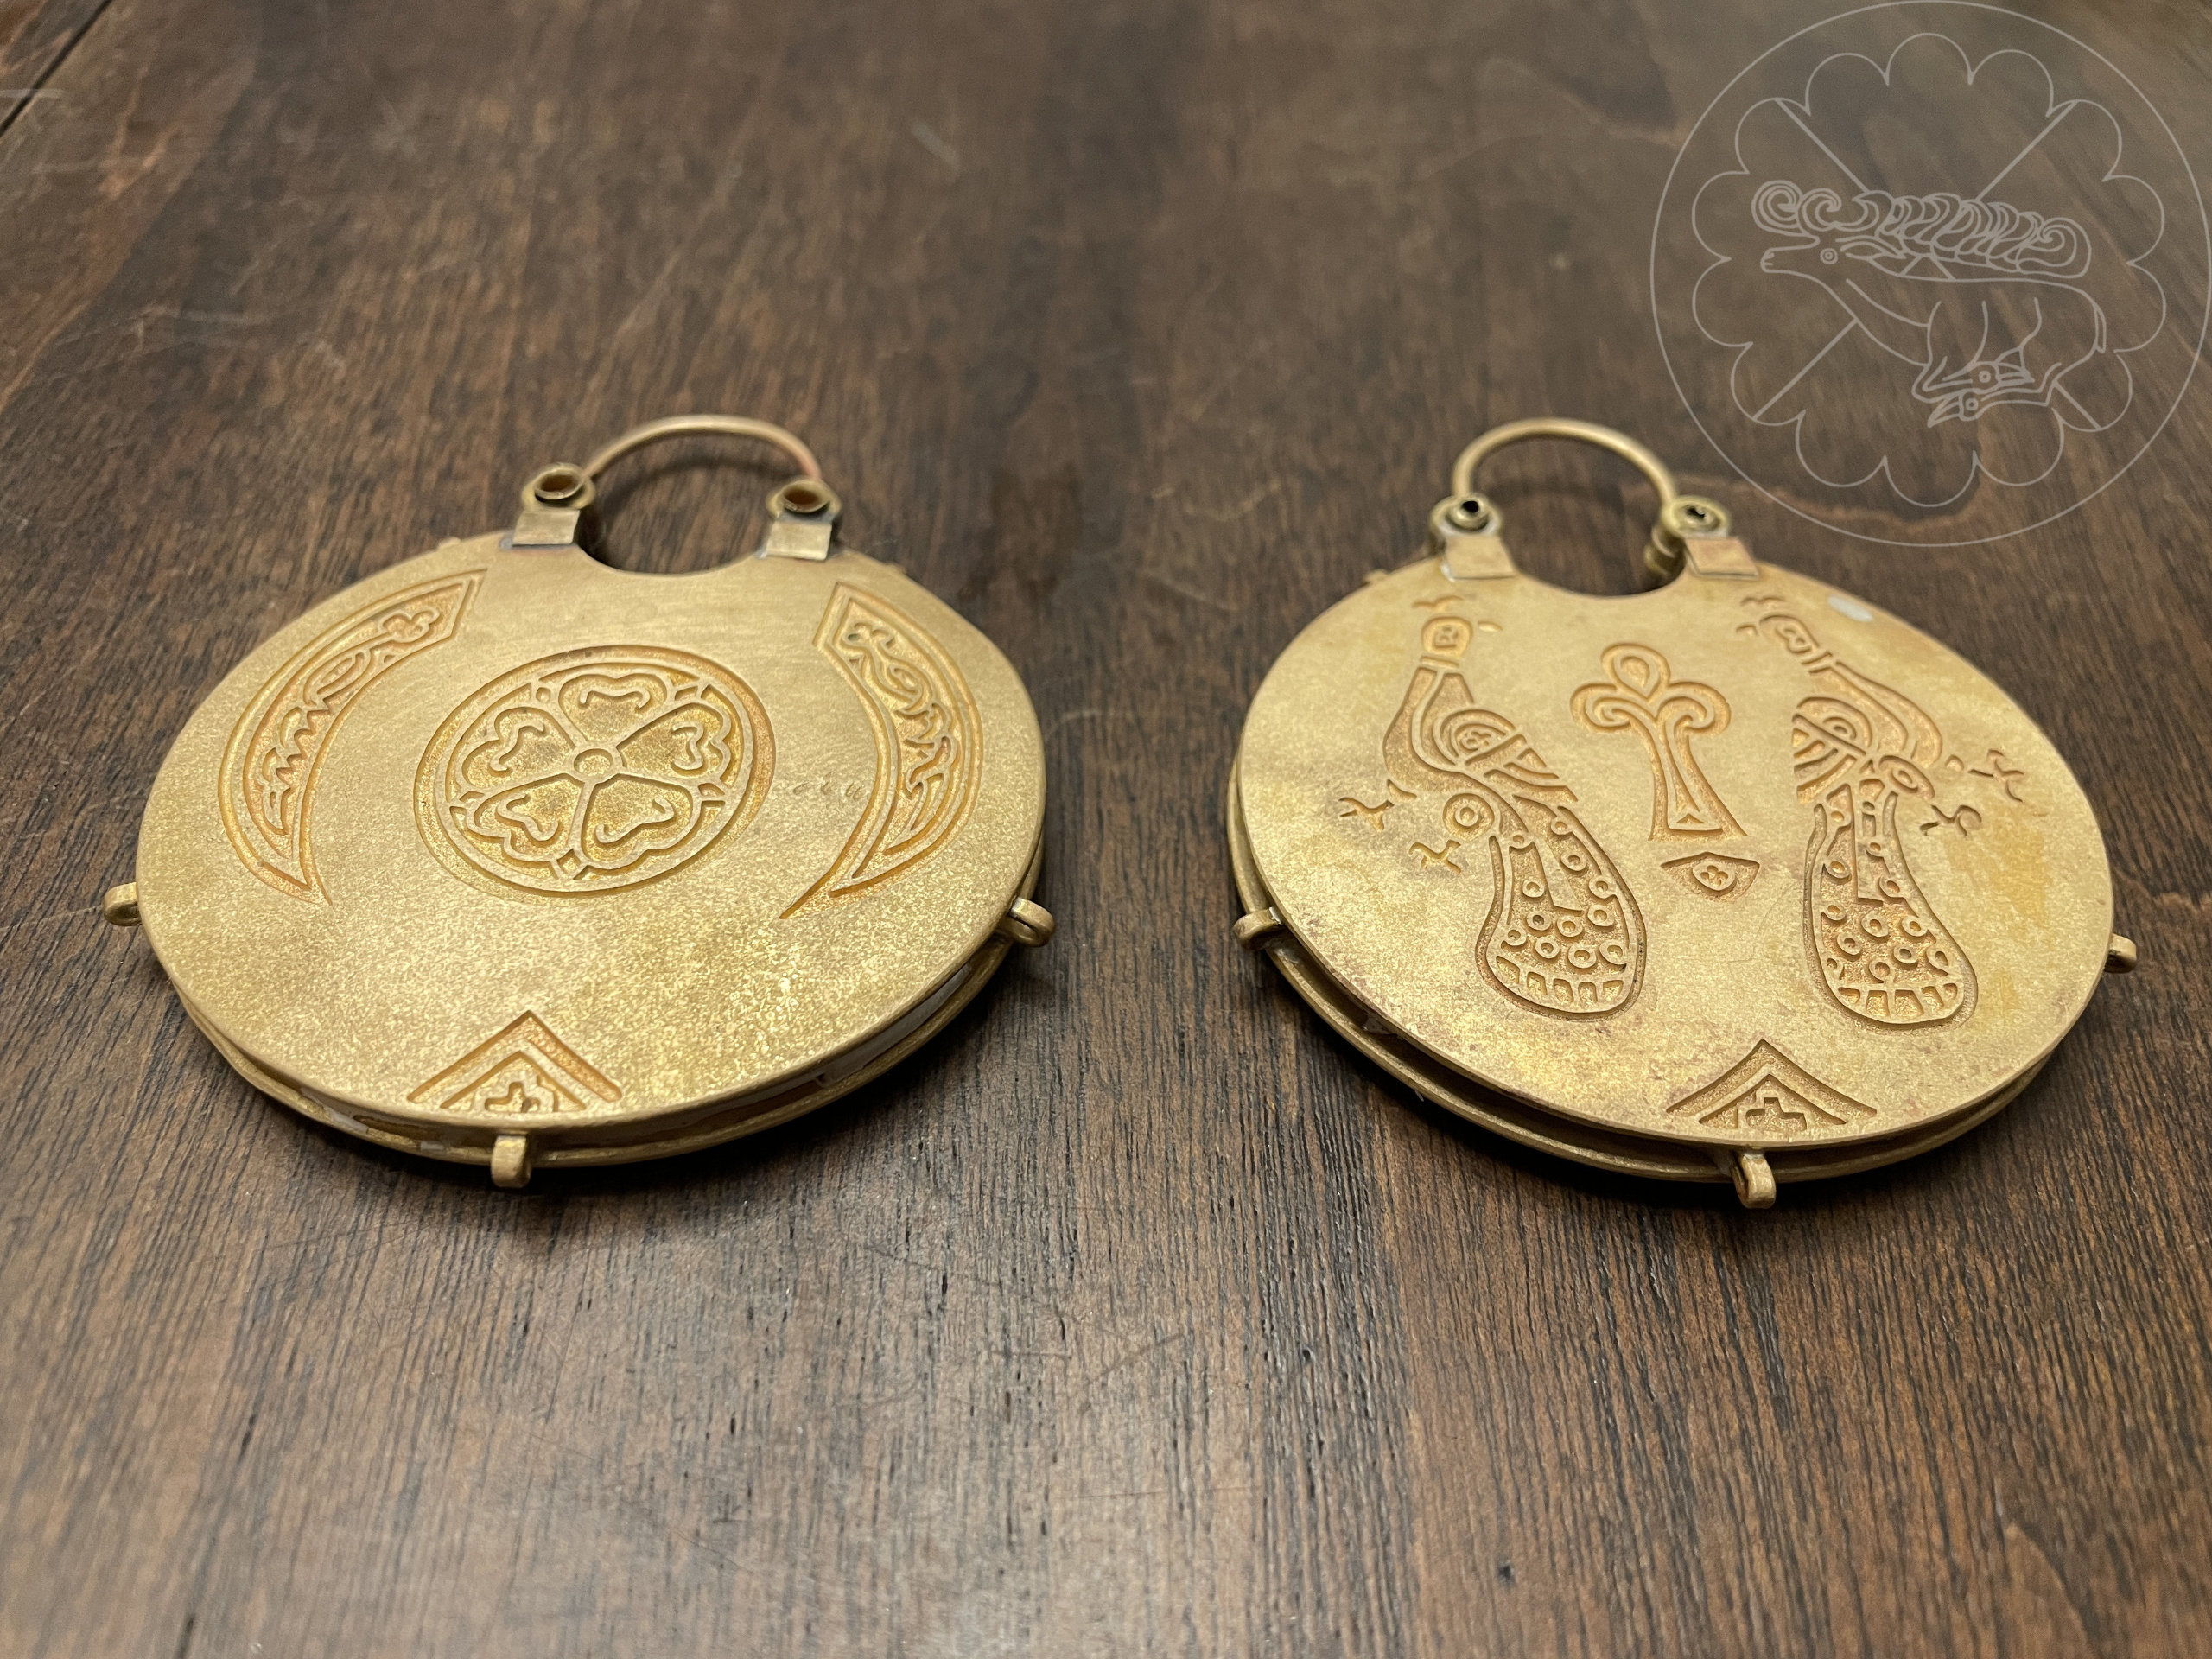
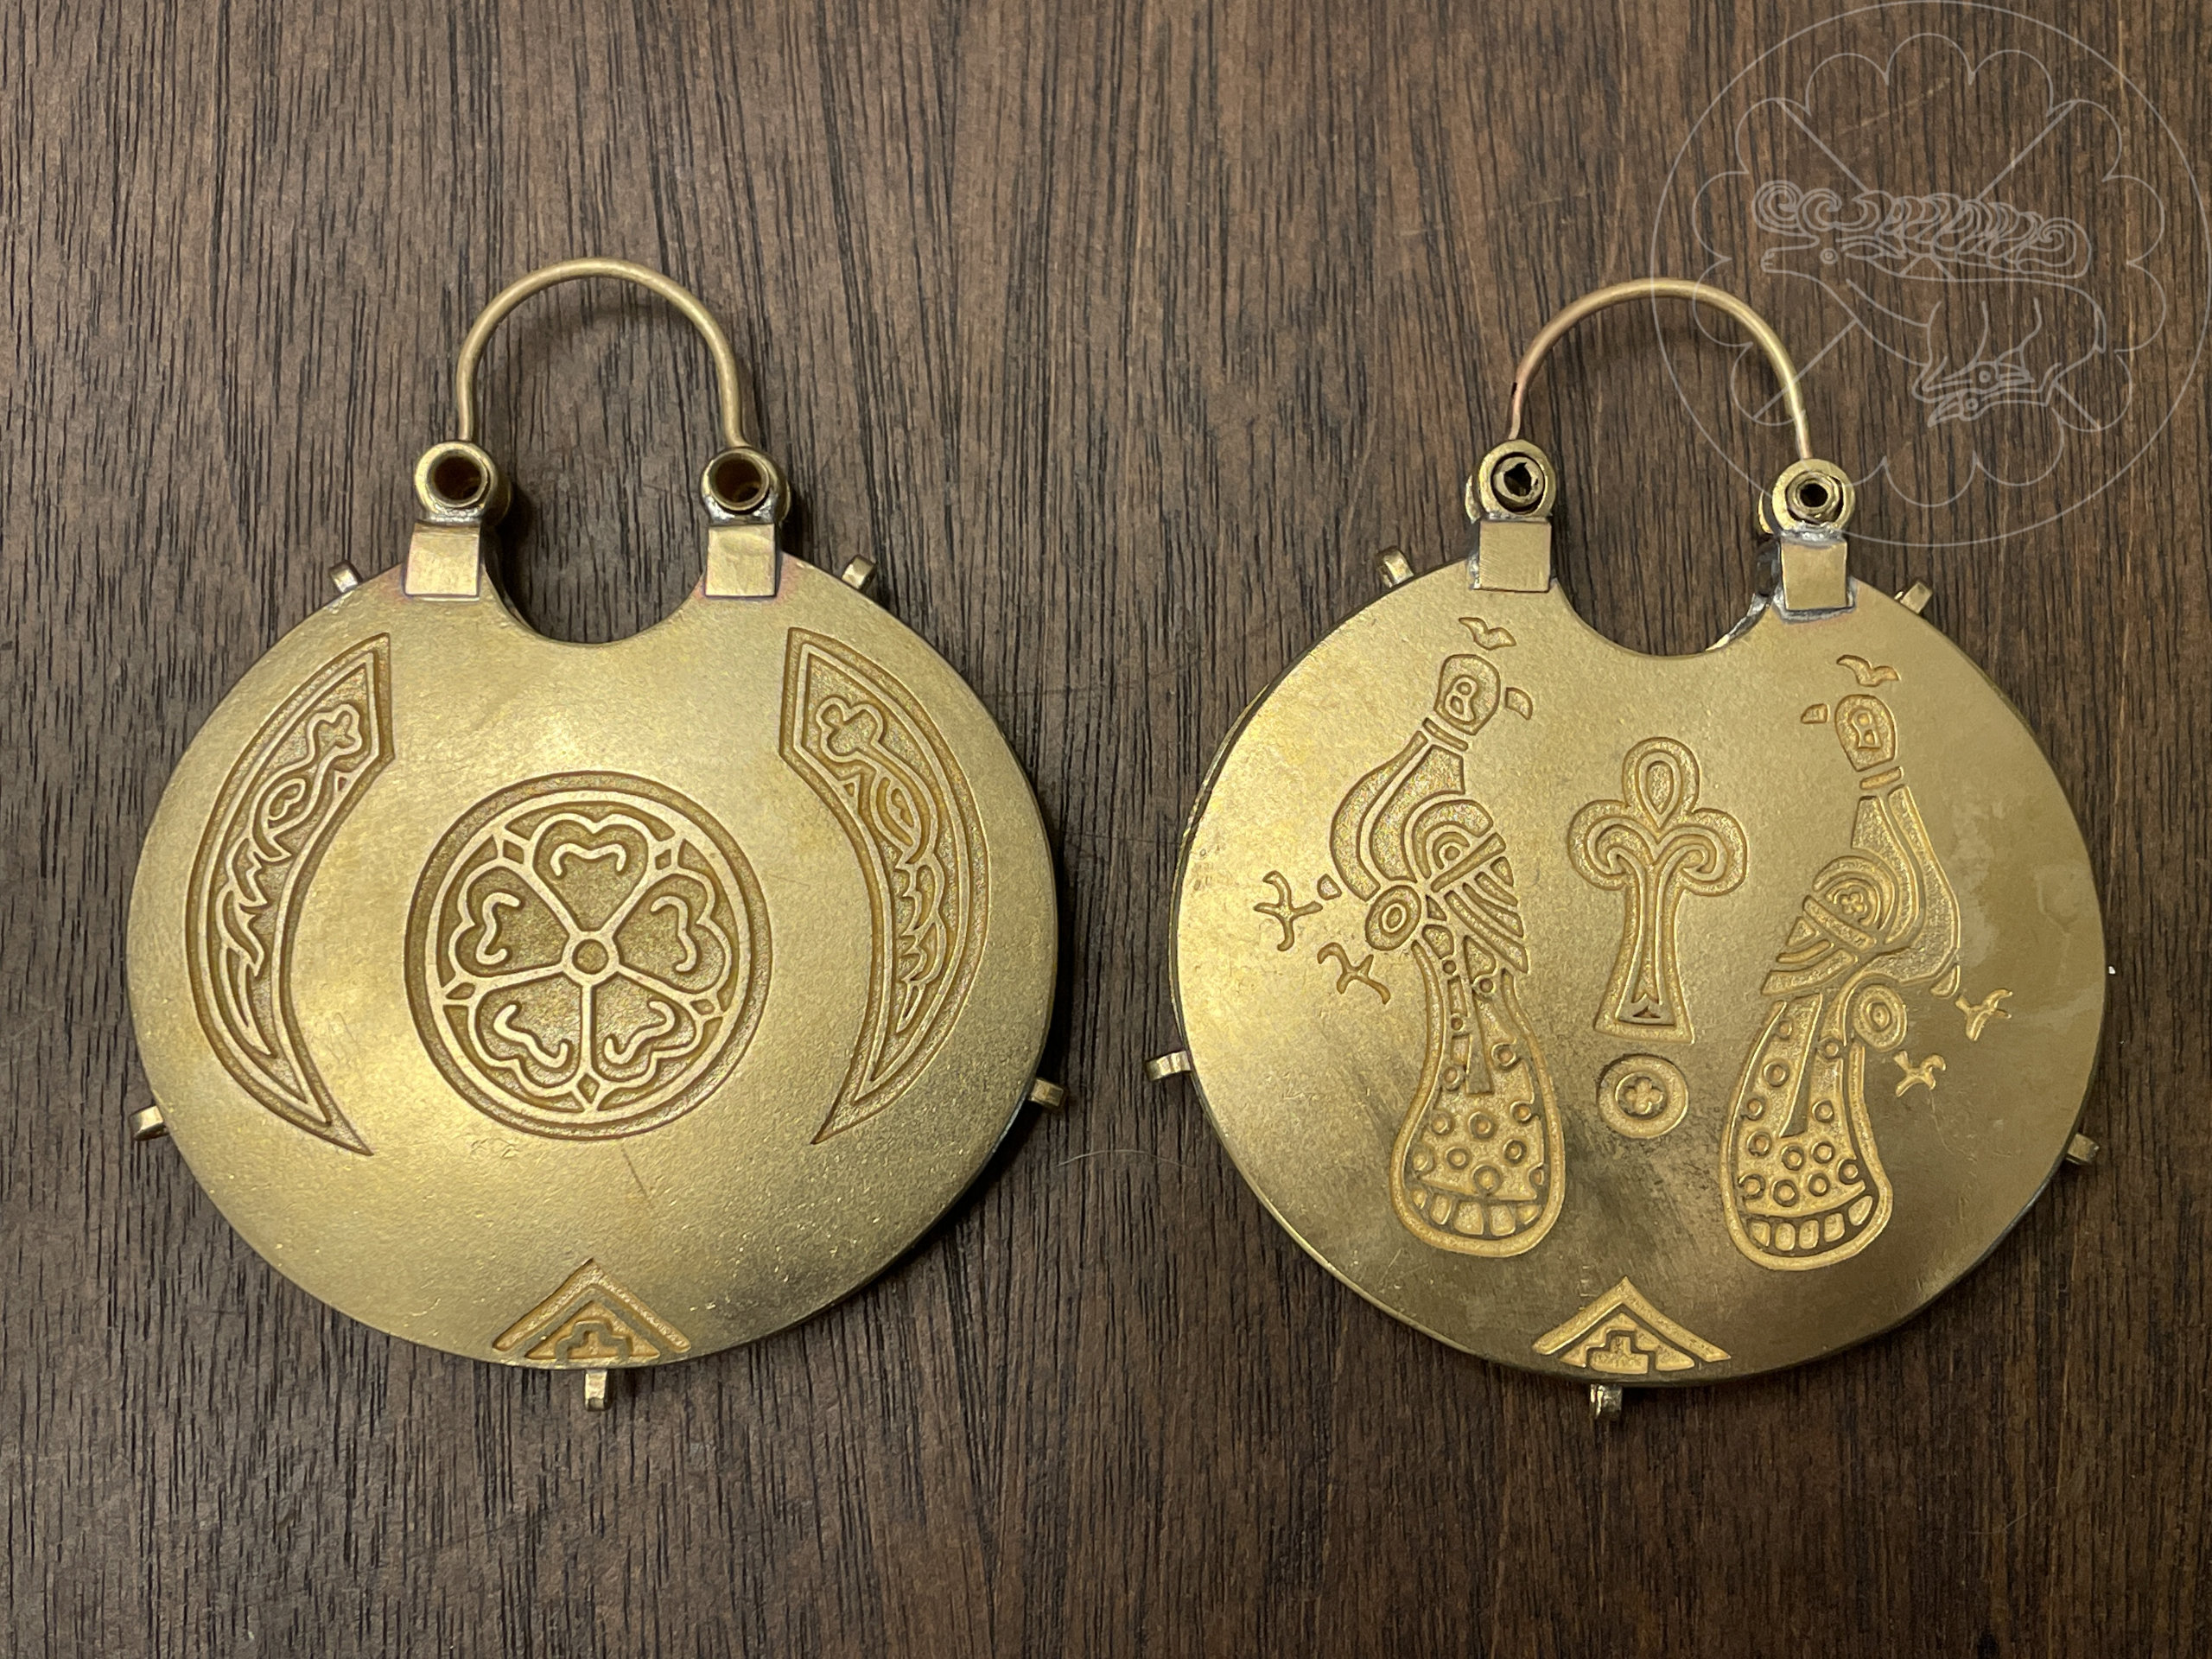
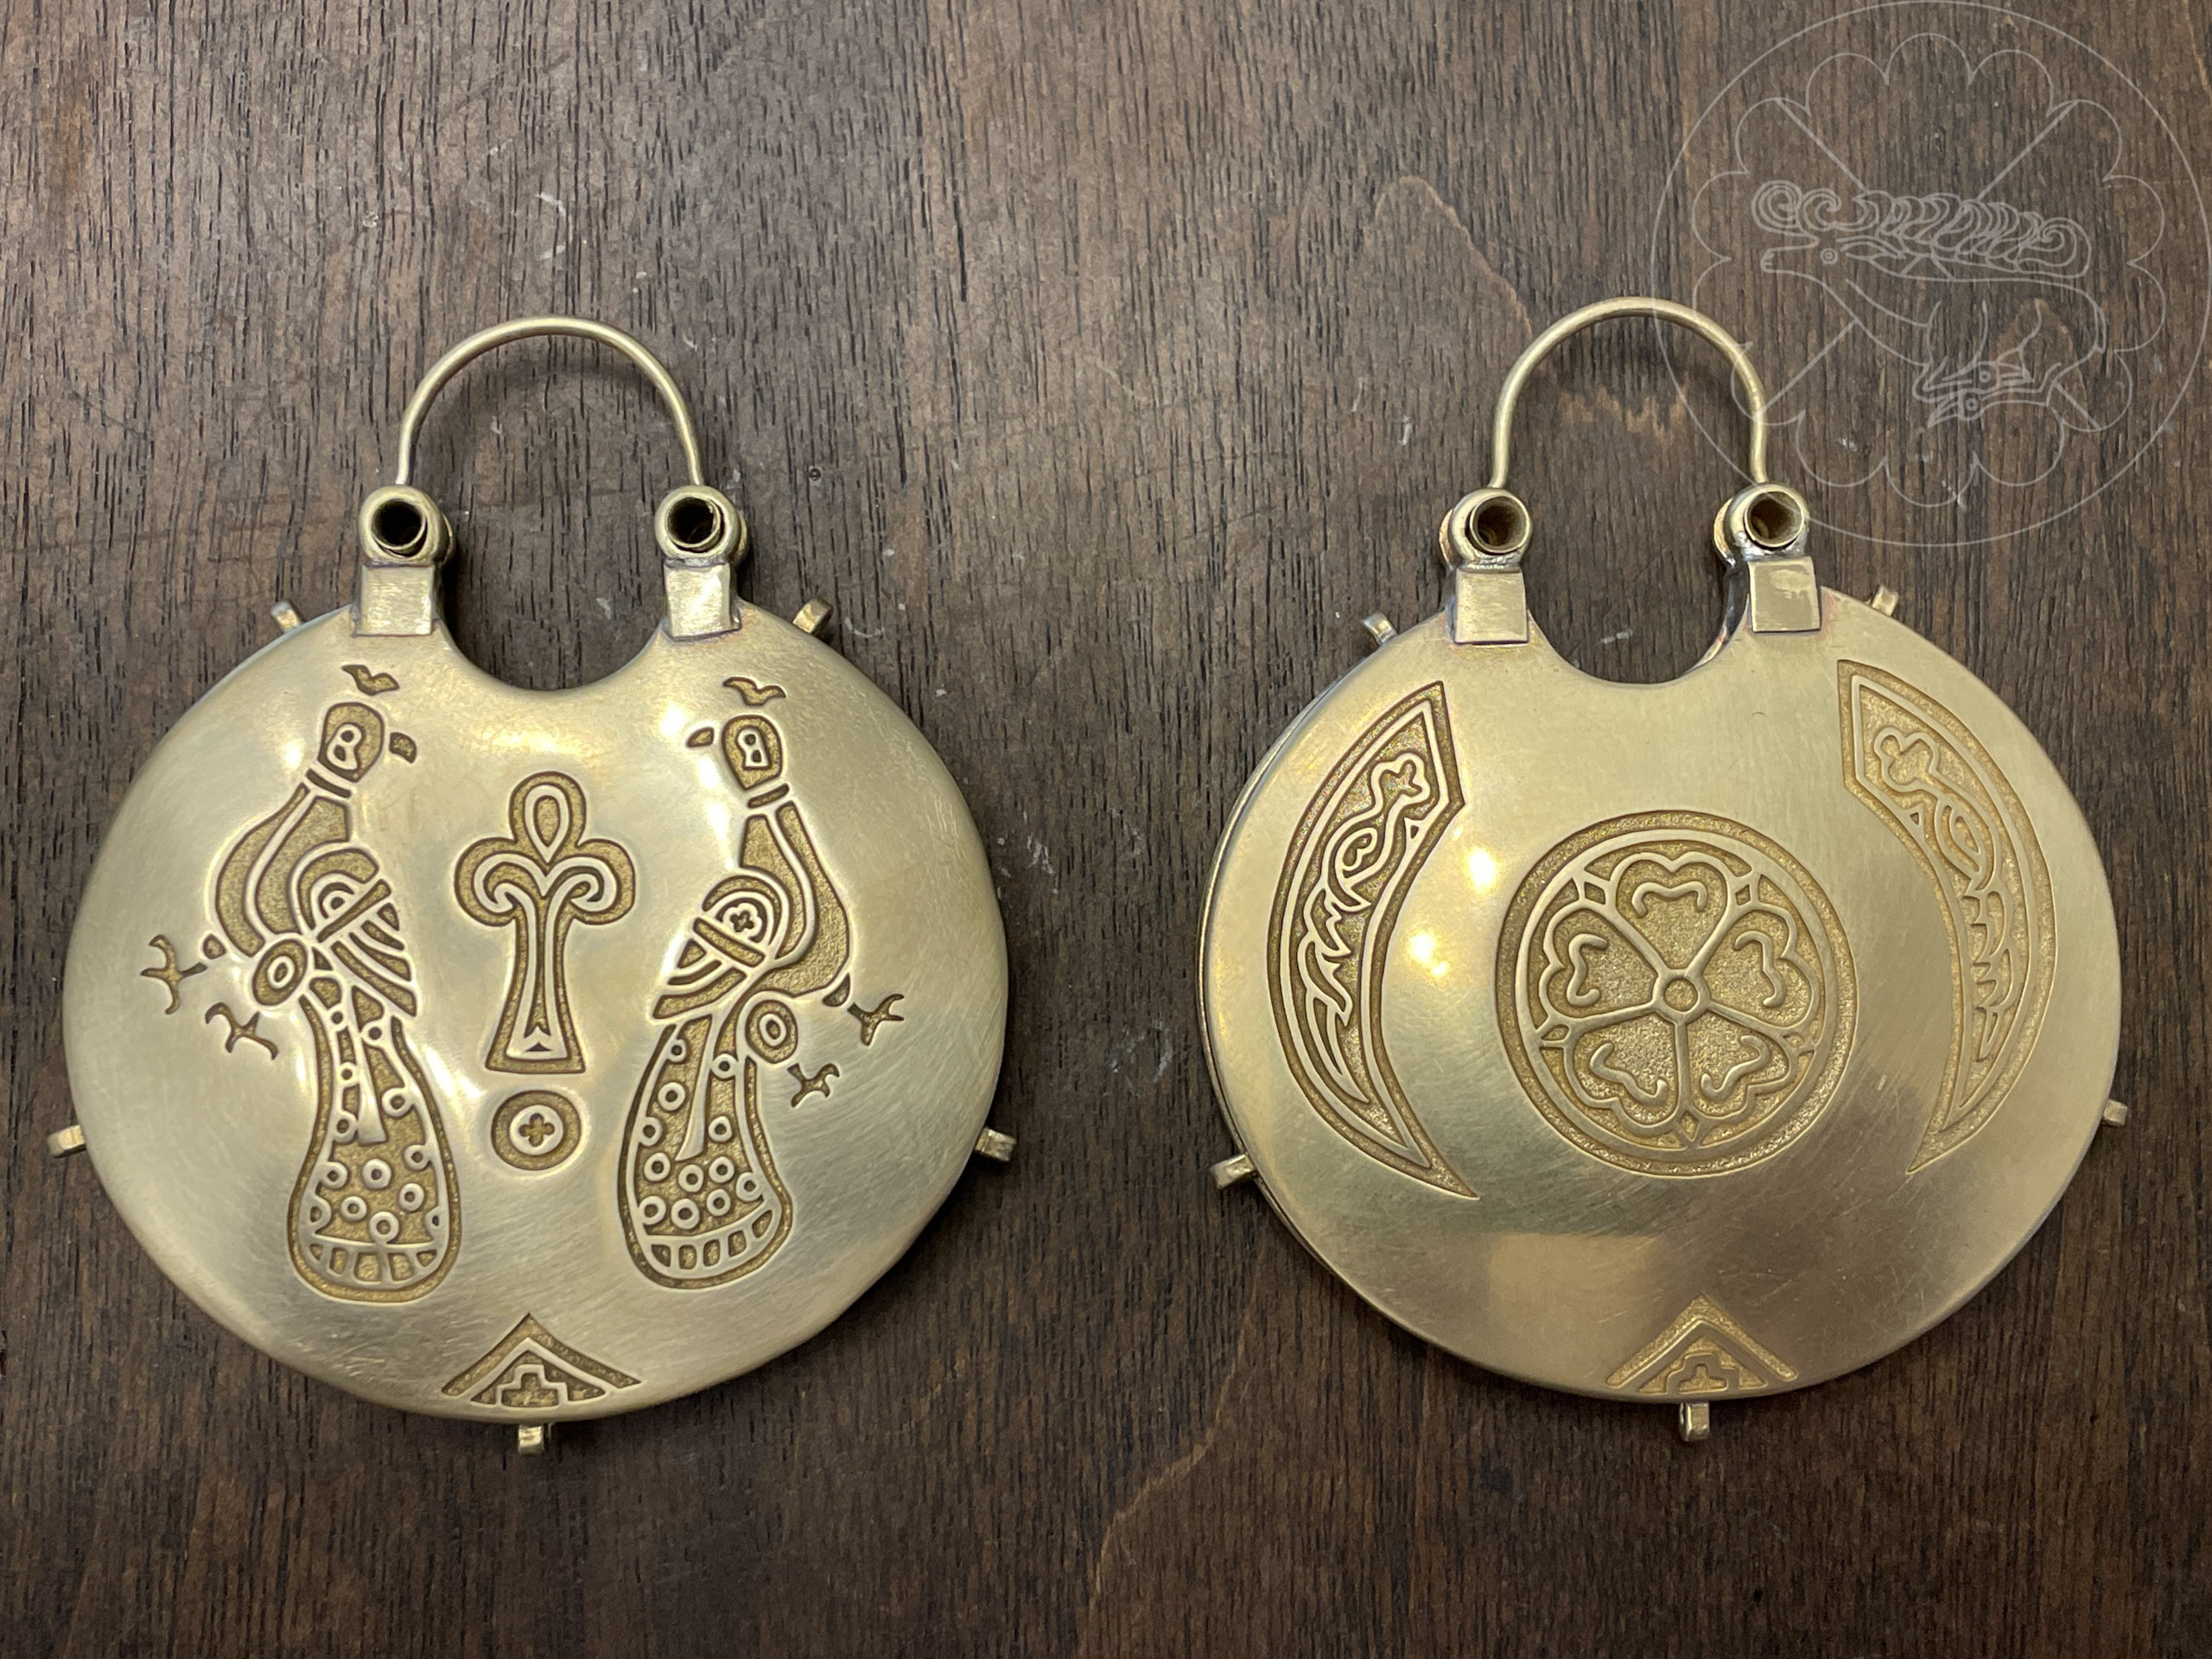
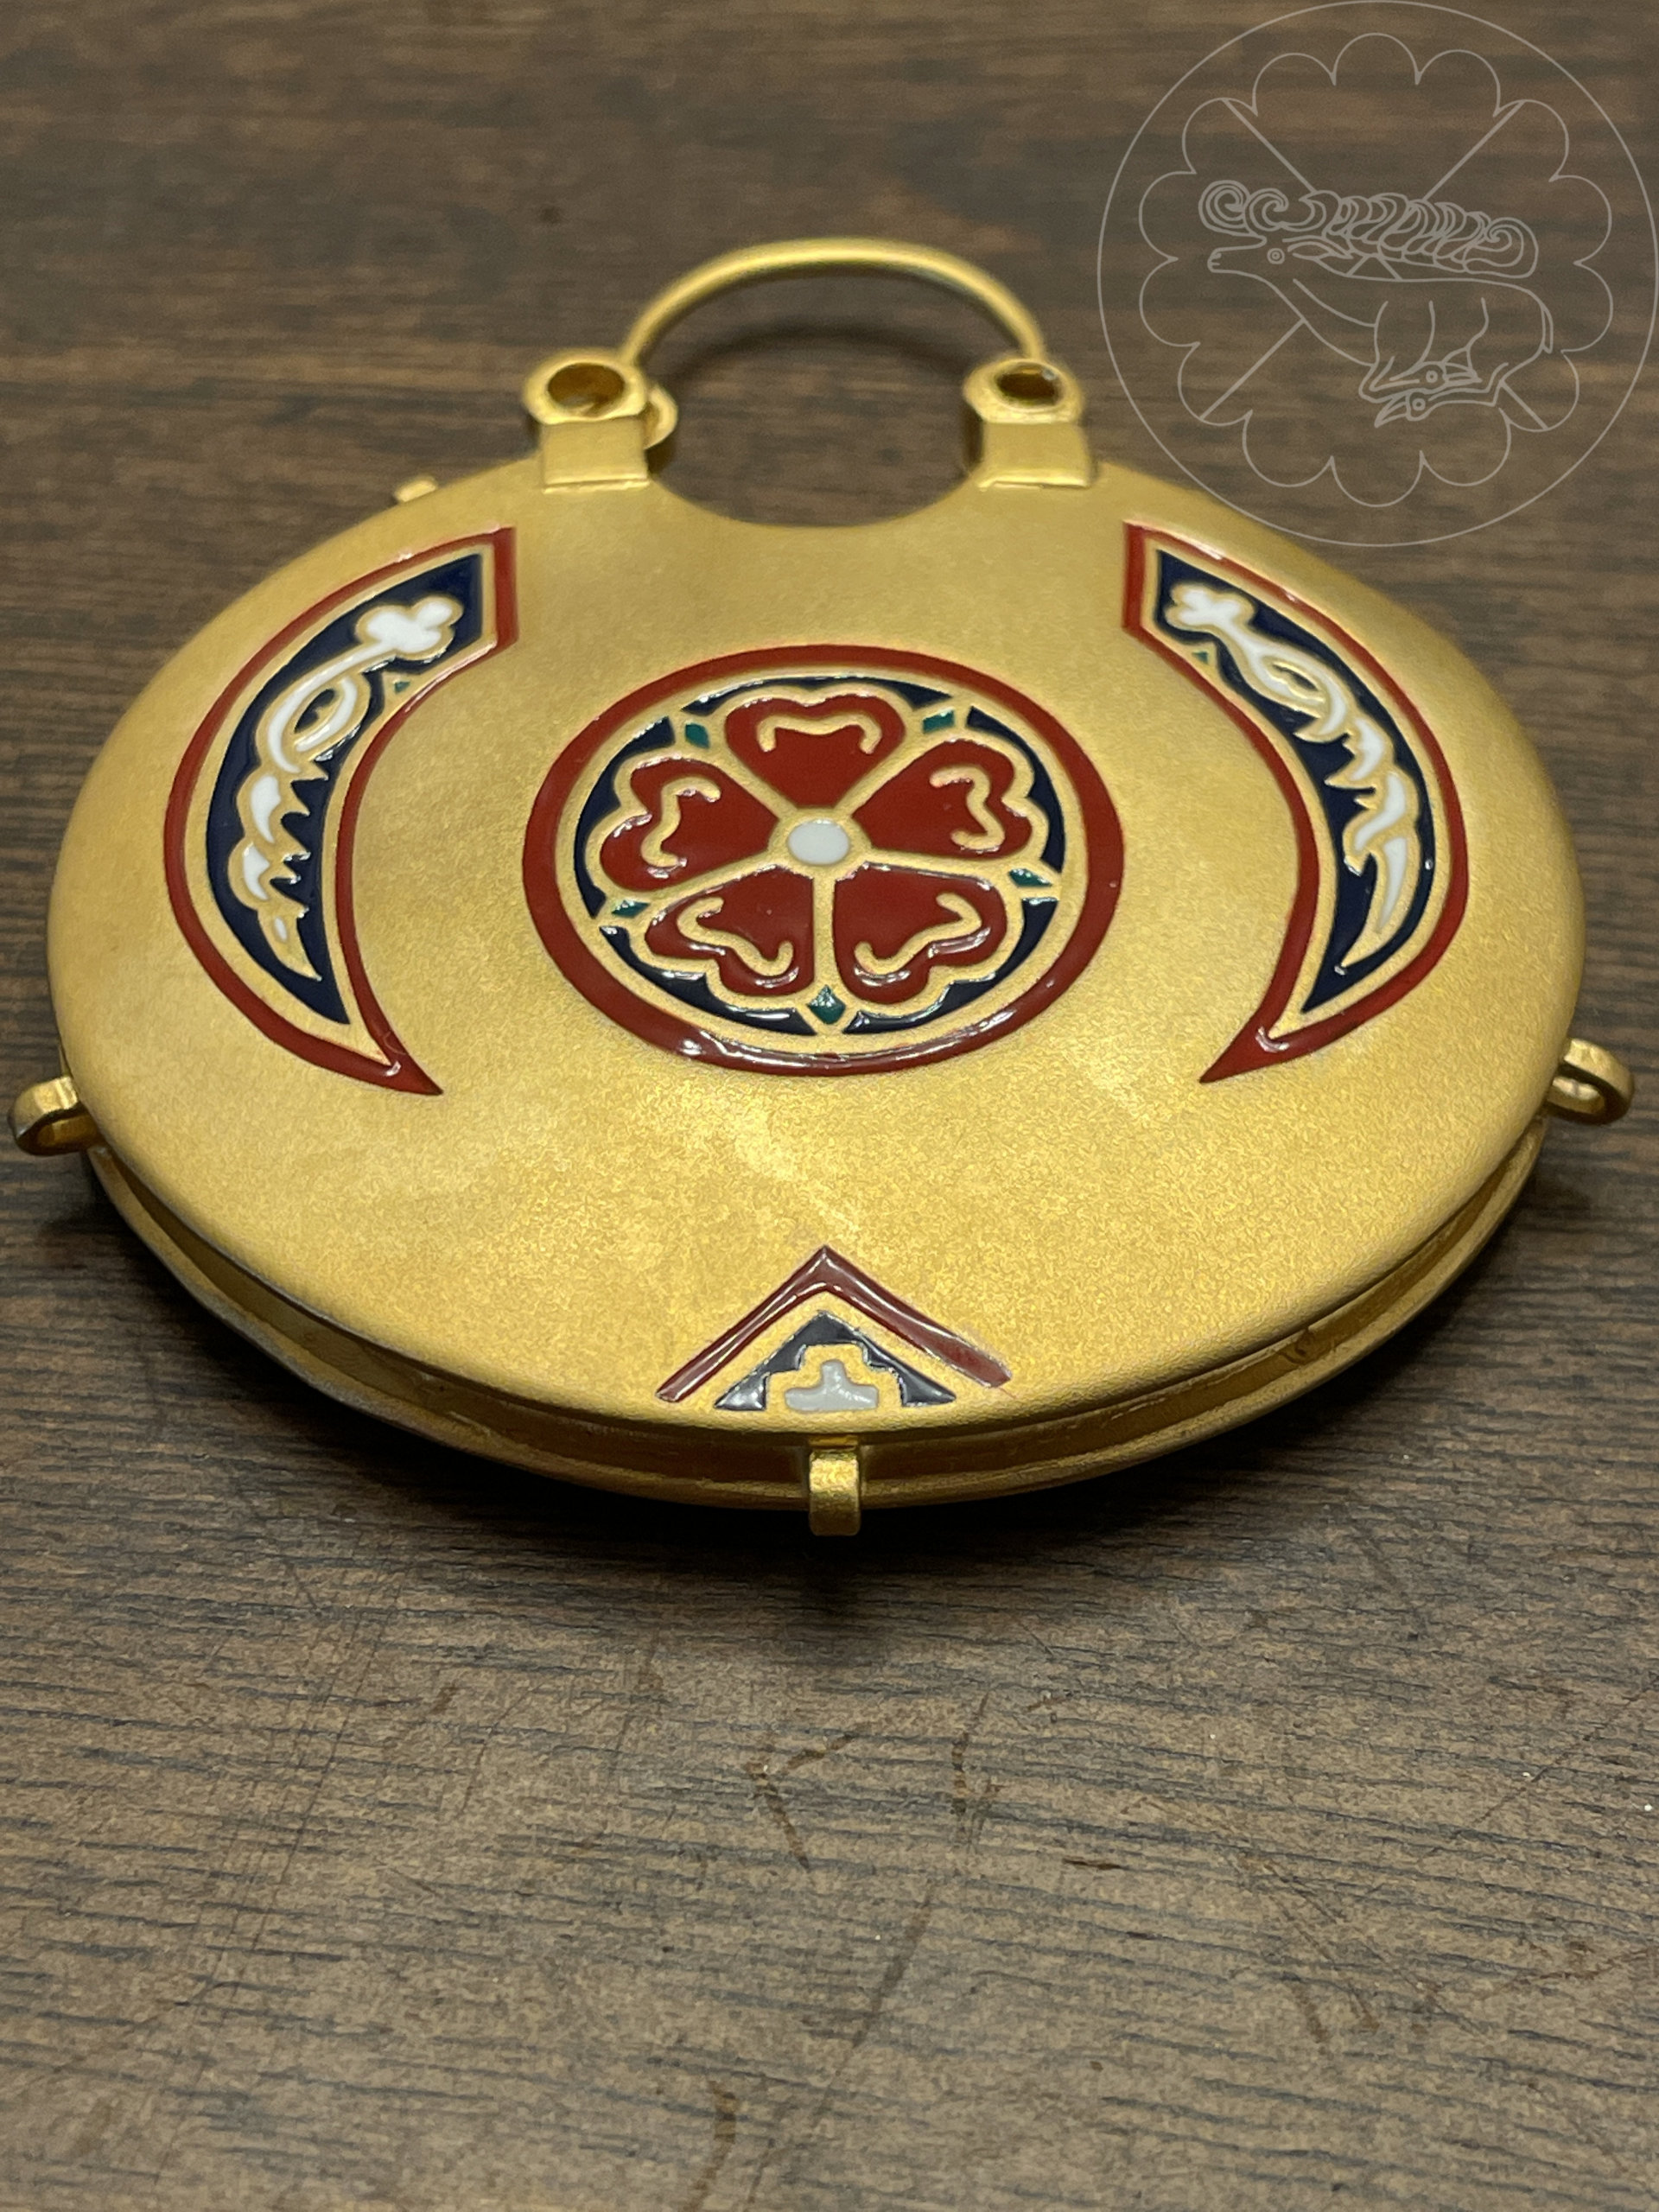
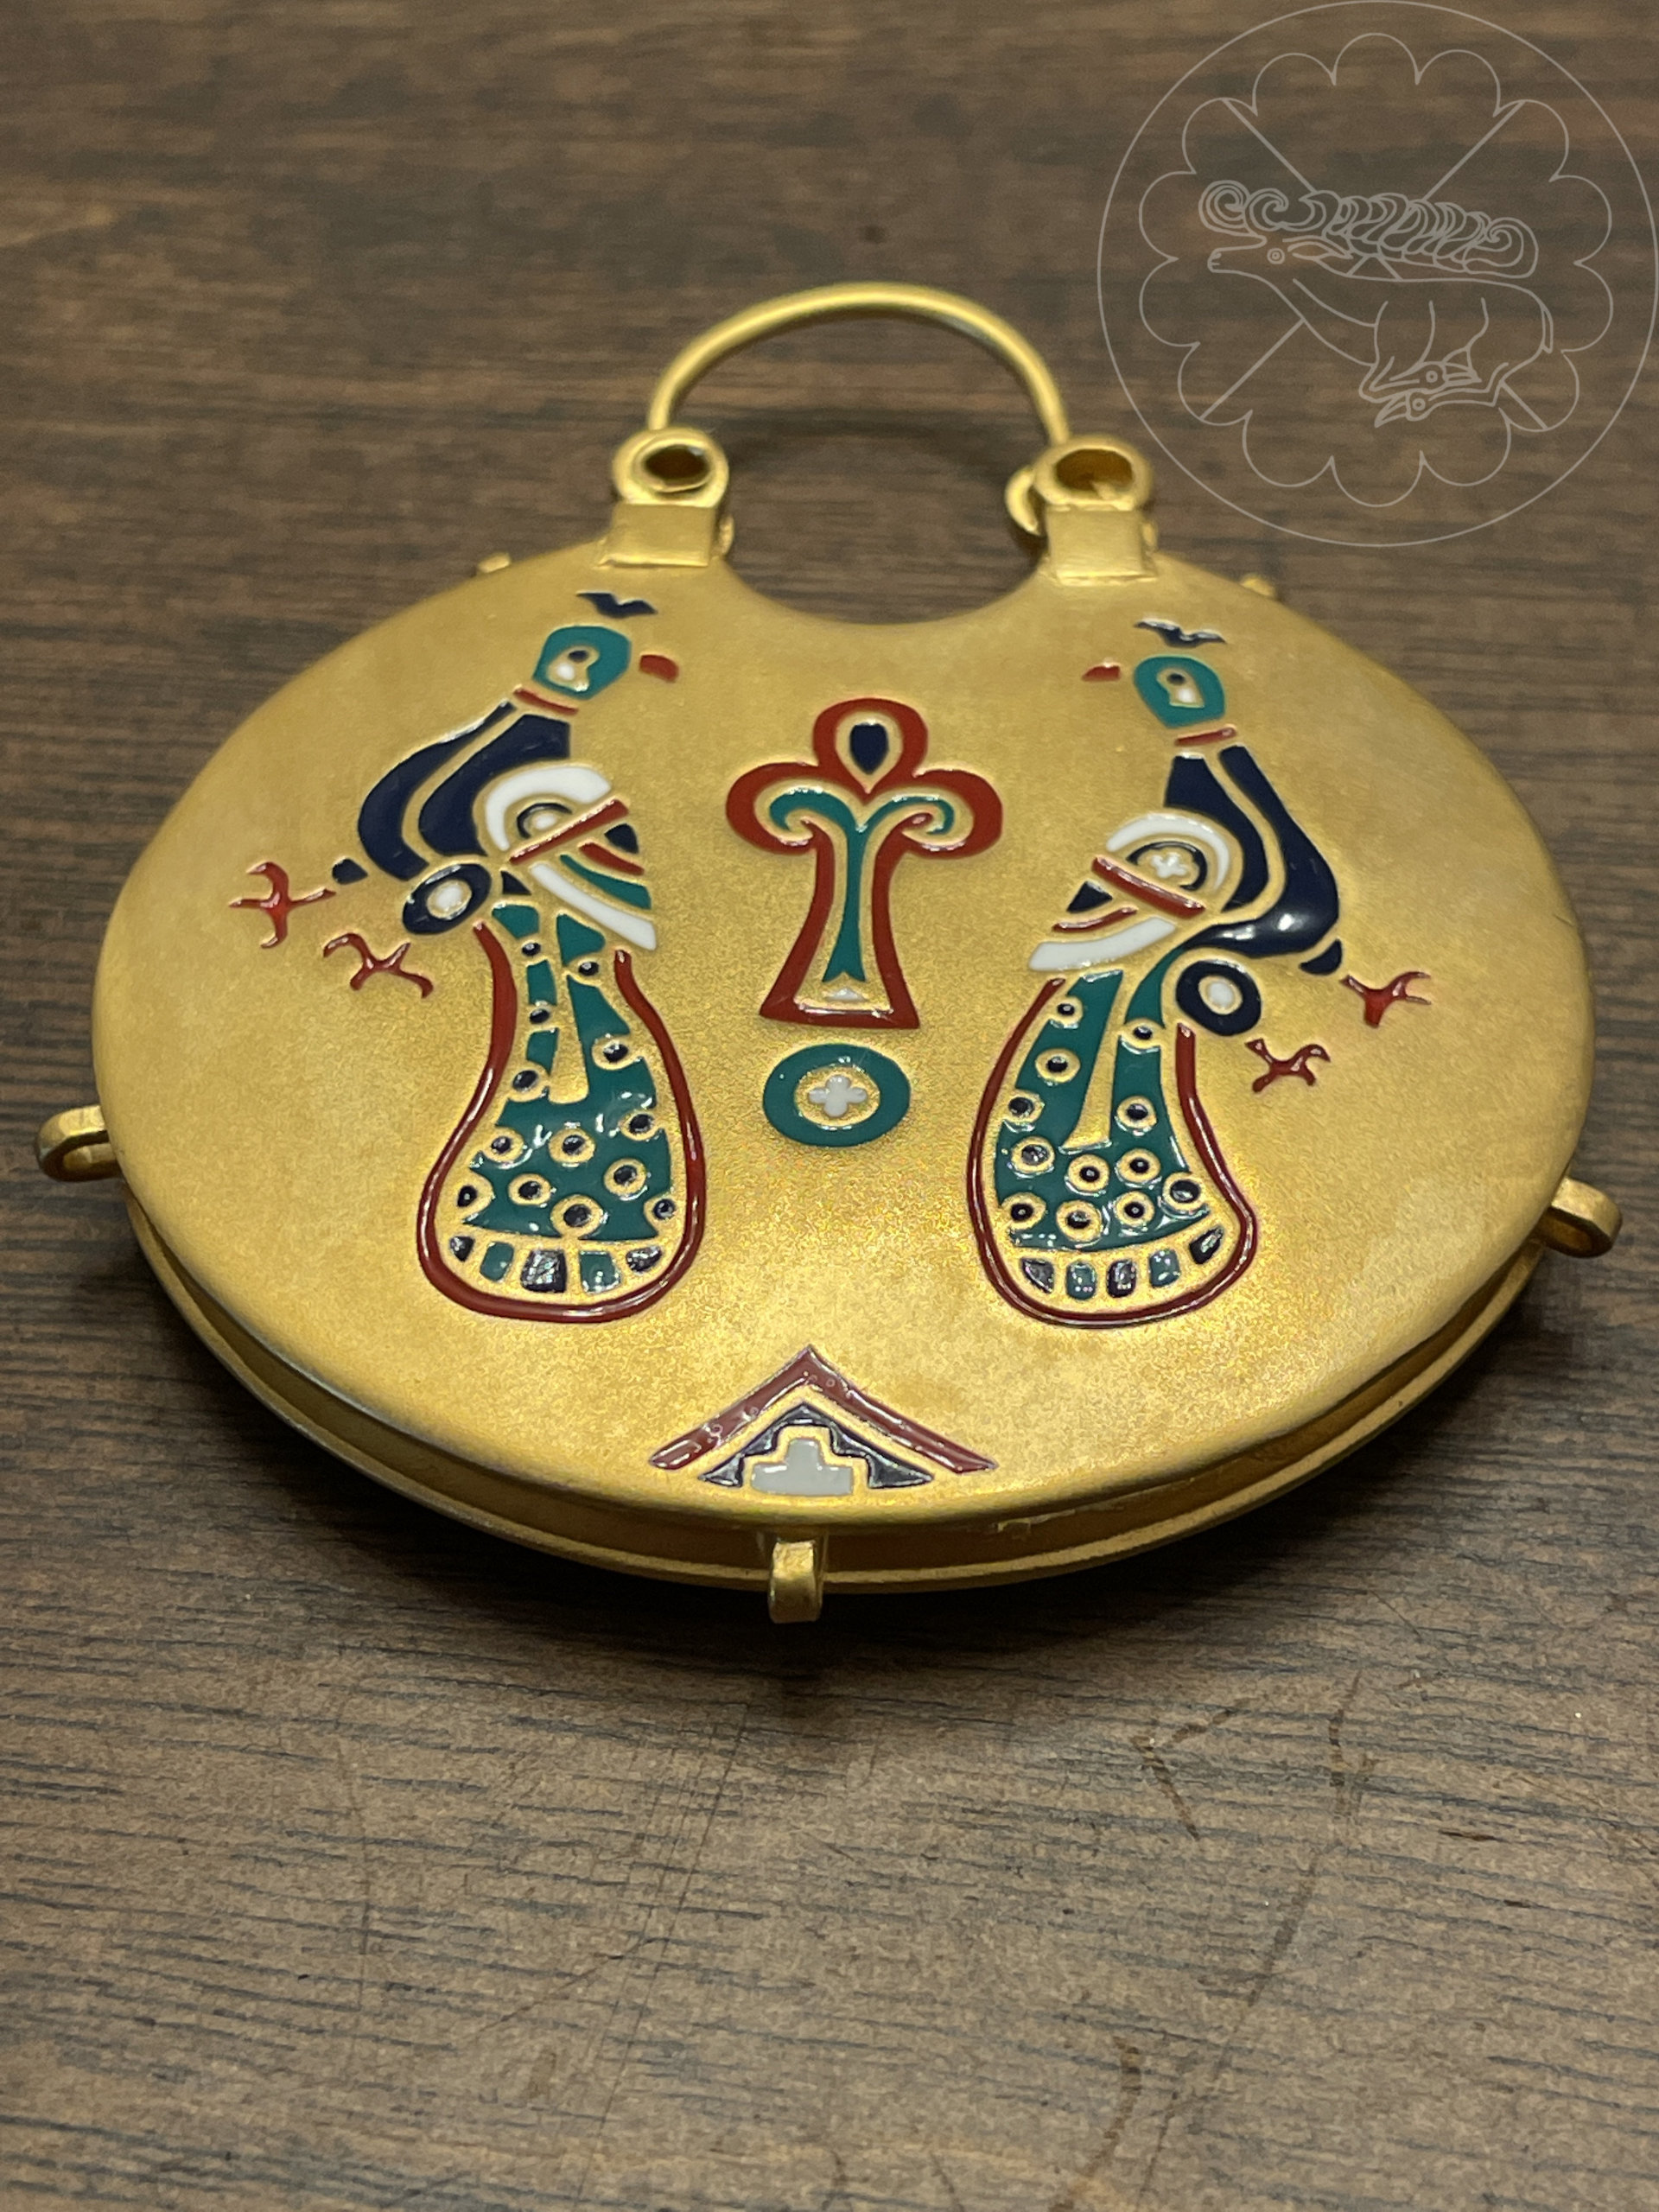
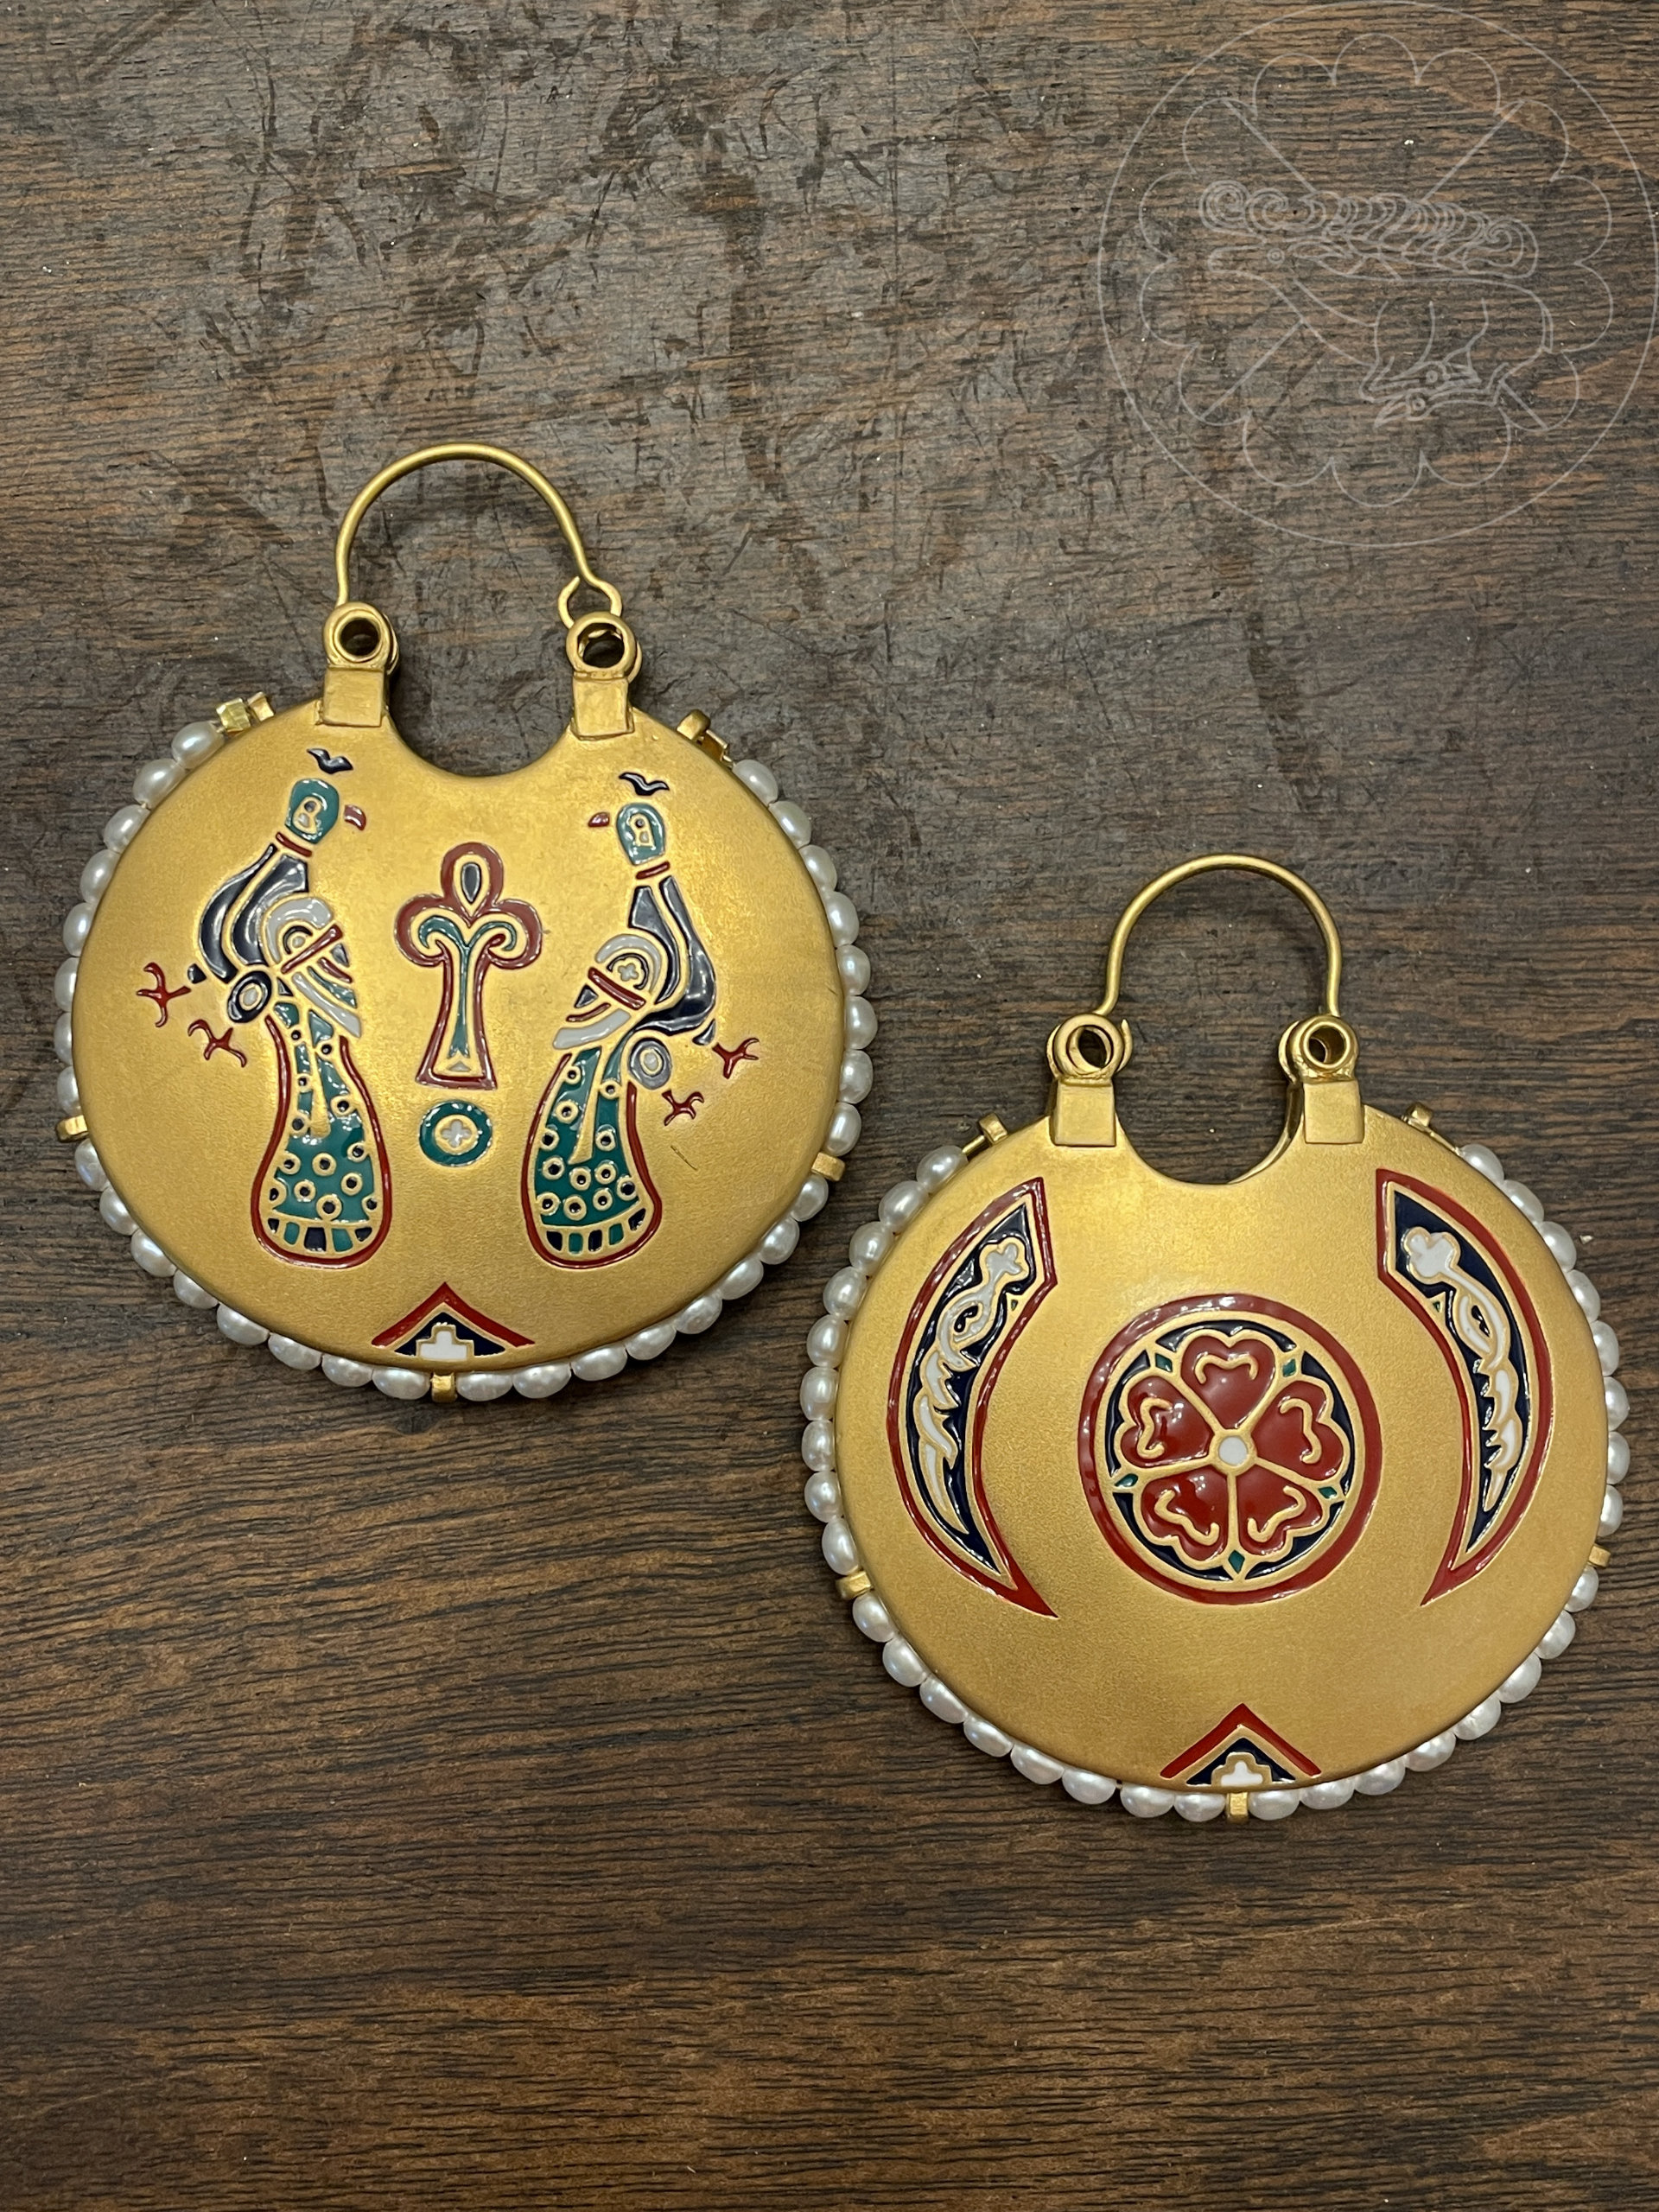
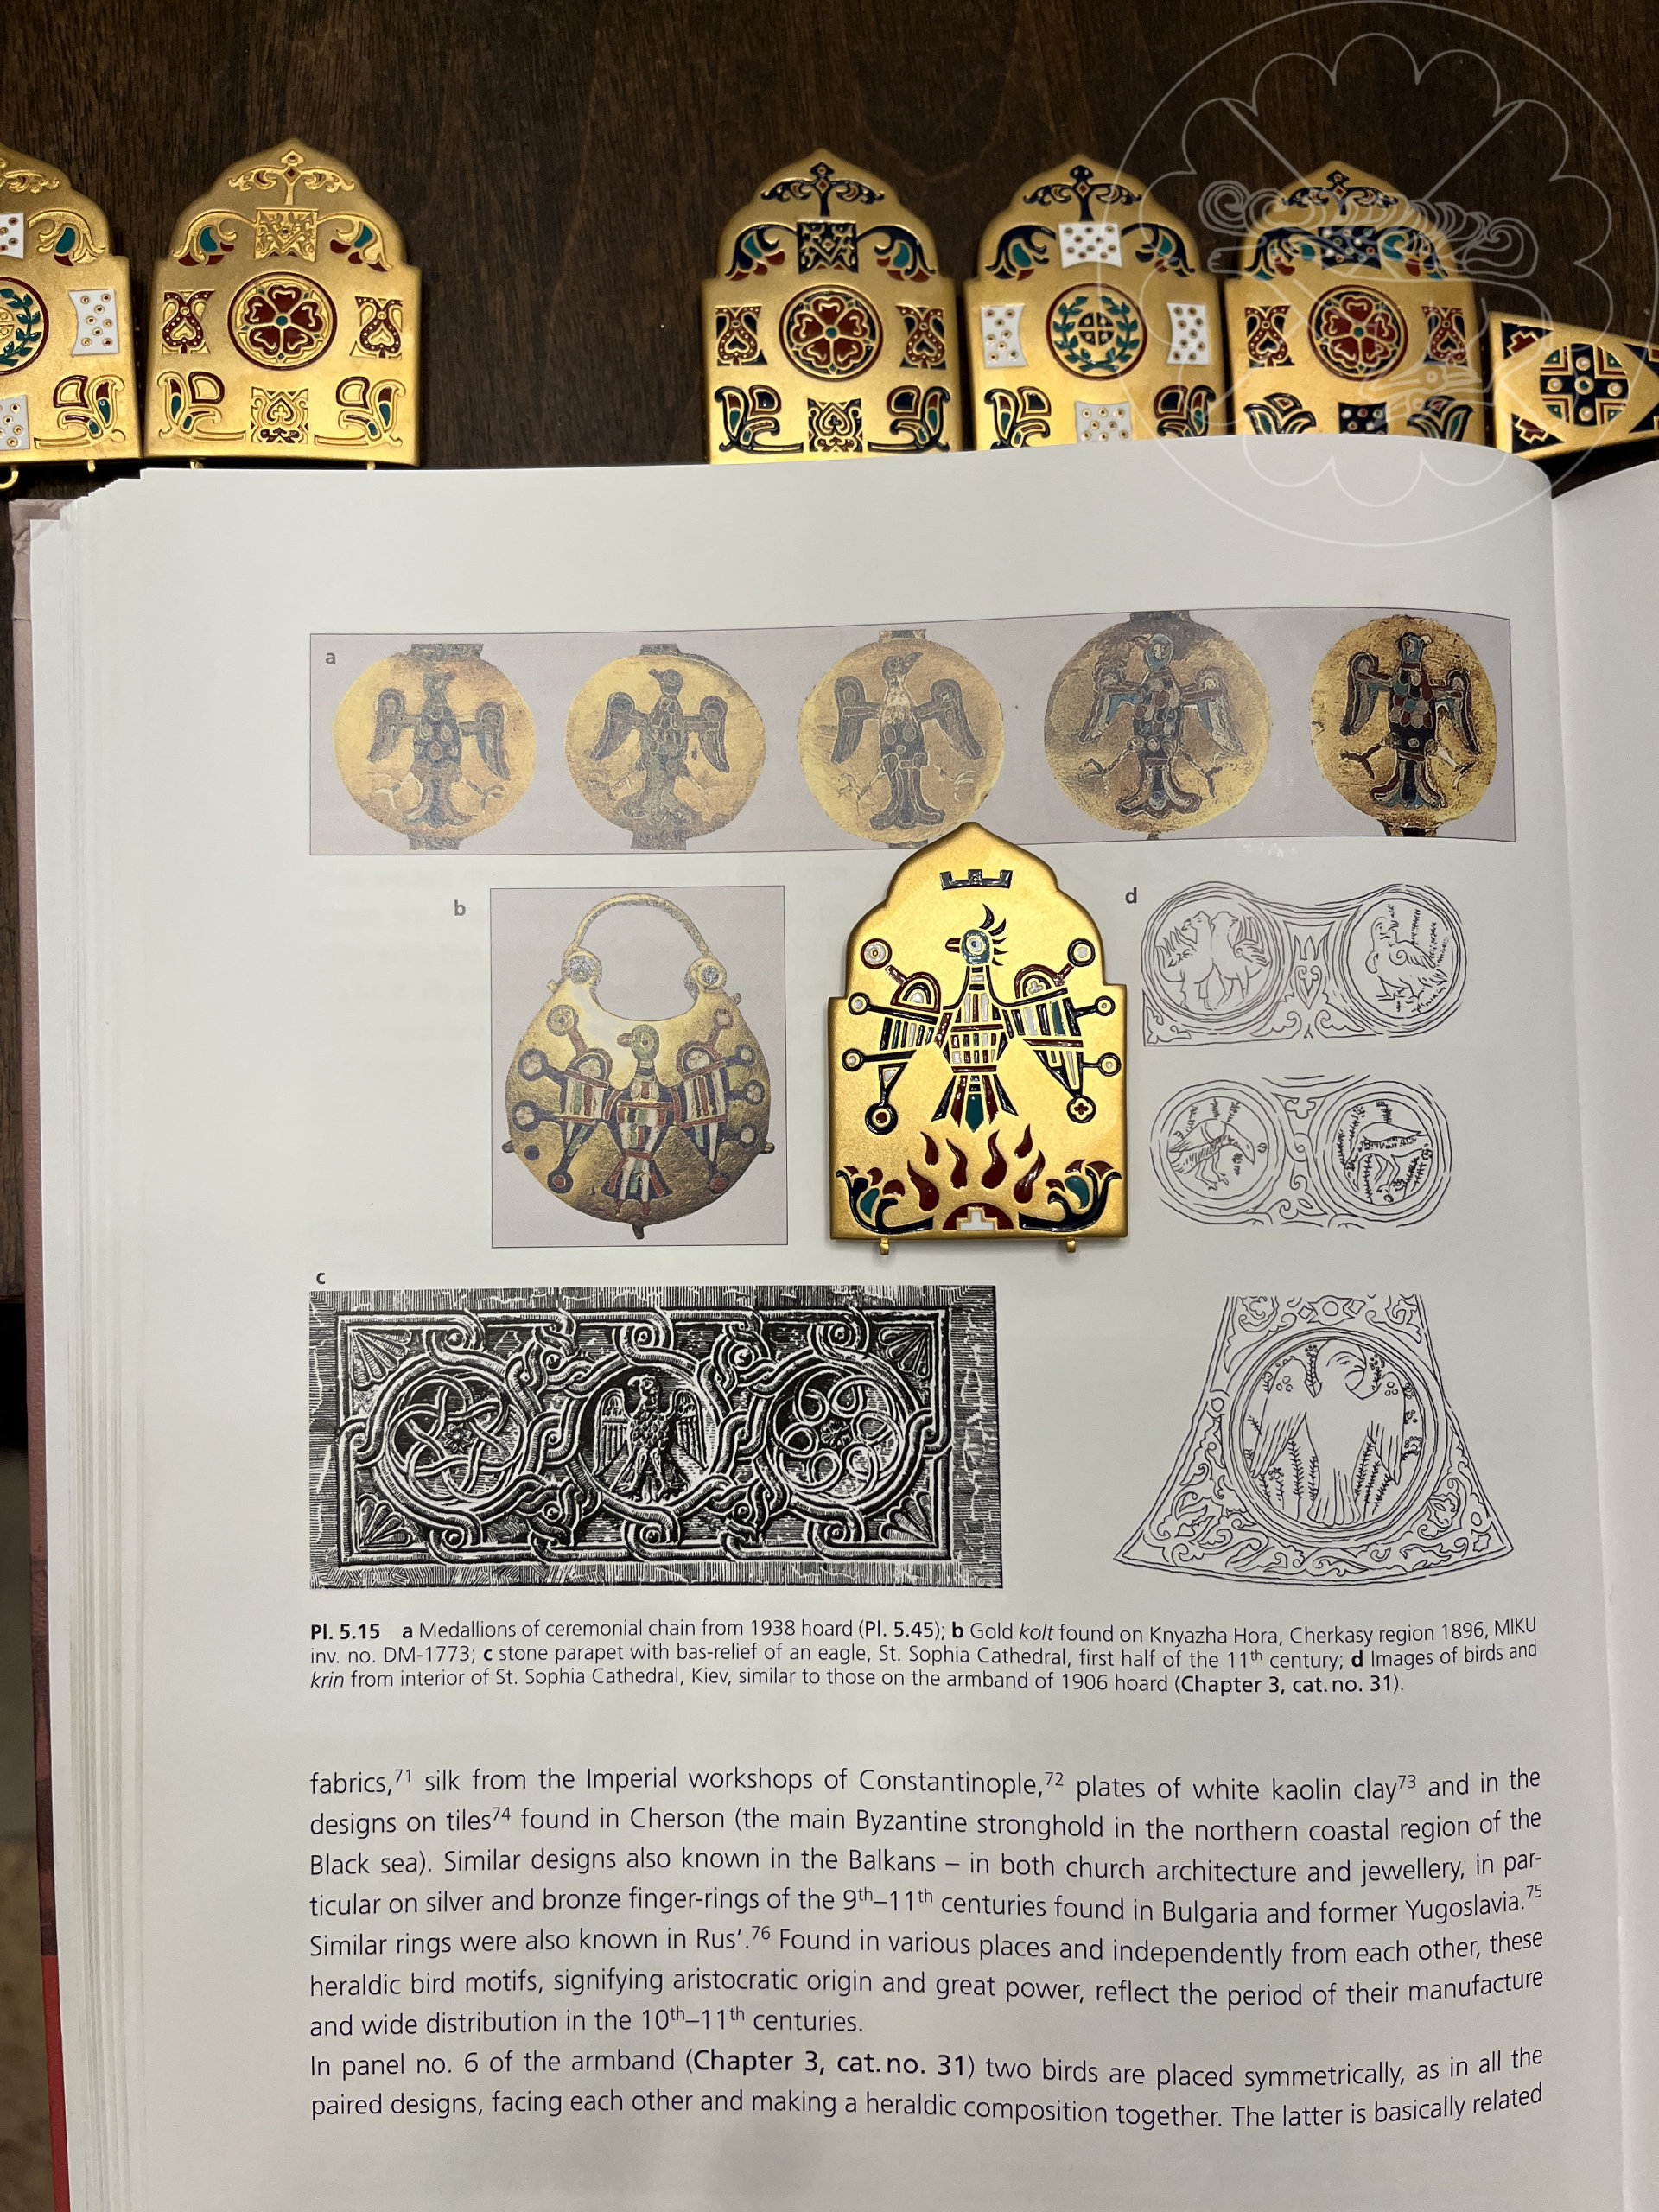
A common motif in several Kolti is the representations of a pair of birds [PICS] on one face, separated by a central feature often one described as representing the tree of life. The birds are believed to be doves mainly – from the Christian tradition associated with the Holy Spirit and symbolizing kindness and beauty. On the opposite side, many featured 2 opposing horn shapes with a round geometric center piece. The particular set I based my kolti on is ~5cm in diameter, and displayed both of these motifs.
Other motifs commonly found were sirens instead of birds or depictions of religious figures or saints, and more rare were other animals, and other geometric patterns.
I’ve known for years looking at pictures and reading descriptions that the kolti were hollow, made from 2 dished discs of metal, and were said to have been stuffed with perfumed cloth. Finding more images over time, and then seeing extant examples in the British Museum I came to understand that the dished discs were separated from one another by a small distance and that there were small wire segments holding them together. Because of the limited viewing angles and small dimension of the pieces I saw, I still didn’t have a good feel for the overall construction. I found some articles describing the method of manufacture of the Kolti (Szmoniewski, Bartłomiej Szymon. “Byzantium and the Slavs in the Light of Goldsmiths’ Production.” u: Chris Entwisle–Noël Adams (ur.),’Intelligible Beauty’: Recent Research on Byzantine Jewellery, London (2010): 161-172.), but only later found a more detailed description of their construction in Dec 2021 when I found the another book (Pekarskaja, Ljudmila V., and Dafydd Kidd. Jewellery of Princely Kiev: The Kiev Hoards in the British Museum and the Metropolitan Museum of Art and Related Material. Römisch-Germanisches Zentralmuseum, 2011), which shows some detailed exploded diagrams detailing how the kolti were constructed, as well as showing a number of different angles and examples which had been damaged, and all of this together gave me the understanding I needed to try to finally make the set.

Note that the above article by Szmoniewski also appears in a British Museum Research Publication named ‘Intelligible Beauty’: Recent Research on Byzantine Jewellery by Entwistle & Adams (2010) which also contains a paper named ‘Temple Pendants’ in Medieval Rus’: How were they Worn? by Natalija Ristovska that has an excellent discussion of various interpretations of how the Kolti (as well as temple rings) were worn. As of this writing, the entire publication of ‘Intelligible Beauty’ is available from the British Museum here.
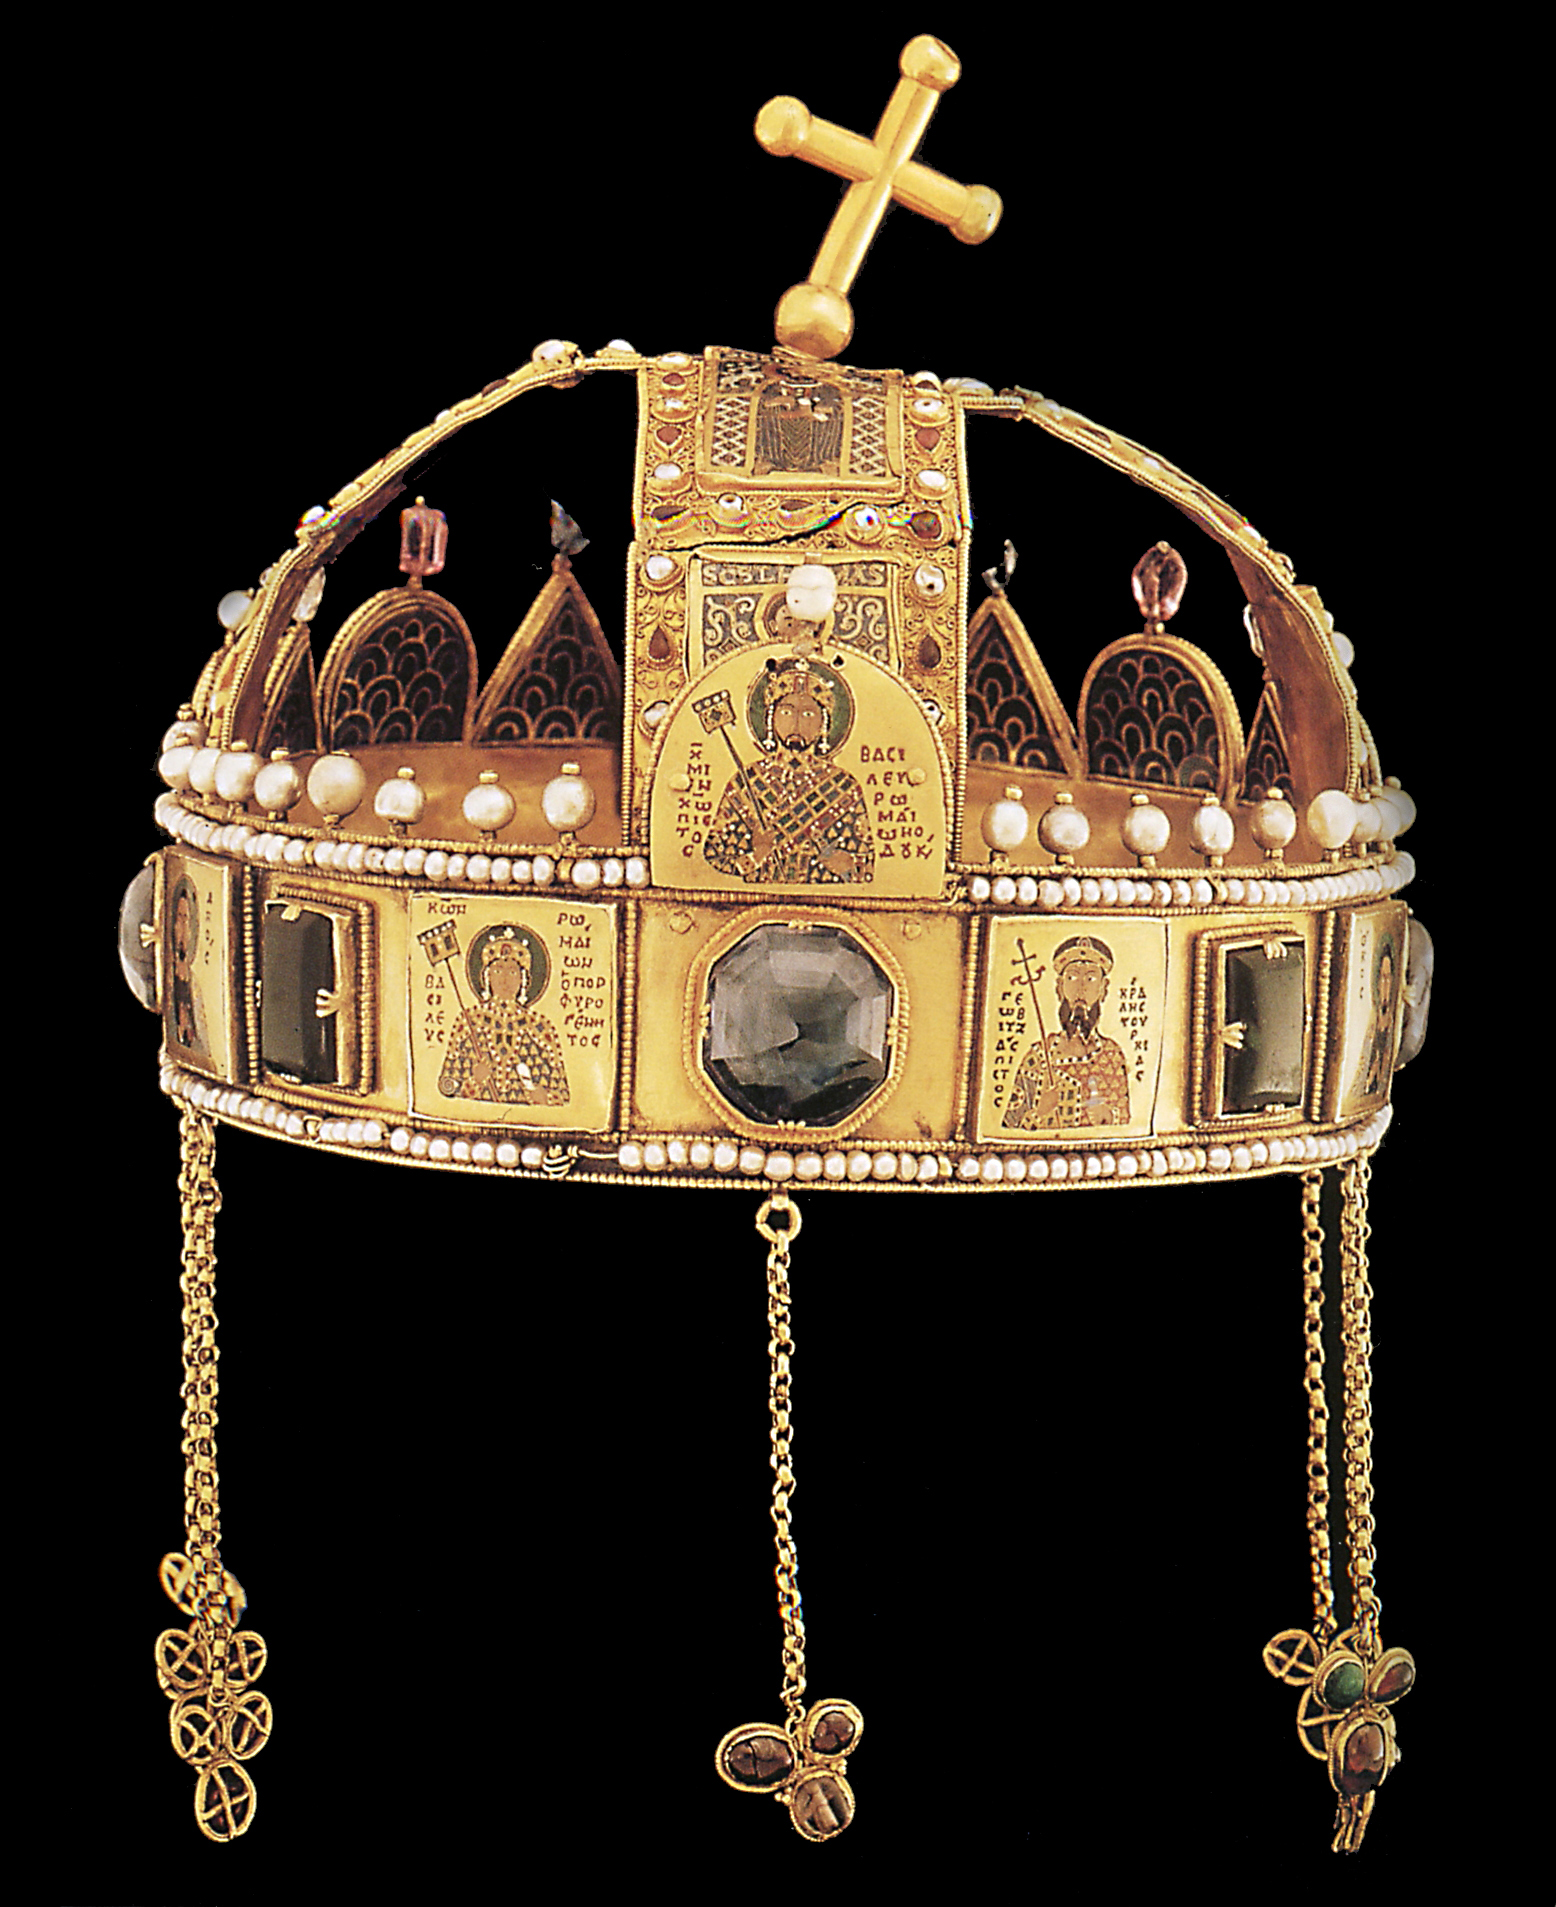
Diadem – At least 2 extant contemporaneous diadems have been found in the same region which use a similar cloisonné technique and bear a similar aesthetic to the numerous Kolti found, and may have indeed been made in the same workshops. Both are from the 12th century. These are know as the Diadem with the Deesis, and the Sakhnivka (or Sakhnovka) Diadem. These crowns bear some similarities to other crowns from the same time period, specifically the Holy Crown of Hungary and the Imperial Crown of the Holy Roman Empire, and the Crown of Constantine Monomachus, in their use of gold, pearls and cloisonné, but like the kolti are regionally unique and distinct in their appearance .
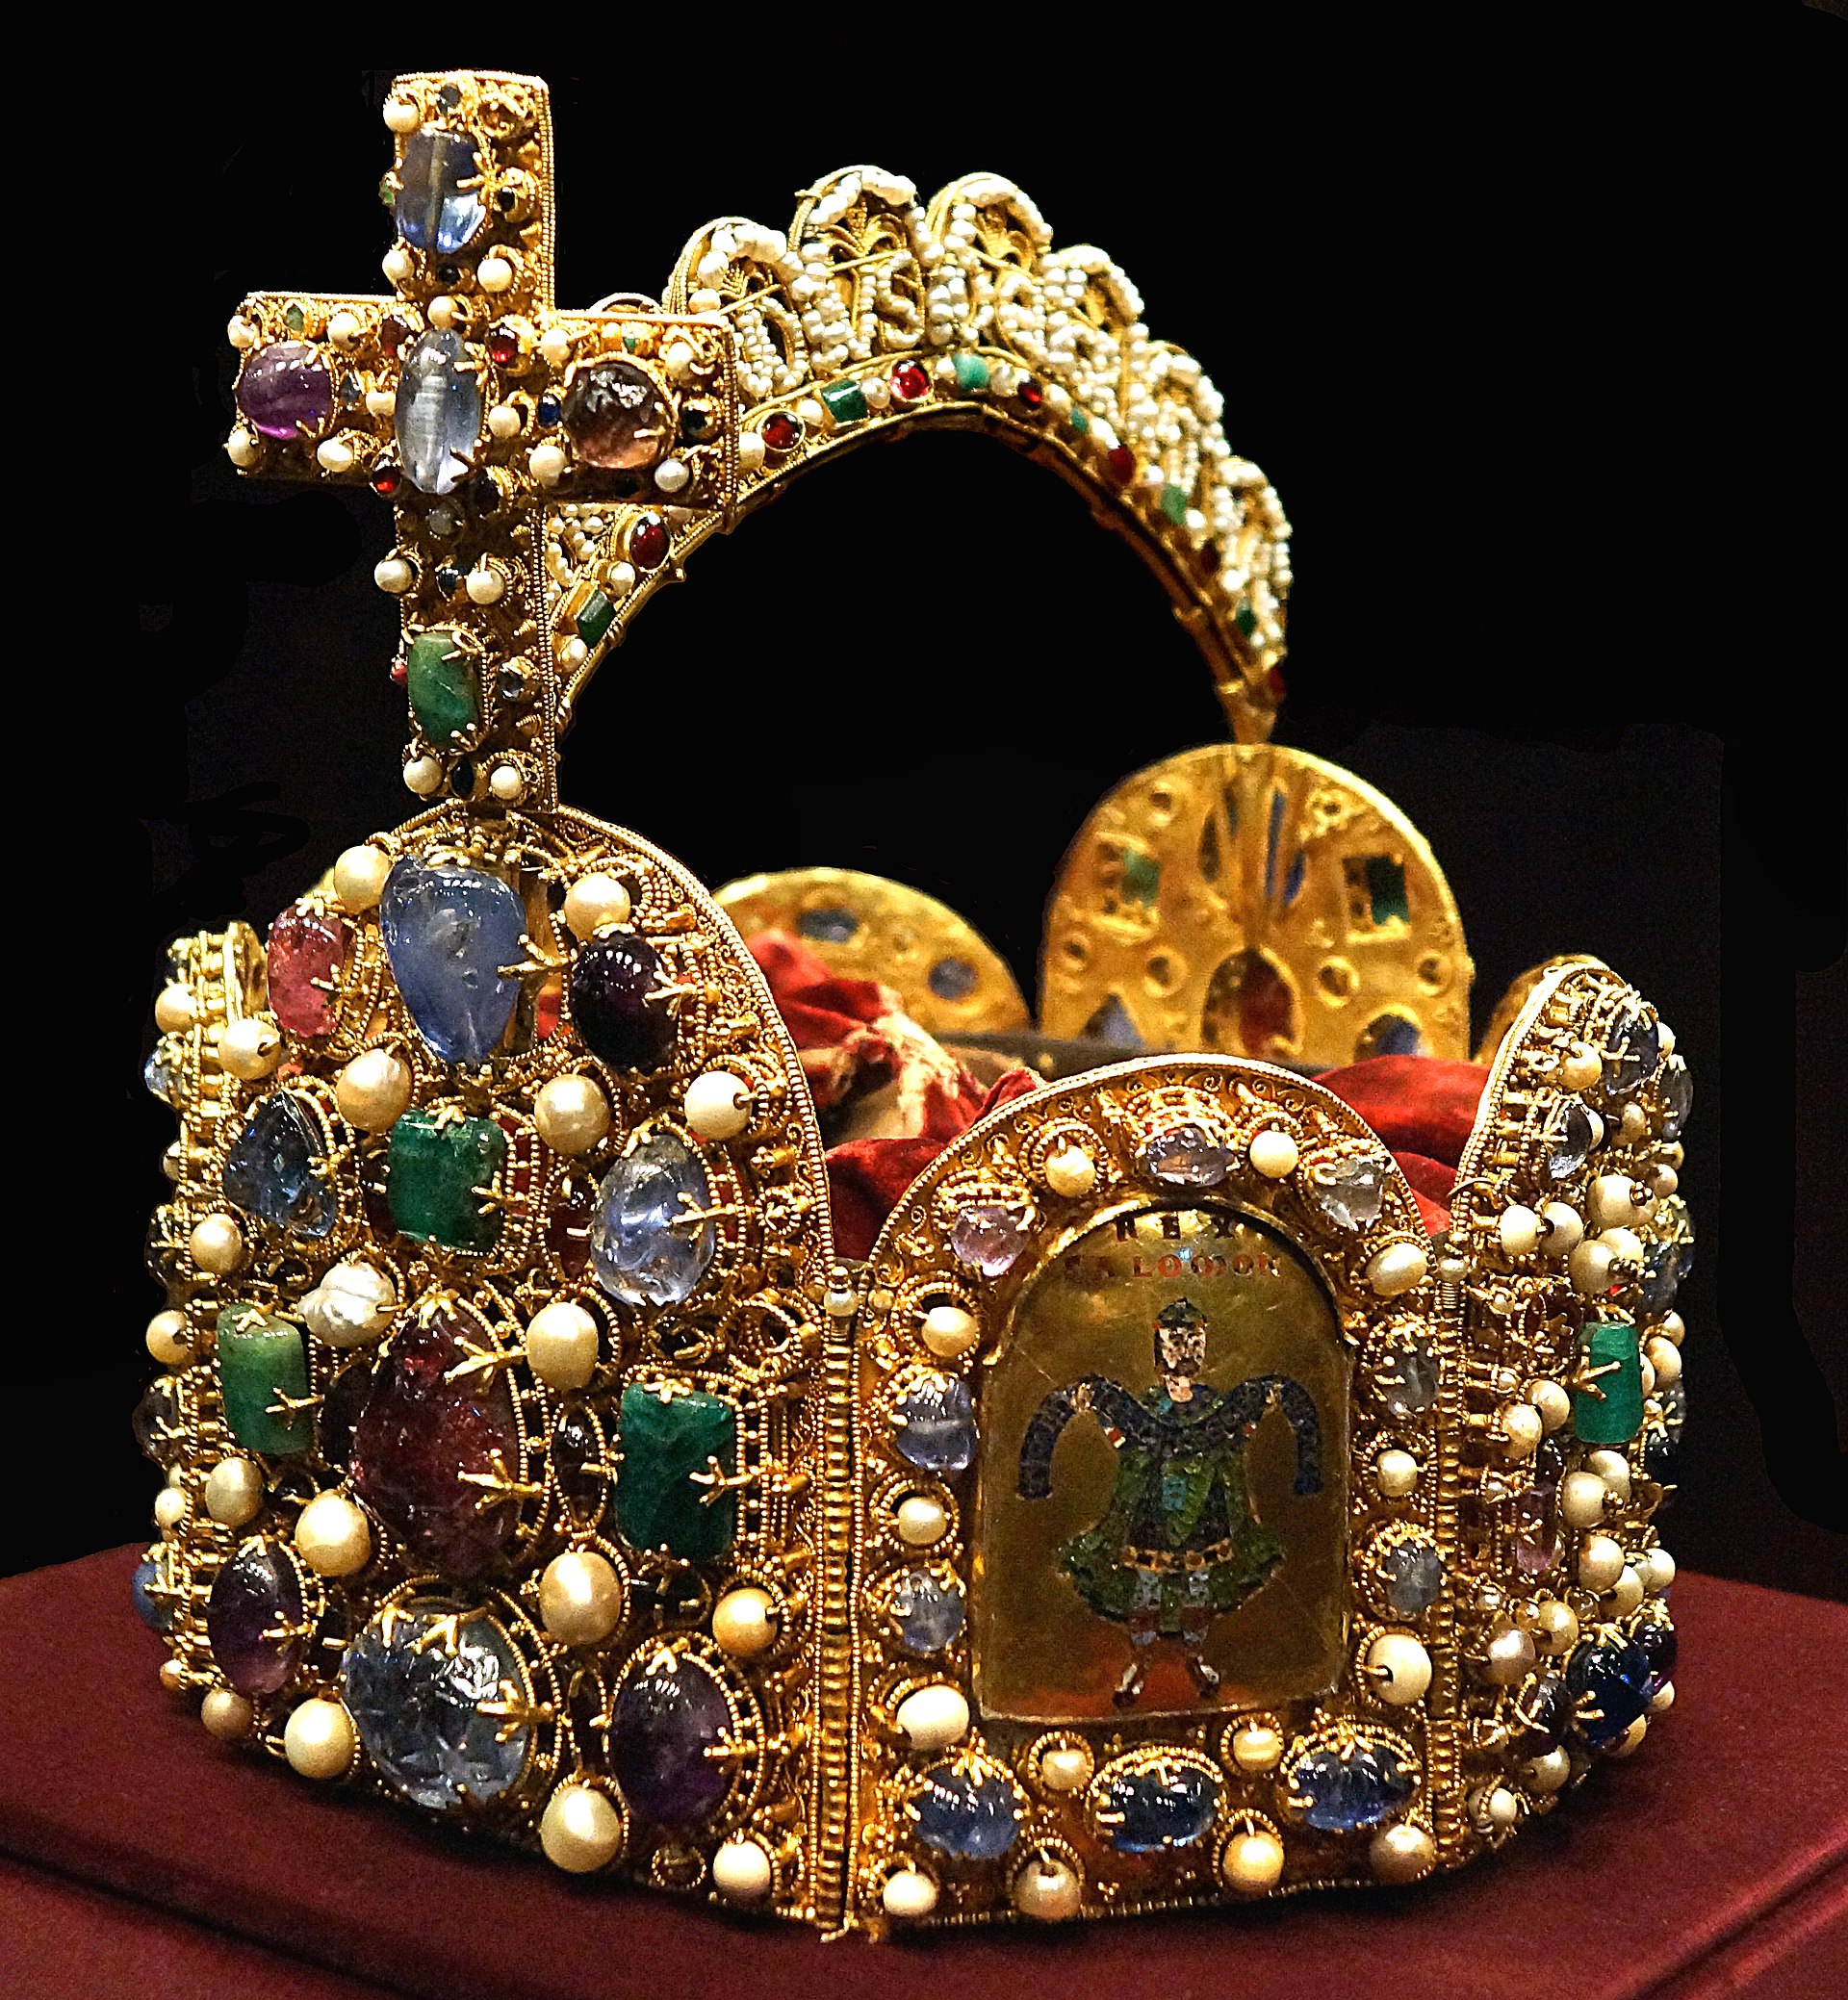
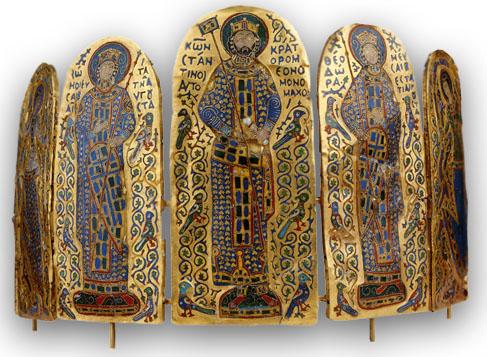
The Diadem with the Deesis contains 7 main plates with a central depiction of Christ, flanked by the Virgin Mary, John the Baptist, the Archangel Michael, the Archangel Gabriel, Saint Peter, and Saint Paul. Two end plates contain geometric patterns. The plates appear to be directly hinged together in this piece, and from the bottom of the plates are suspended an array of pendants (3 from each plate), some of which are enameled as well.
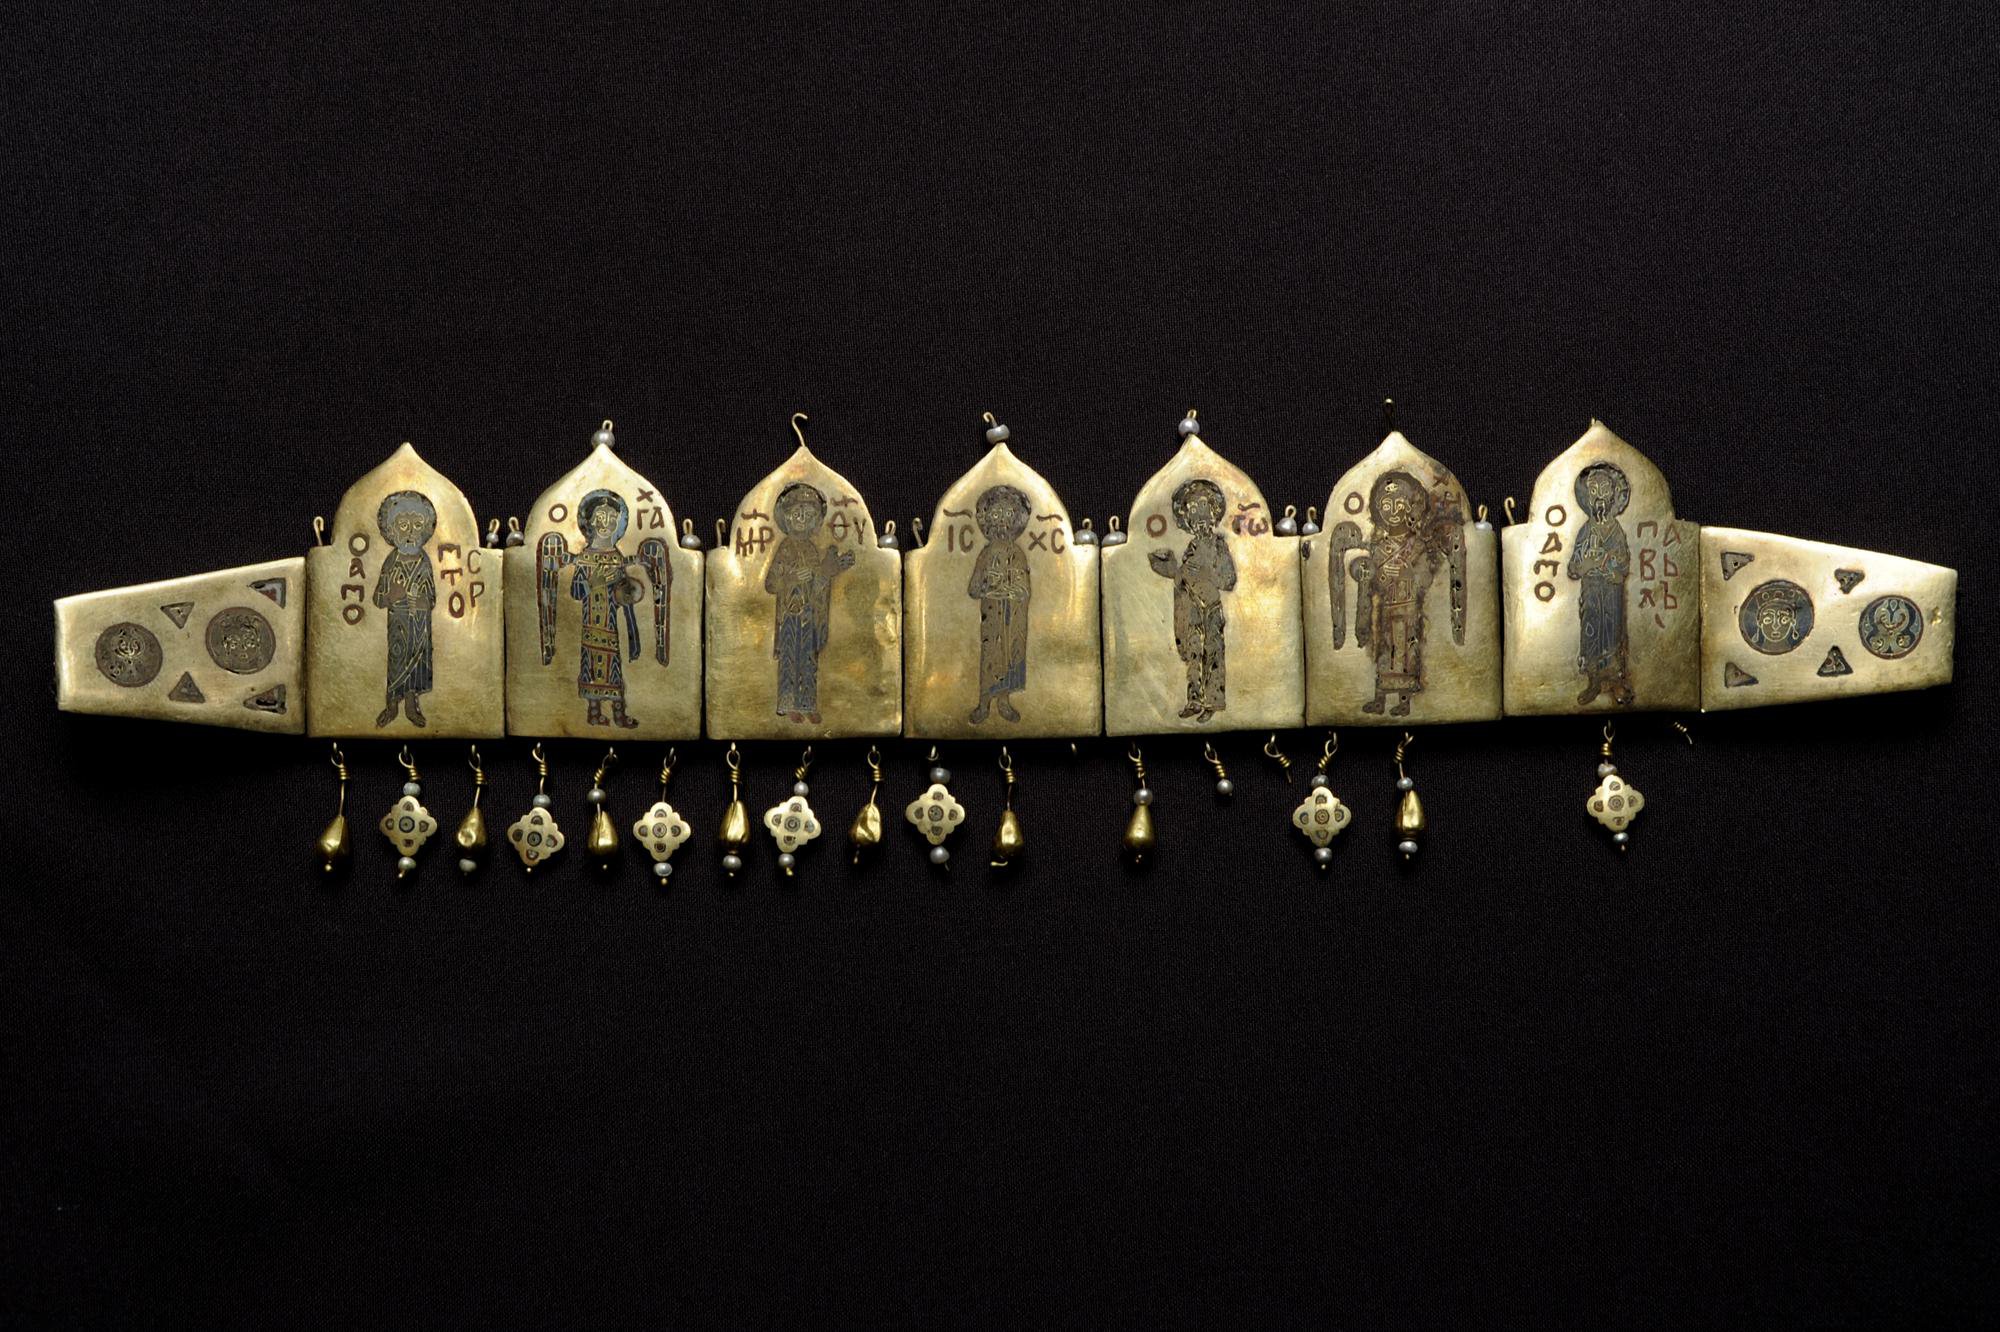
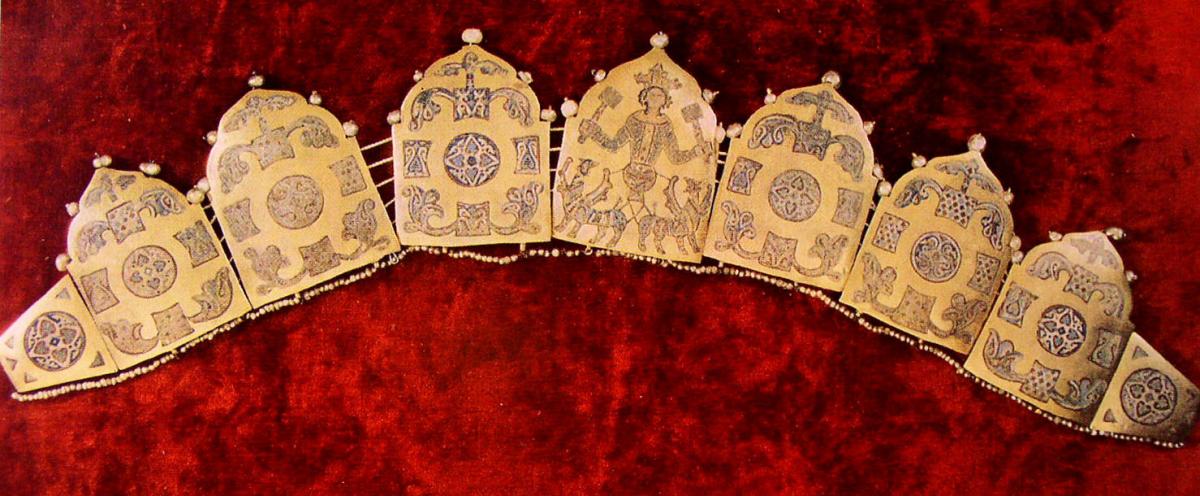
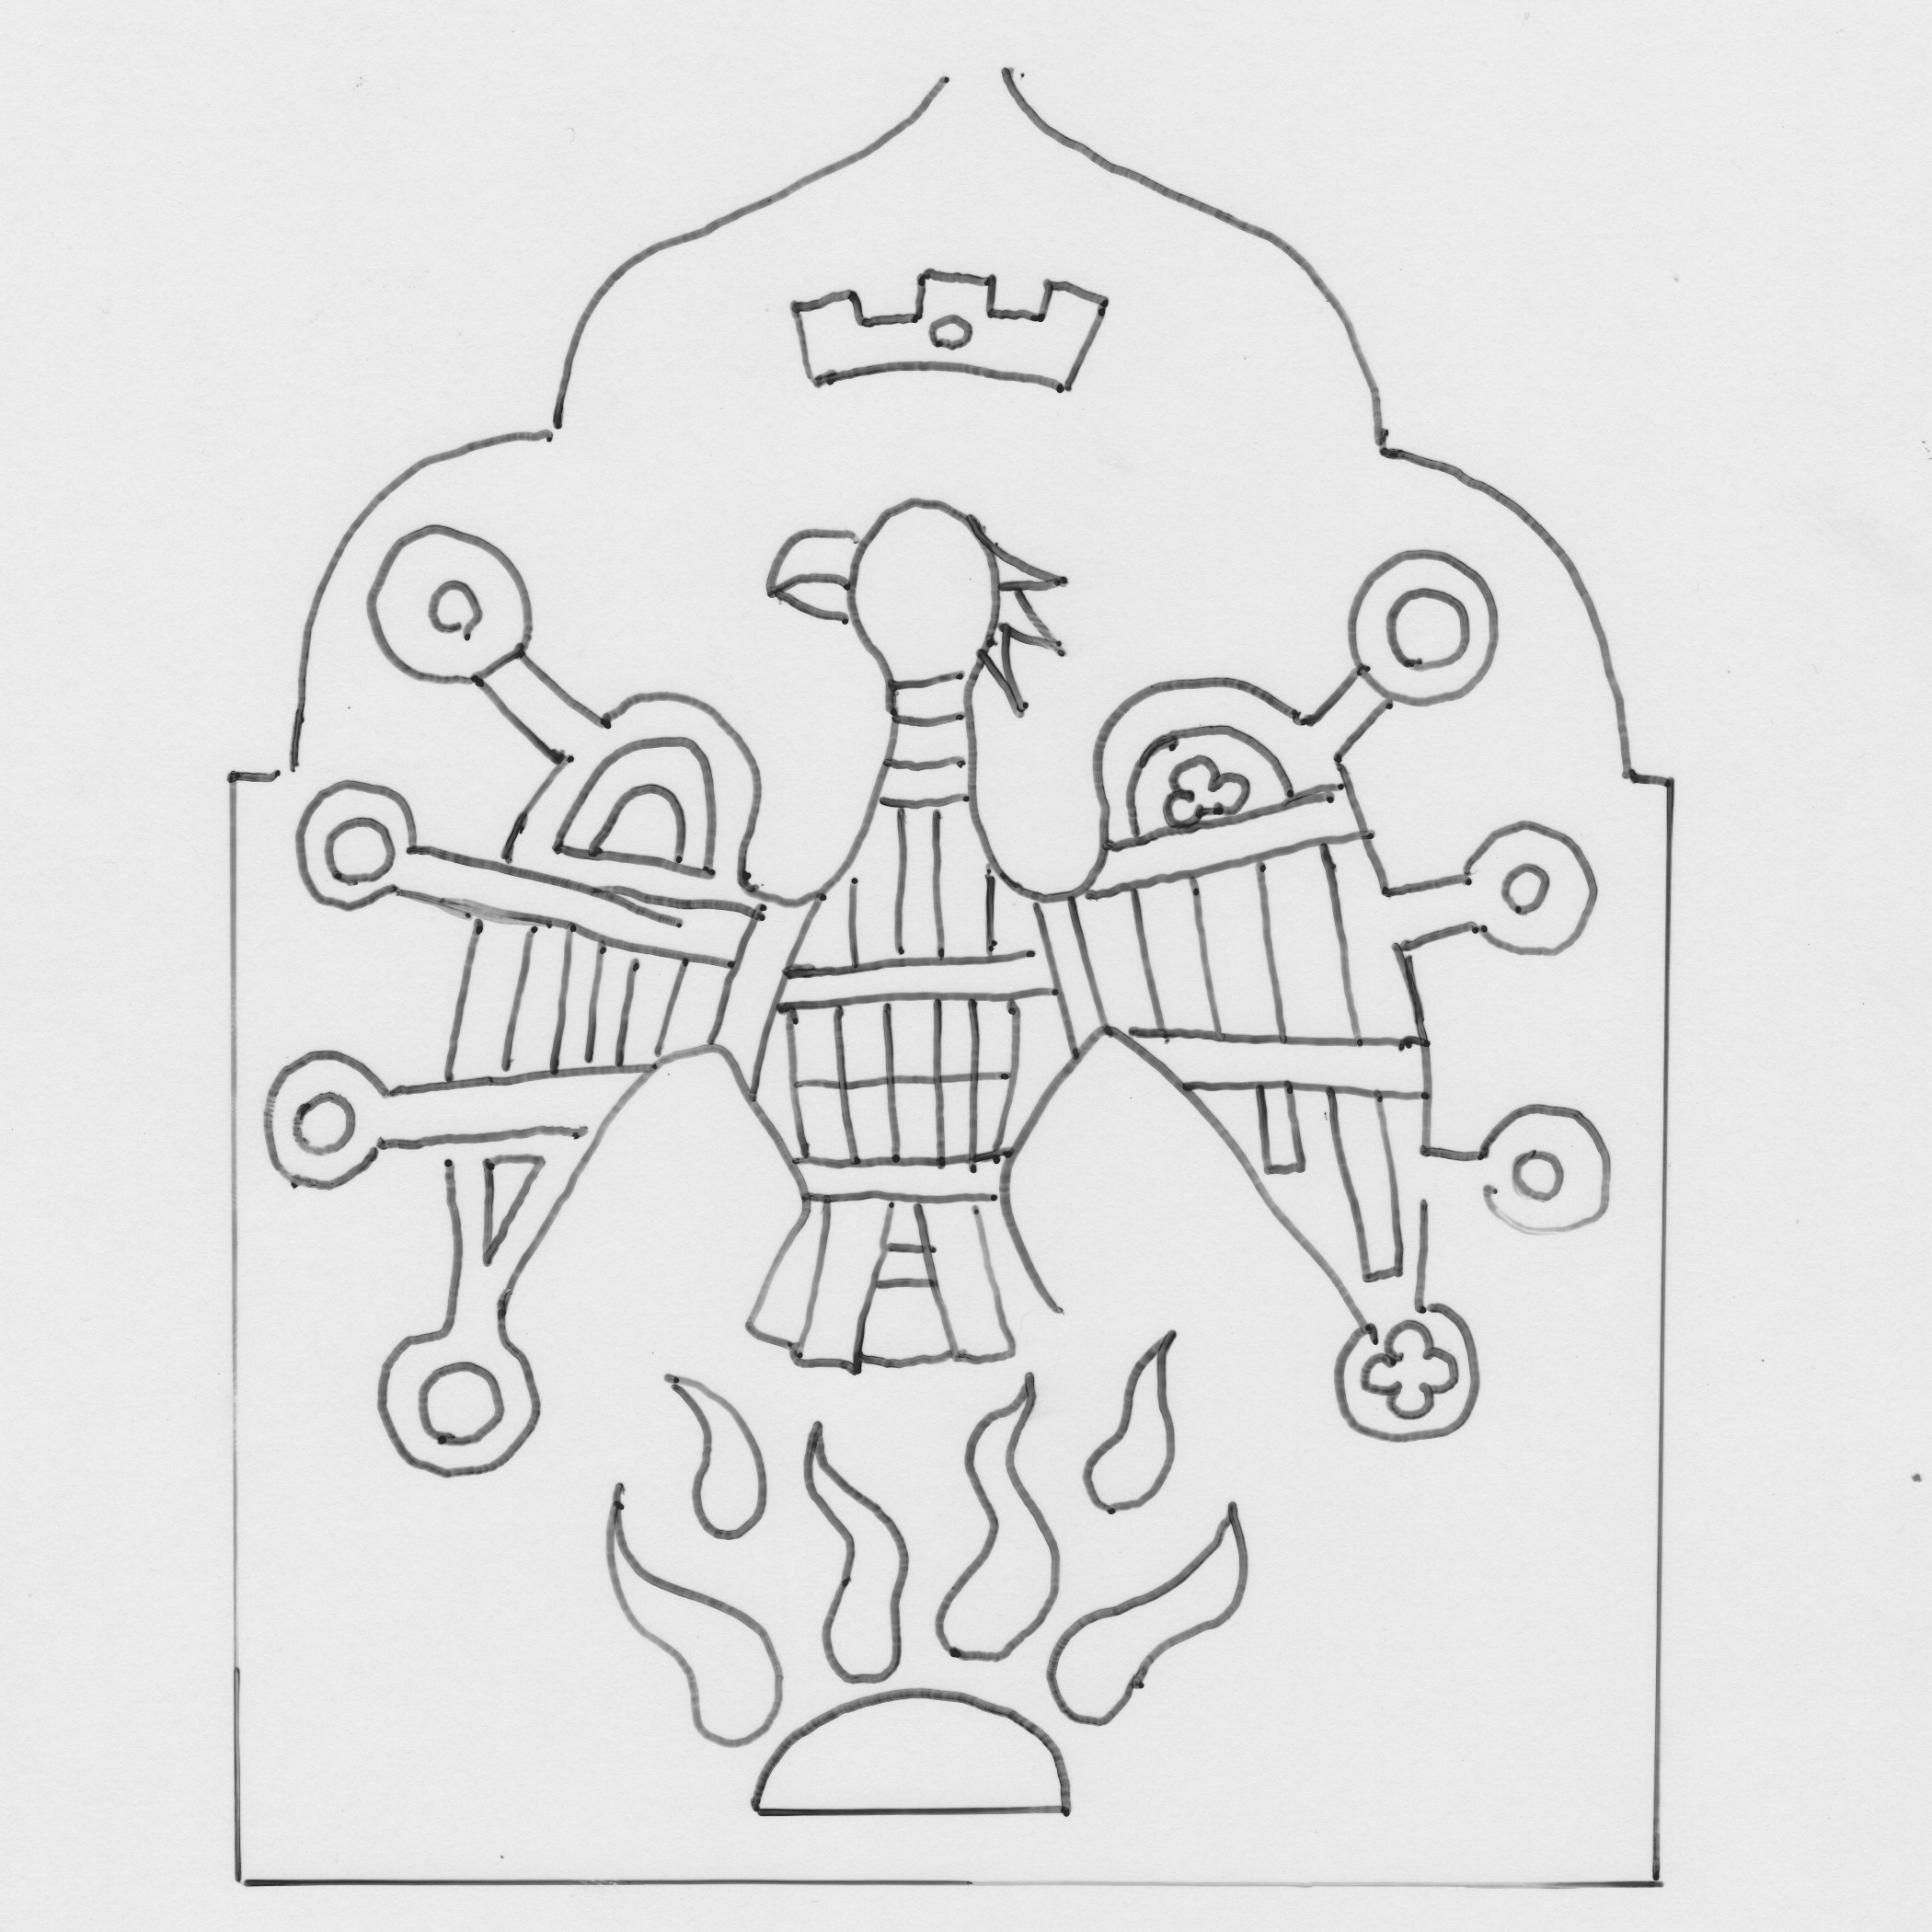
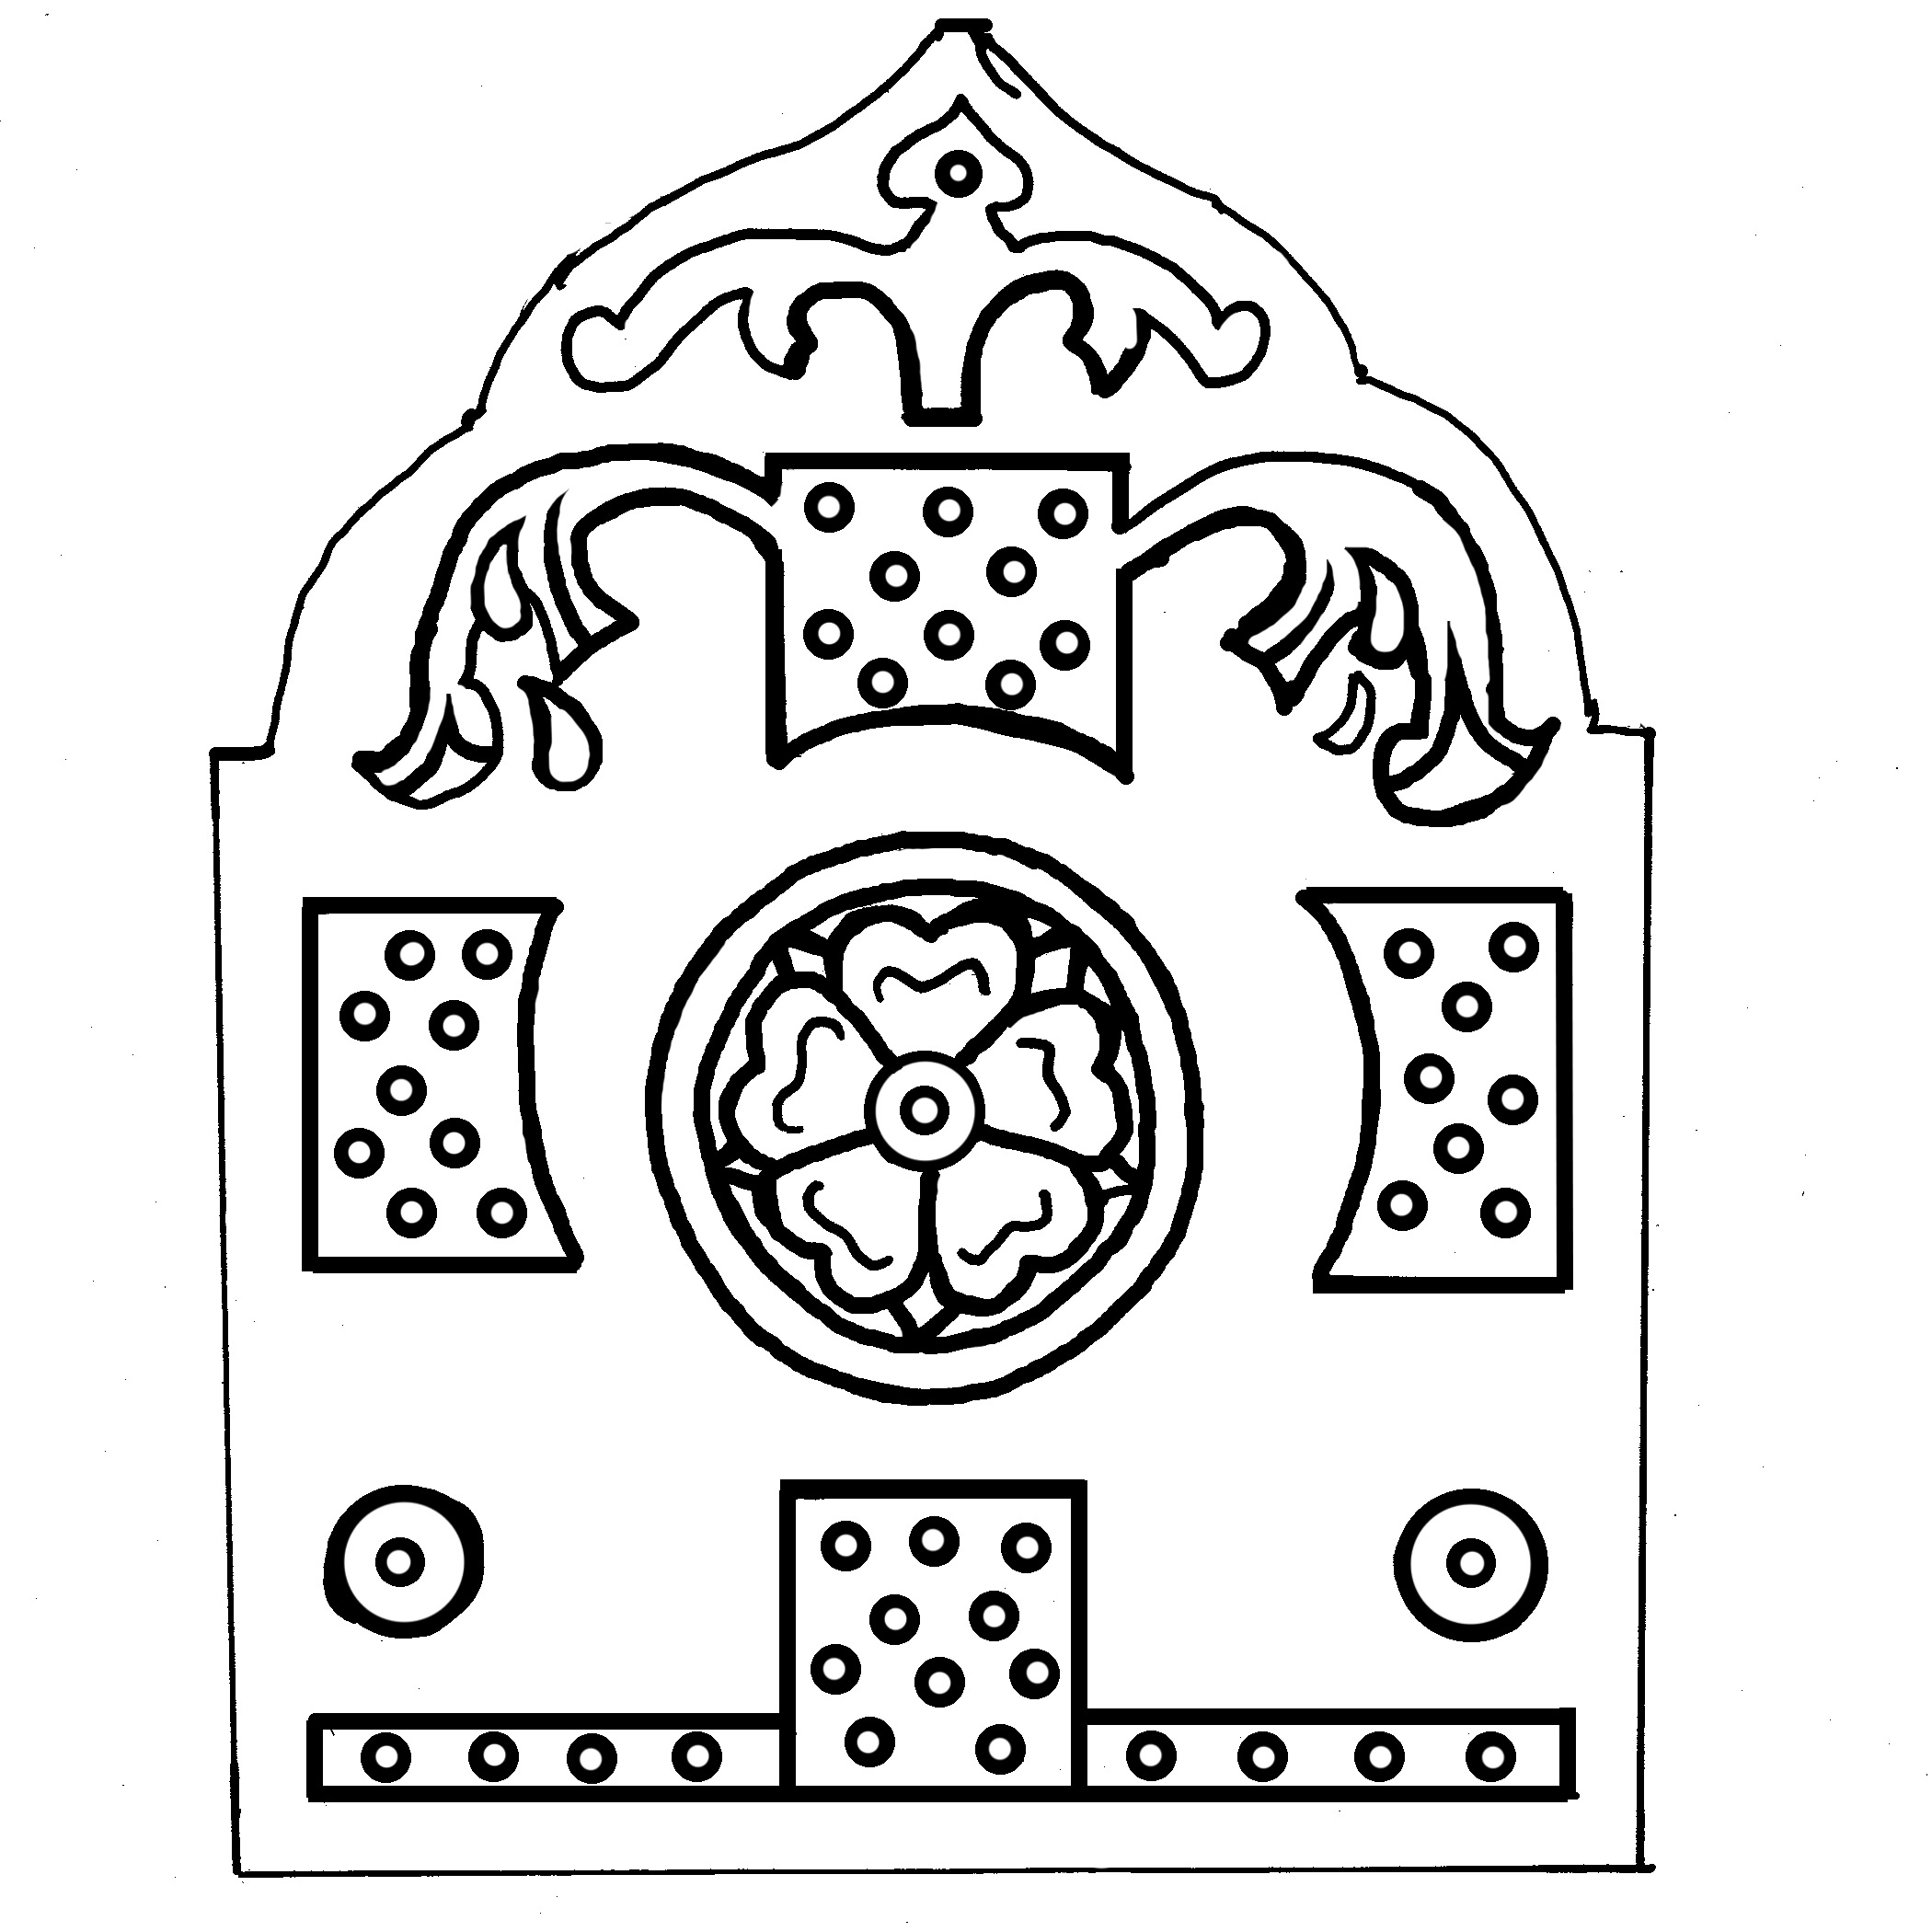
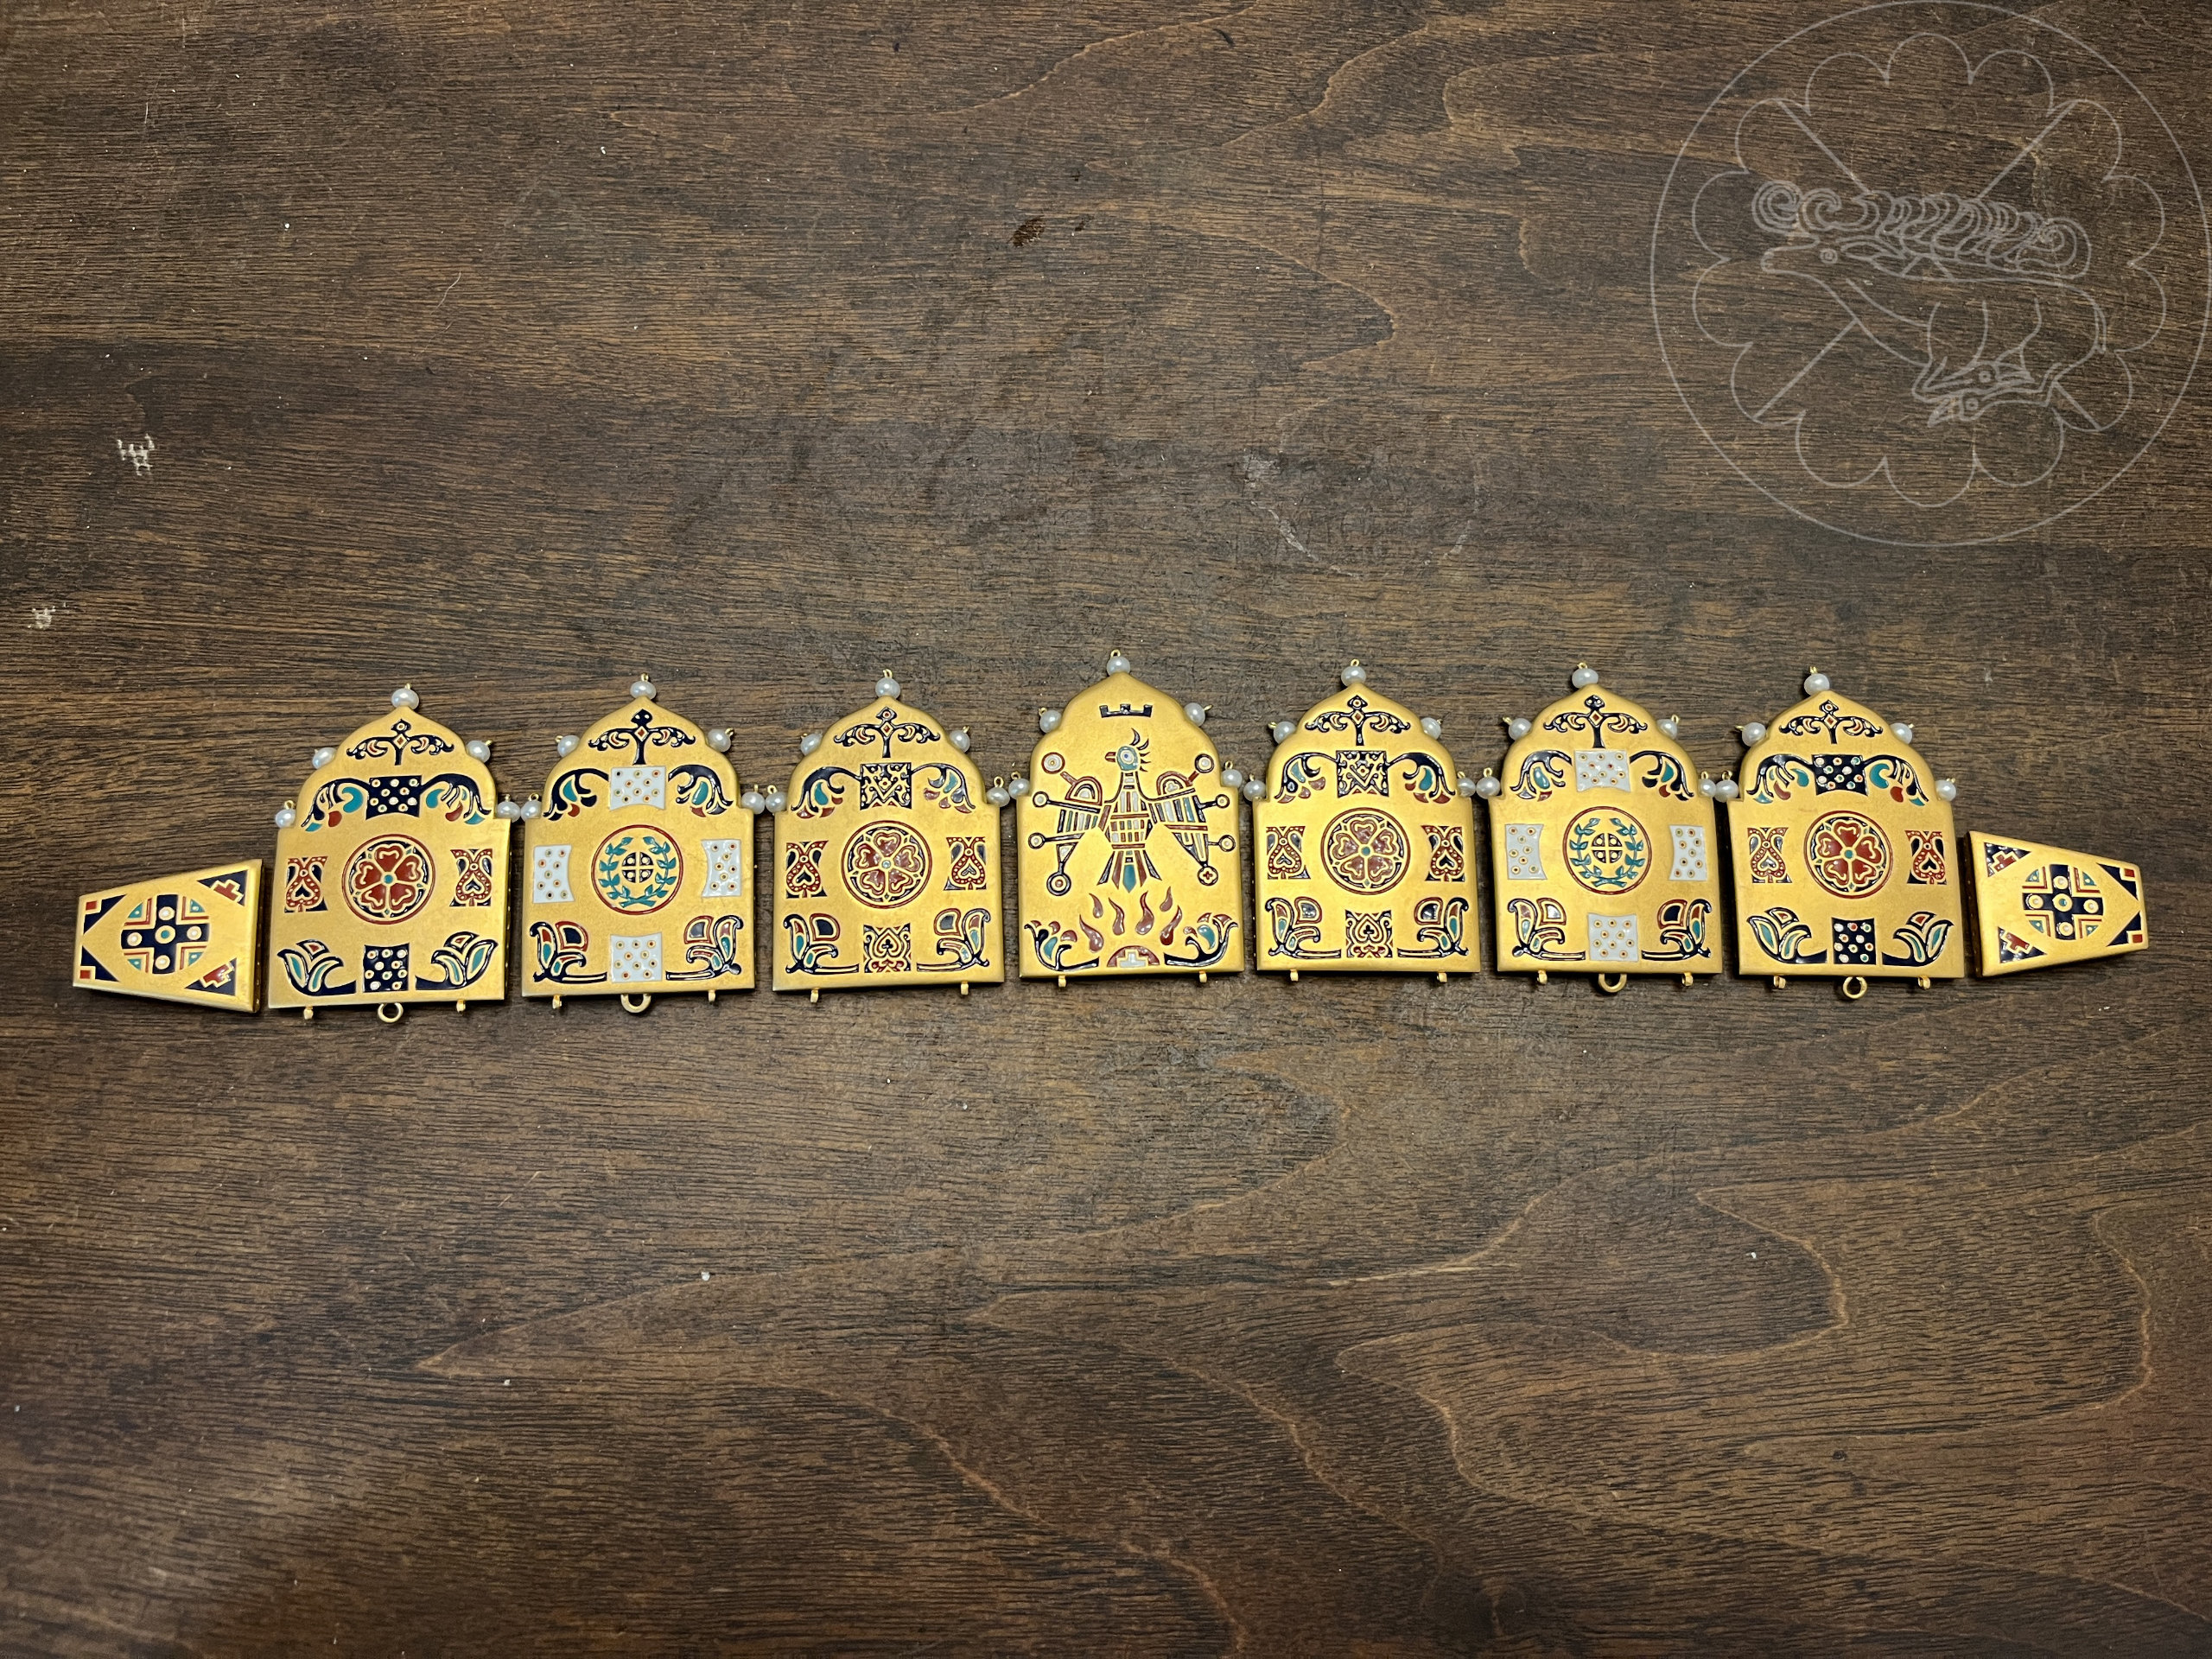
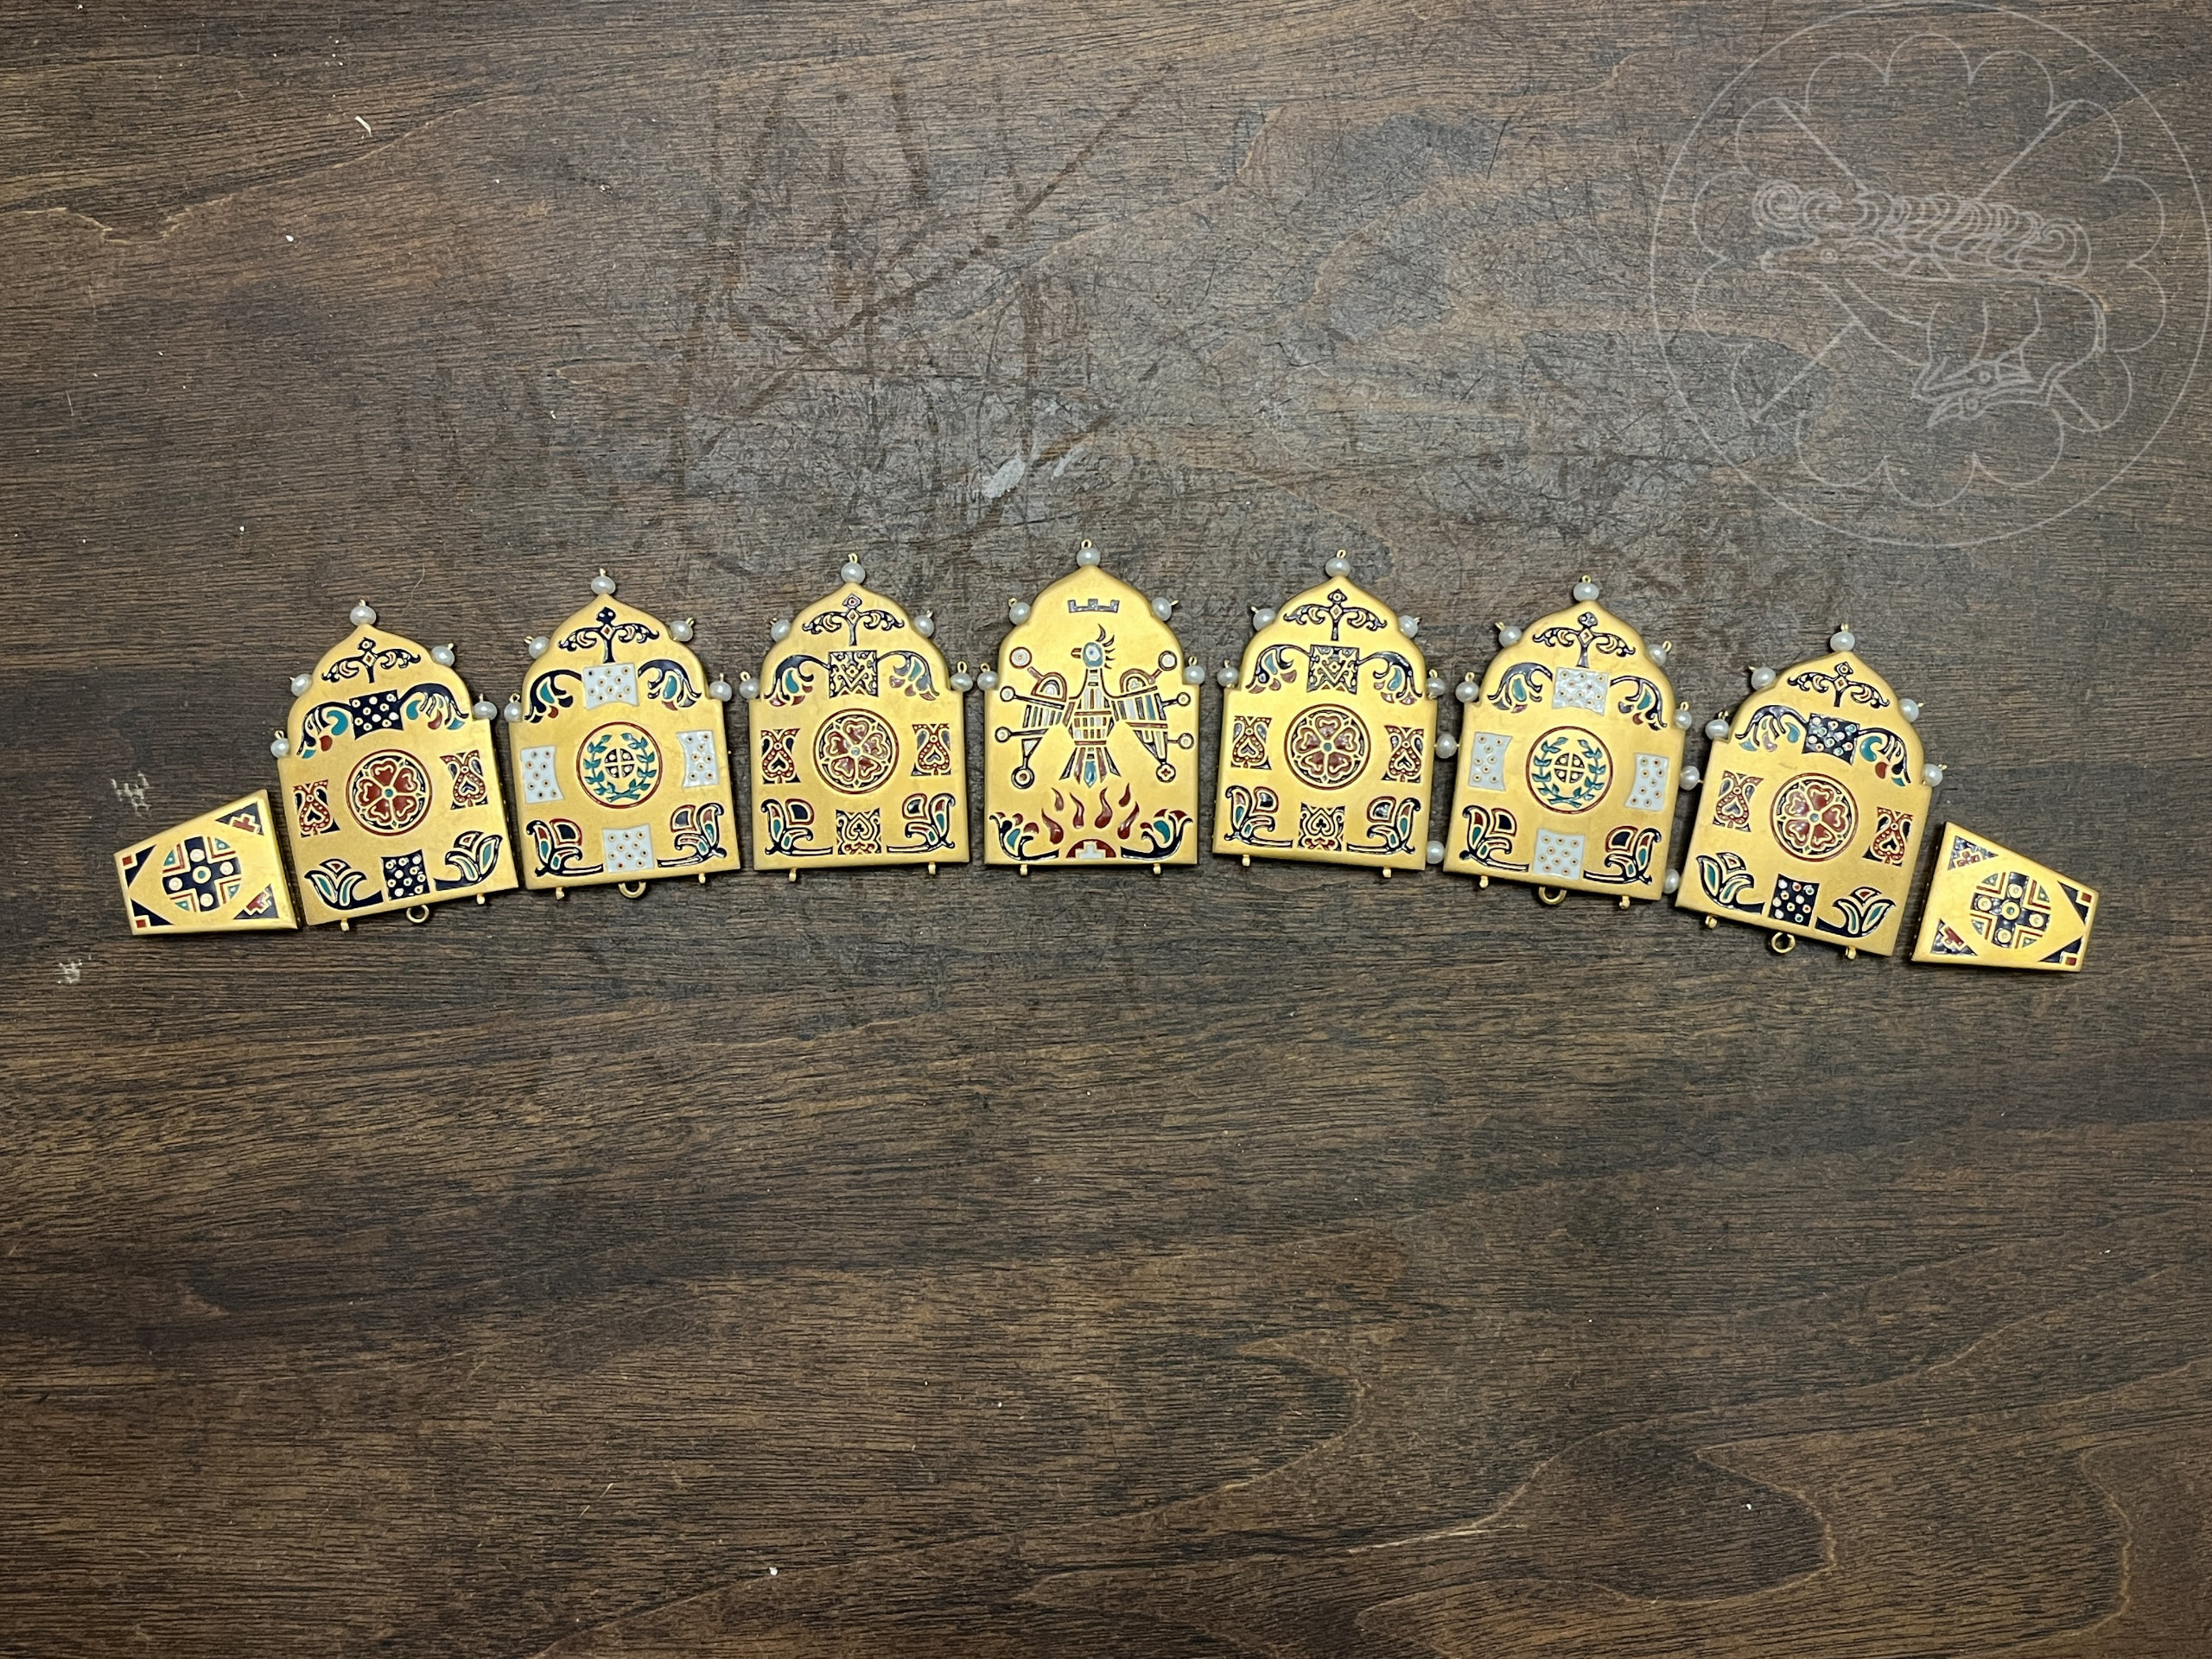
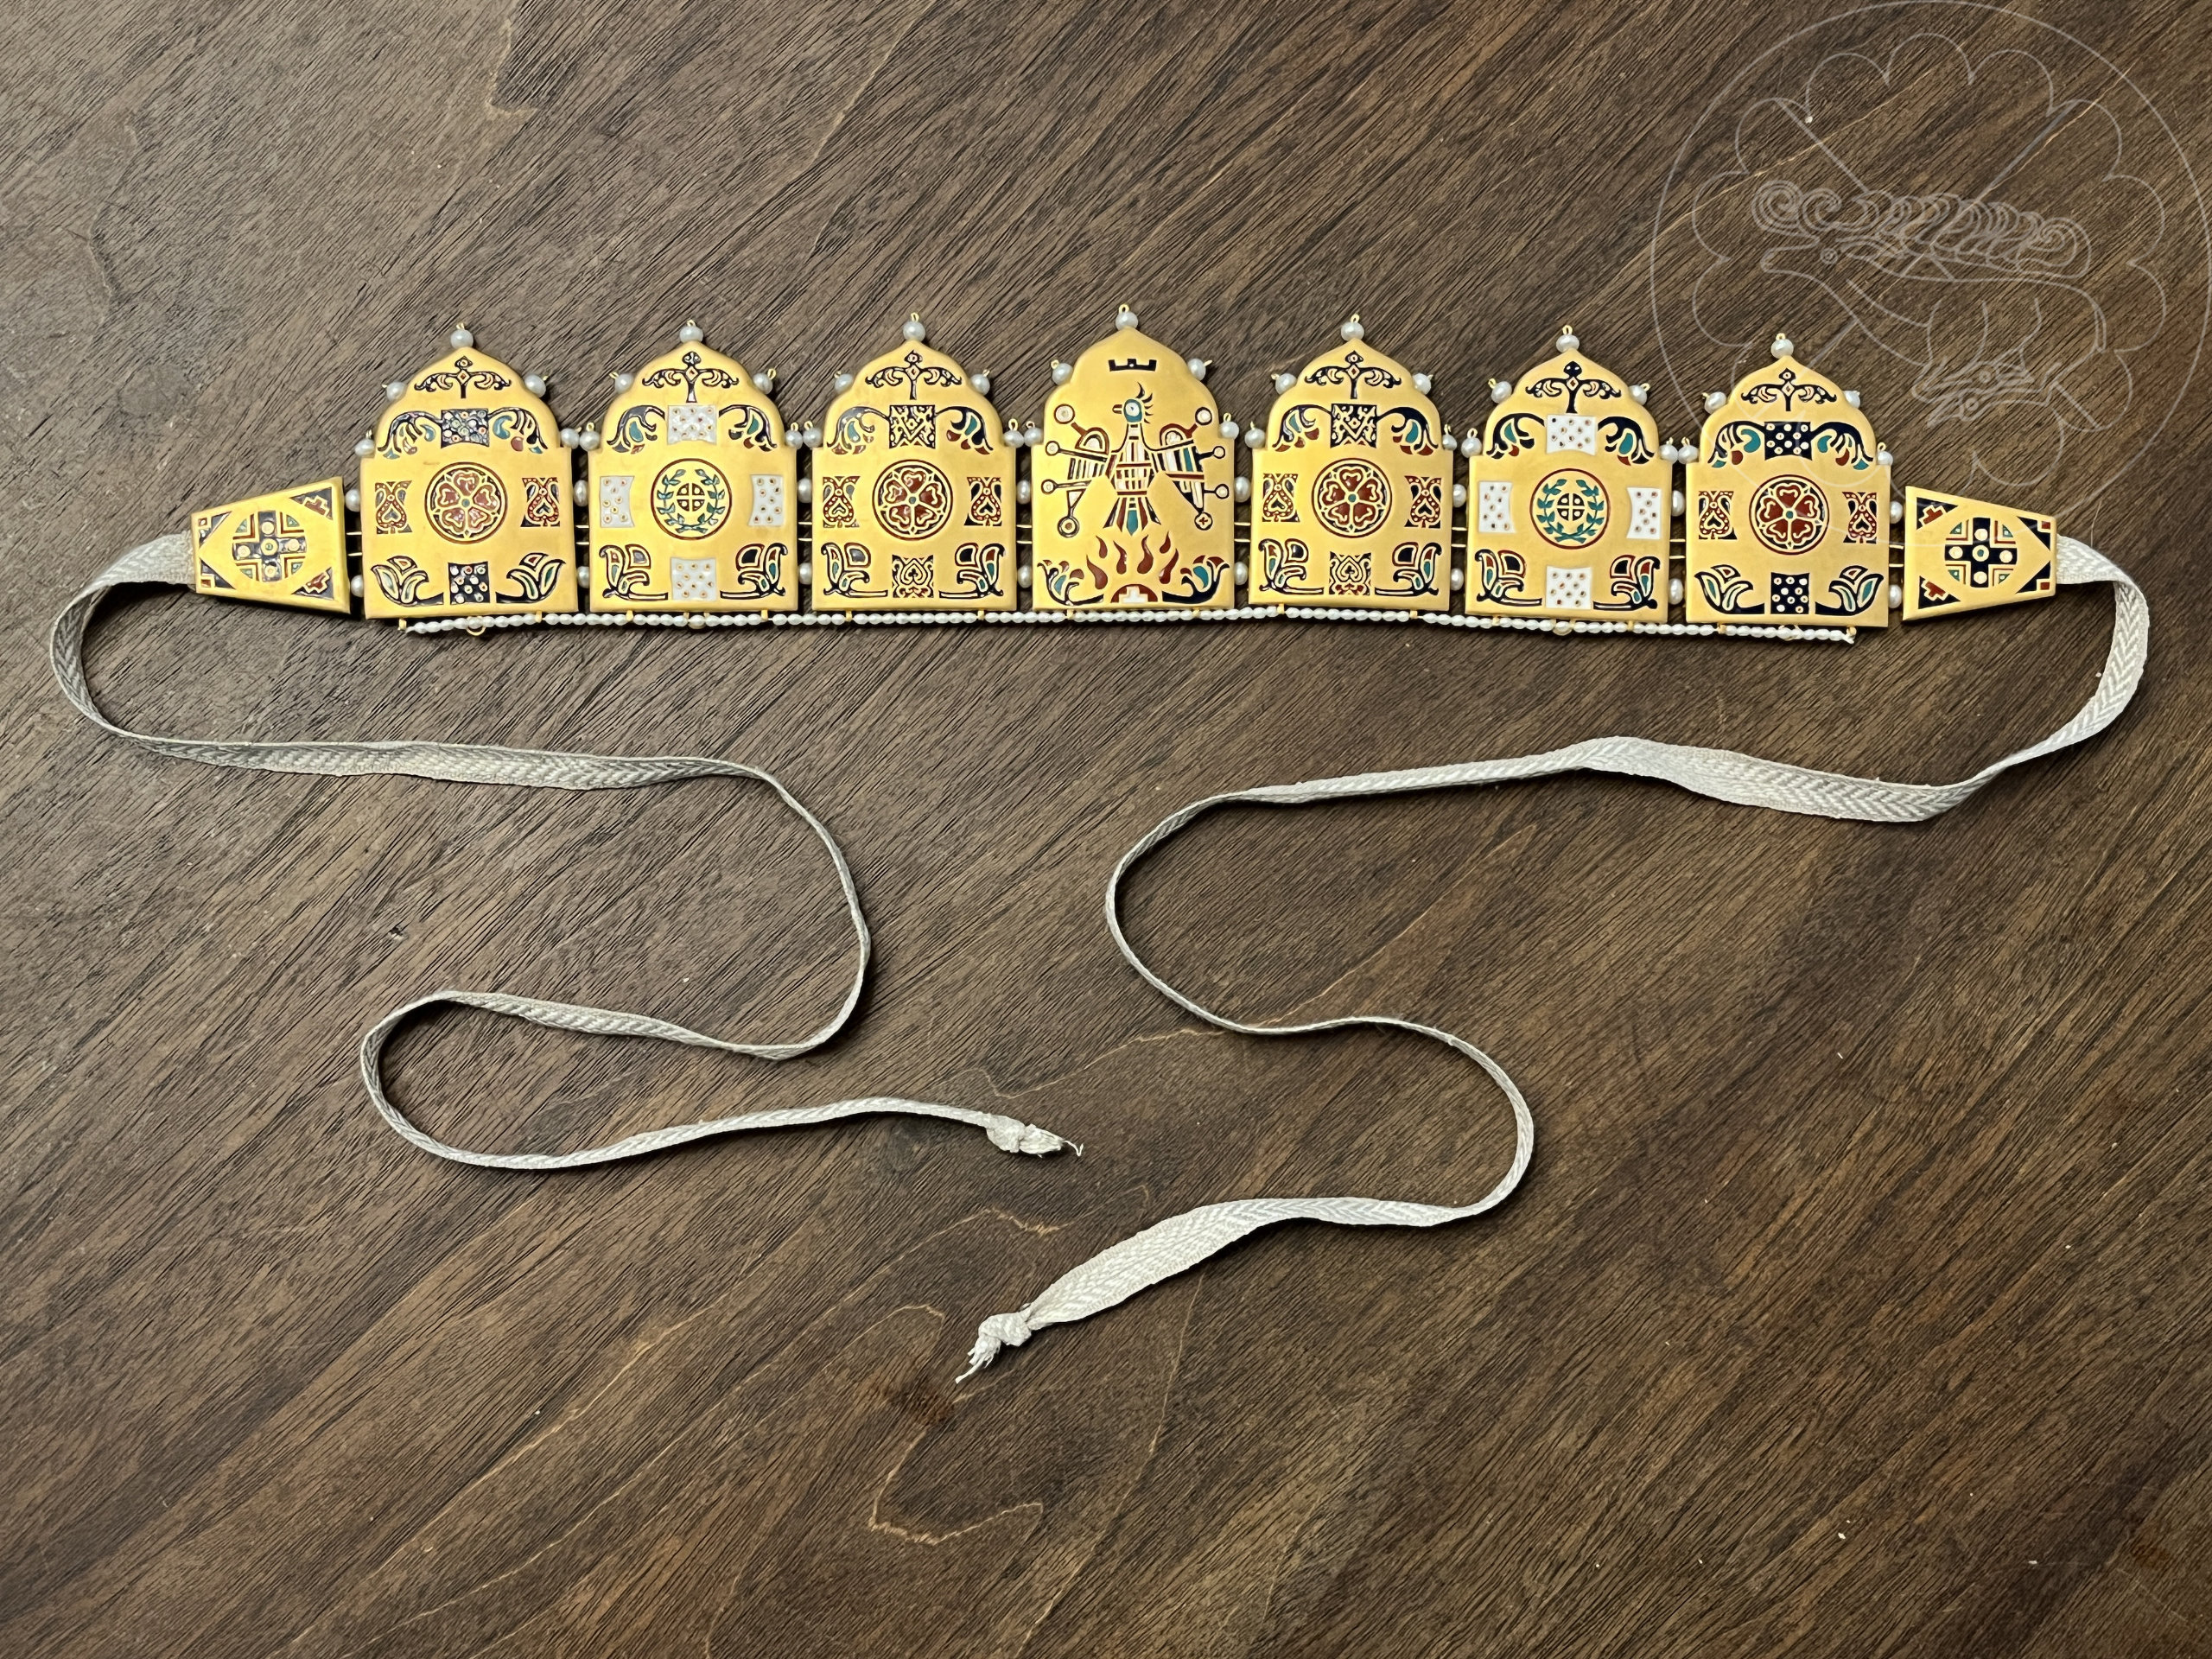
The Sakhnivka diadem is similar in shape and design, also with 7 main plates and 2 end pieces [PIC], but appears to be constructed of separate plates which were held together by strings or wires. The plates each have 5 pearls attached to the top, and loops on the bottom edge, to hold a string of beads or pearls. The central plate of the Sakhnivka diadem depicts Alexander the Great’s ascent to heaven, being pulled in a chariot by a pair of griffons. He olds in his hands spears with a bait of meat at the tips, to lure the griffons upward – a really interesting myth that spans several cultures and depictions. The side plates contain round geometric center pieces surrounded above and below, and at the sides, with mostly rectangular shapes with have curved edges mirroring the curve of the center round on the faces adjacent to it. From the top and bottom rectangles, curved shapes emerge to either side in a sort of floral design below and wing-like design above, and from above the top rectangle, a birdlike shape emerges. The end plates also contain a round geometric pattern similar to those of the side plates. From the bottoms of each of the main plates extend two loops. Though no pendants were found to hang from these loops, it is speculated that they may have held pendant beads or a string of beads or pearls strung below the diadem, or both. It was housed in the Museum of Historical Treasures of Ukraine in Kyiv before the war, but I’m not sure if it’s still there or has been moved for safety, as many national treasures have.
I have not been able to find a great deal of detailed information or images of the construction of either diadem – only photos of the fronts of the plates. The best information I could find in English is the following article: Dmytrenko, Nataliia. “The reconstruction of a diadem from Sakhnivka village of Cherkasy region and the question about its attribution.” Українська академія мистецтва 25 (2016): 289-302.
Artistic Inspiration
Rather than try to produce an exact reproduction of these pieces, I wanted to personalize them. My wife, for whom these pieces were made, has as the main charge of her arms in the SCA a phoenix, and a badge with 2 peacocks.
She is also a Lady of the Rose and a member of the Order of the Laurel. Residing in the Kingdom of the Outlands, a common decoration is a stag’s tyne. I decided to incorporate all of these details into the design of the kolti and the diadem.
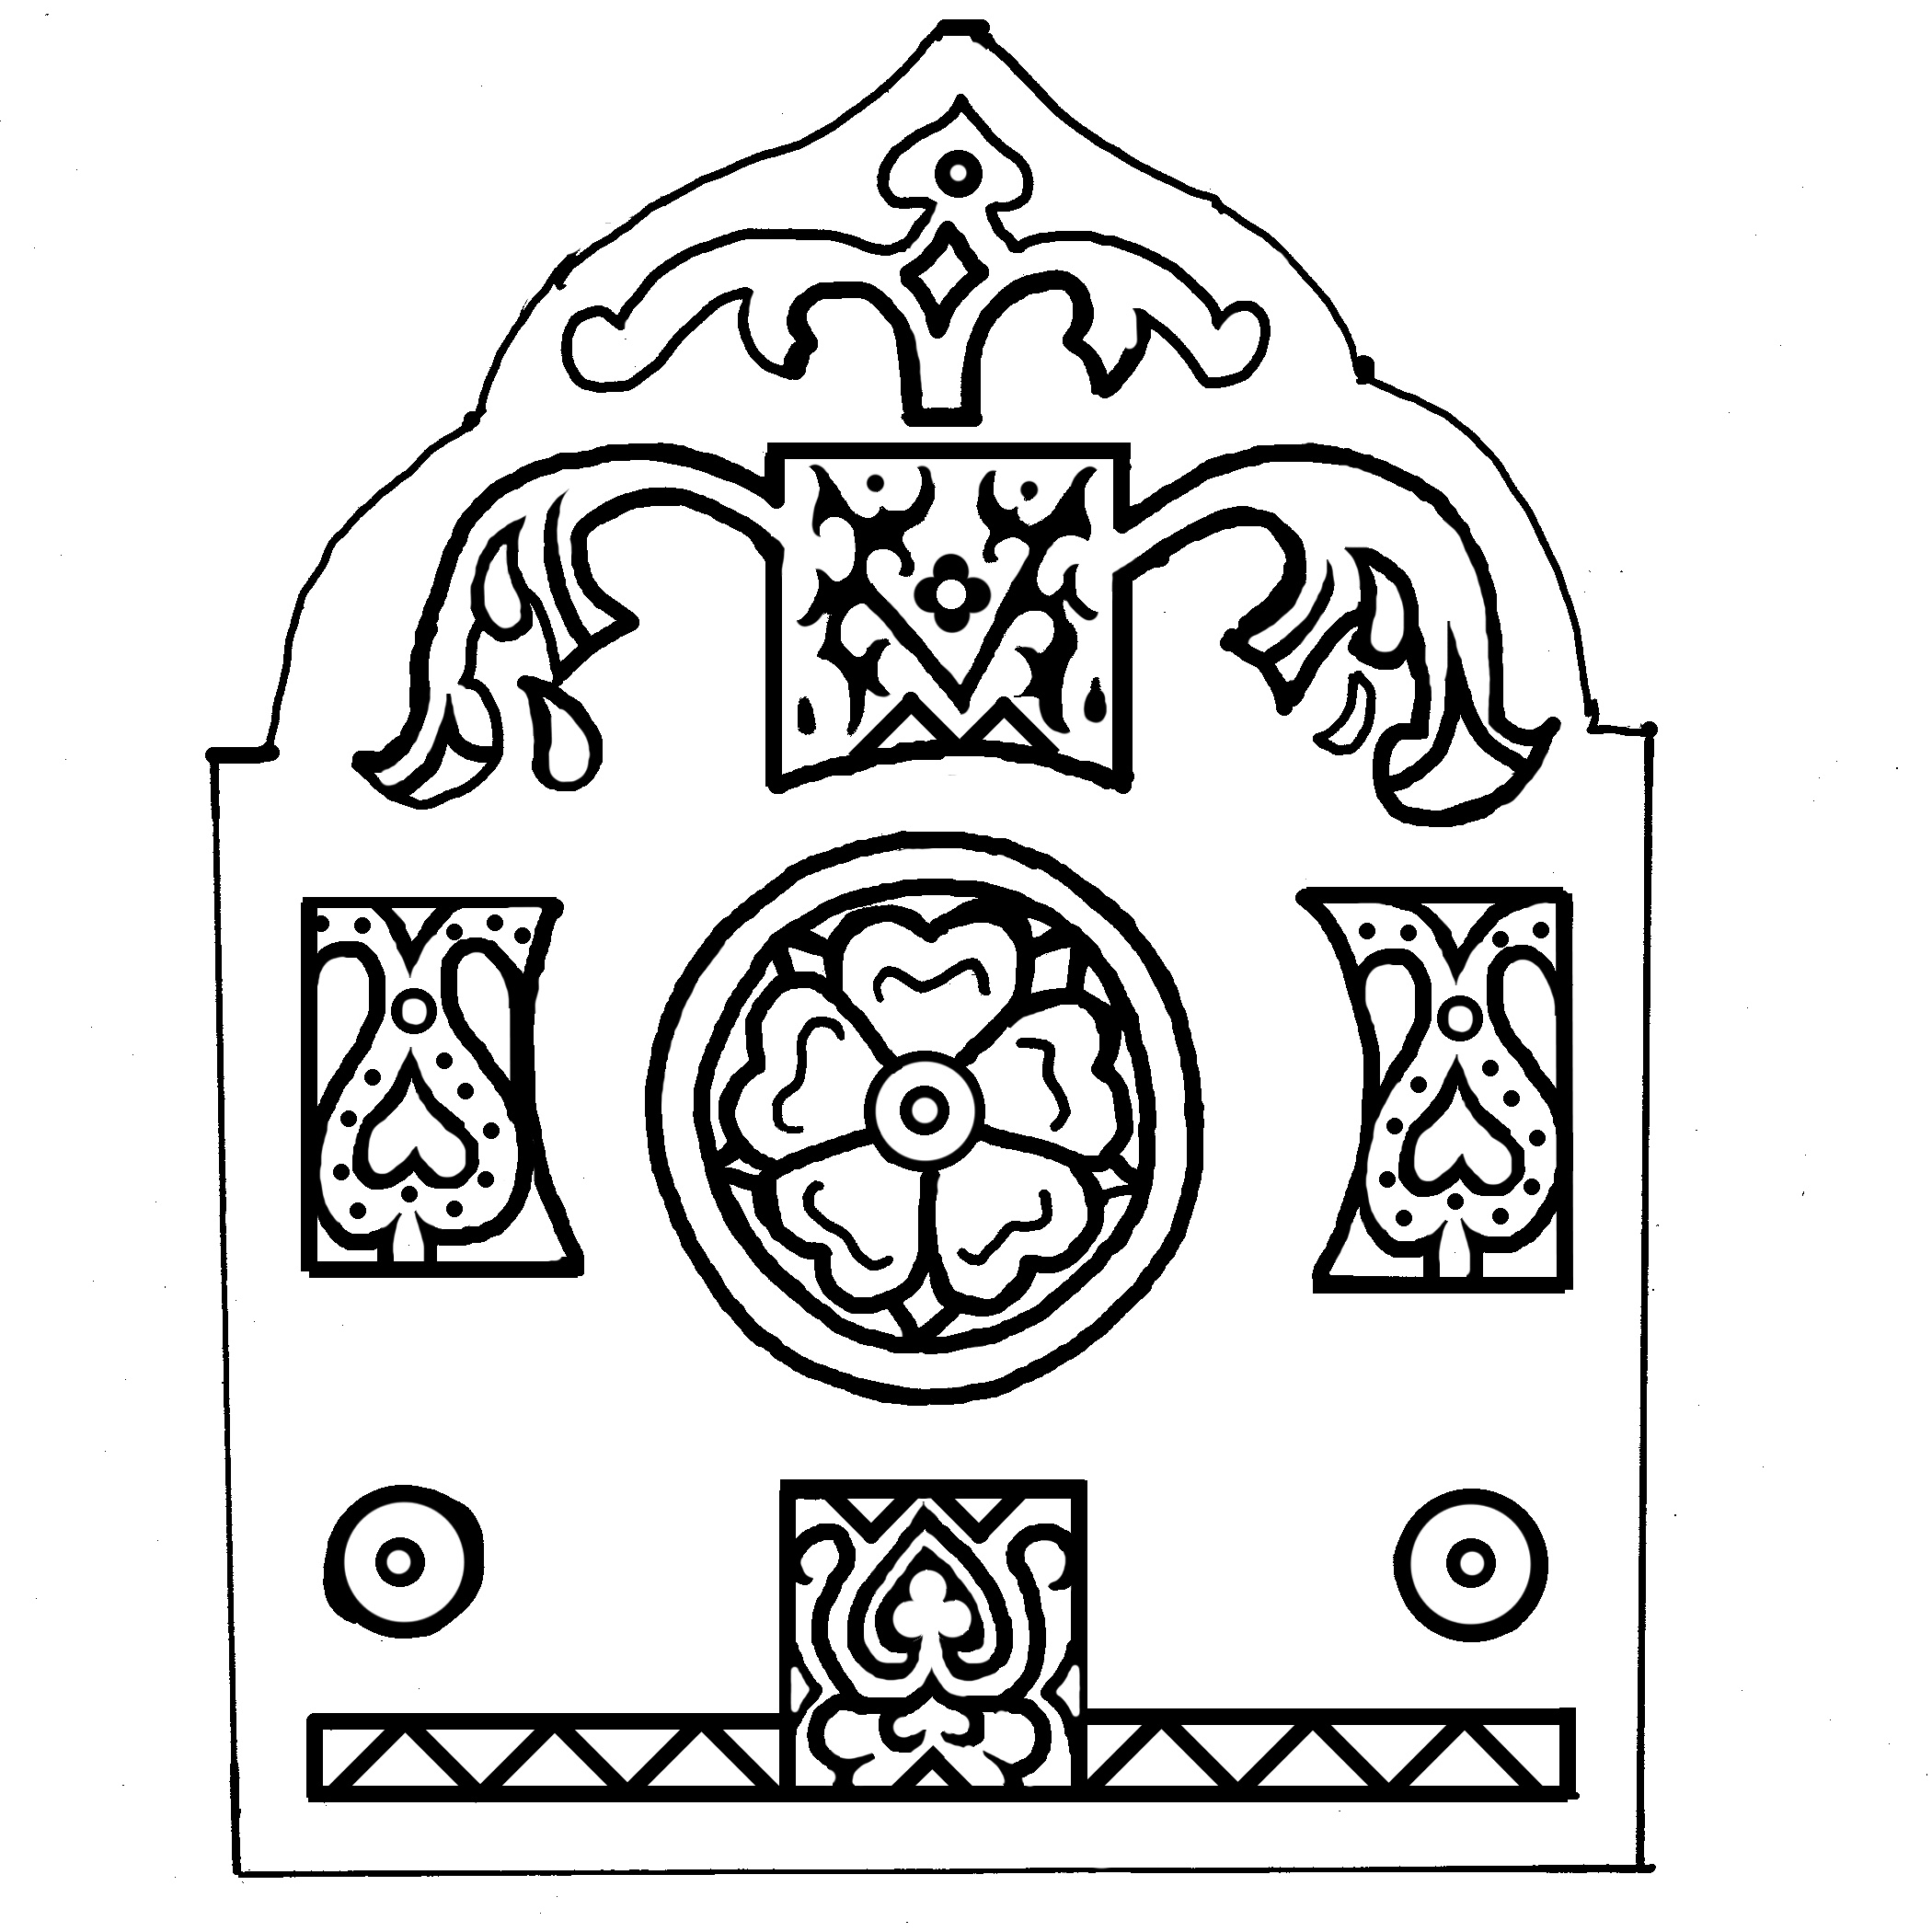
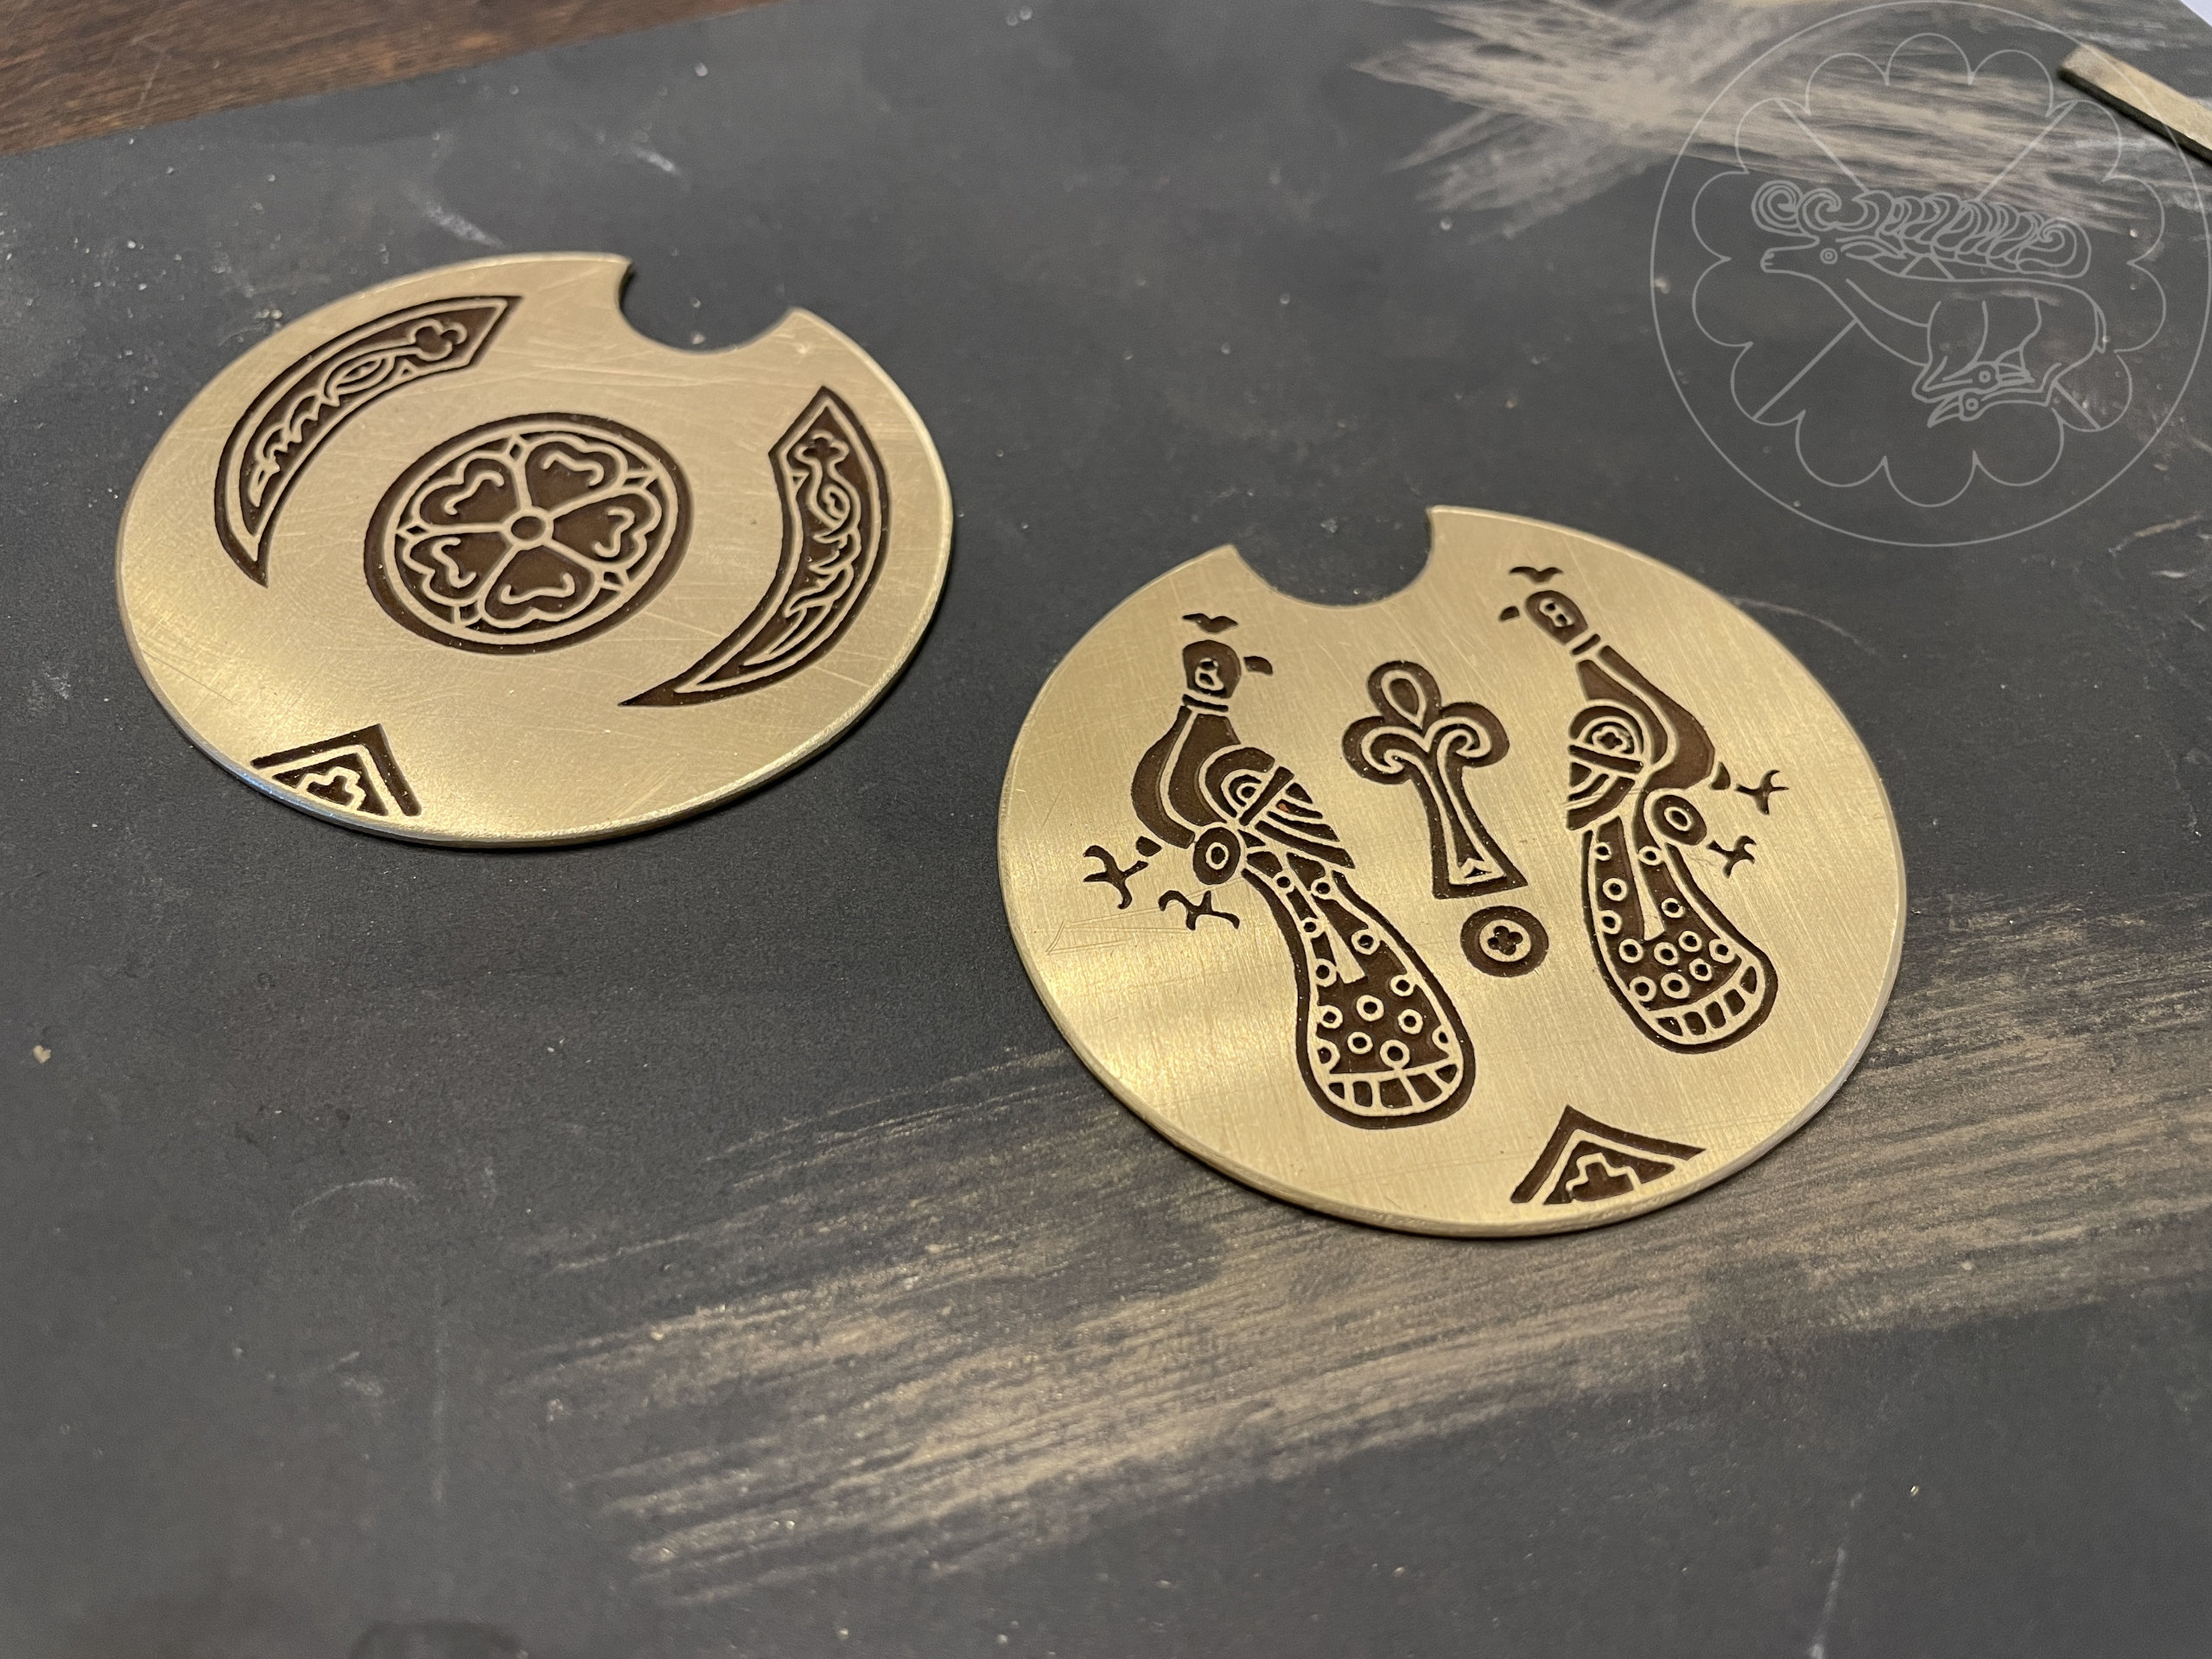
The doves on the kolti were changed to peacocks, by elongating and modifying the tails ad adding a crest to their heads On the other side of the kolt, the round center was replaced with a heraldic rose, and the white curving features inside the horns were easily replaced with stag’s tynes.

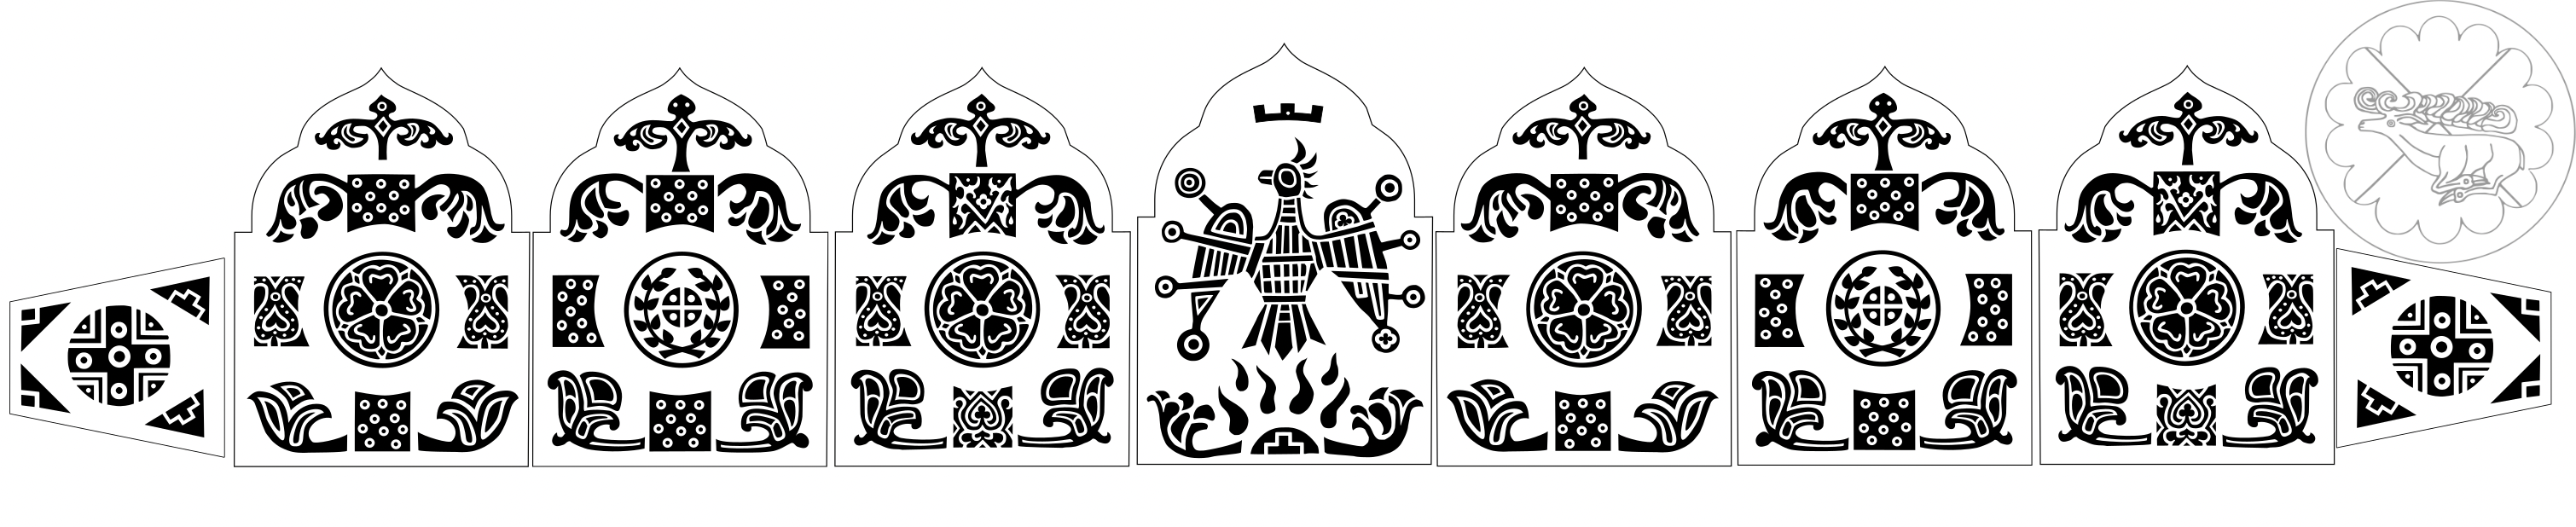
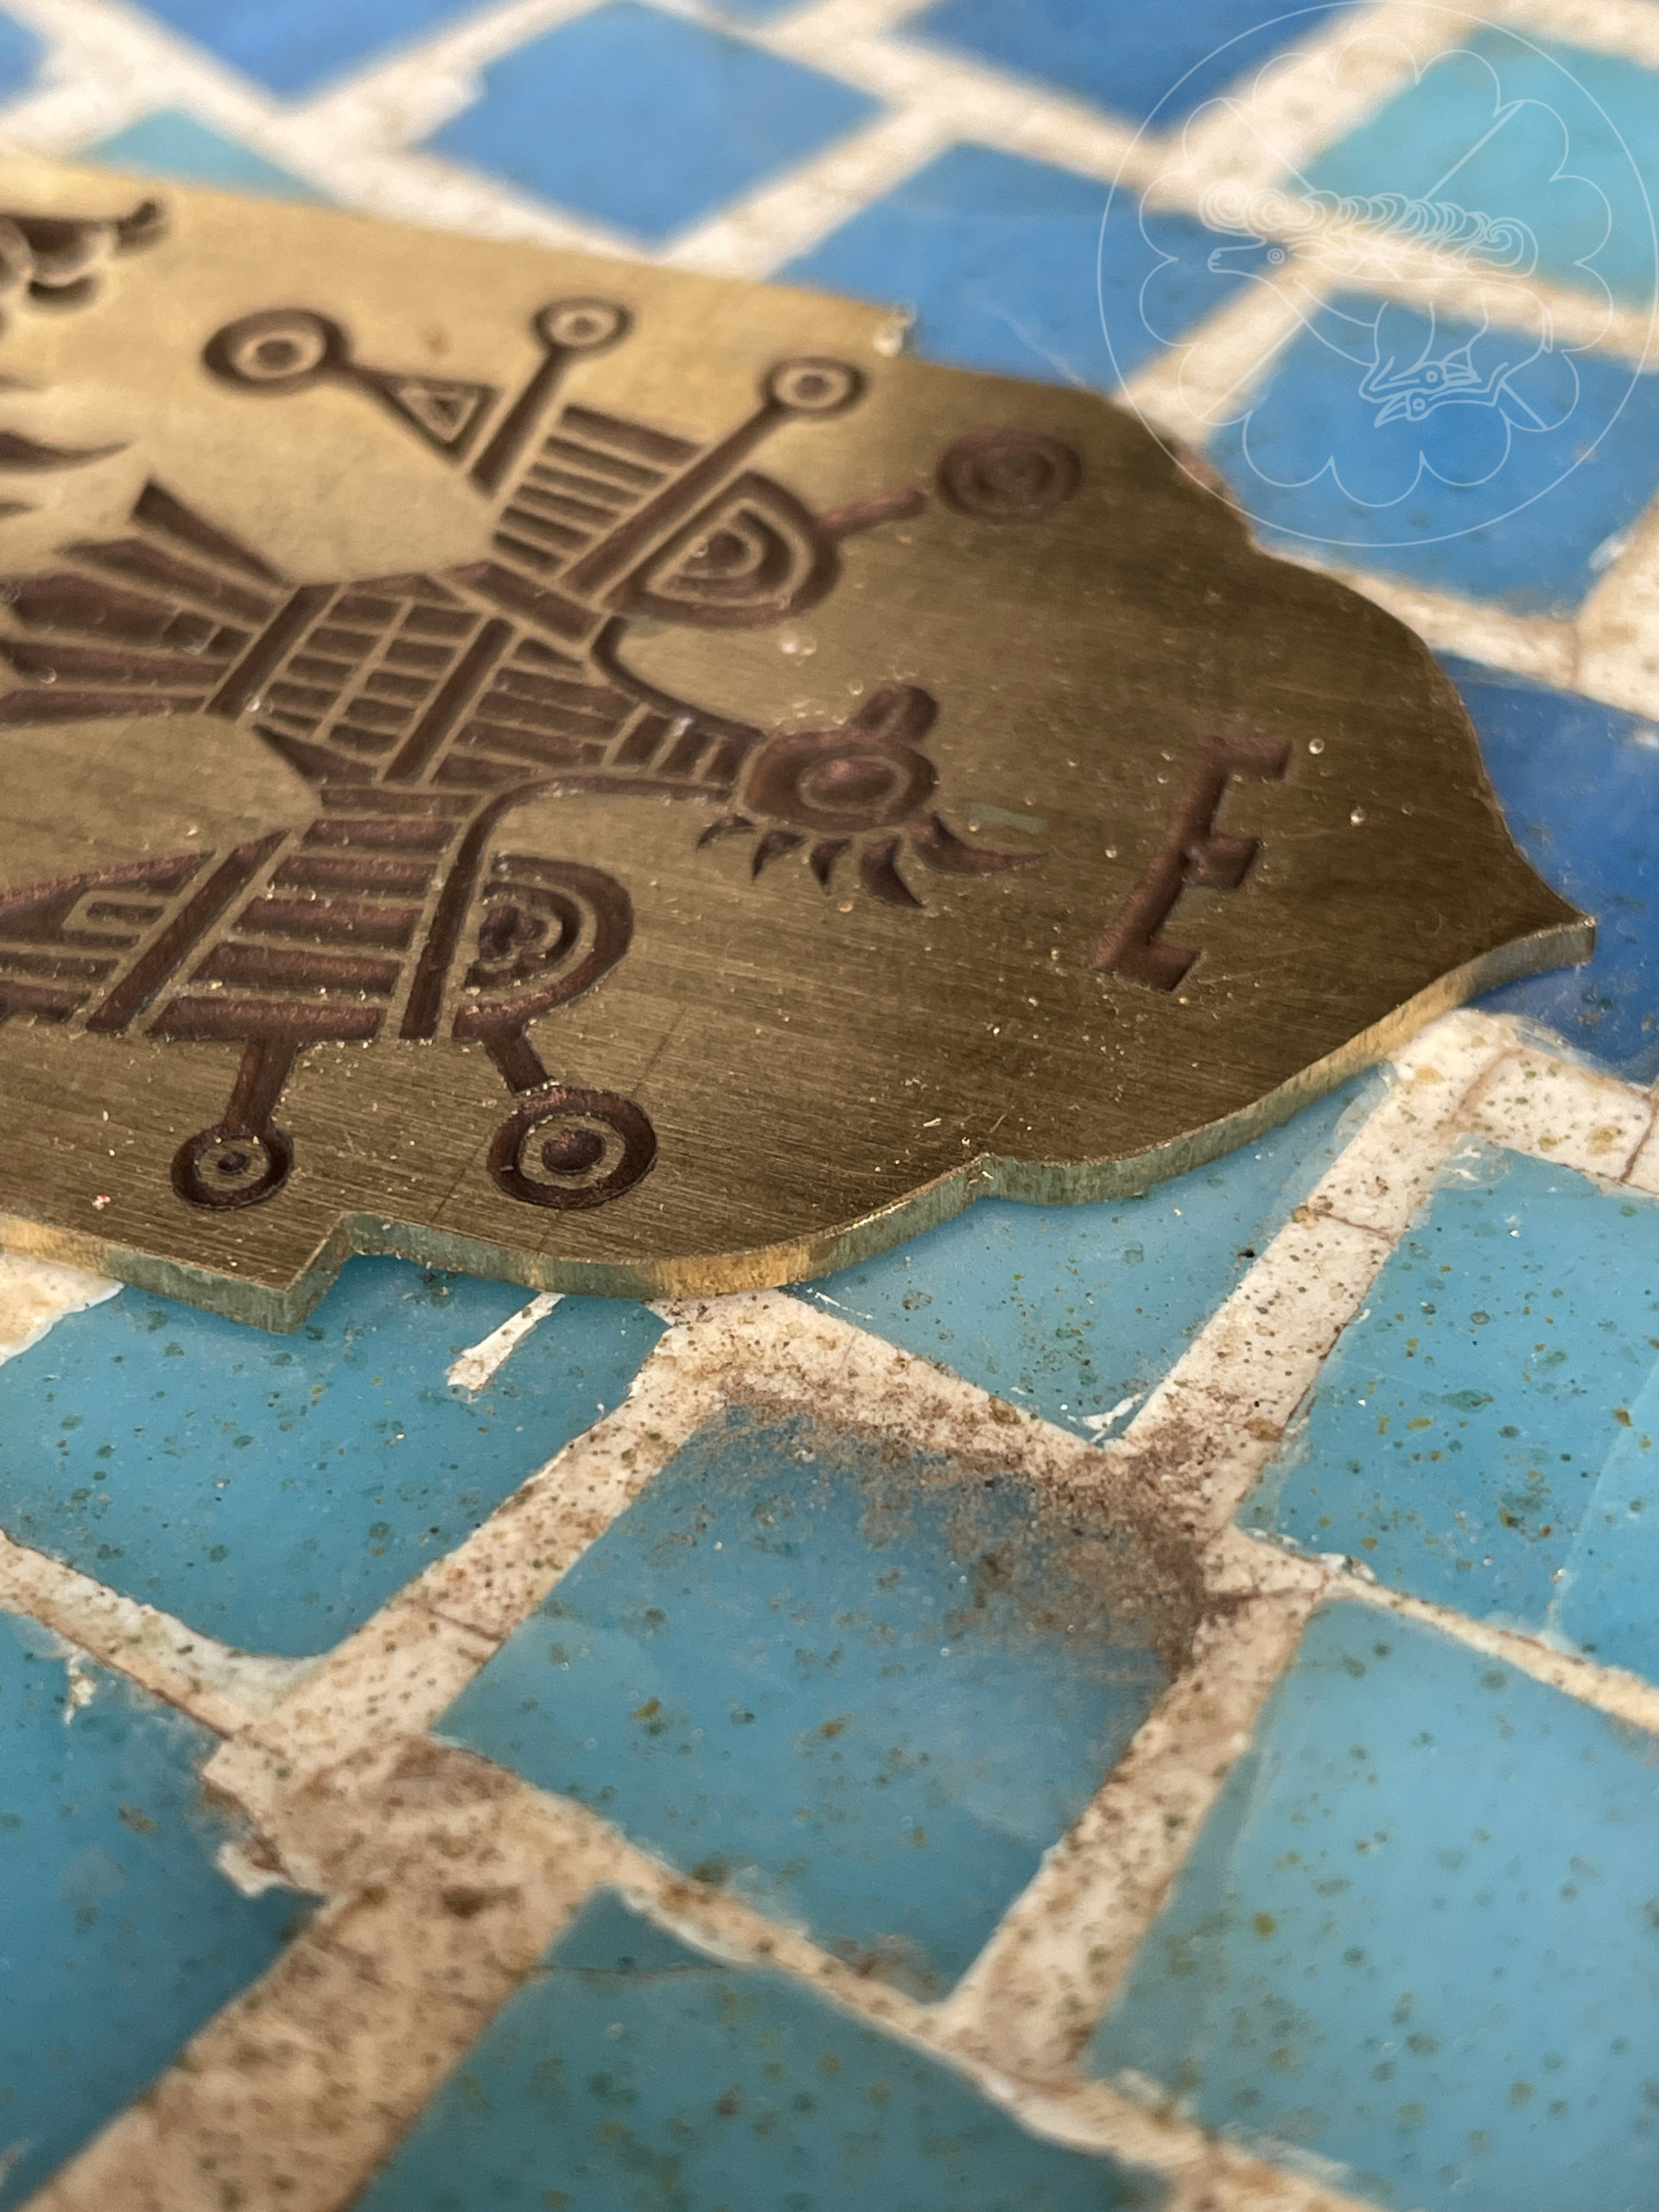
The central plaque of the diadem replaces Alexander the Great with a phoenix, stylized from an “eagle” found on a kolt, and a County coronet was added above the phoenix.
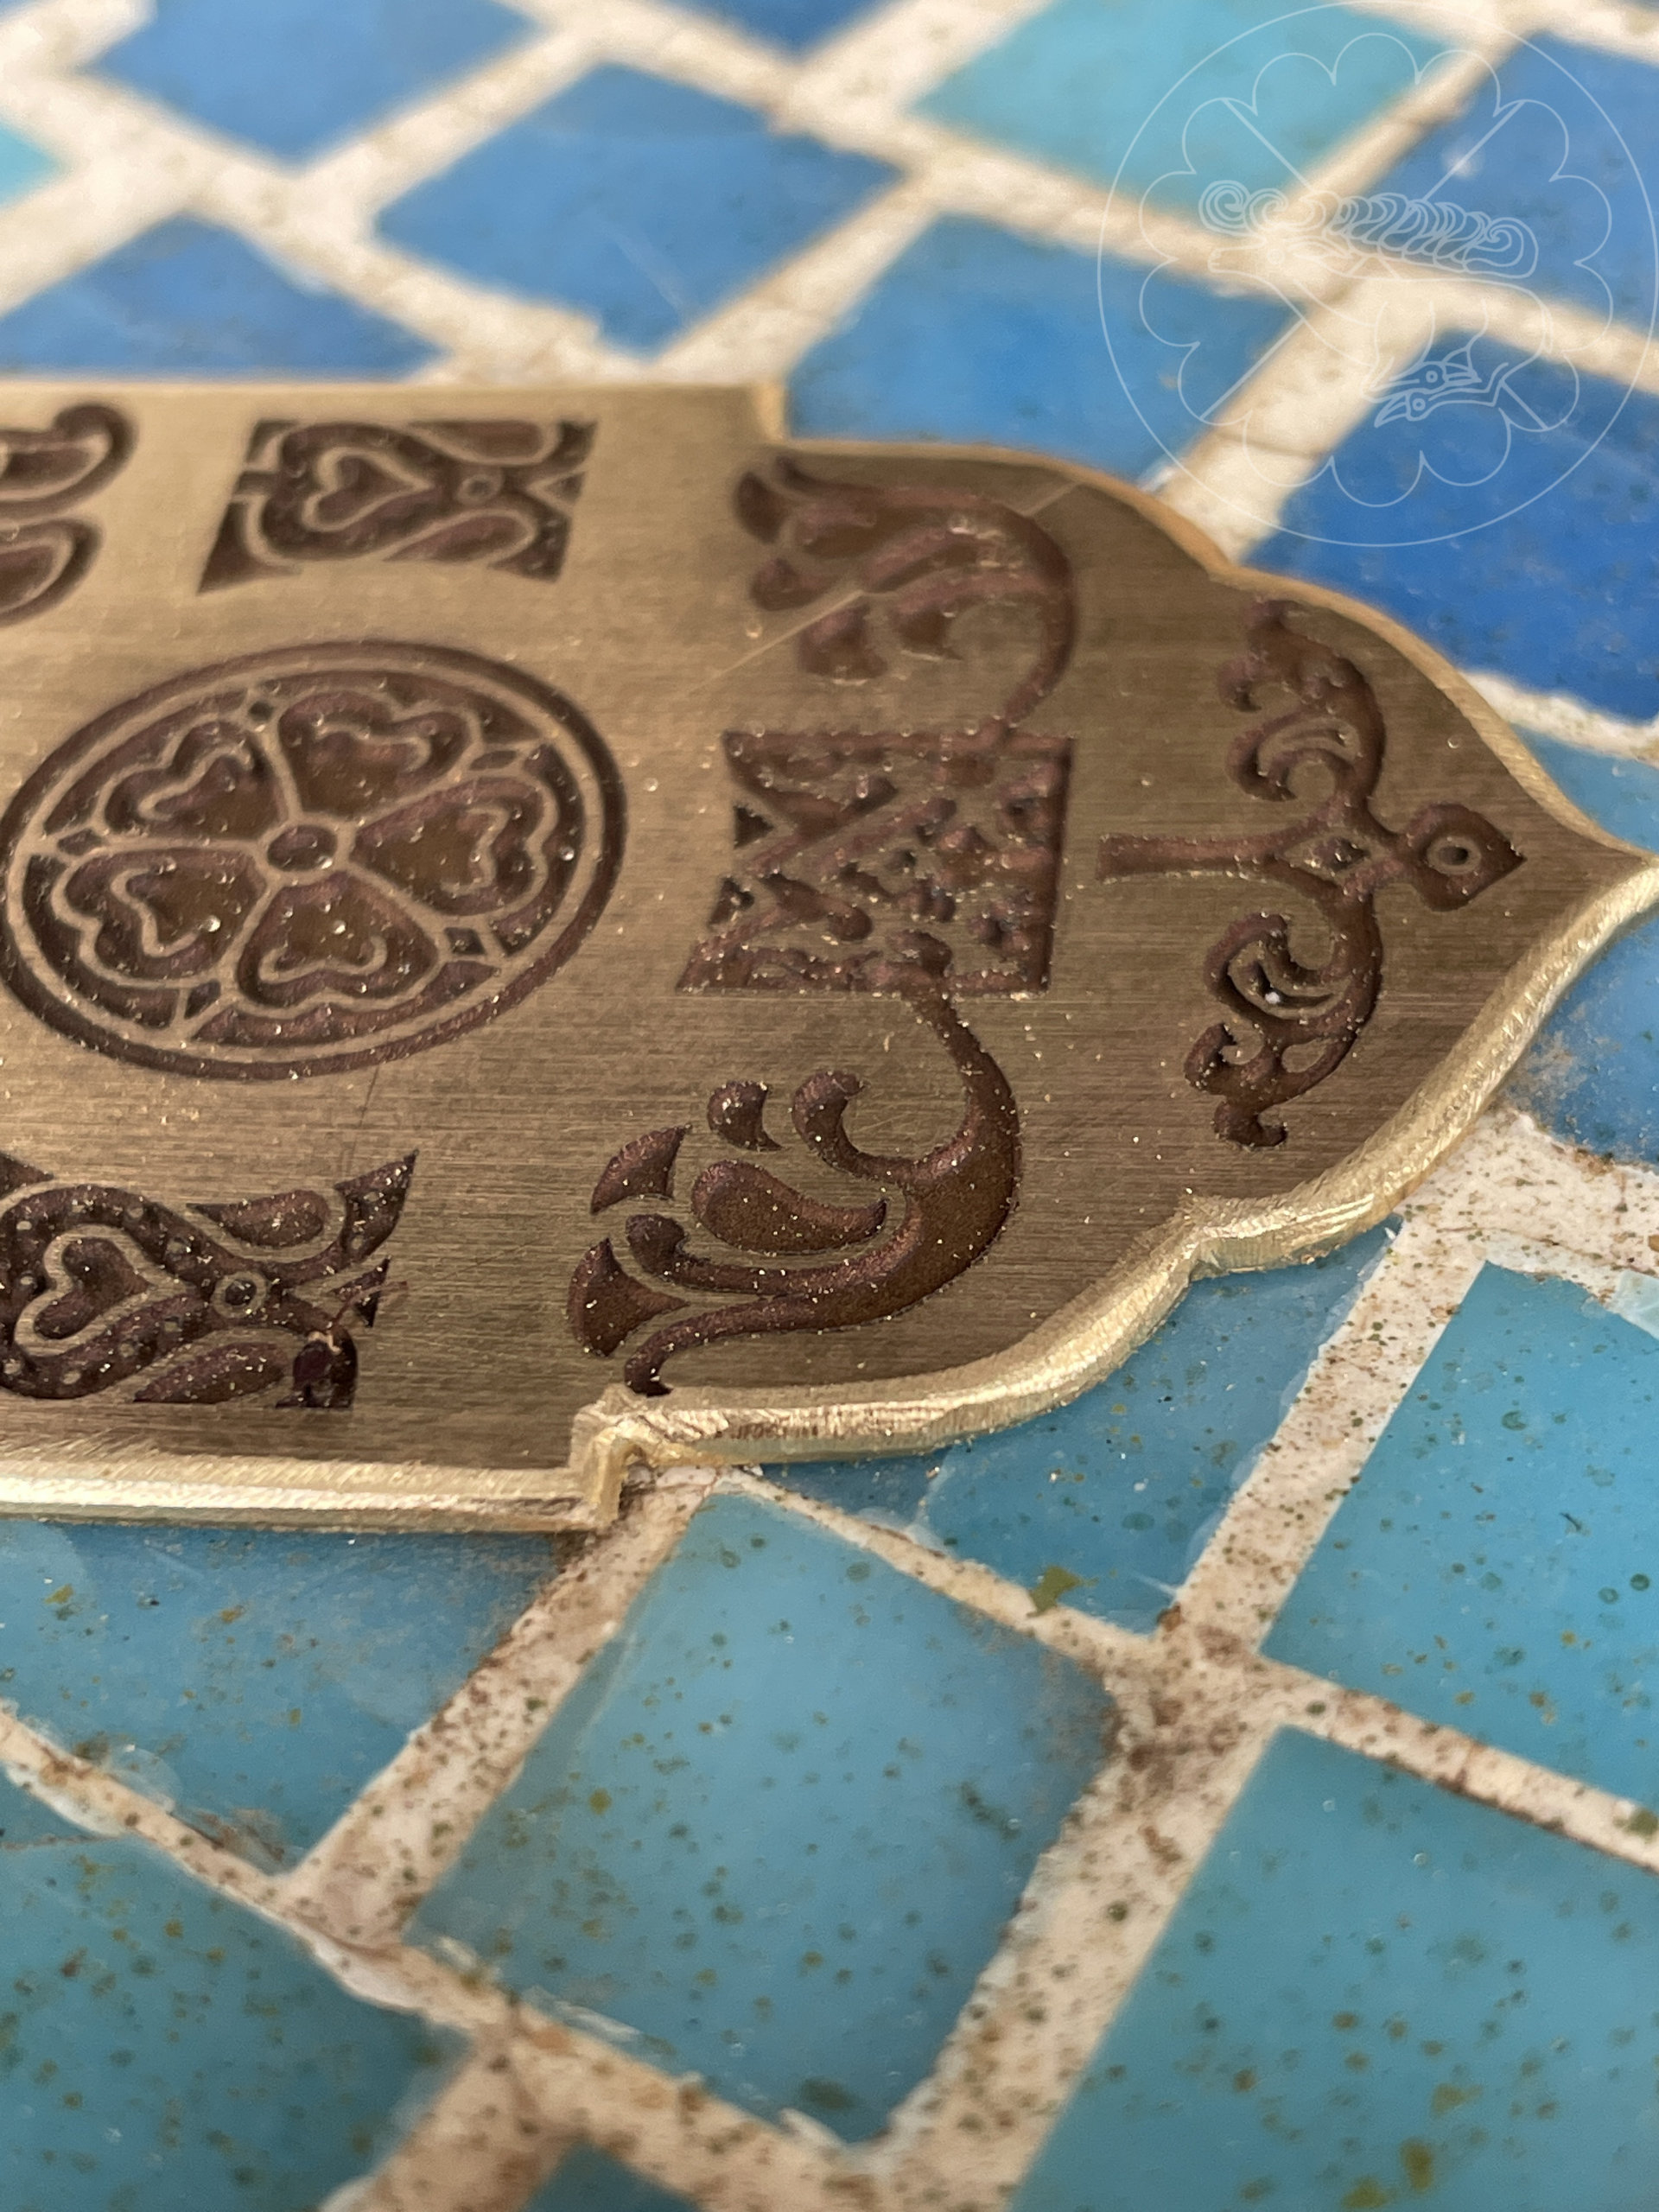
On the side plaques of the diadem, the central features were alternated with roses and a laurel wreath, while each plate extending outward on each side had unique variations of the the surrounding details.
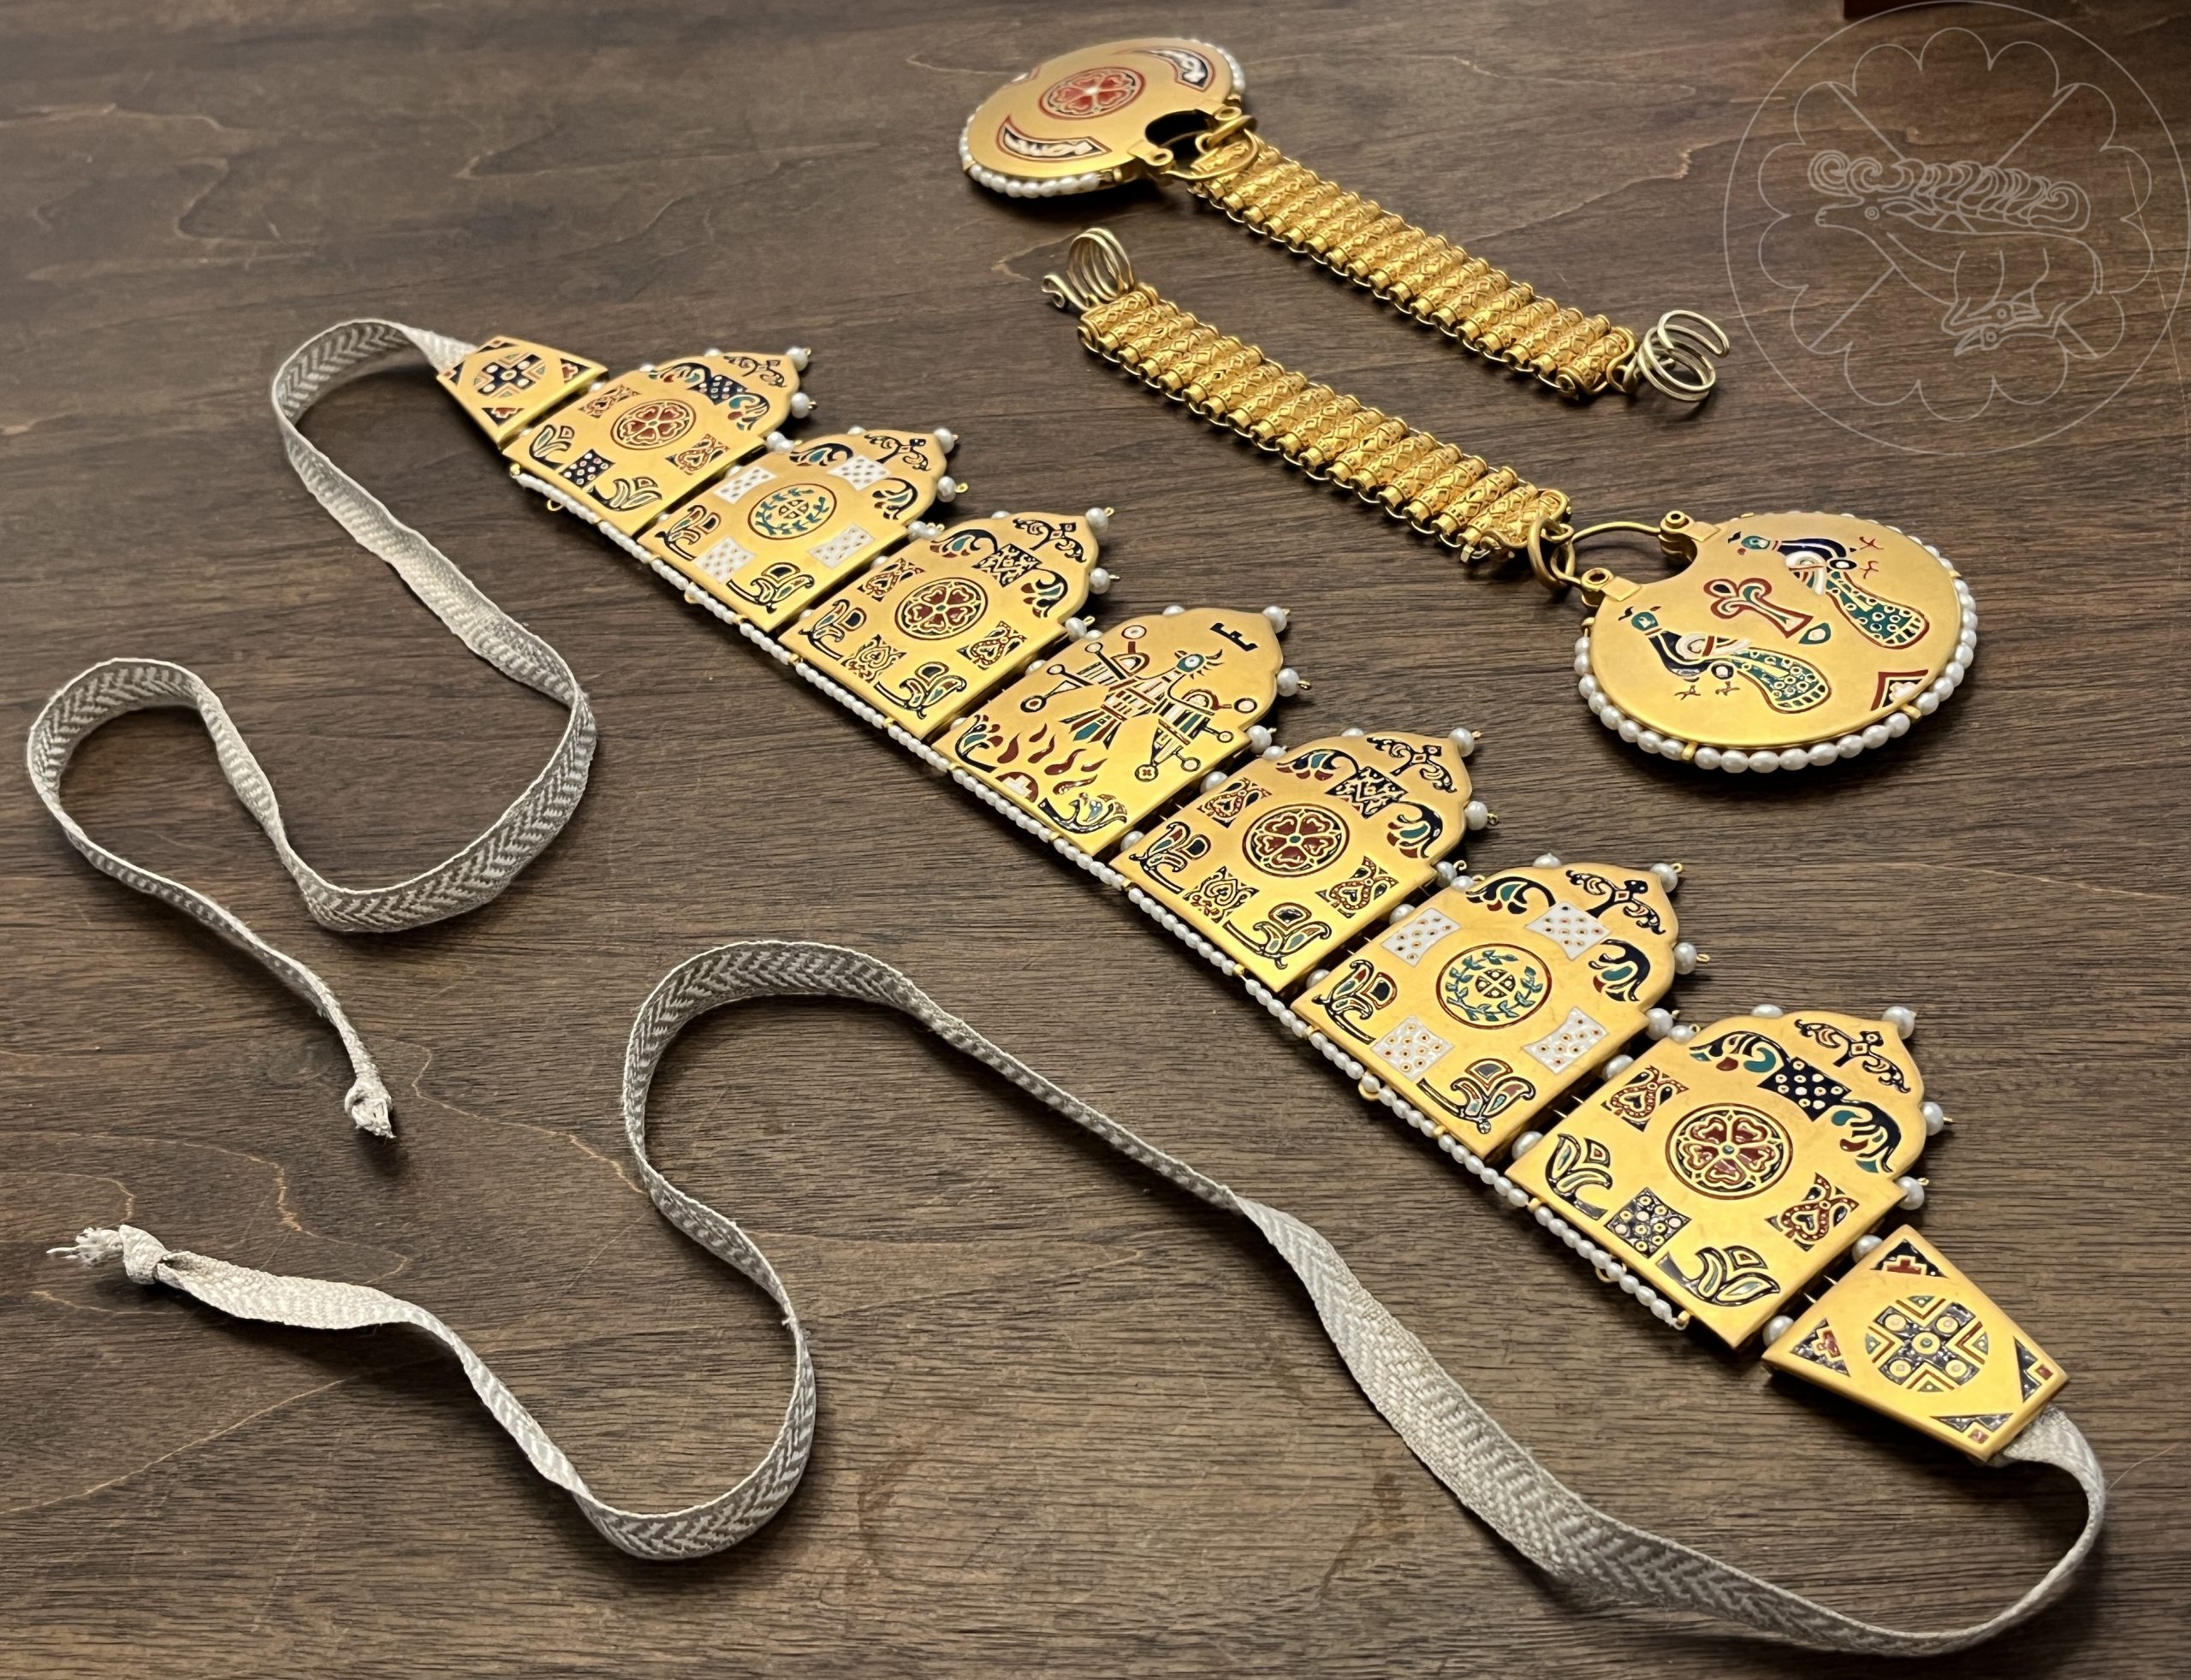
Kolti Construction
For years I’ve been fascinated with enameled Kyivan kolti and diadems. In 2015 I made up designs and planned to make a set of Kolti and a diadem. The historical methods used to make them involve very fine cloisonné enamel in gold. Being intimidated by the fine detail involved in the hot enamel process, and concerned about the difficulty of gold plating before or after enameling, I decided on an alternate route to approximate the desired look using a champlevé process, etching to achieve depth on the features, and using a cold enamel process to achieve the look. For the enamel process to have suitable depth to work, it needed to be fairly deep, at minimum 0.4-0.5mm in order to produce an opaque appearance.
I hand drew the initial artwork for the project in 2015, a complete set for the kolti and the diadem (some of which is shown above). I then made several attempts at chemical etching to create the pattern of the kolt as a trial. I attempted resists using laser printer toner transfer both with transparency sheet and with Press-n-Peel Blue PCB Toner Transfer Paper, and attempted etching with both ferric chloride and with HCl/H2O2 mixture. Due to the depth of etching required, and the fine detail of the pieces, I was not able to obtain a deep enough etch without burning through the thin separation lines to achieve the clean look I was shooting for. Even the best one had some blowout without being quite deep enough to use.
*Note that with my refined drawings and some patience, and possibly re-application of resist during the process, it is probably possible chemically etch to the depth needed for this project, but undercutting may still be an issue if the separations are fine enough – it didn’t work for me and so I found another way to do it.
From there the project sat for several years. This was probably for the best, because during that time I did learn a lot more about how the kolti were actually constructed, and had time to develop a better understanding of how the project would all finally come together.
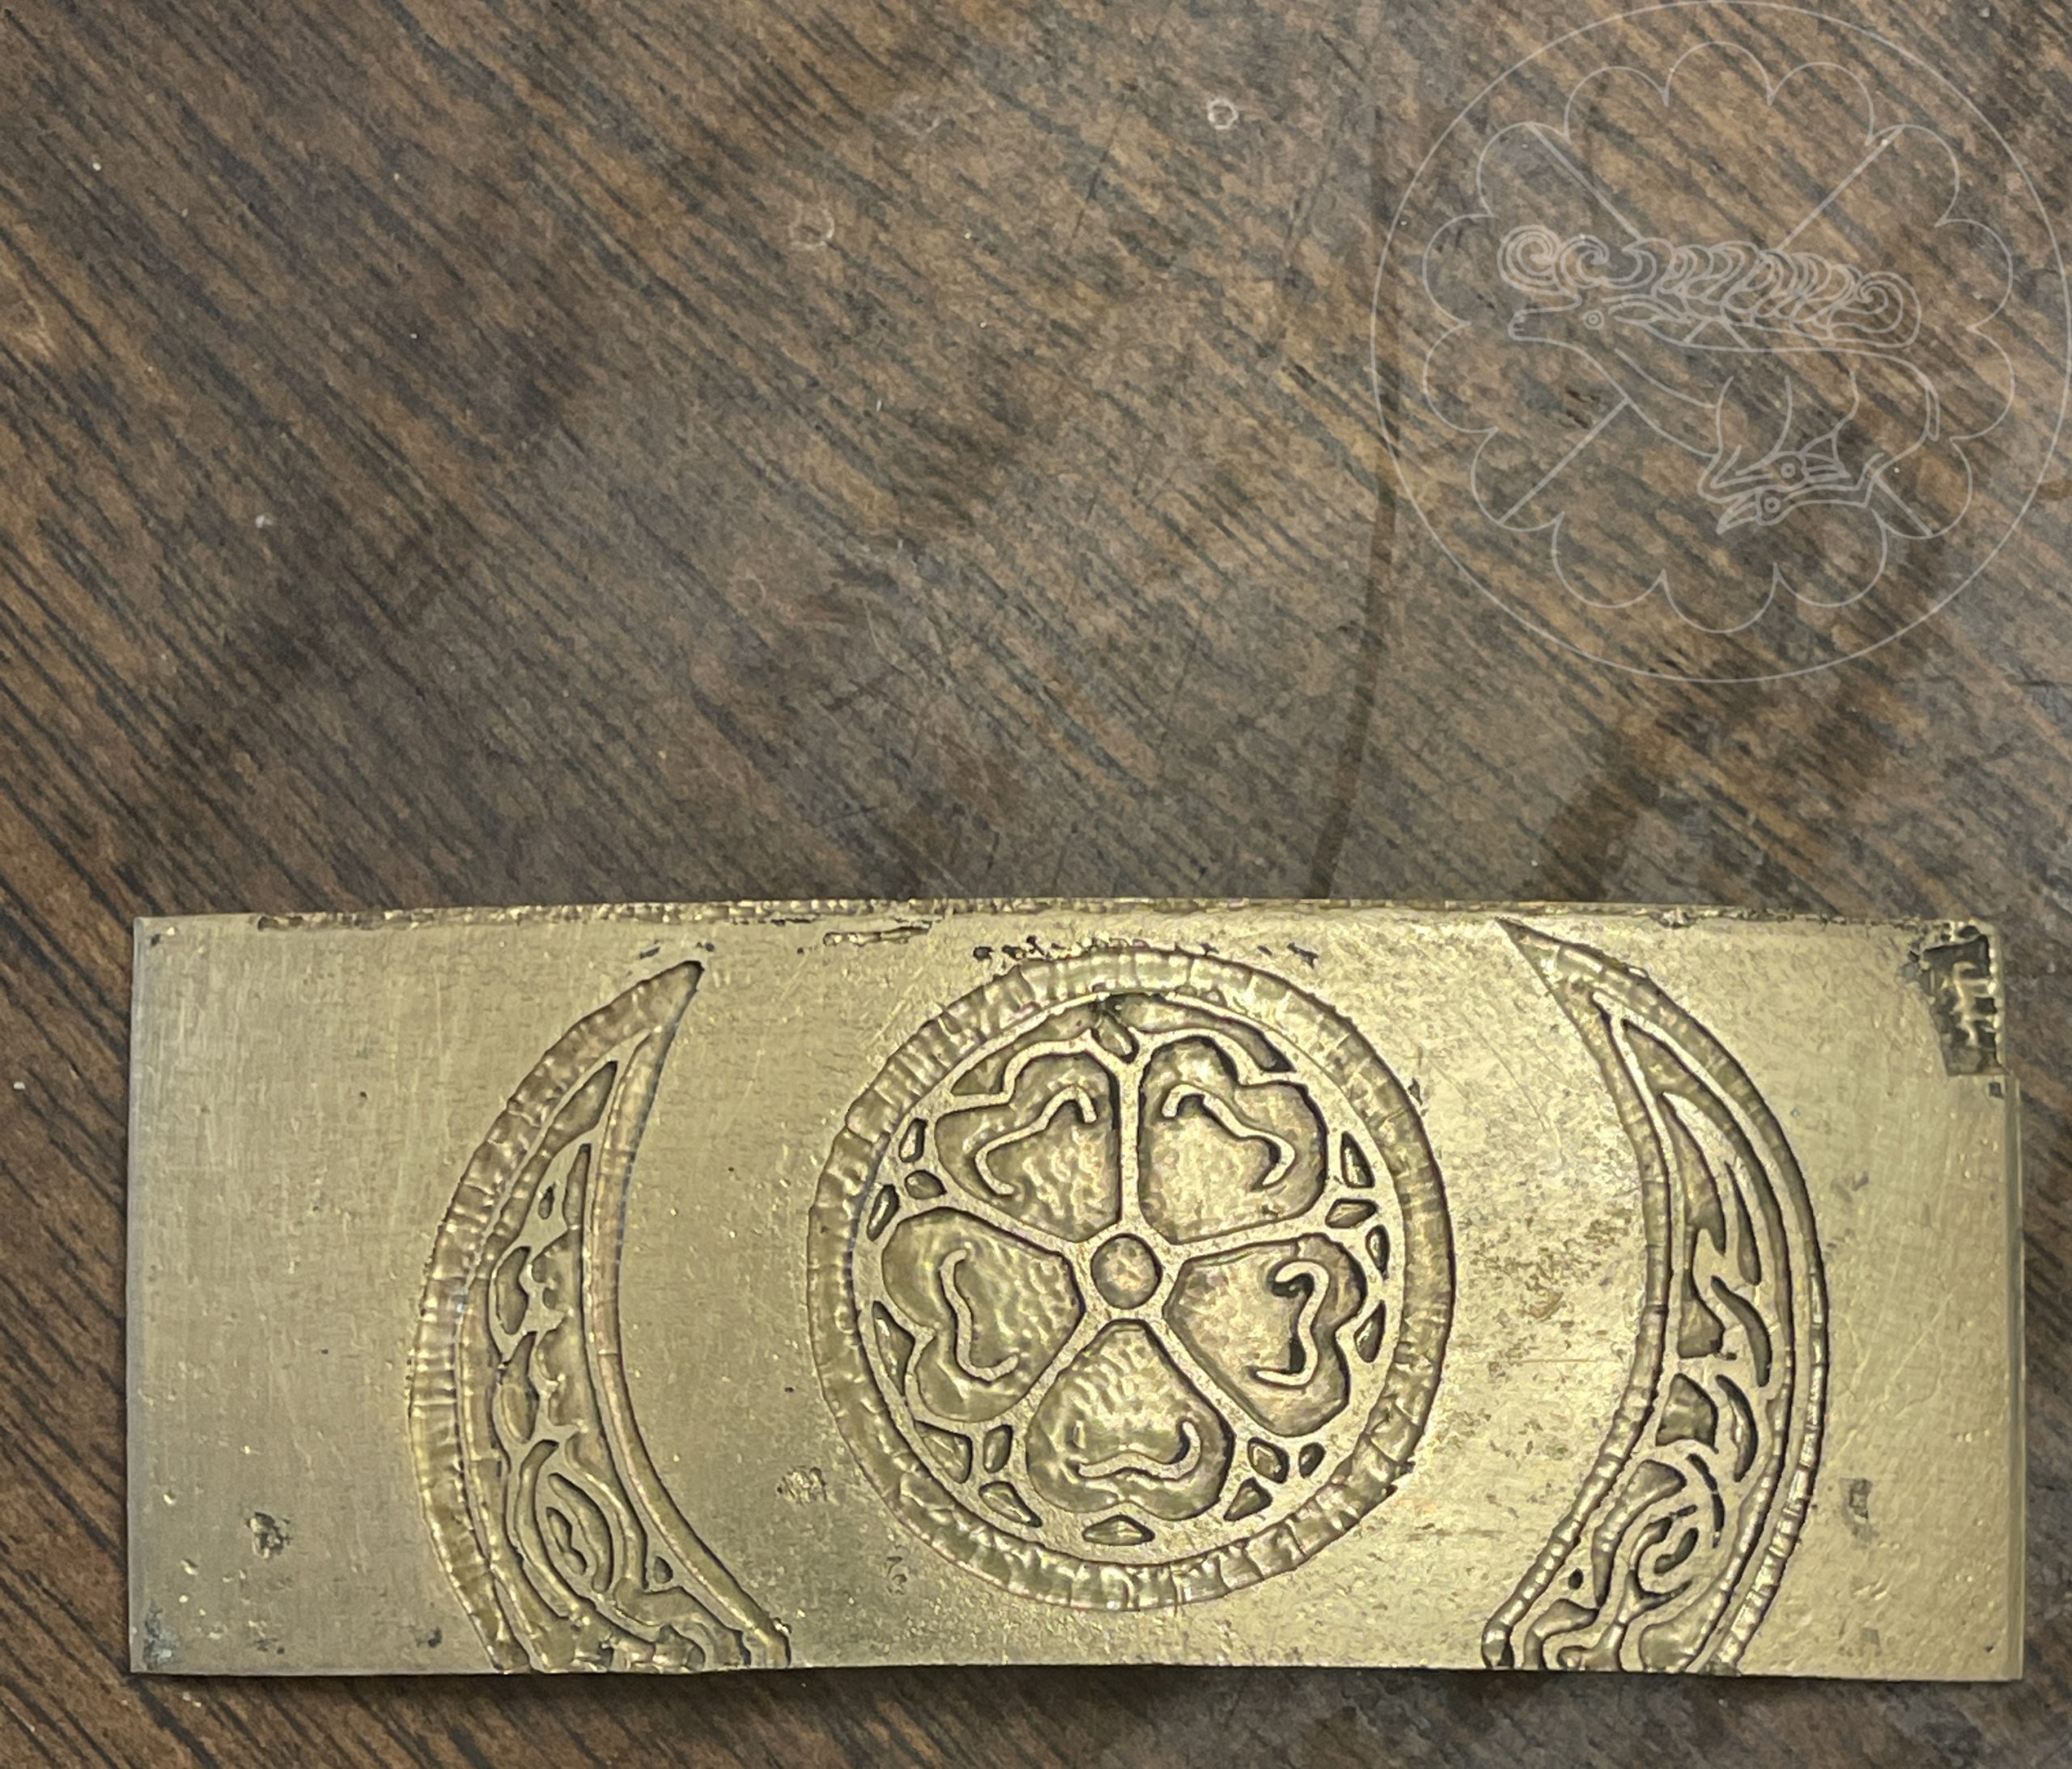
In 2022, having found more information about the construction of the Kolti, as well as some new ideas about the etching, I went back to the drawing board. Over the years I had looked into several other etching techniques, including precision photochemical etching, laser cutting (where I was thinking I would cut through completely and overlay and solder to a separate piece), and finally fiber laser engraving. The fiber laser was the final piece of the puzzle needed to enable the project. The technique is capable of deeply etching very precise patterns.
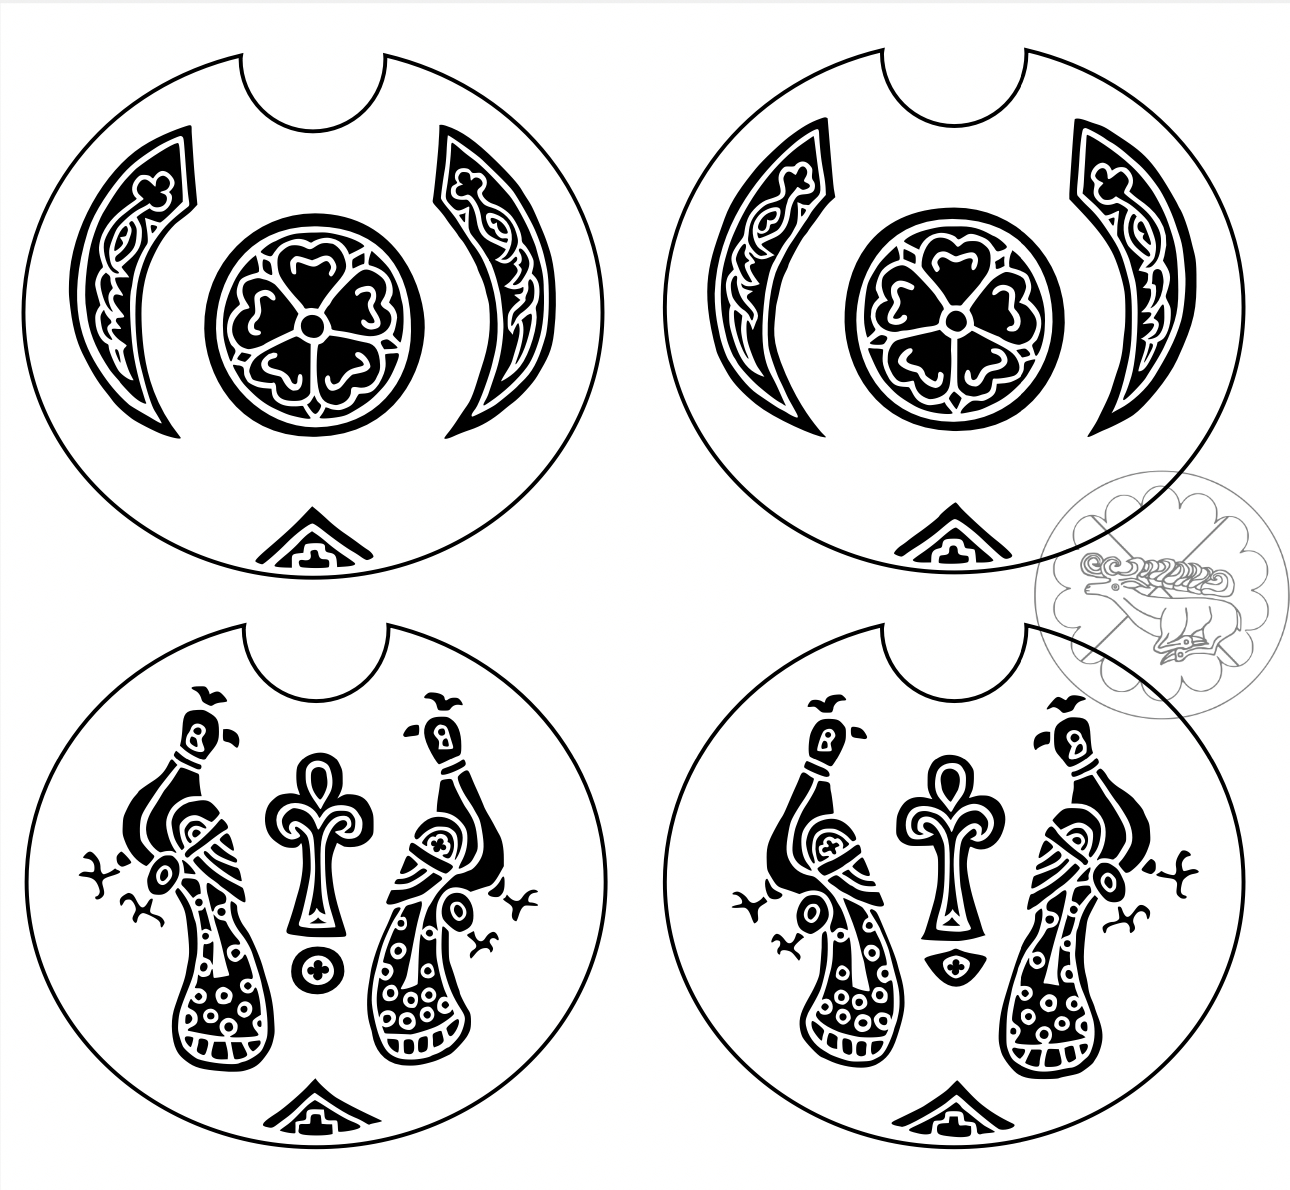
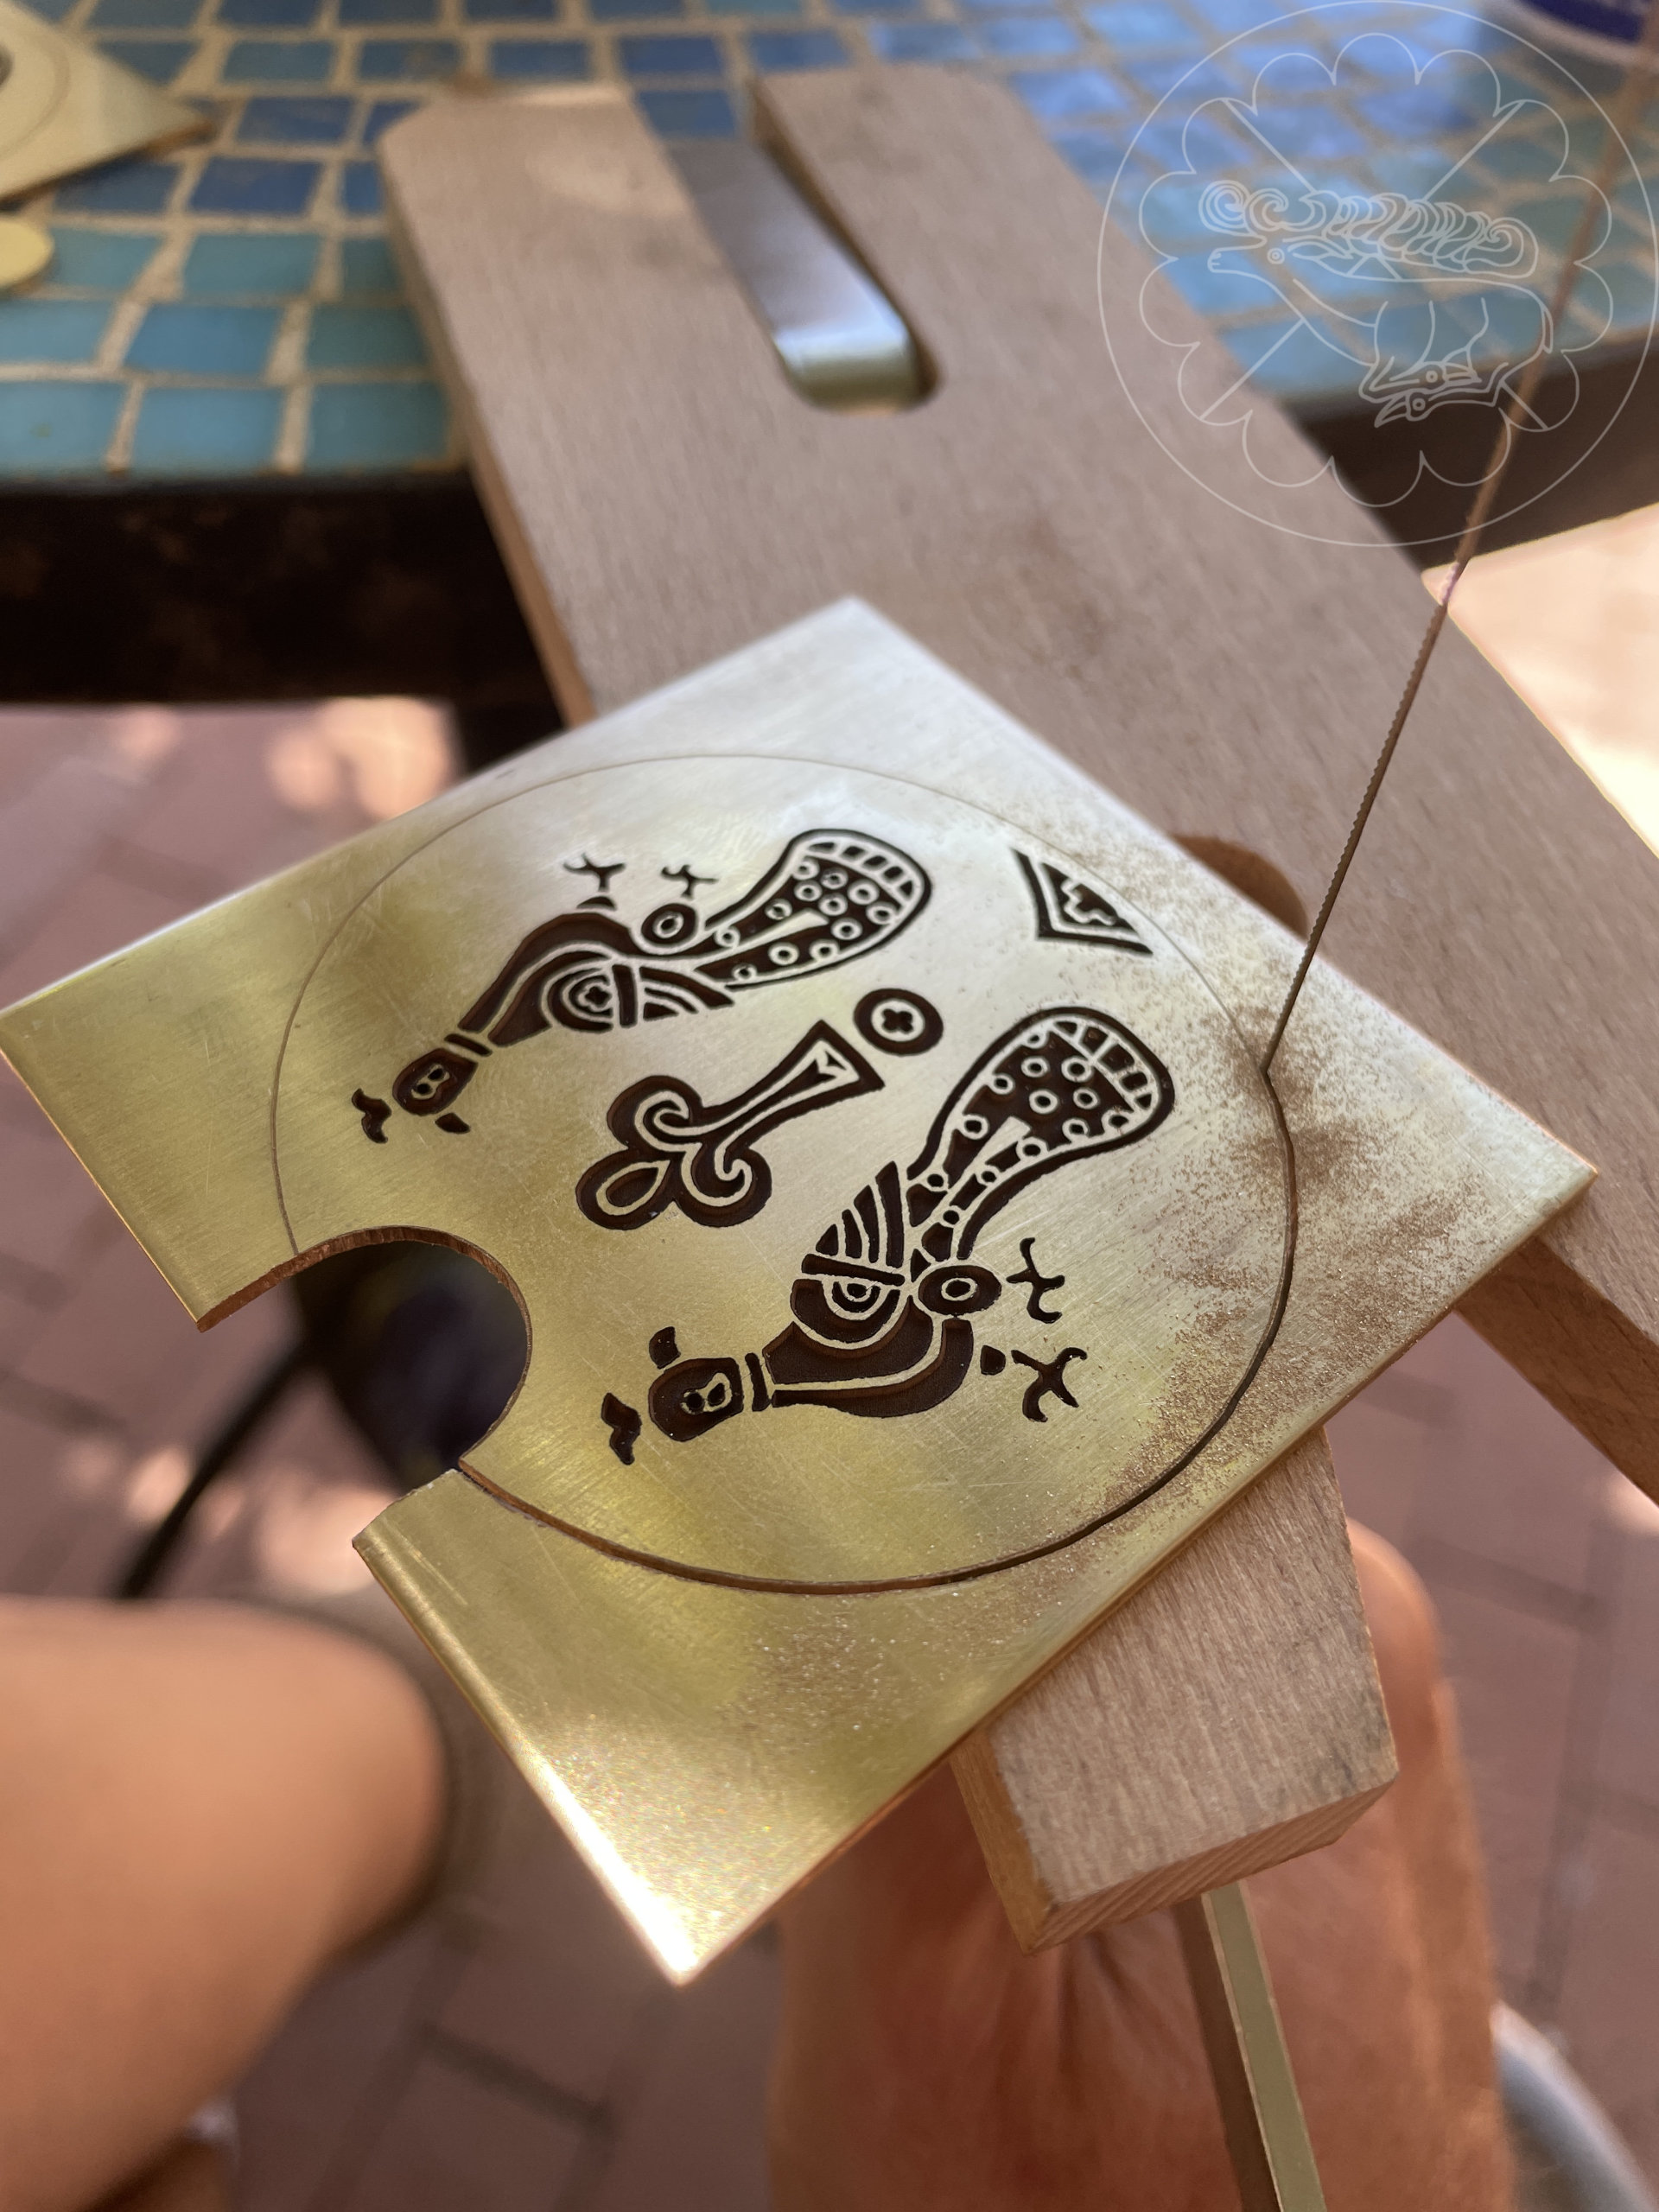
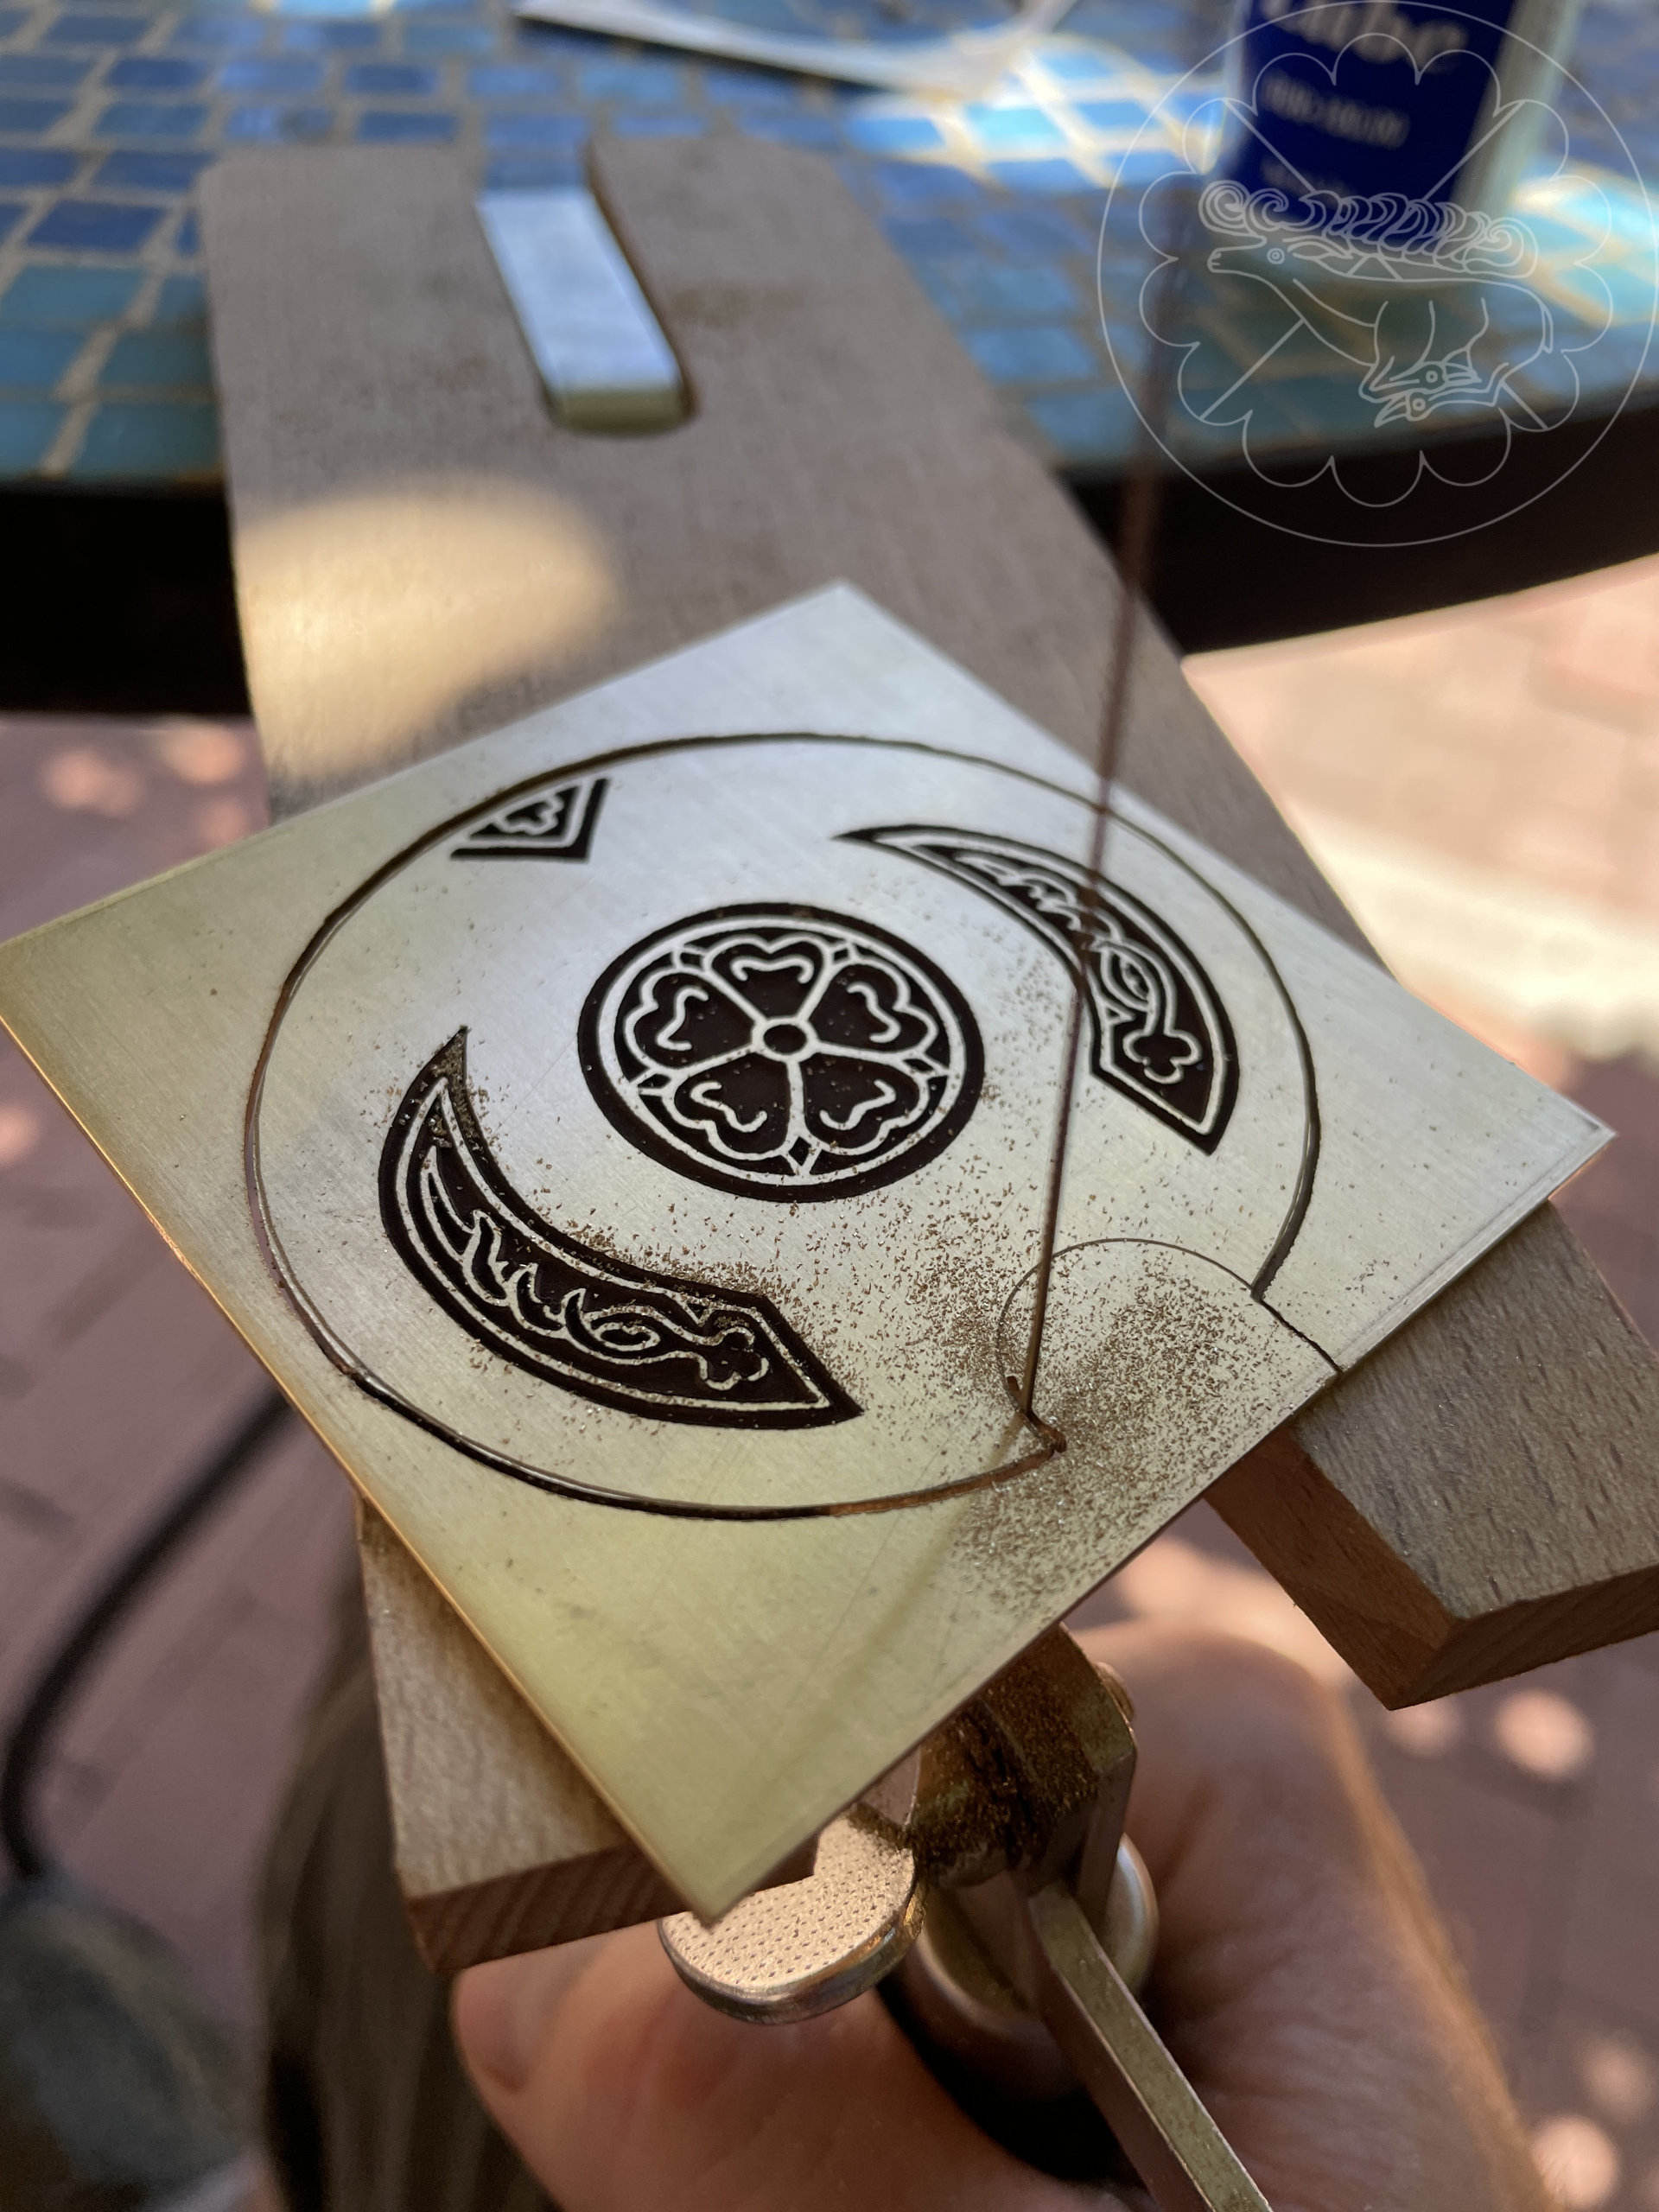
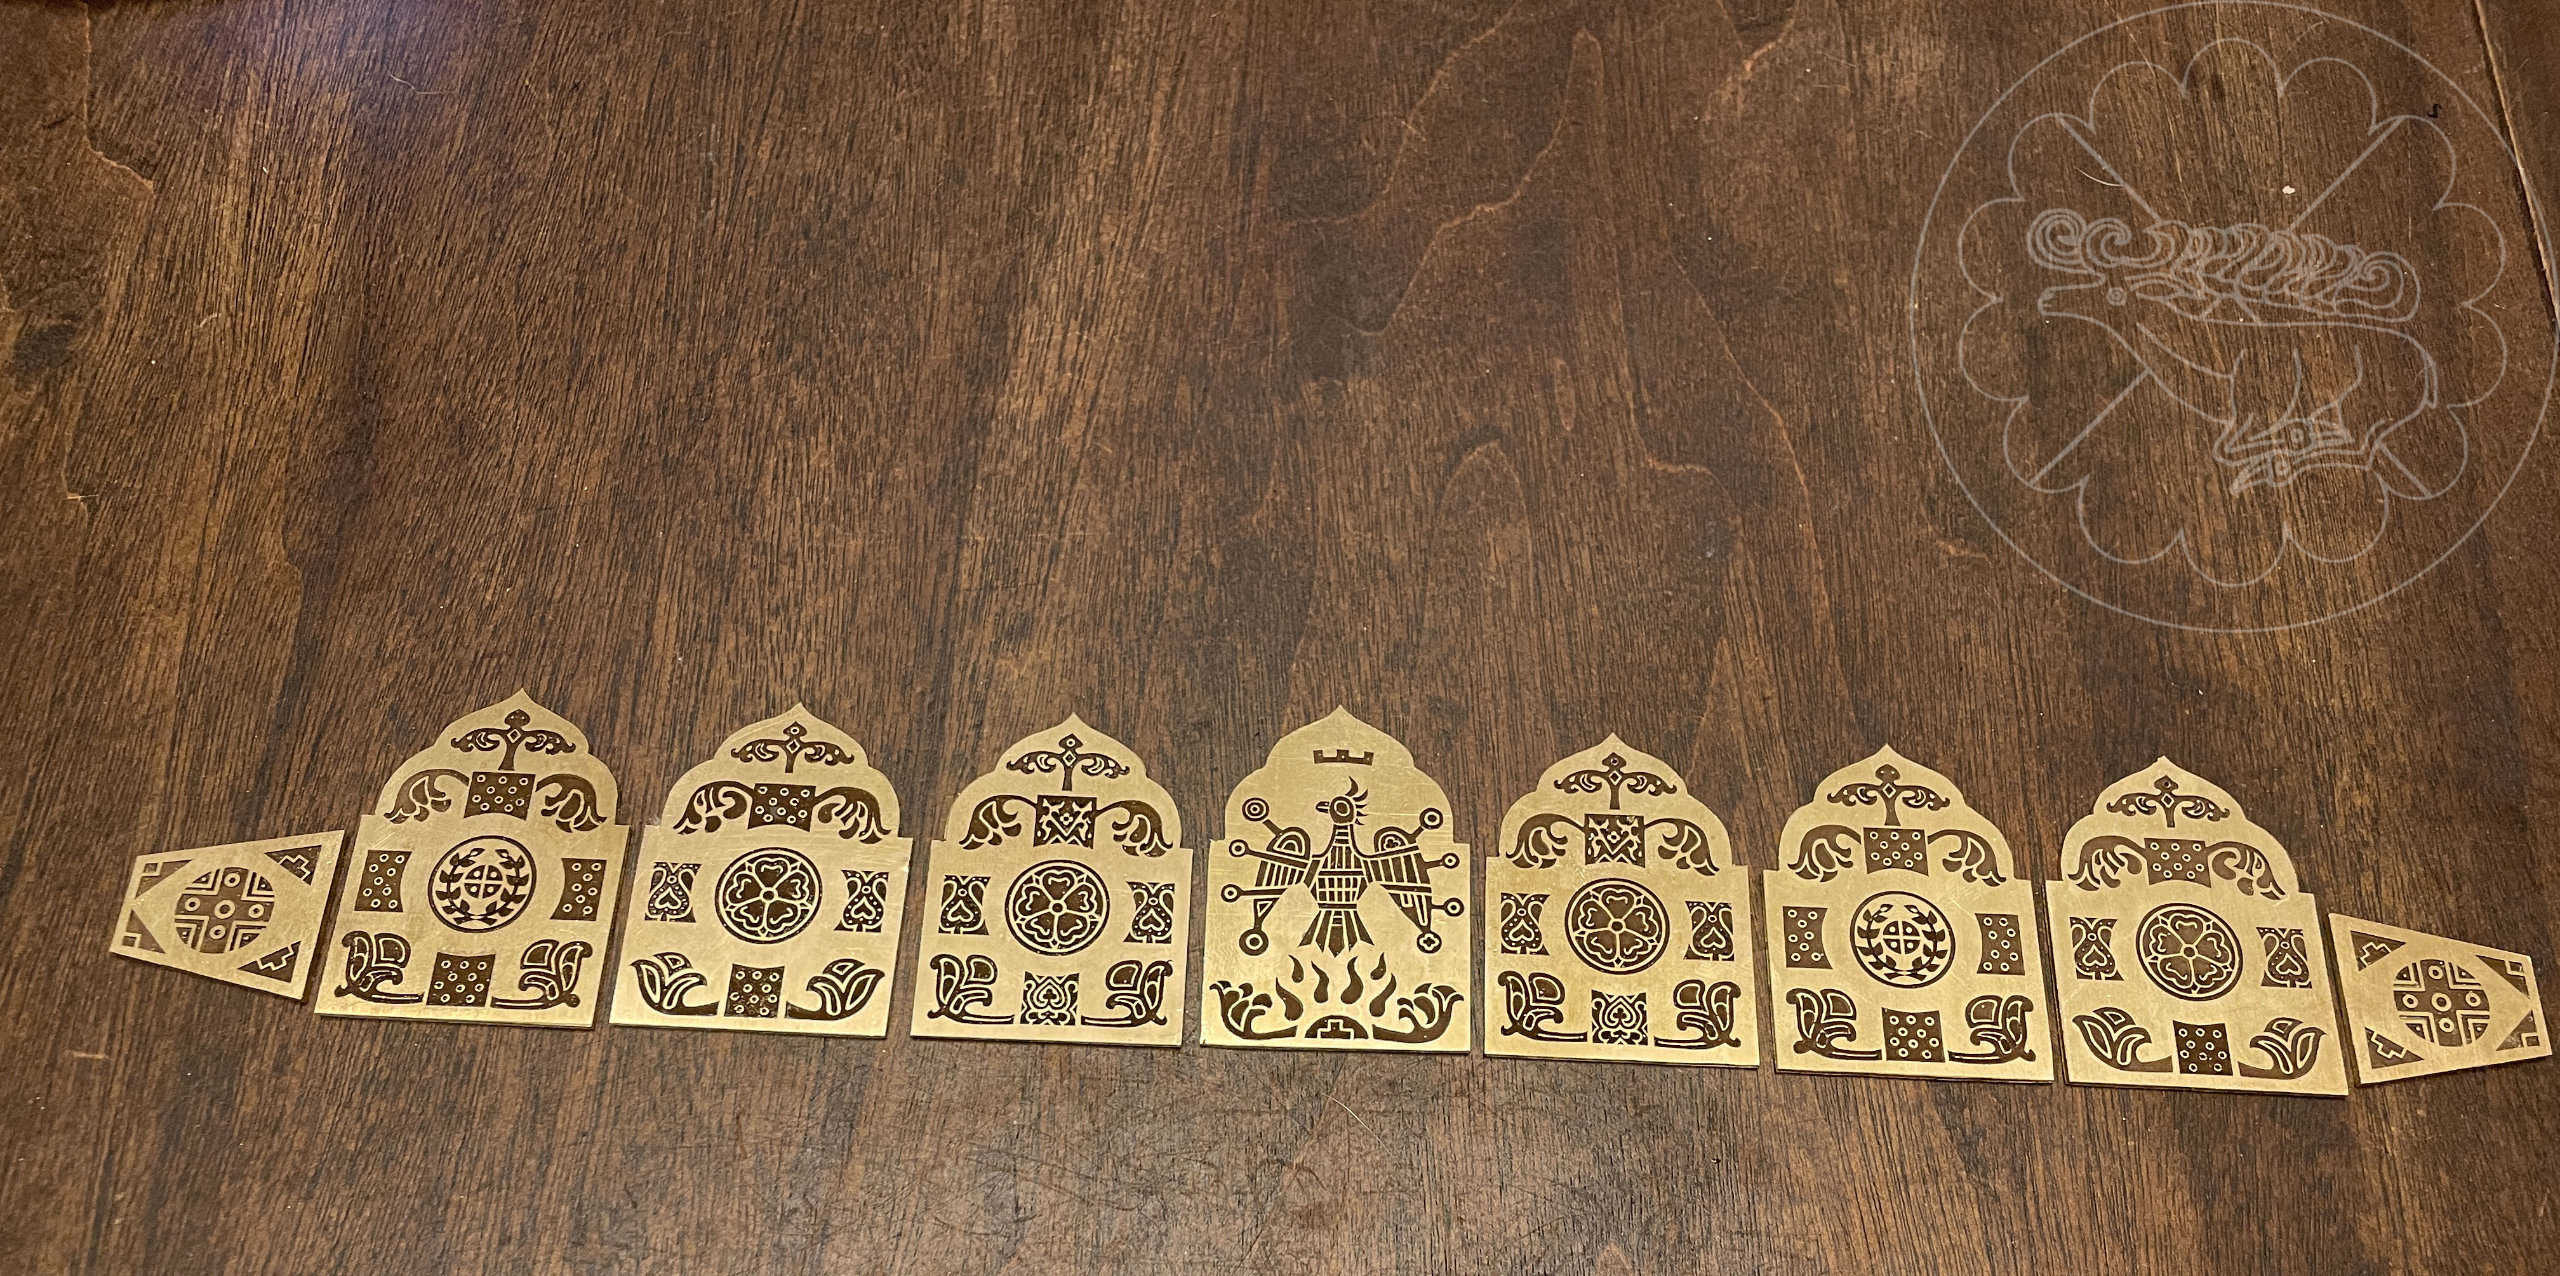
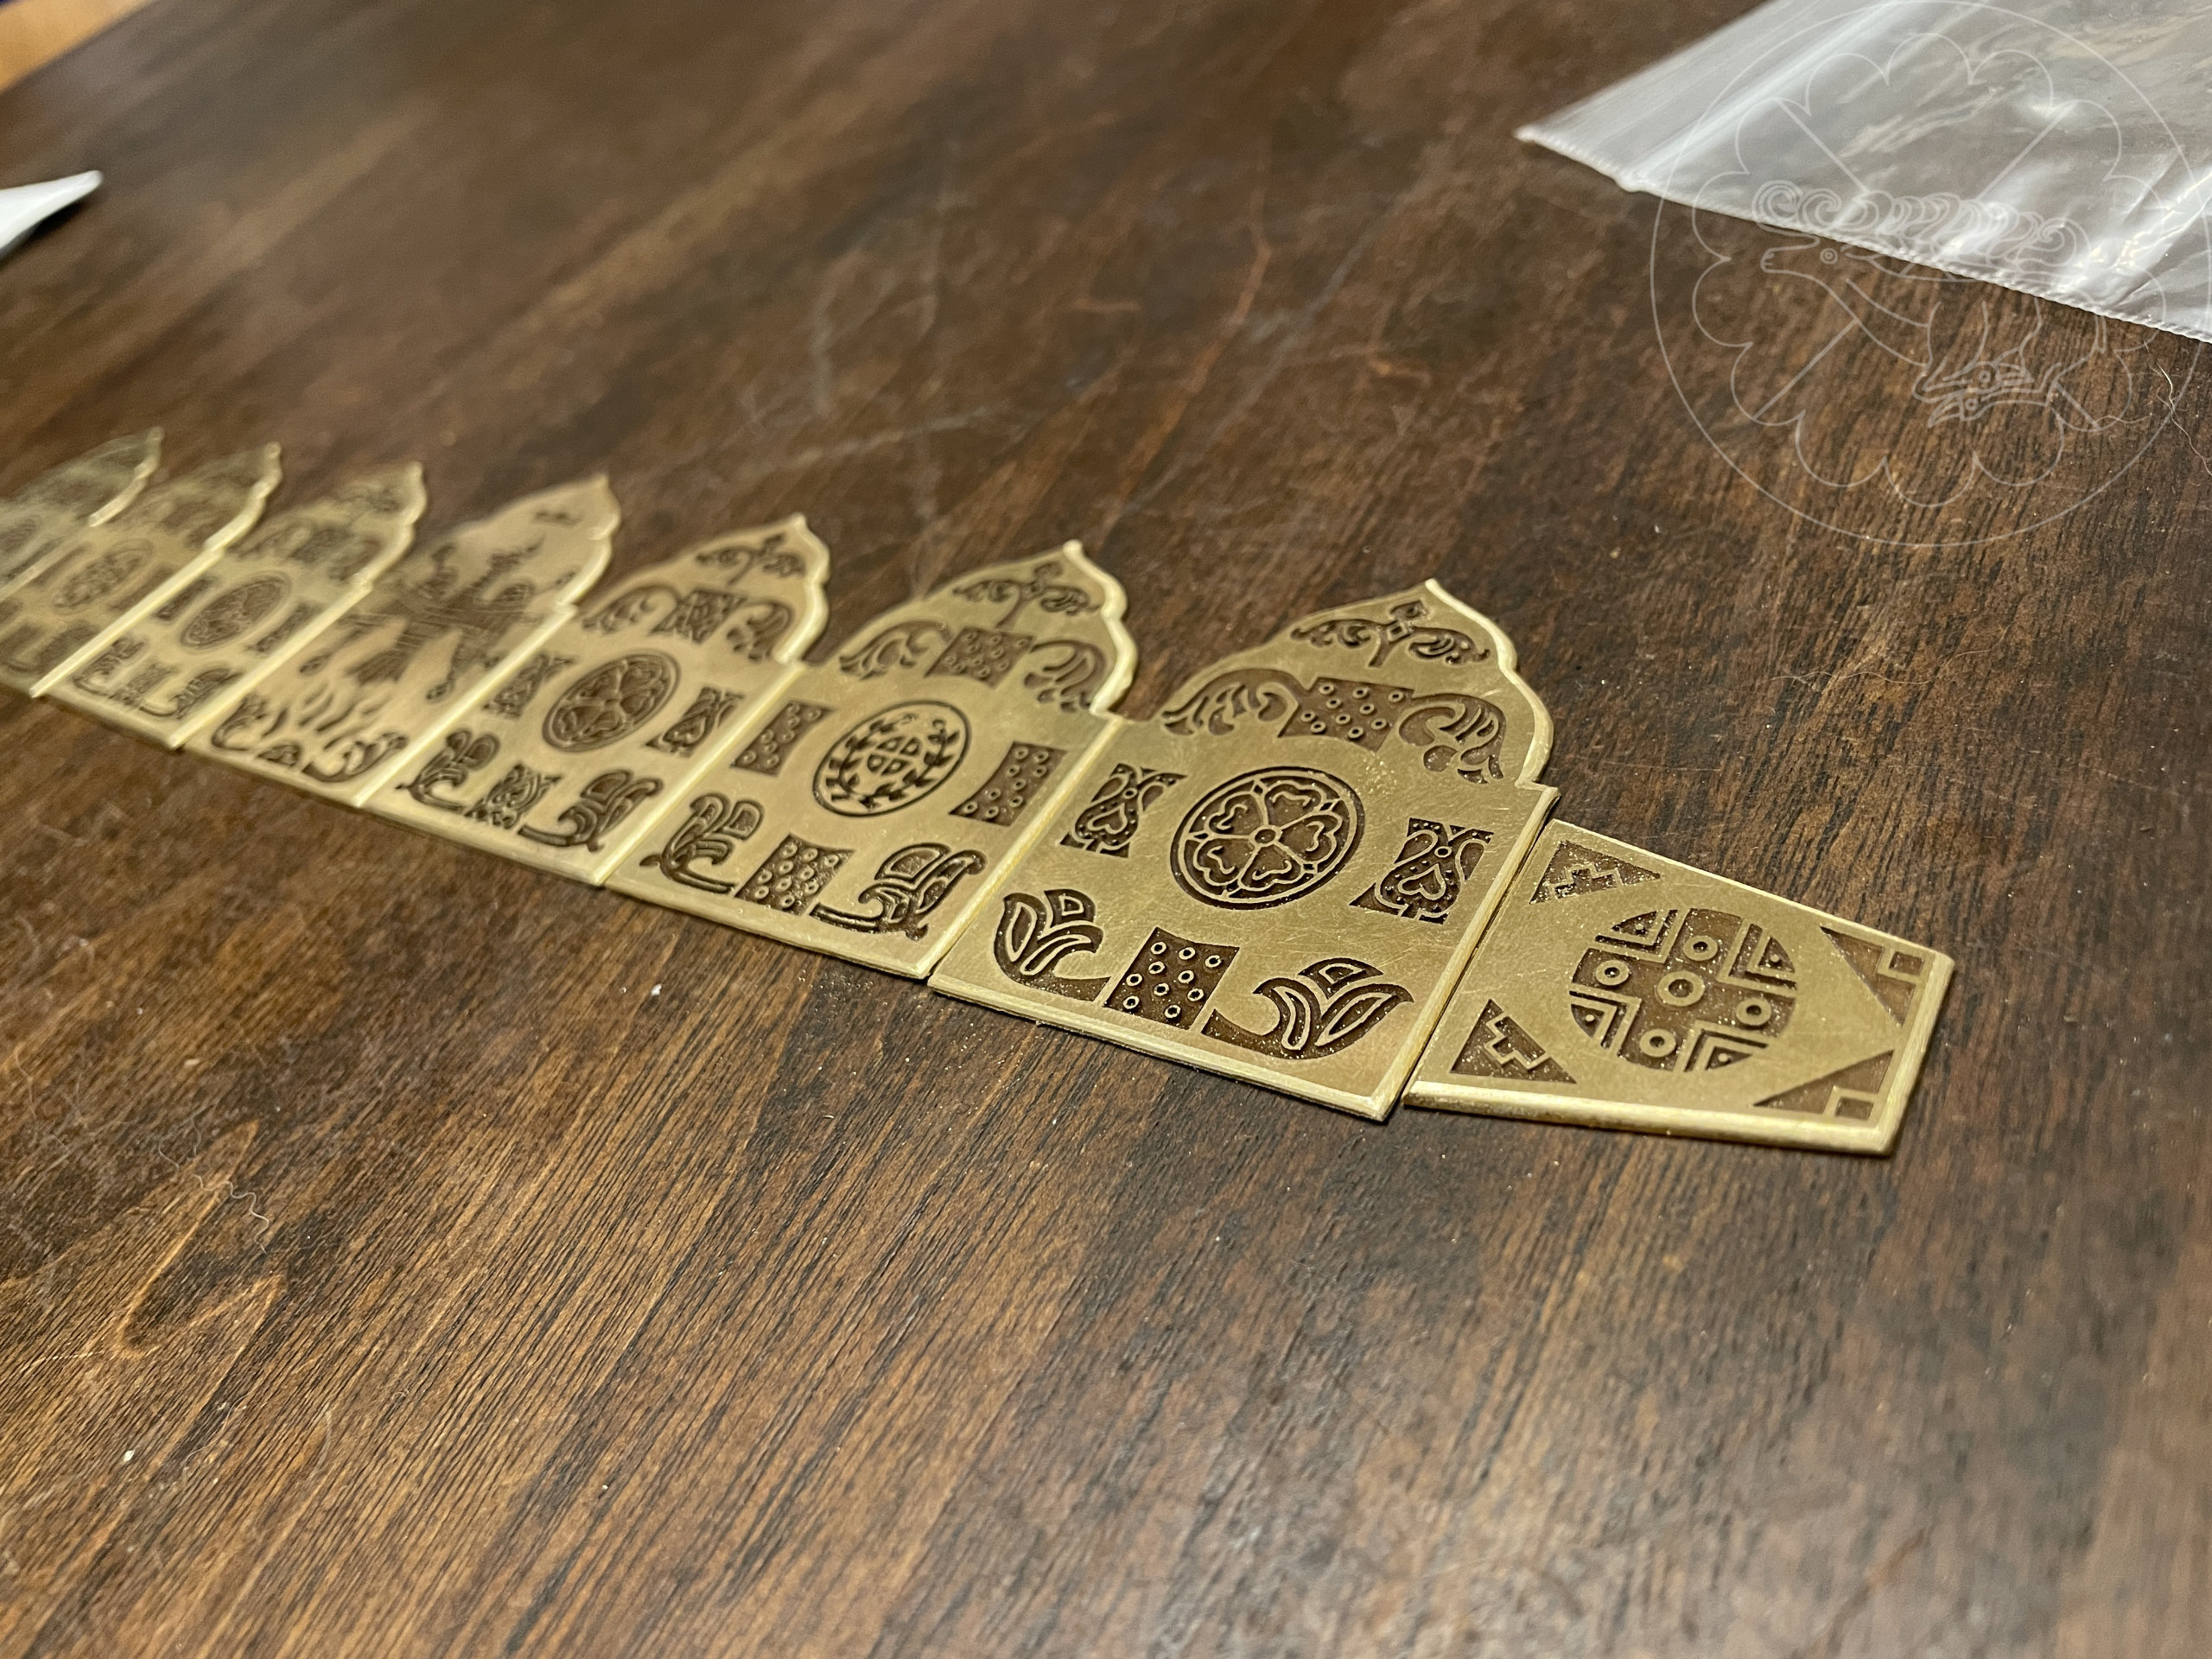
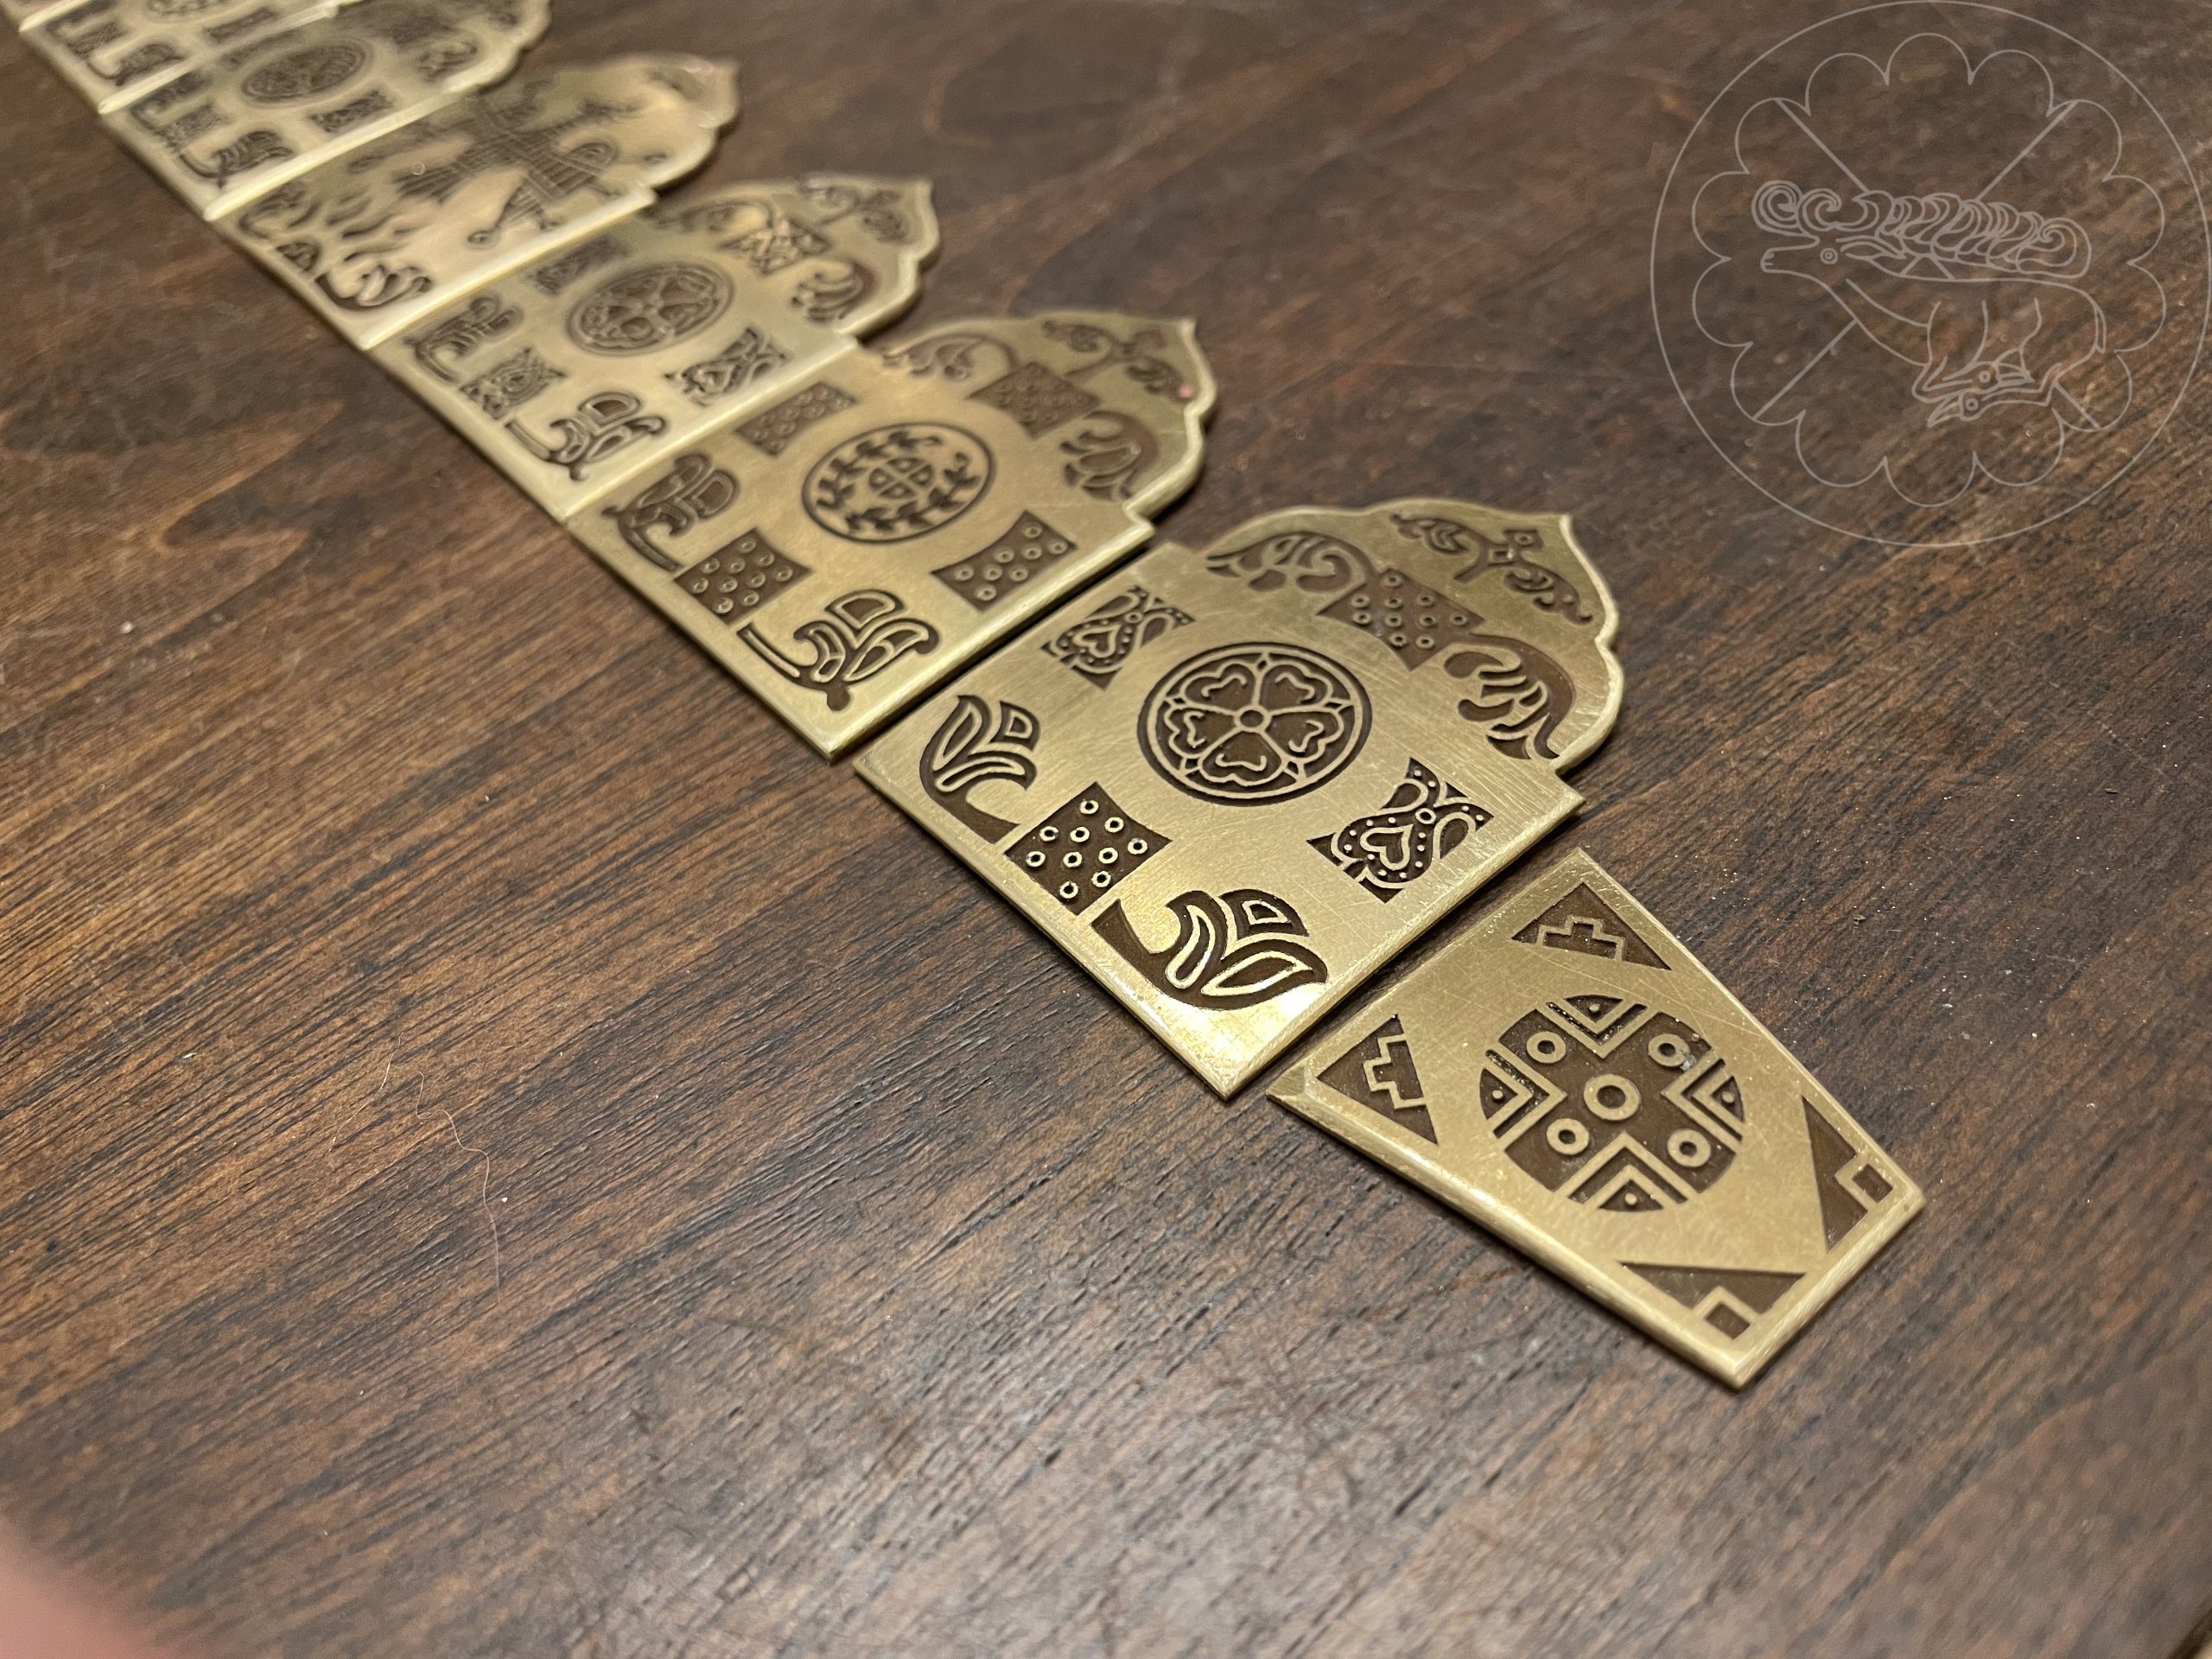
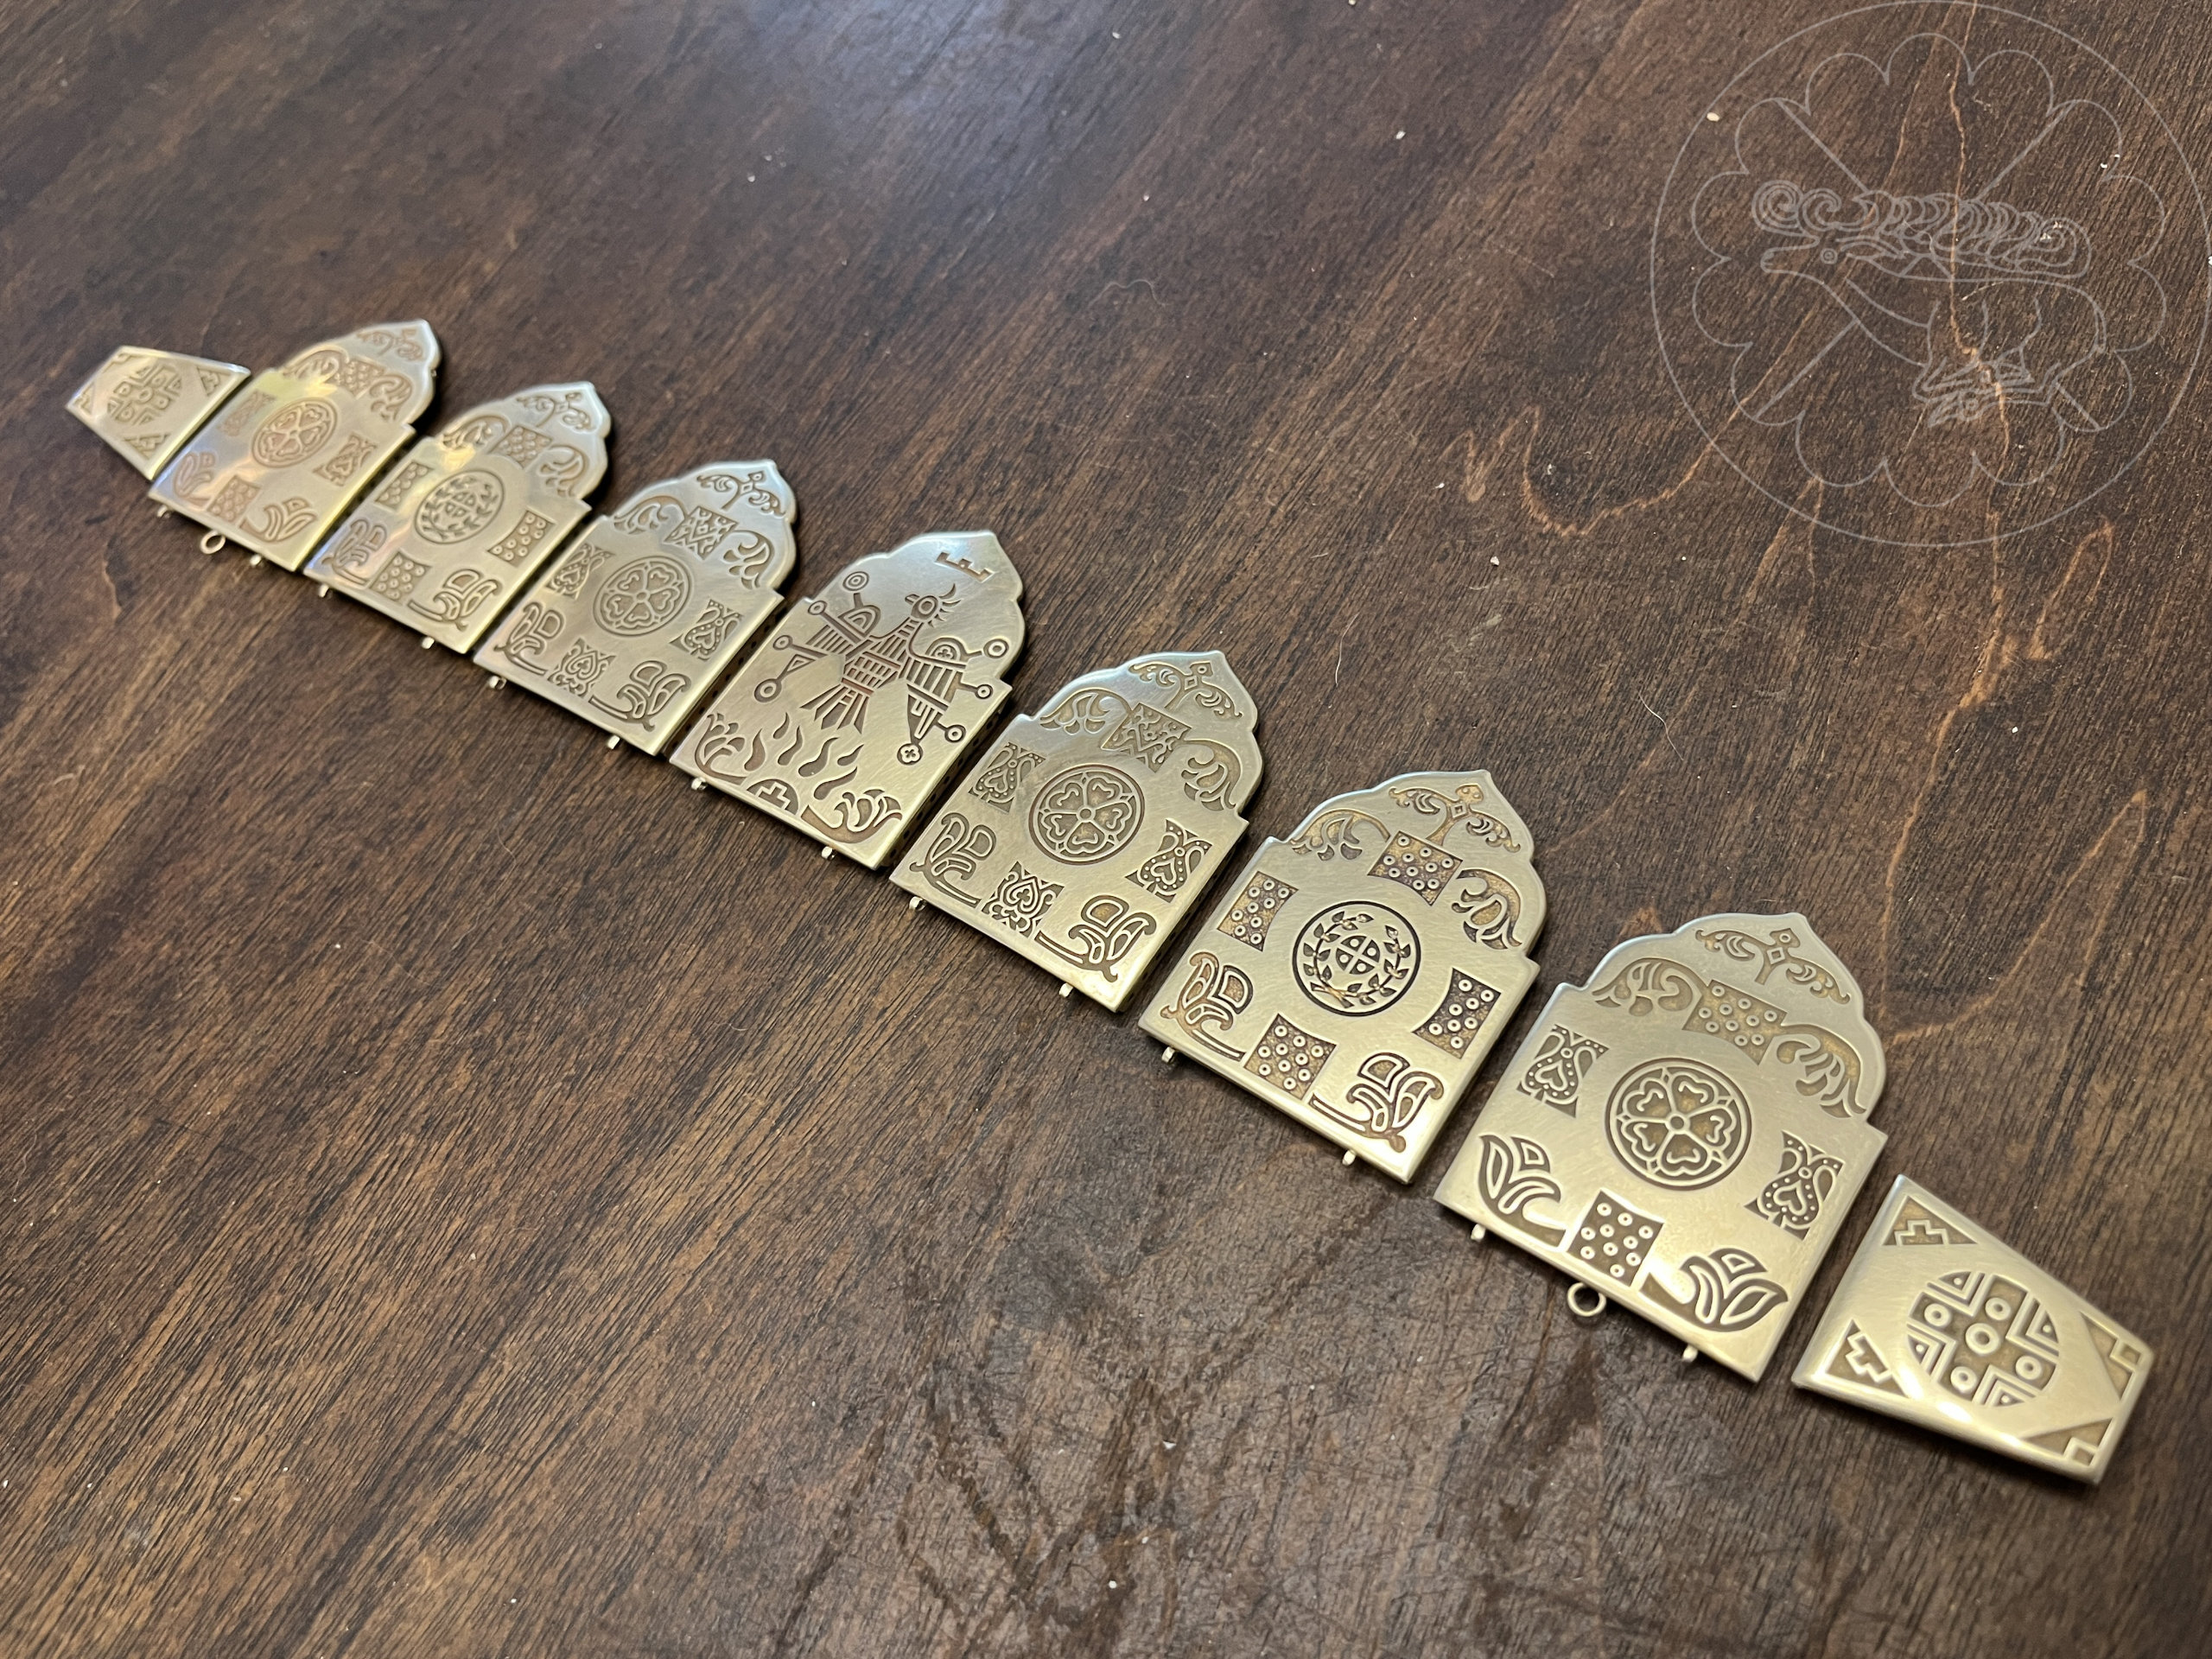
My initial art was hand drawn then scanned and printed for the earlier photo-etch attempts. For the laser engraving, I wanted to have much finer control over the design, and so I scanned the initial art and converted it into a vector file using Inkscape. From there I spent a long time refining the vector images, first for the kolti, then after they were made, for the diadem. Once the vector images were completed, I converted them to pdf at the proper size for engraving. I made 4 separate plate designs, so that each kolt would be subtly distinct from the other. I included the outline shape of the kolt in a thin line which would be etched along with the deep pattern to use as a cutting guide for the etched pieces.
Since I didn’t know how precise the thickness of the etch would be, but wanted at least 0.5mm depth, I chose to use 16 gauge red brass, with an overall thickness ~1.3mm. Heat dissipation can be an issue with laser etching, and I thought that the thicker metal would be safer to both prevent warping and ensure there was still sufficient backing after the etch. In retrospect I could have used a thinner material – 18 gauge at least – and still achieved excellent results with lighter weight on the final piece. The final weight of an the individual kolt was ~56, significantly higher than the extant pieces (which are listed as ranging from ~14 to ~40g from various sources – astoundingly light) even though they are gold, a much more dense material. This is due to the fact that they used significantly thinner material to make the kolt discs. If I had used 18 gauge, the weights would be down ~20%, and with 20 gauge they would be down ~35% though at this thin, the depth of the etch may become an issue.
When I had the first piece test-etched, the etching achieved a depth of ~0.6-0.7mm depth with very fine definition.

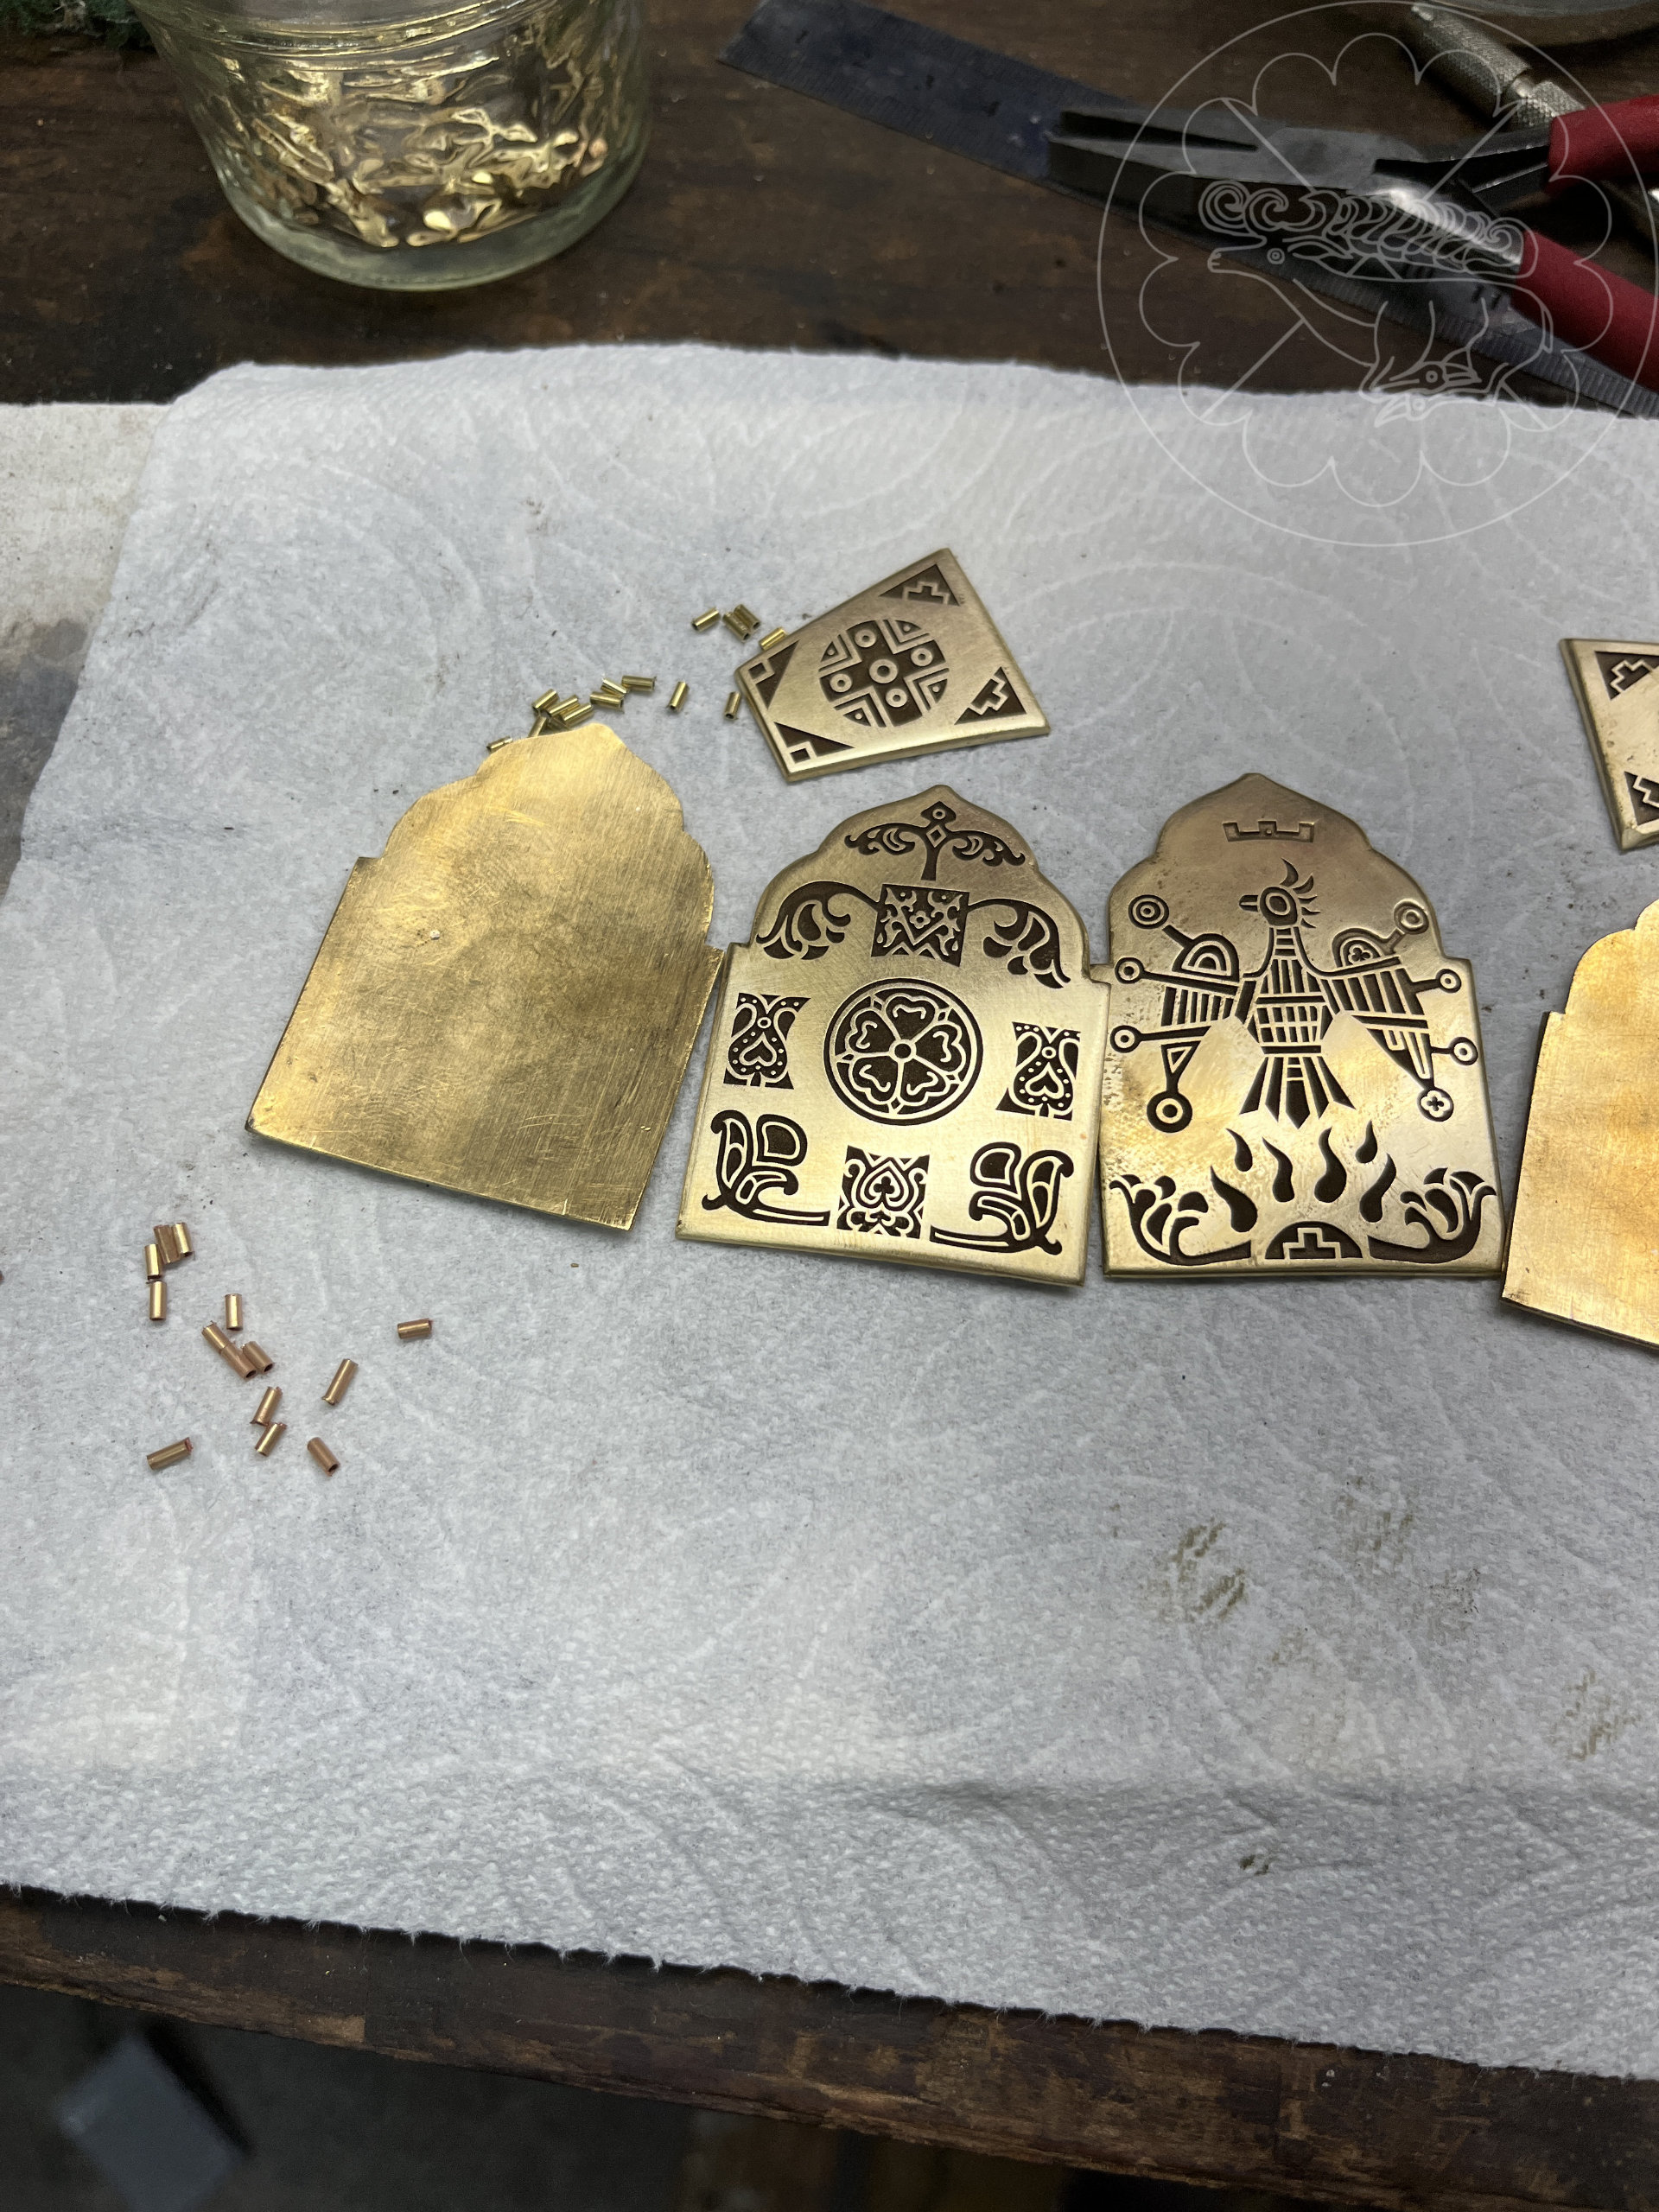
With that, I had 6 plates etched – 4 for 2 complete kolti, and an extra set as a spare for practice or use if I made any mistakes in the fabrication. The resulting cut plates were beautiful, the etching looked great.
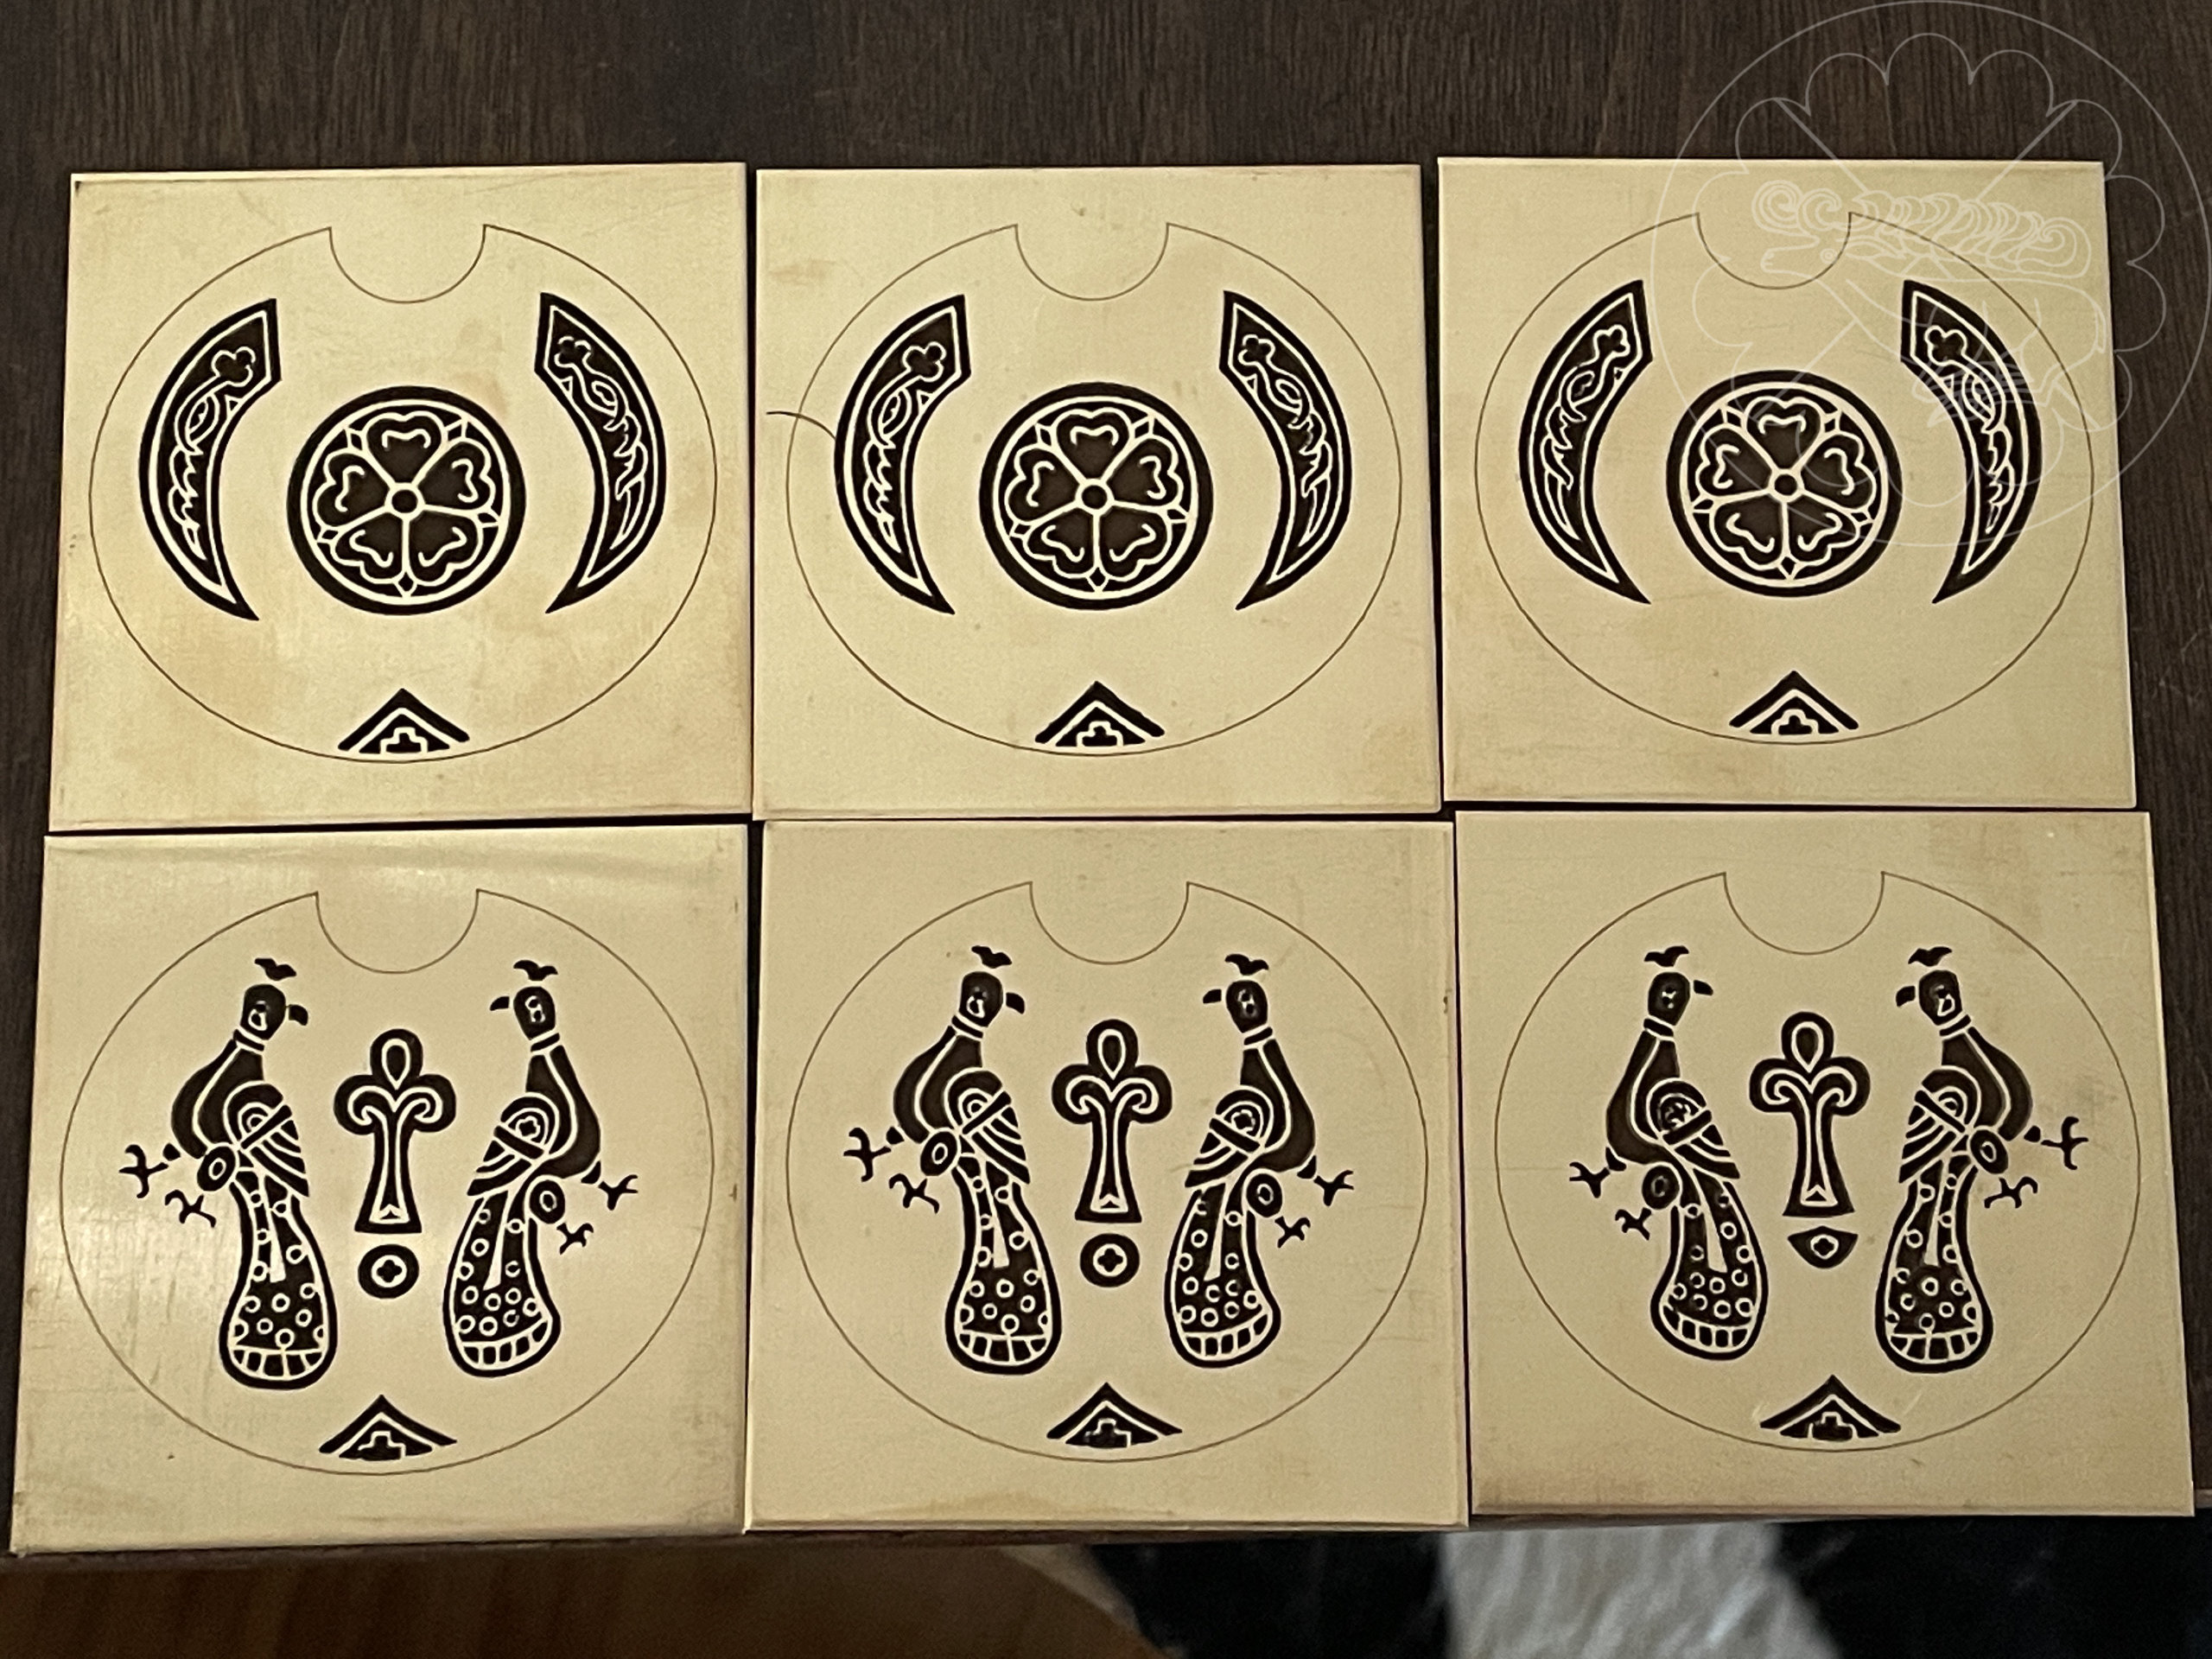
Some of the detail looks blown out in the photos, but that’s just the black oxidation from the laser that put some soot onto the edges – it didn’t affect the detail and came off when the pieces were subsequently processed, will be seen shortly. Now I just needed to figure out how to put them together and enamel them.
Overall construction followed the construction assembly shown in the diagram above.
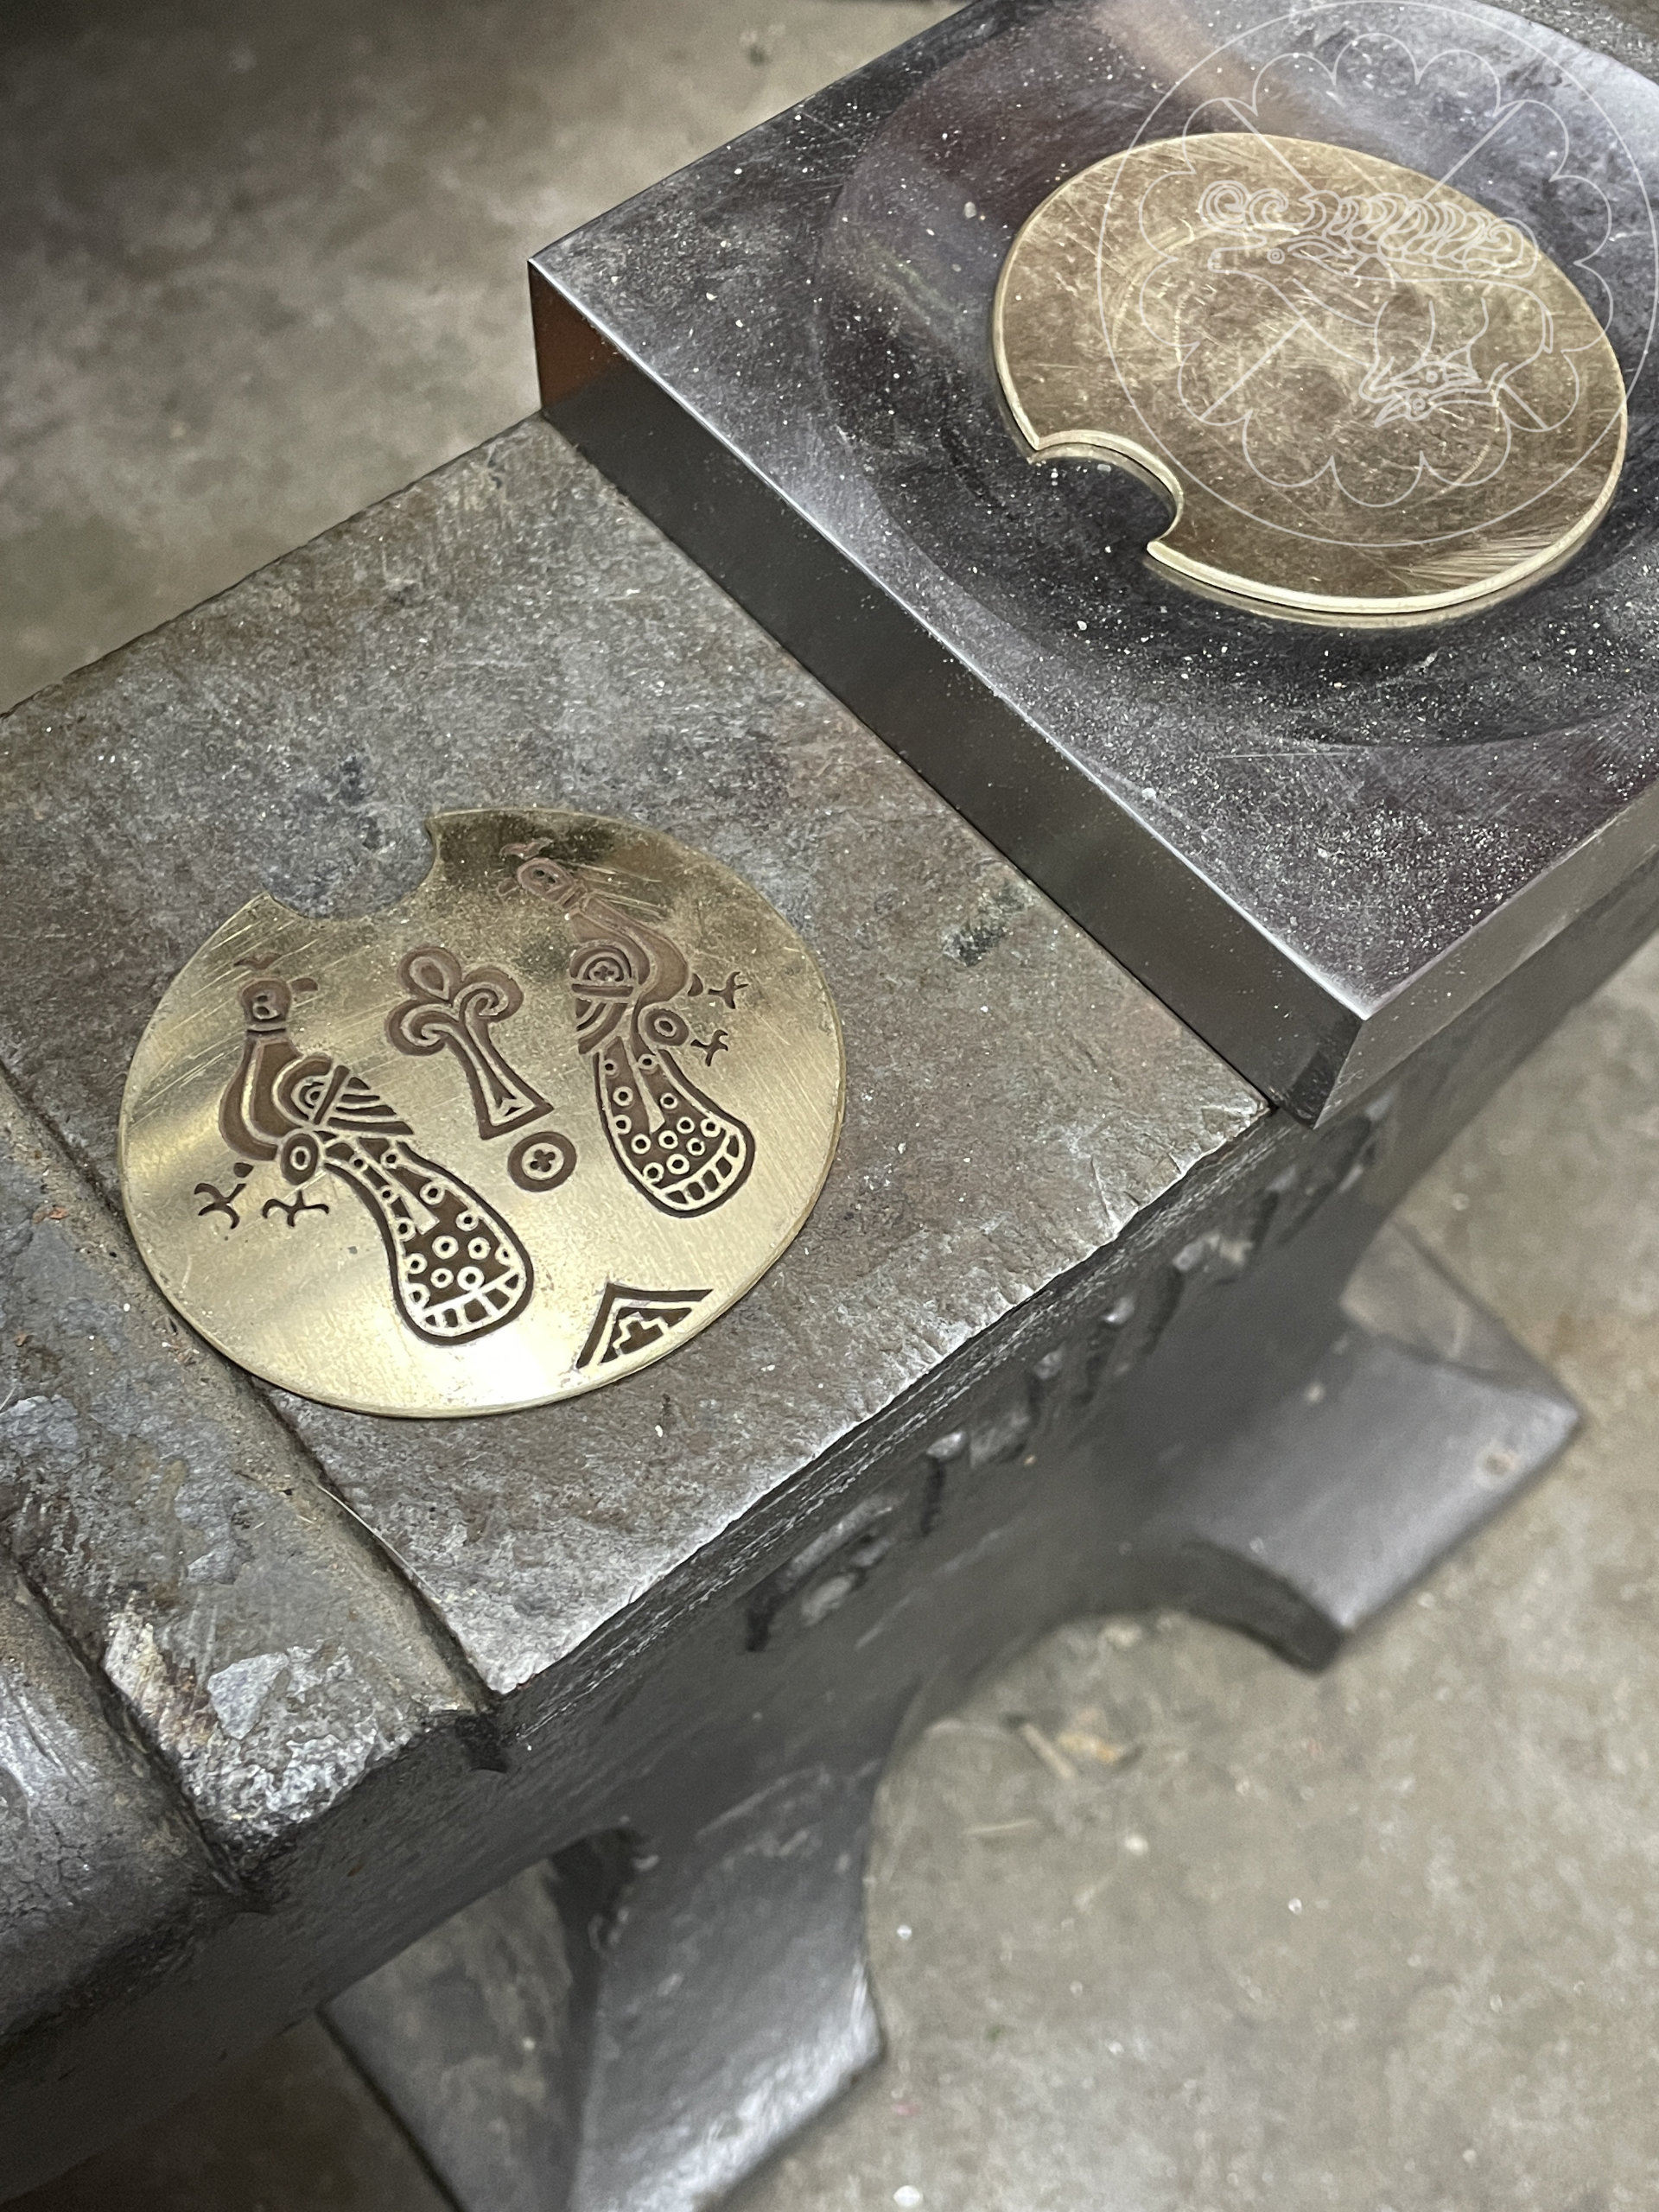
With the etched pieces in hand, first the discs were cut out with a jewelry saw along the laser marks.

The discs were then dished.
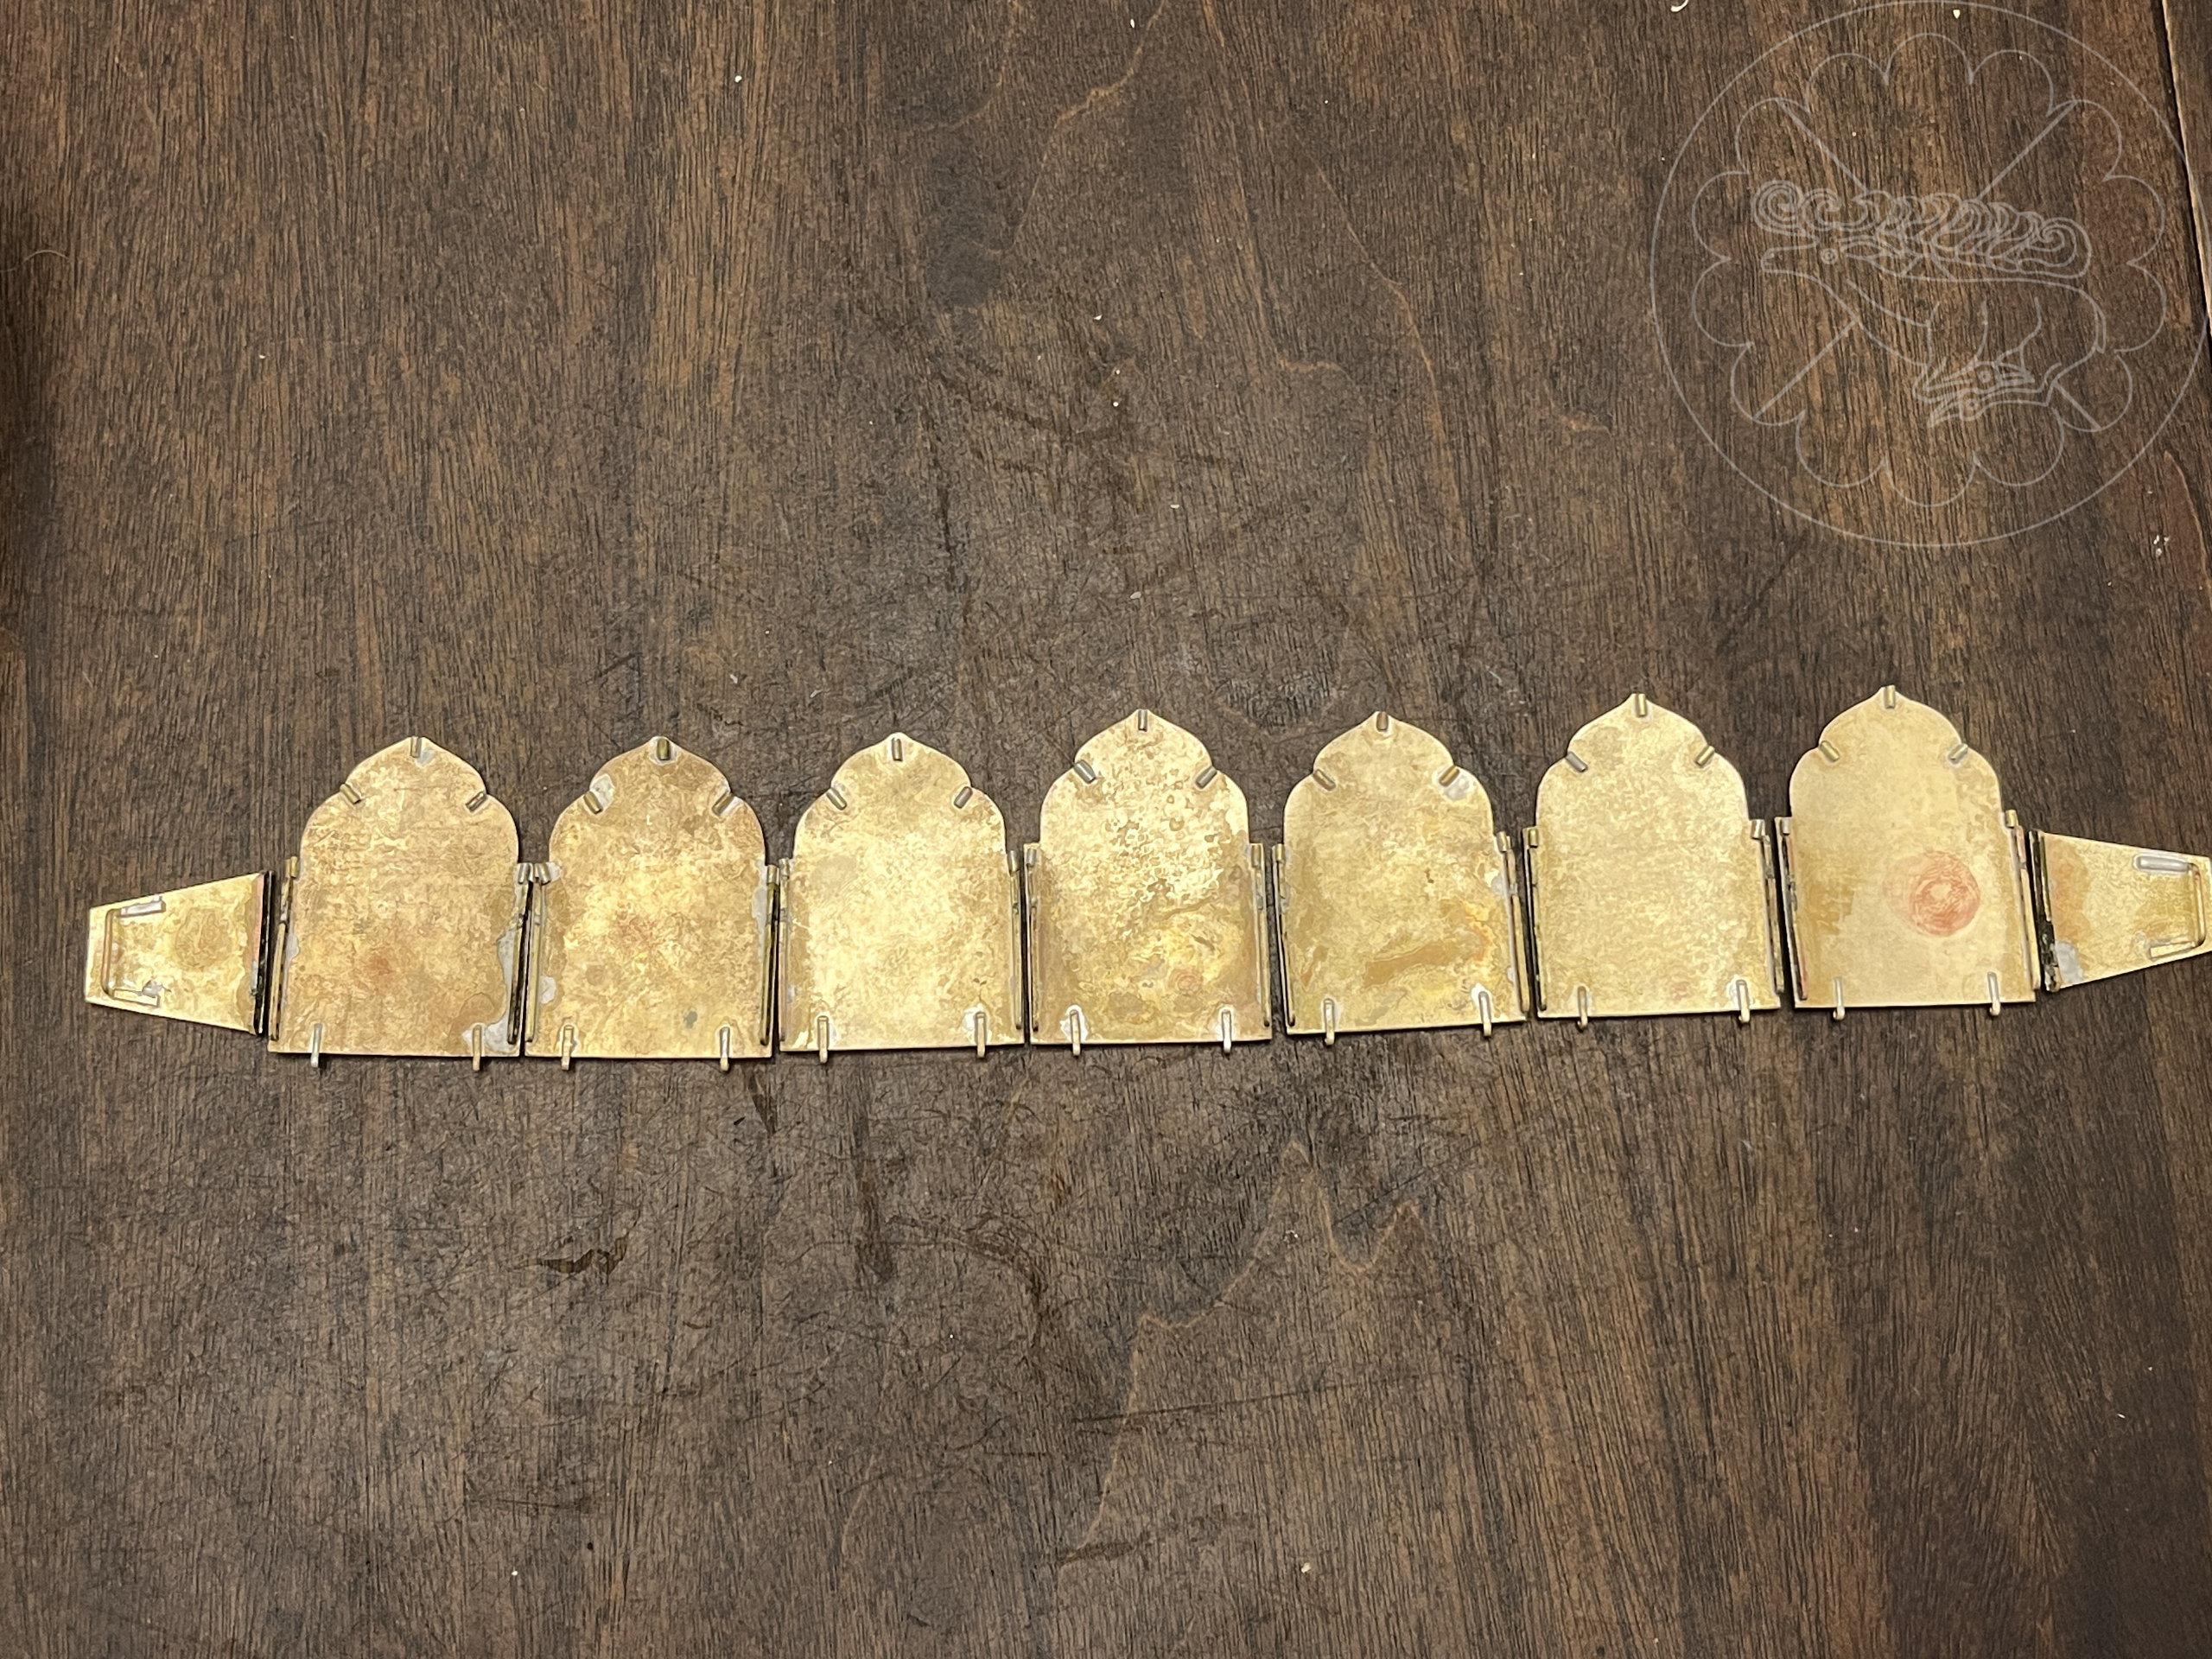
A spacing ring was made from 3/16” wide 26 ga. brass bezel wire to hold the halves apart. First roughly, then with detail at the top edge added.
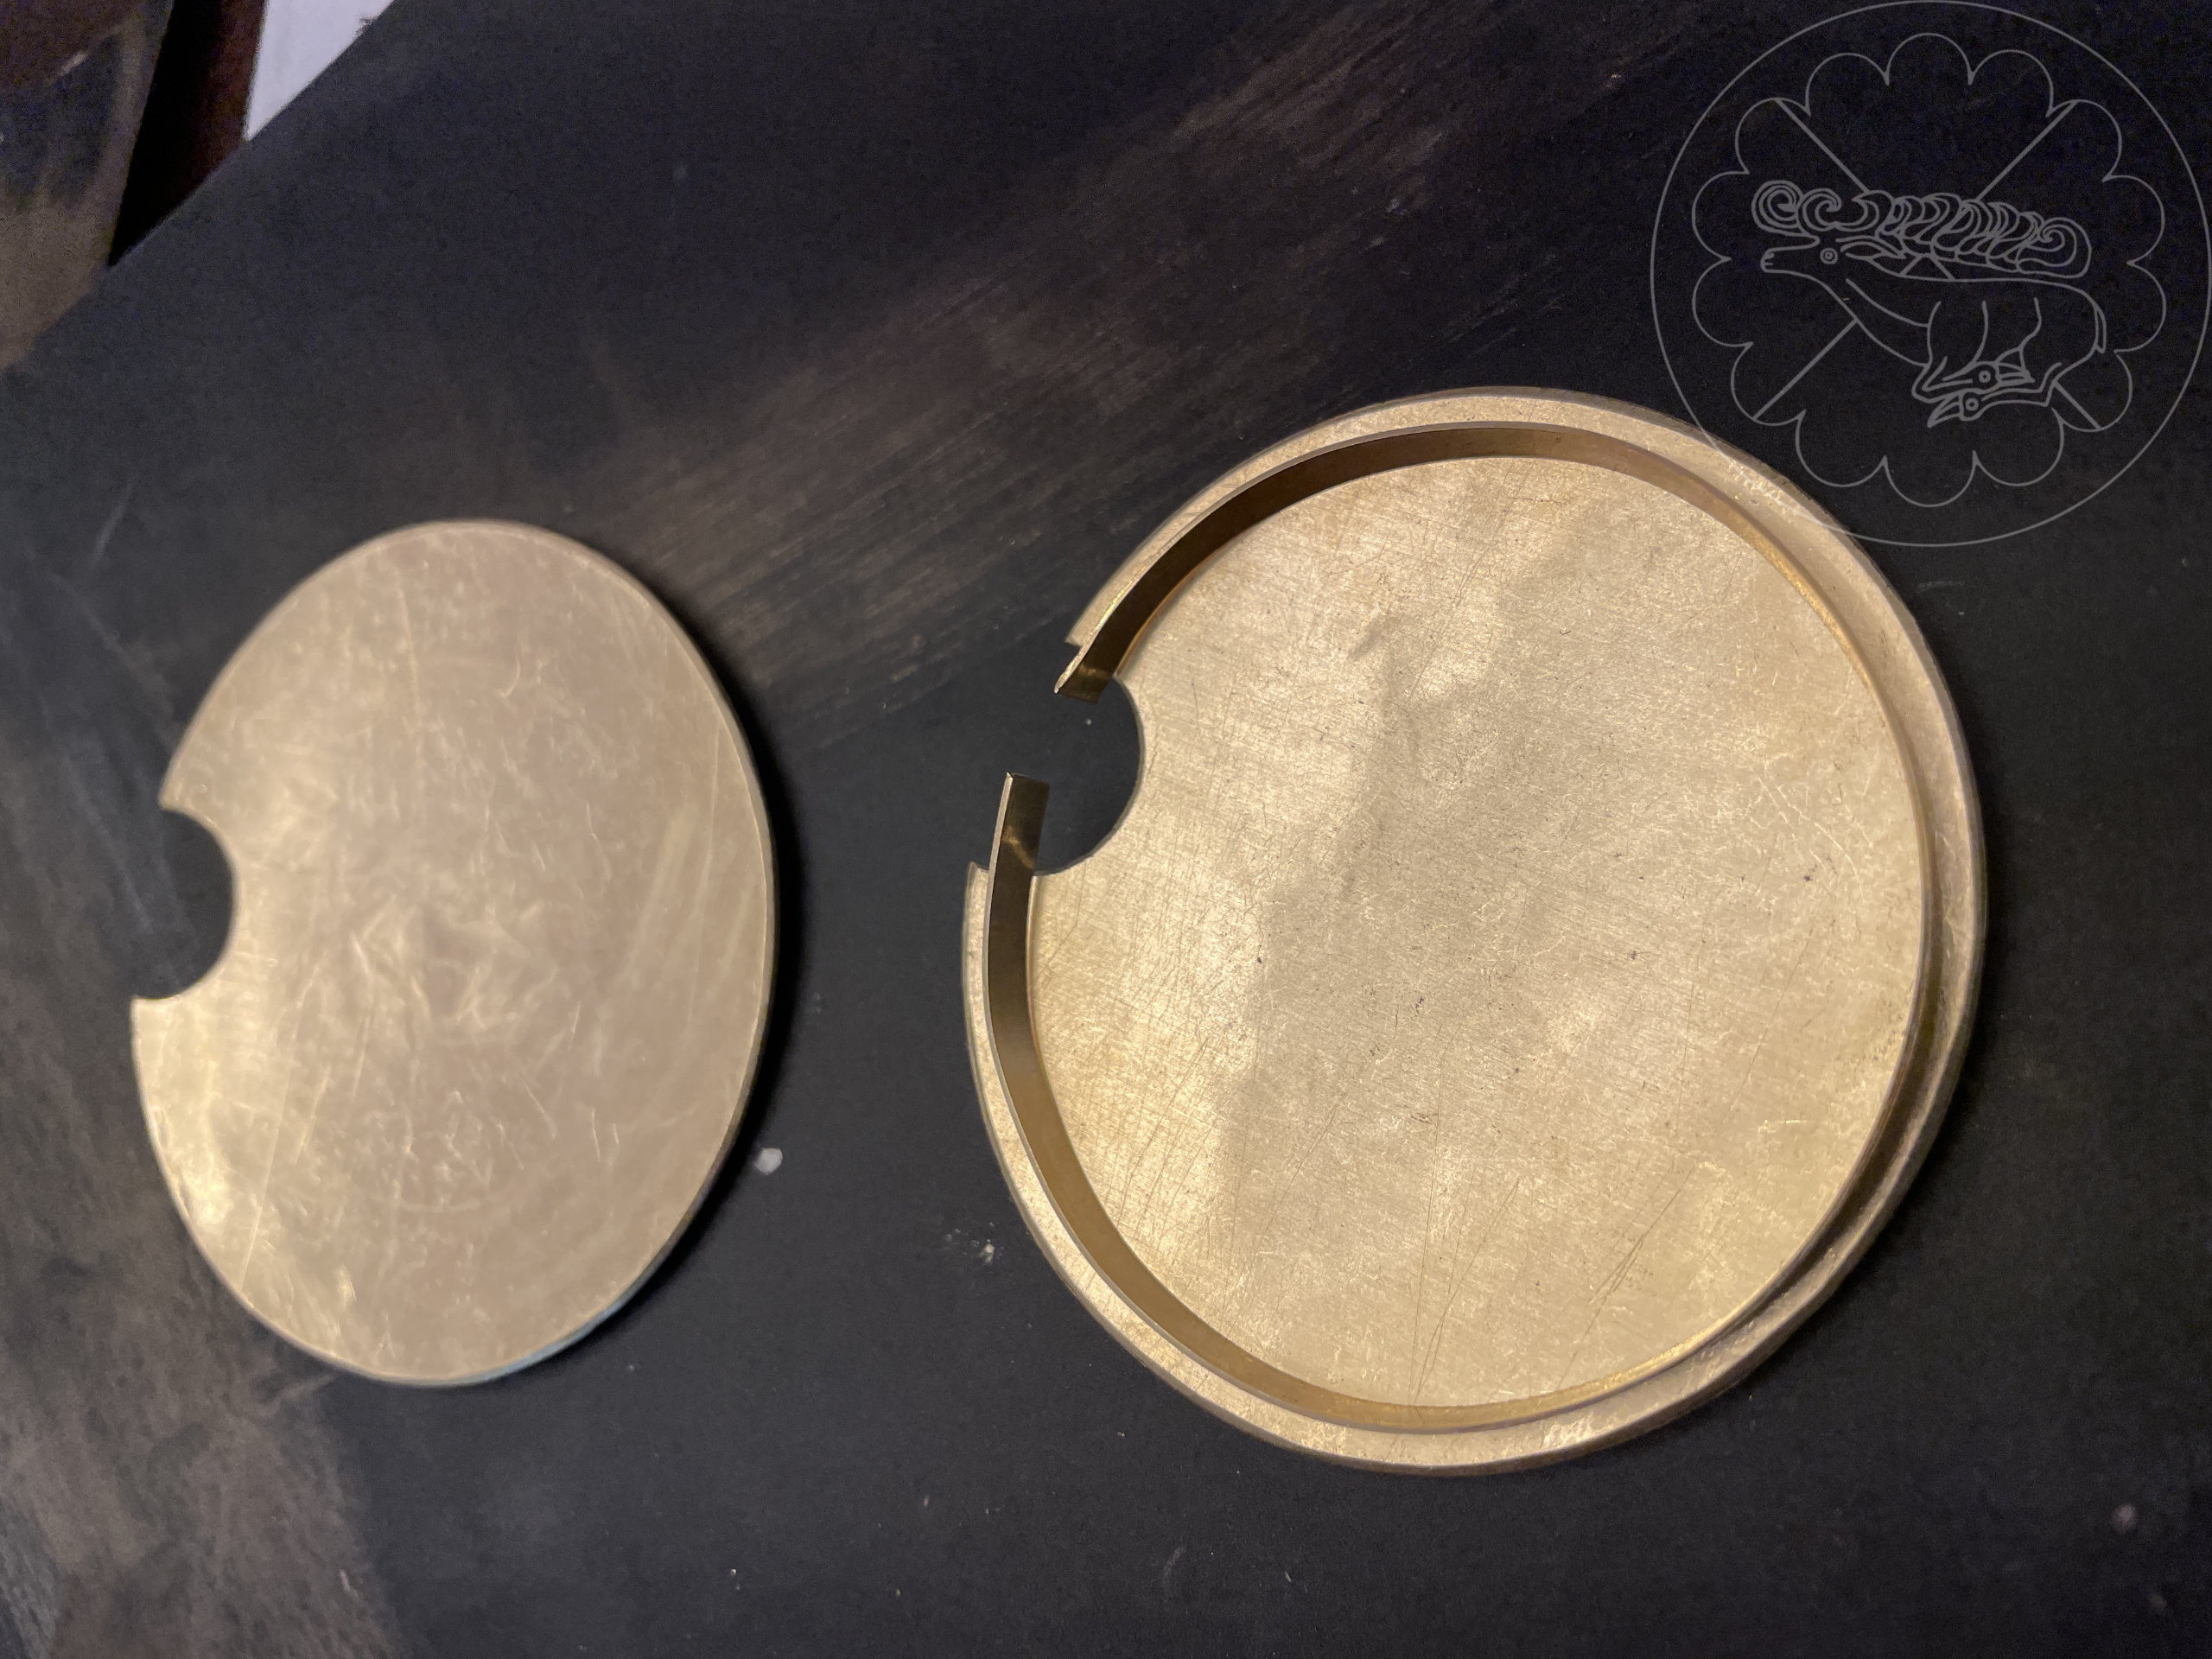
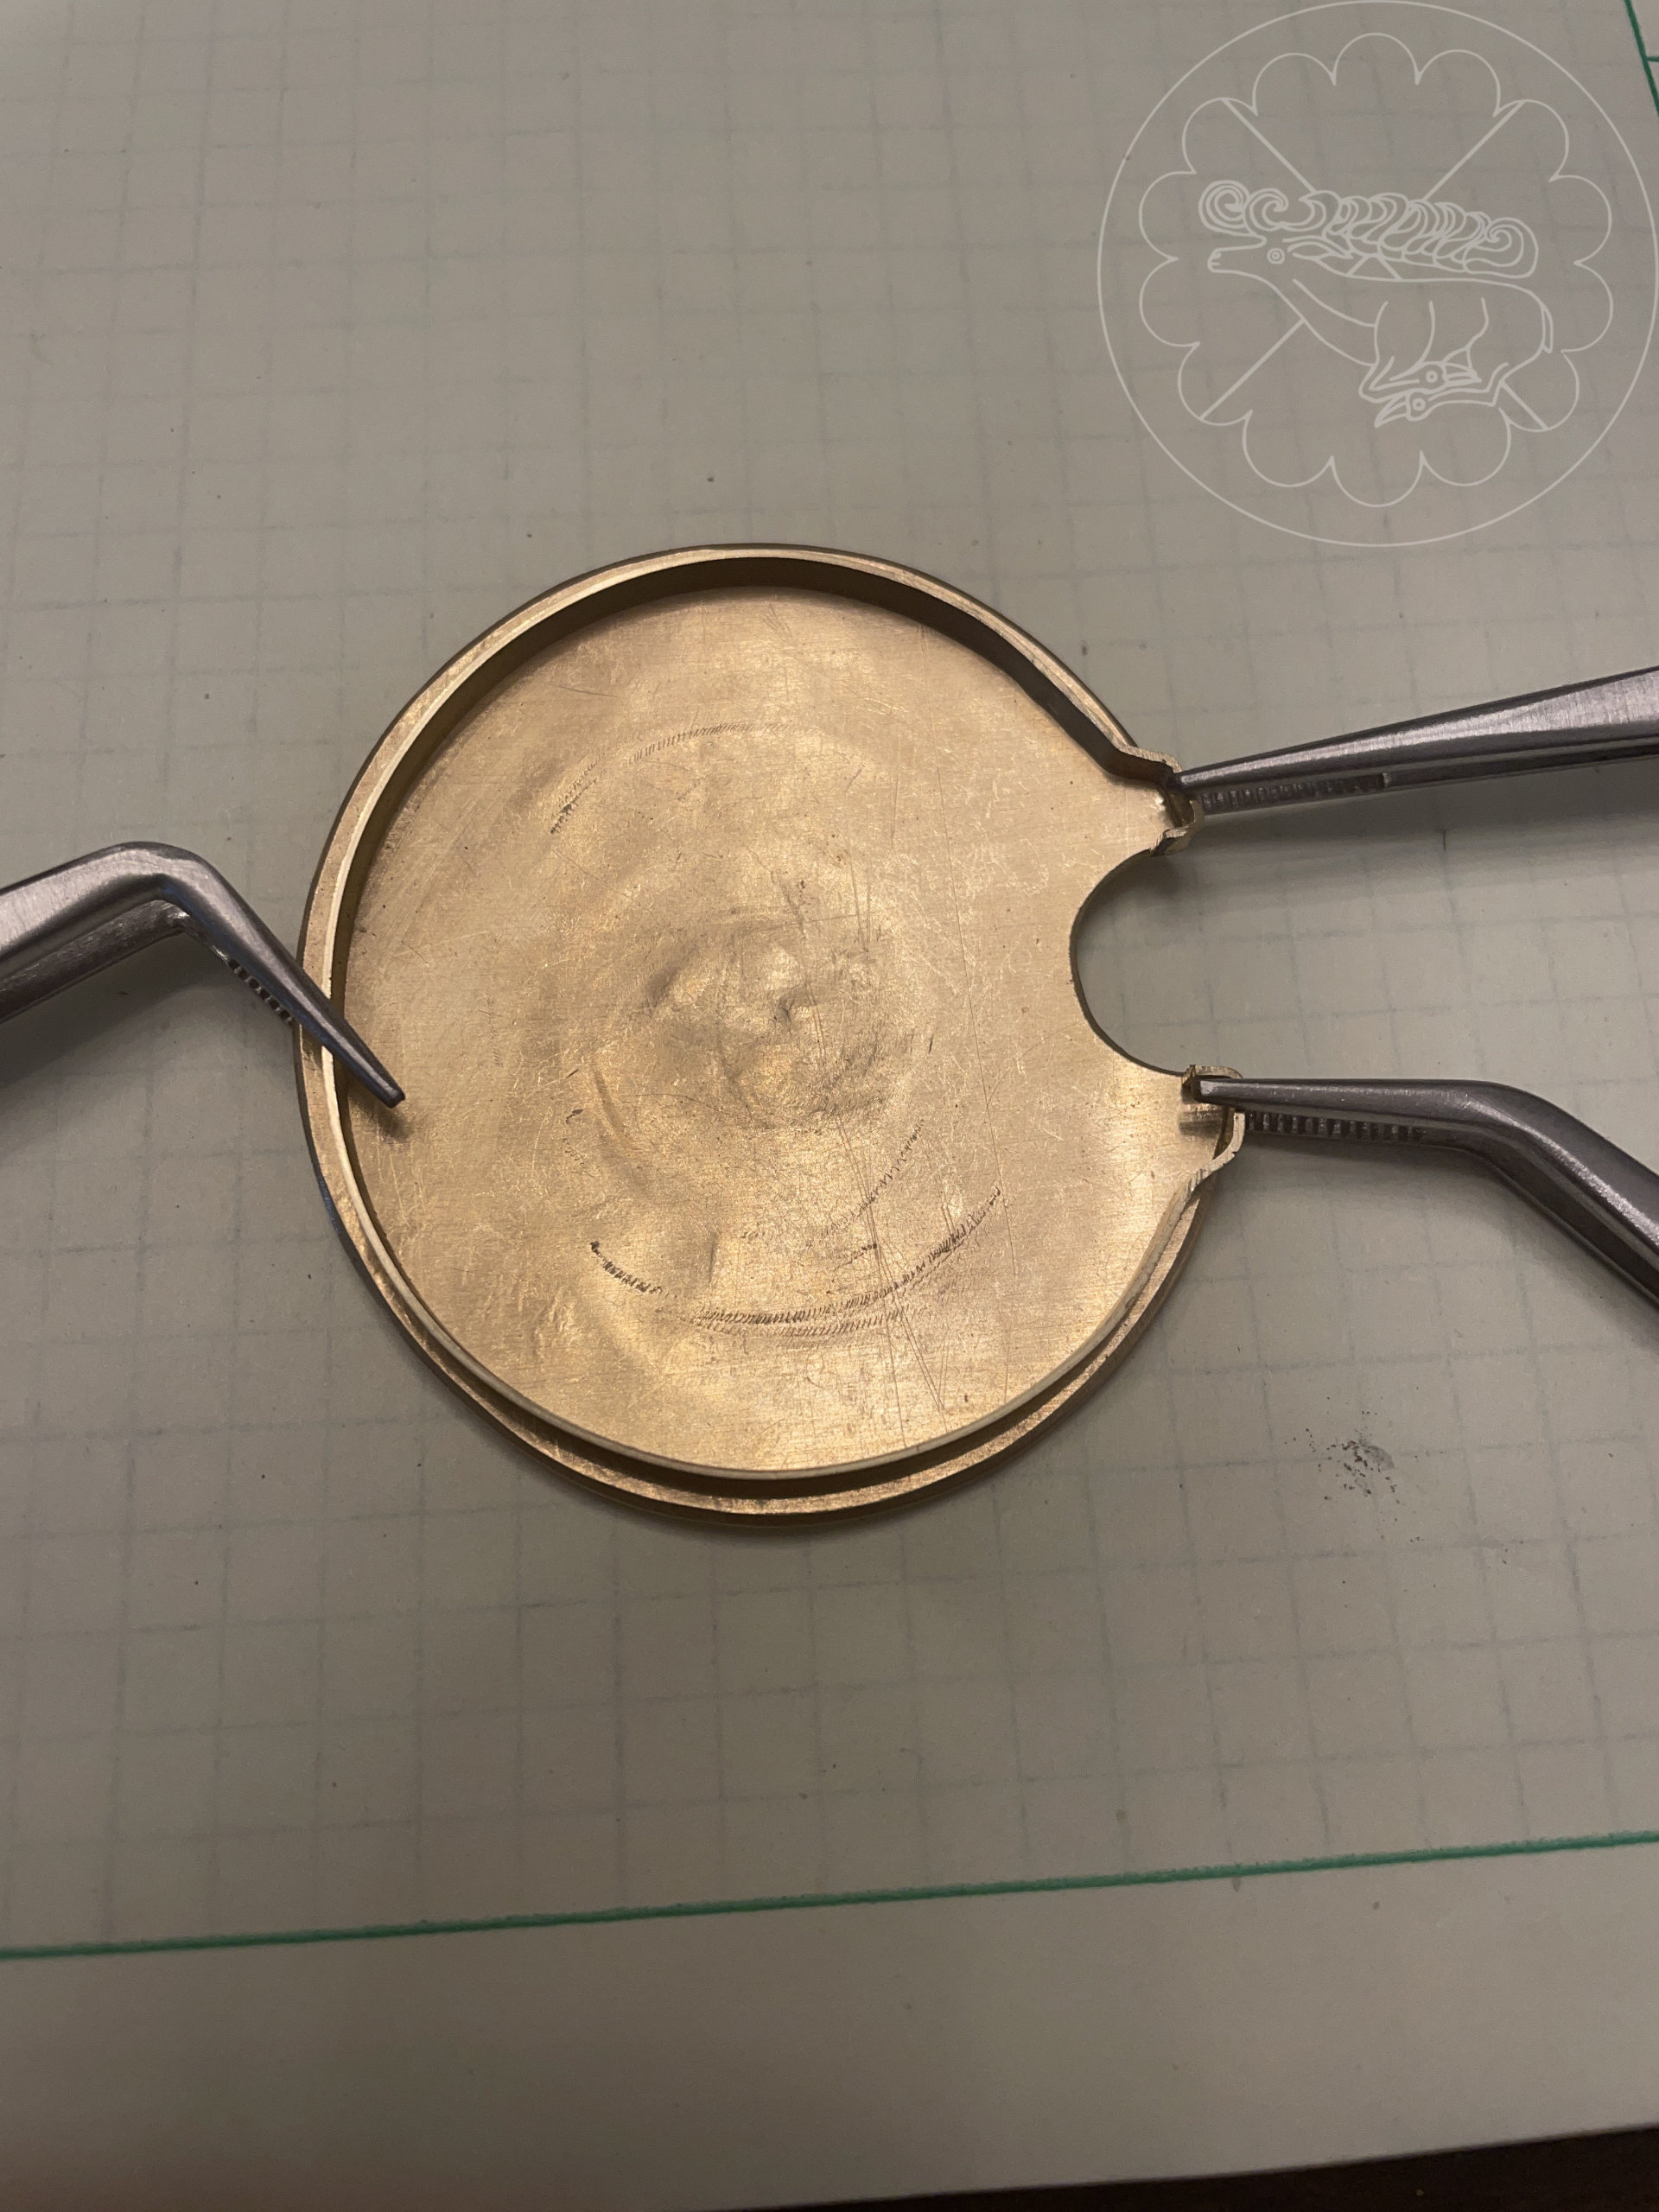
The bezel spacer was then soldered in place on one side and then the other disc was soldered to it.
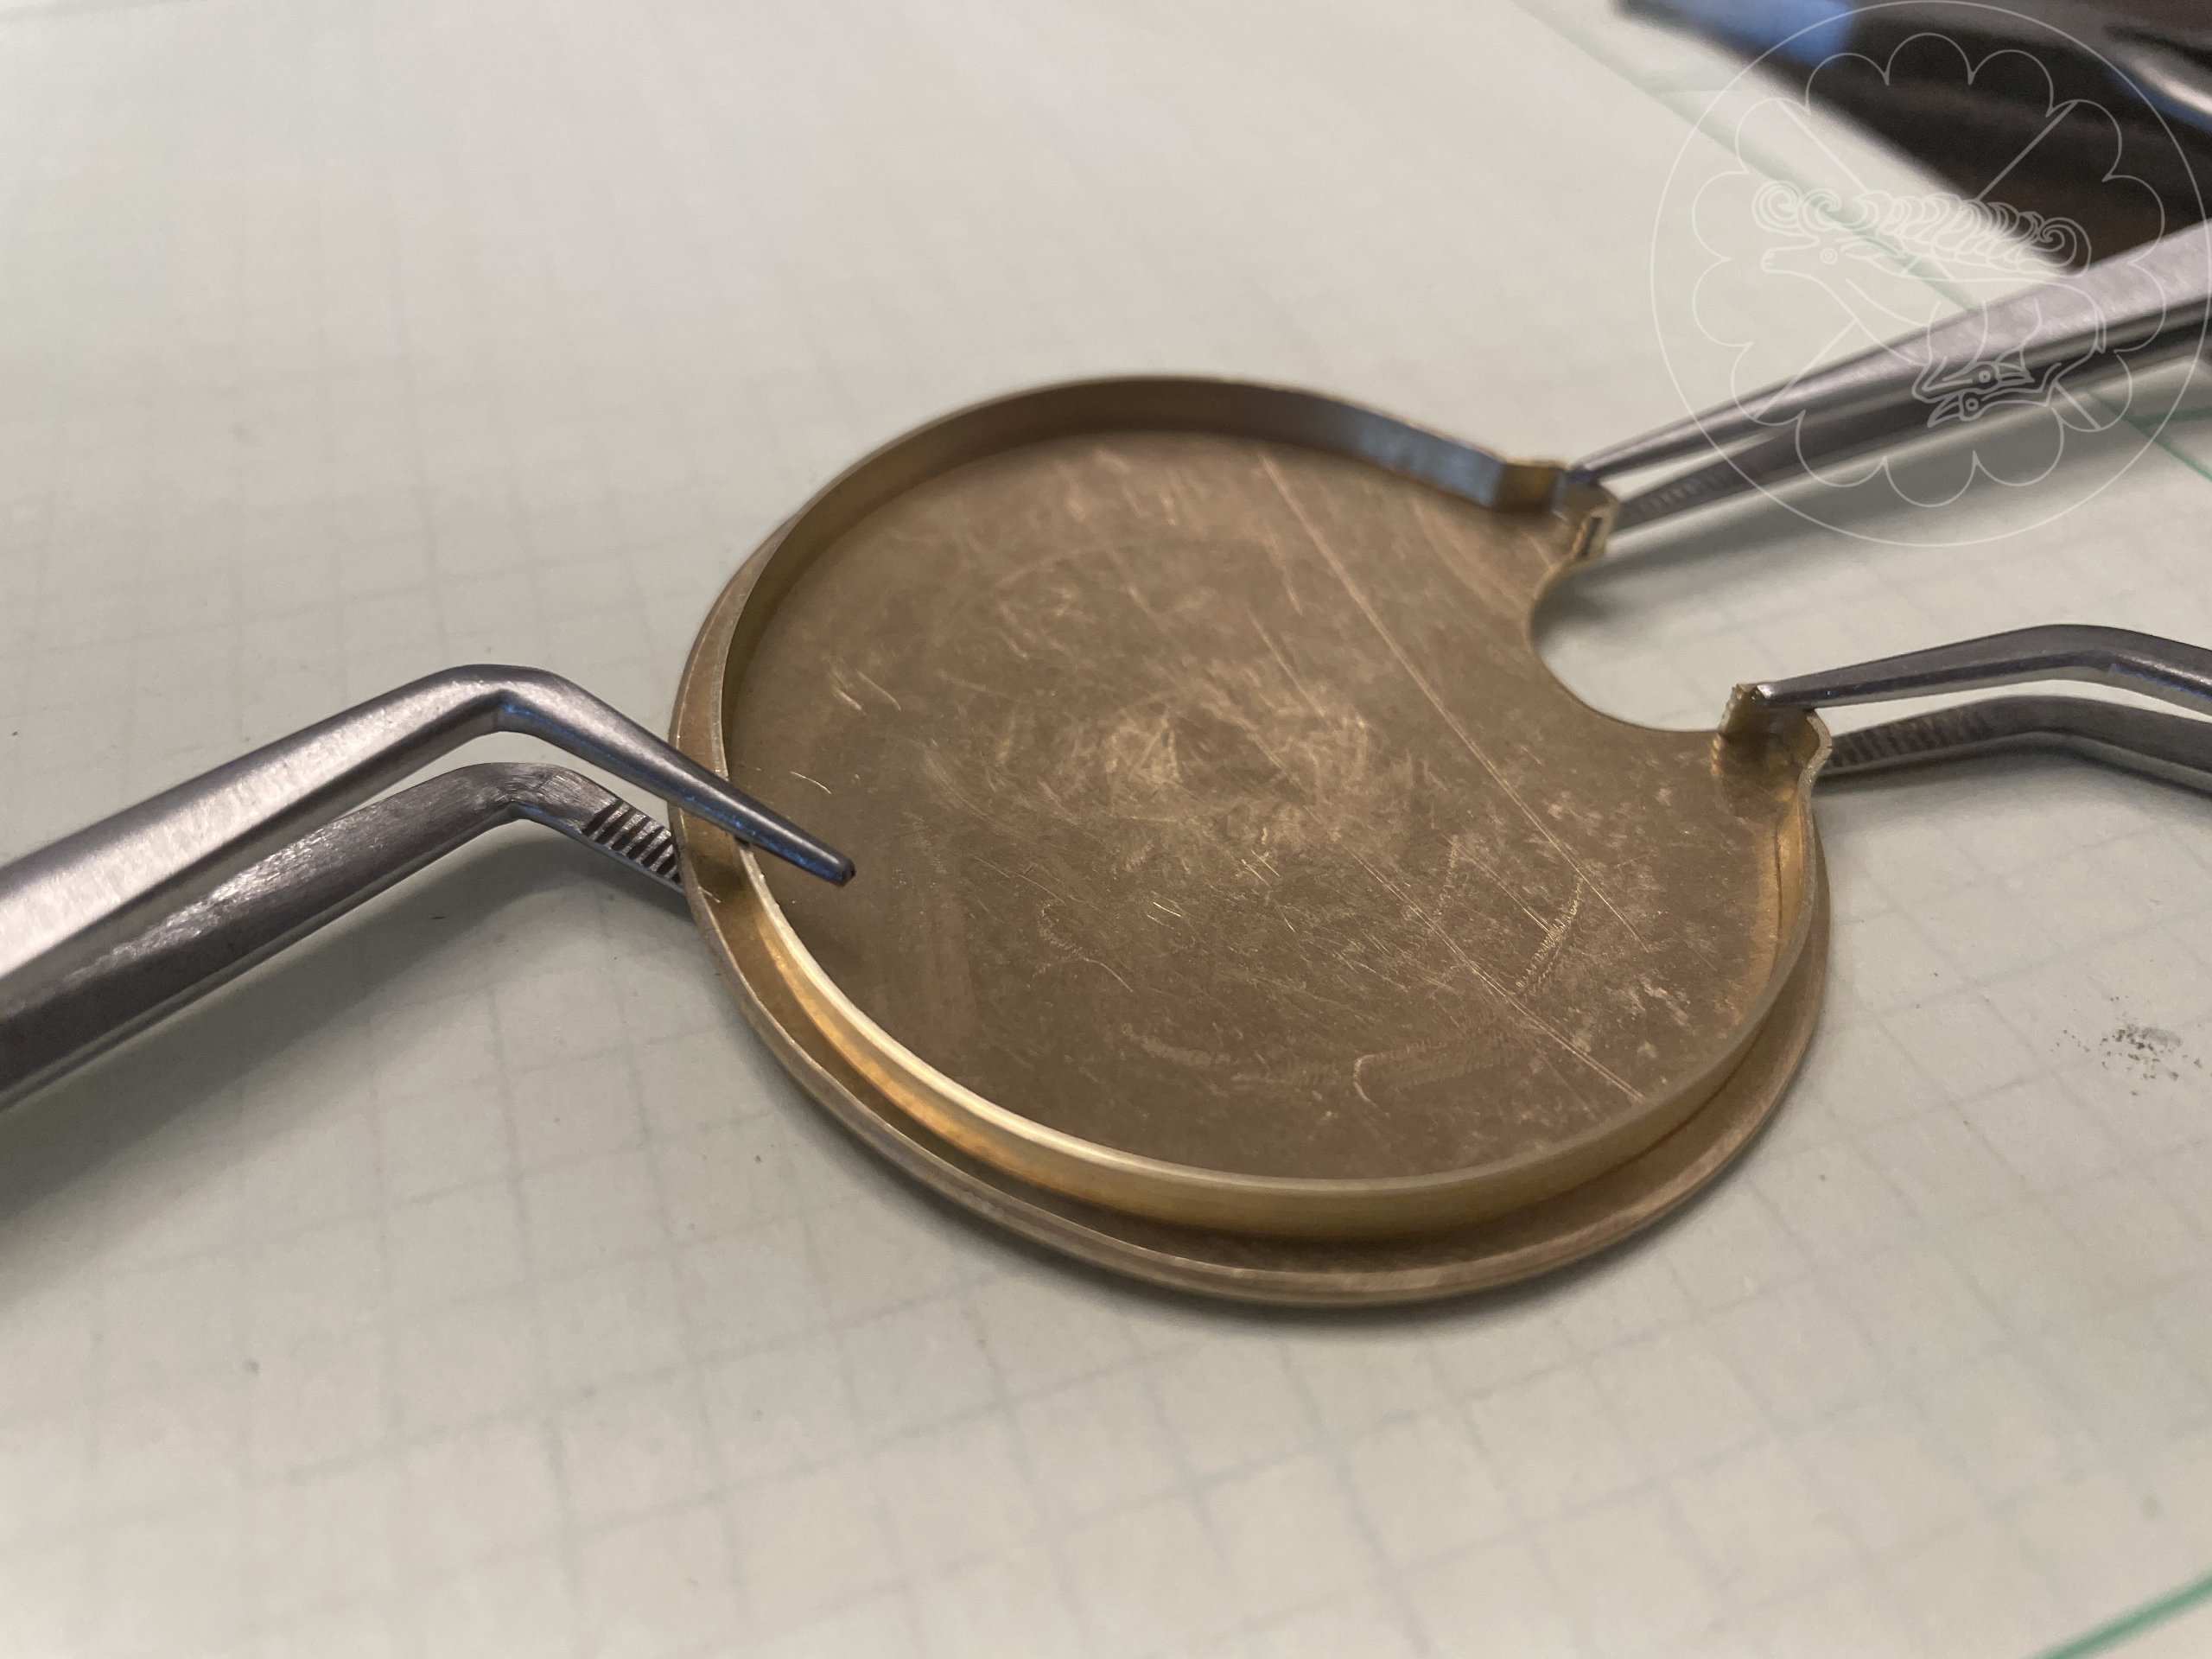
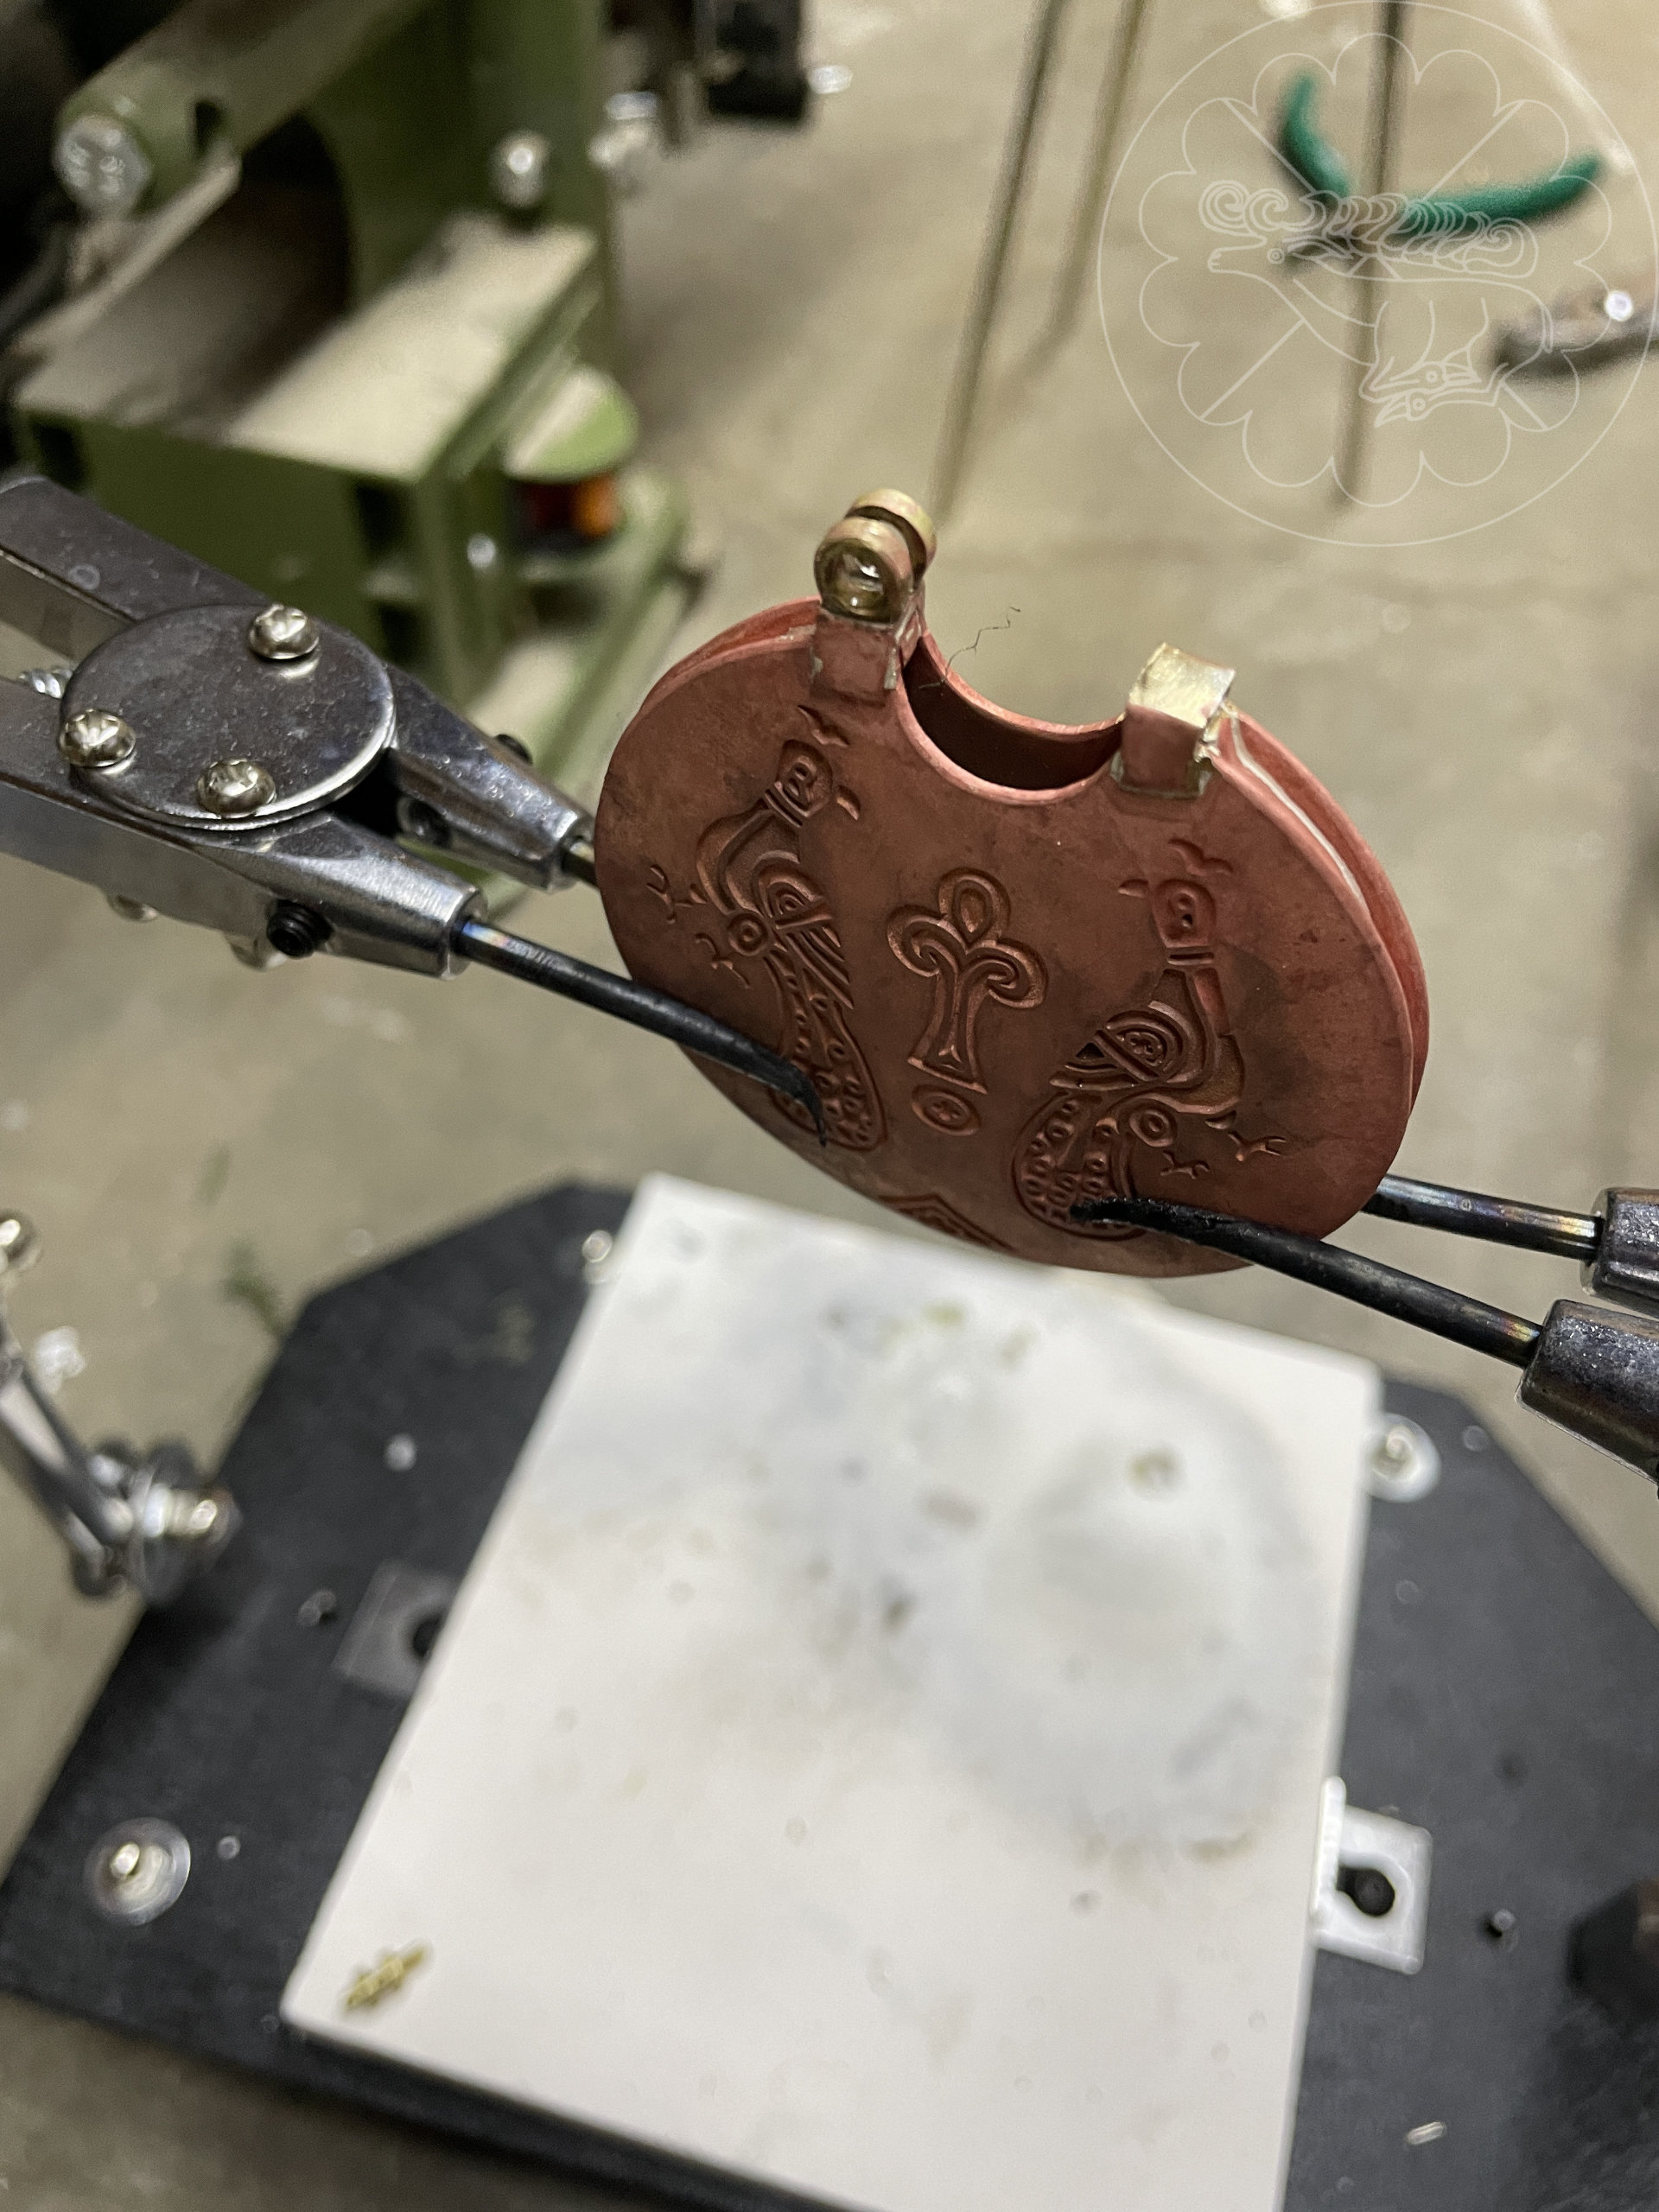
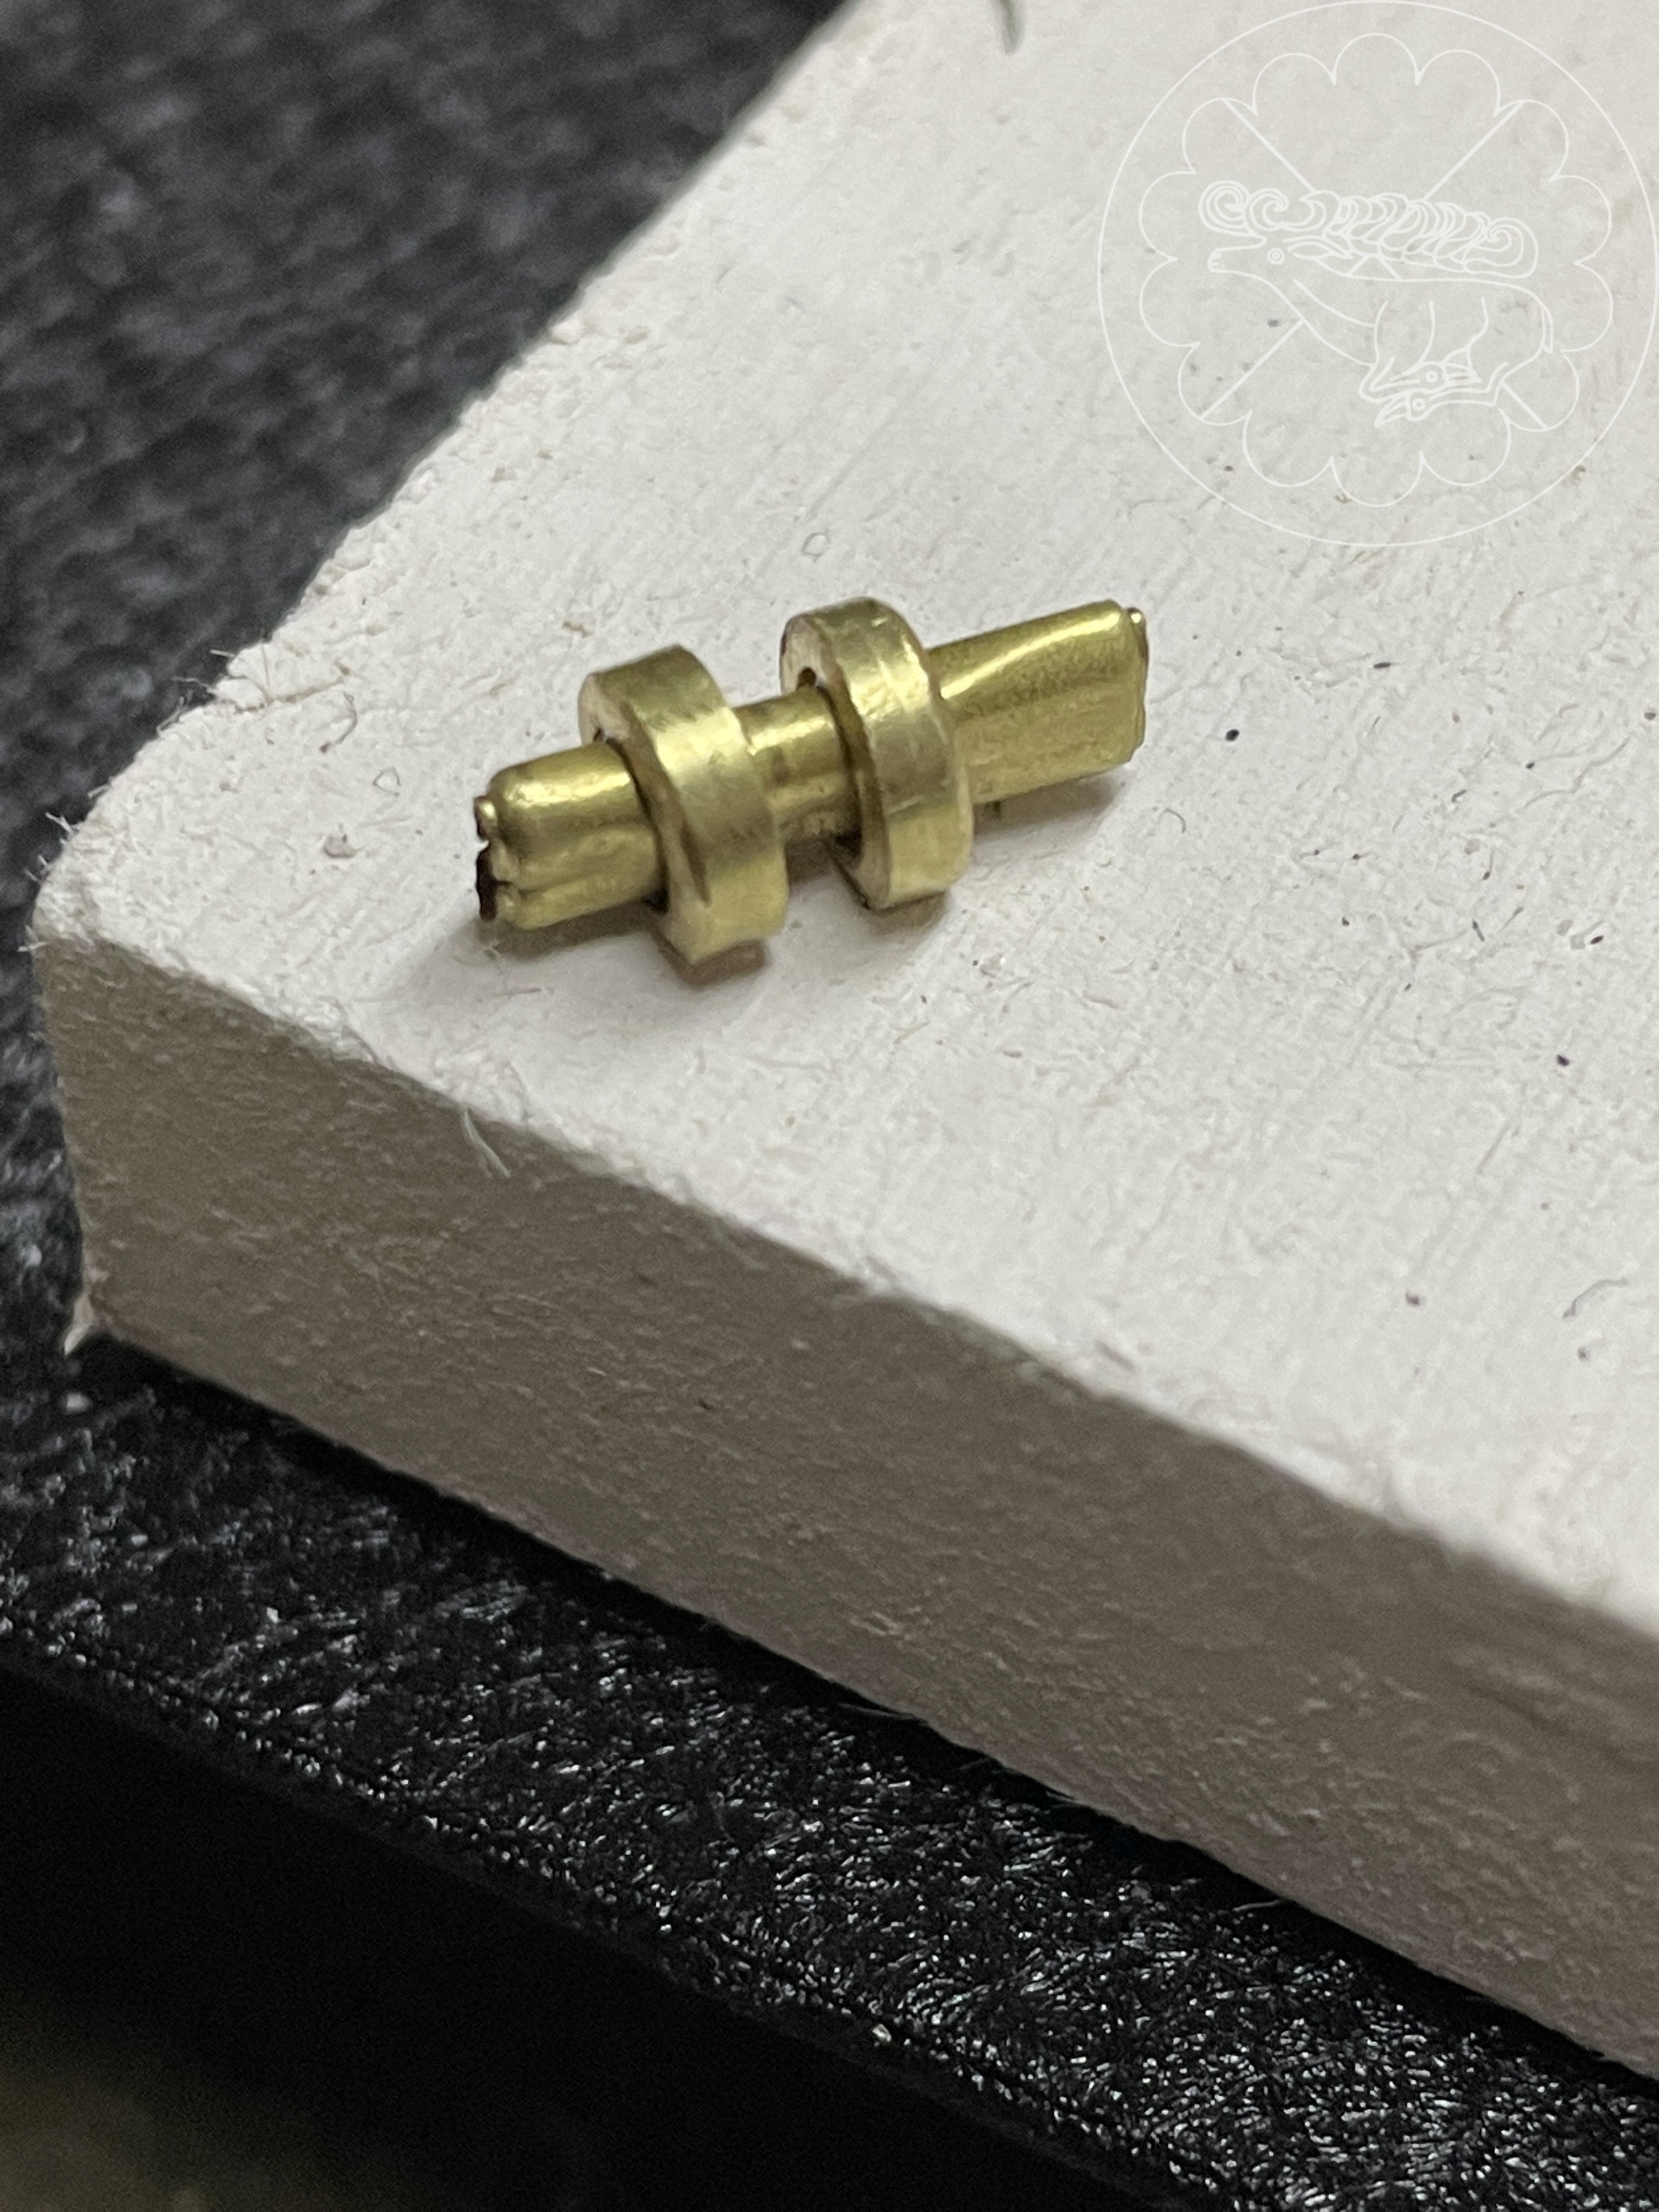
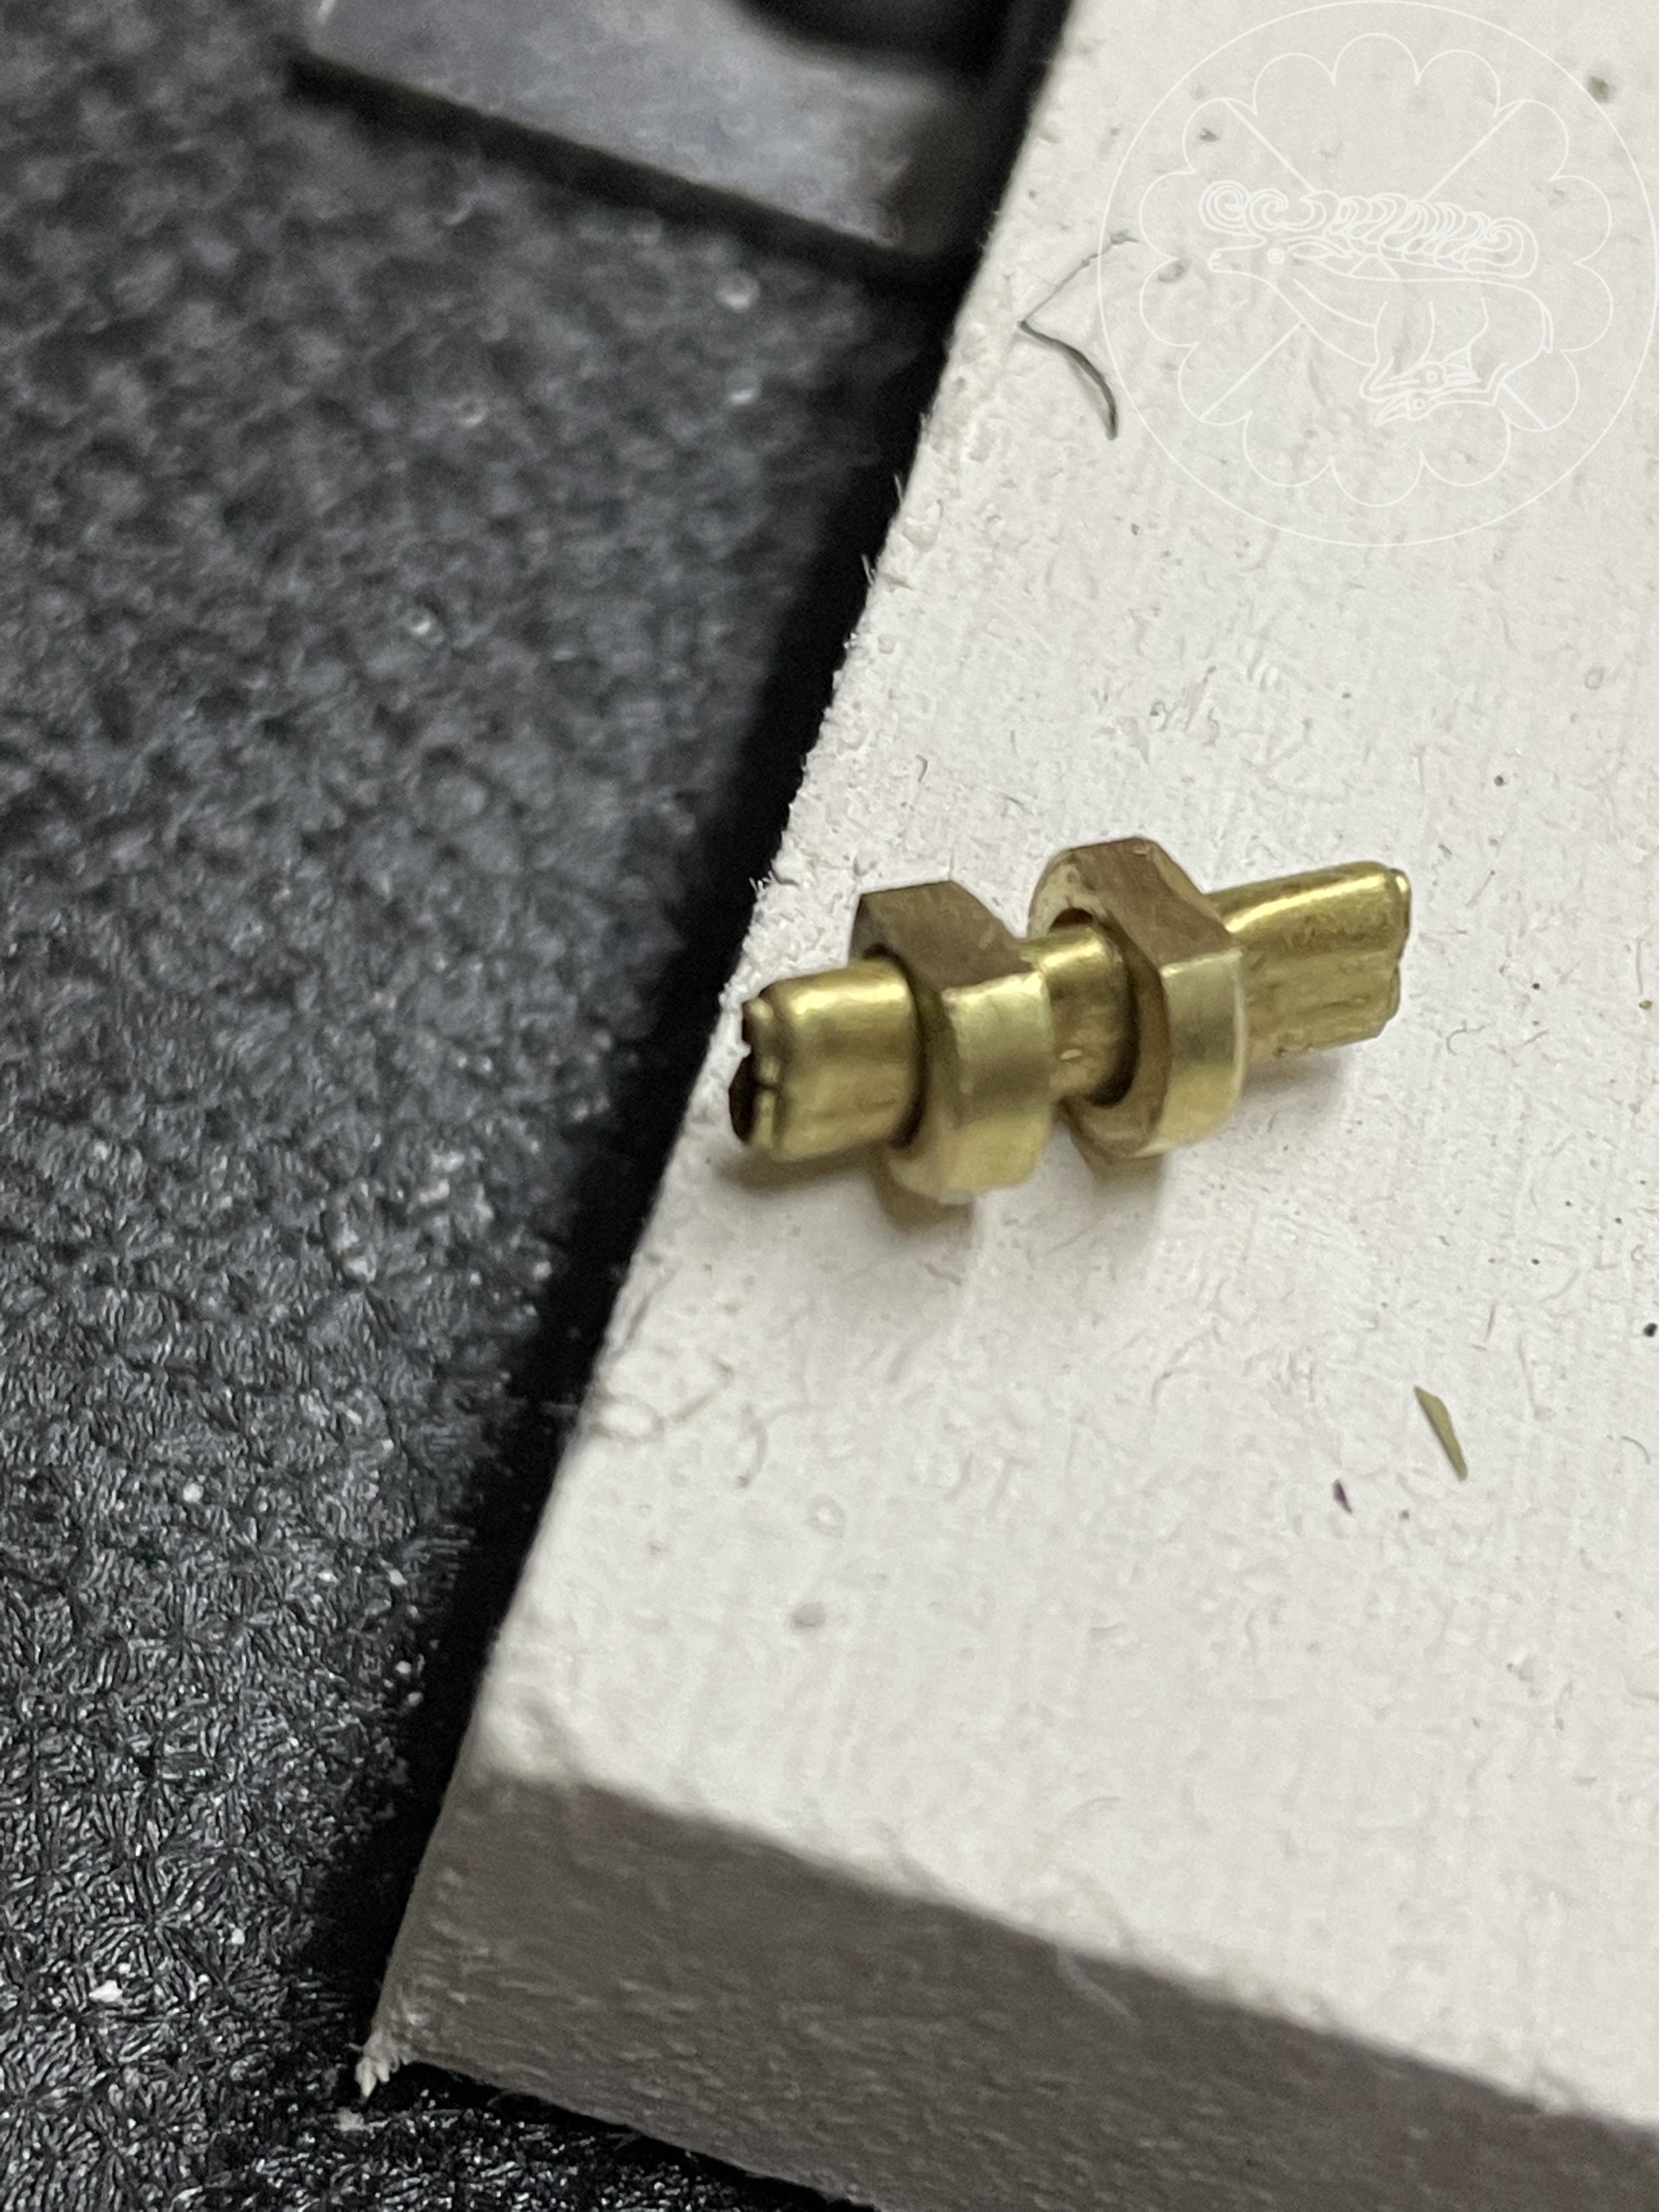
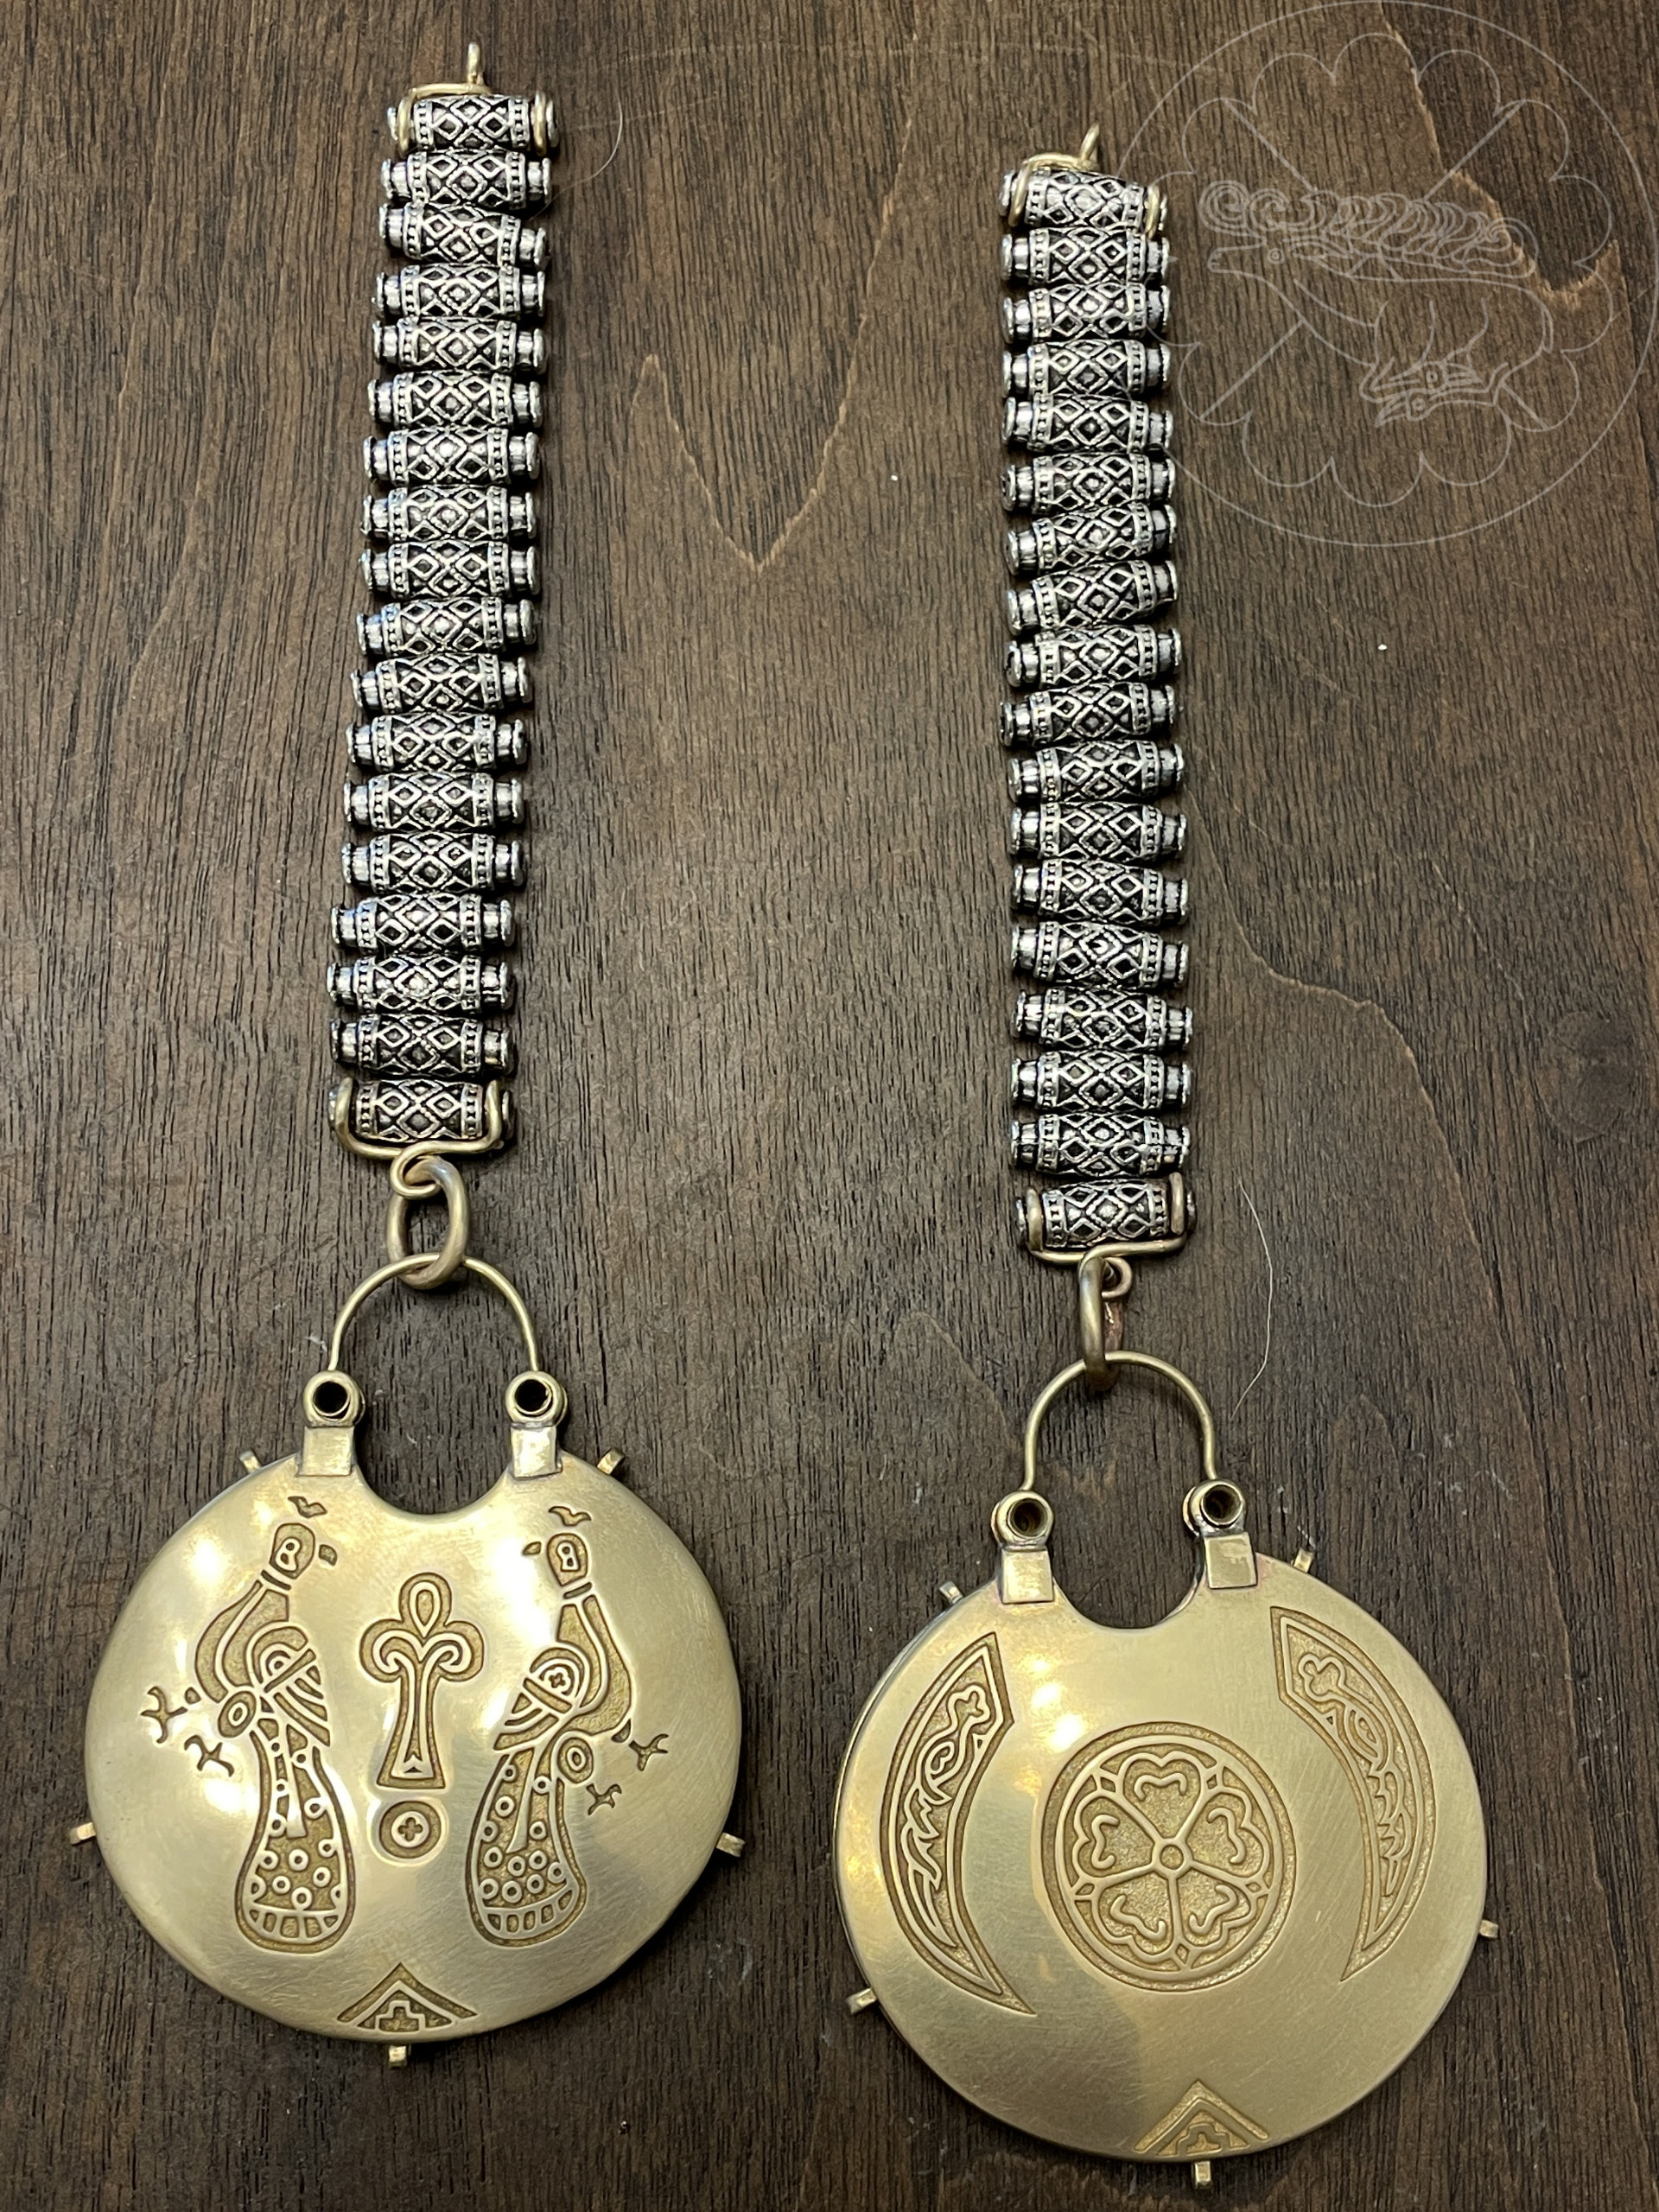
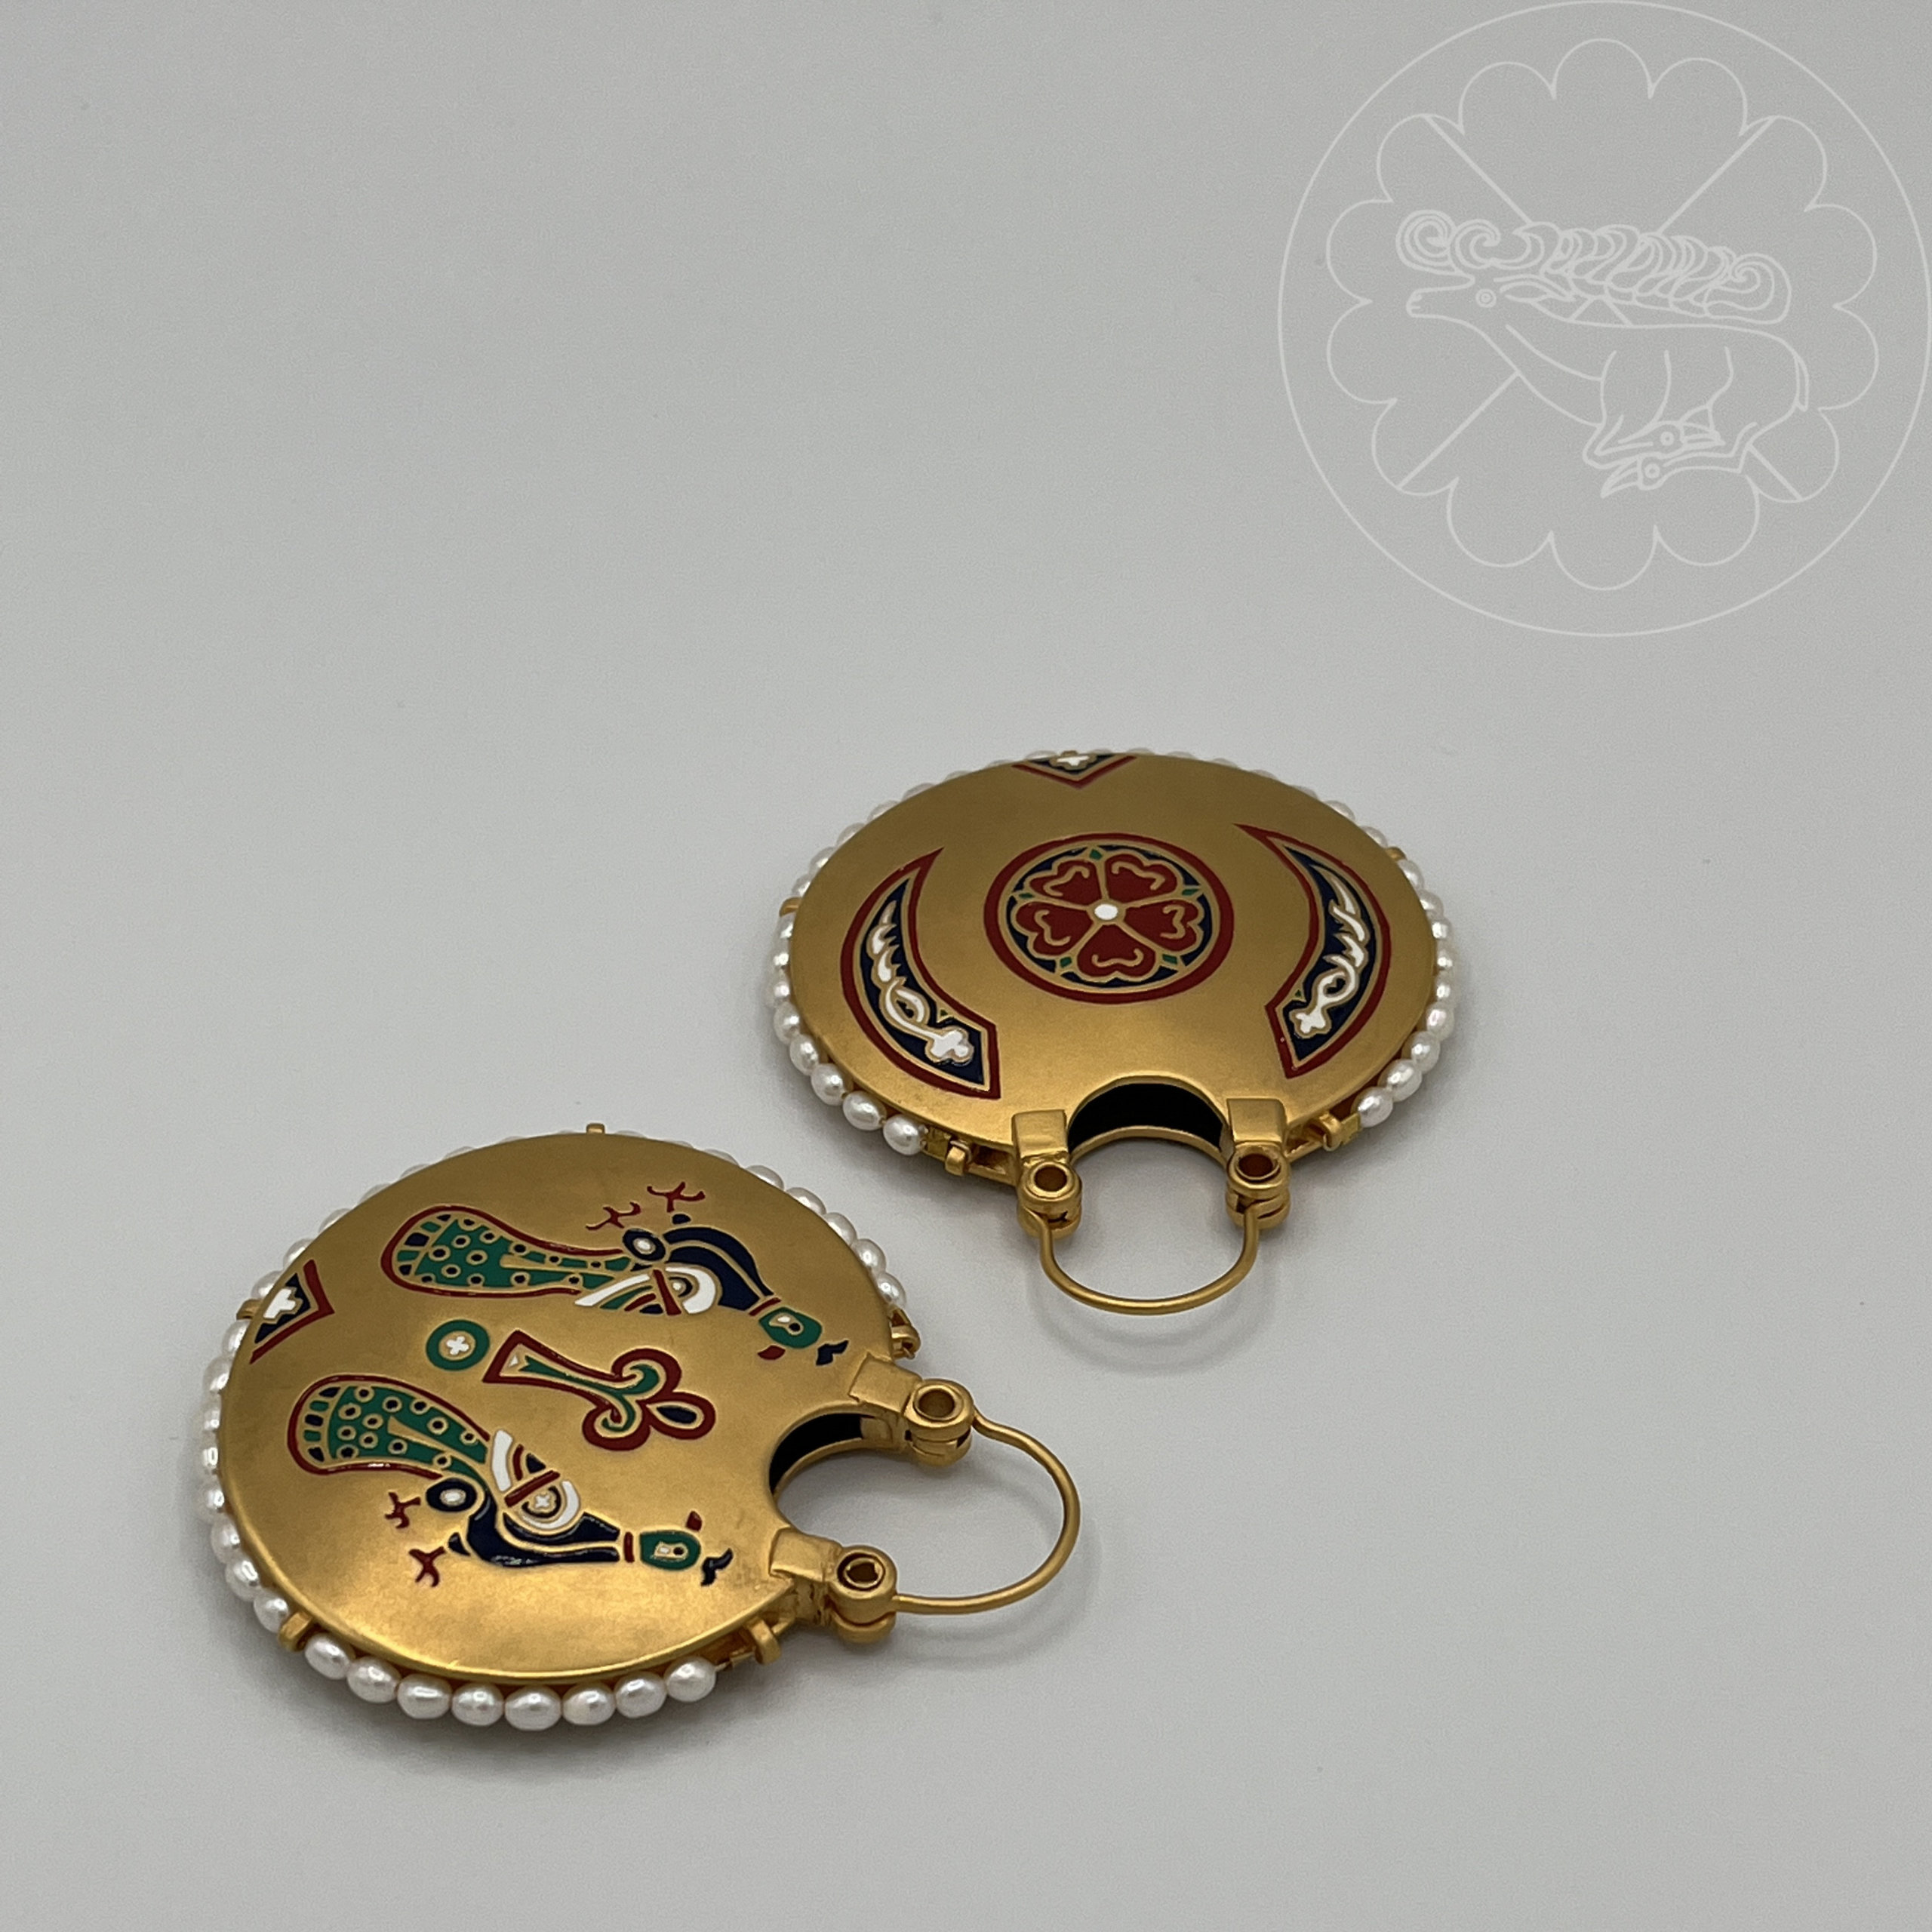
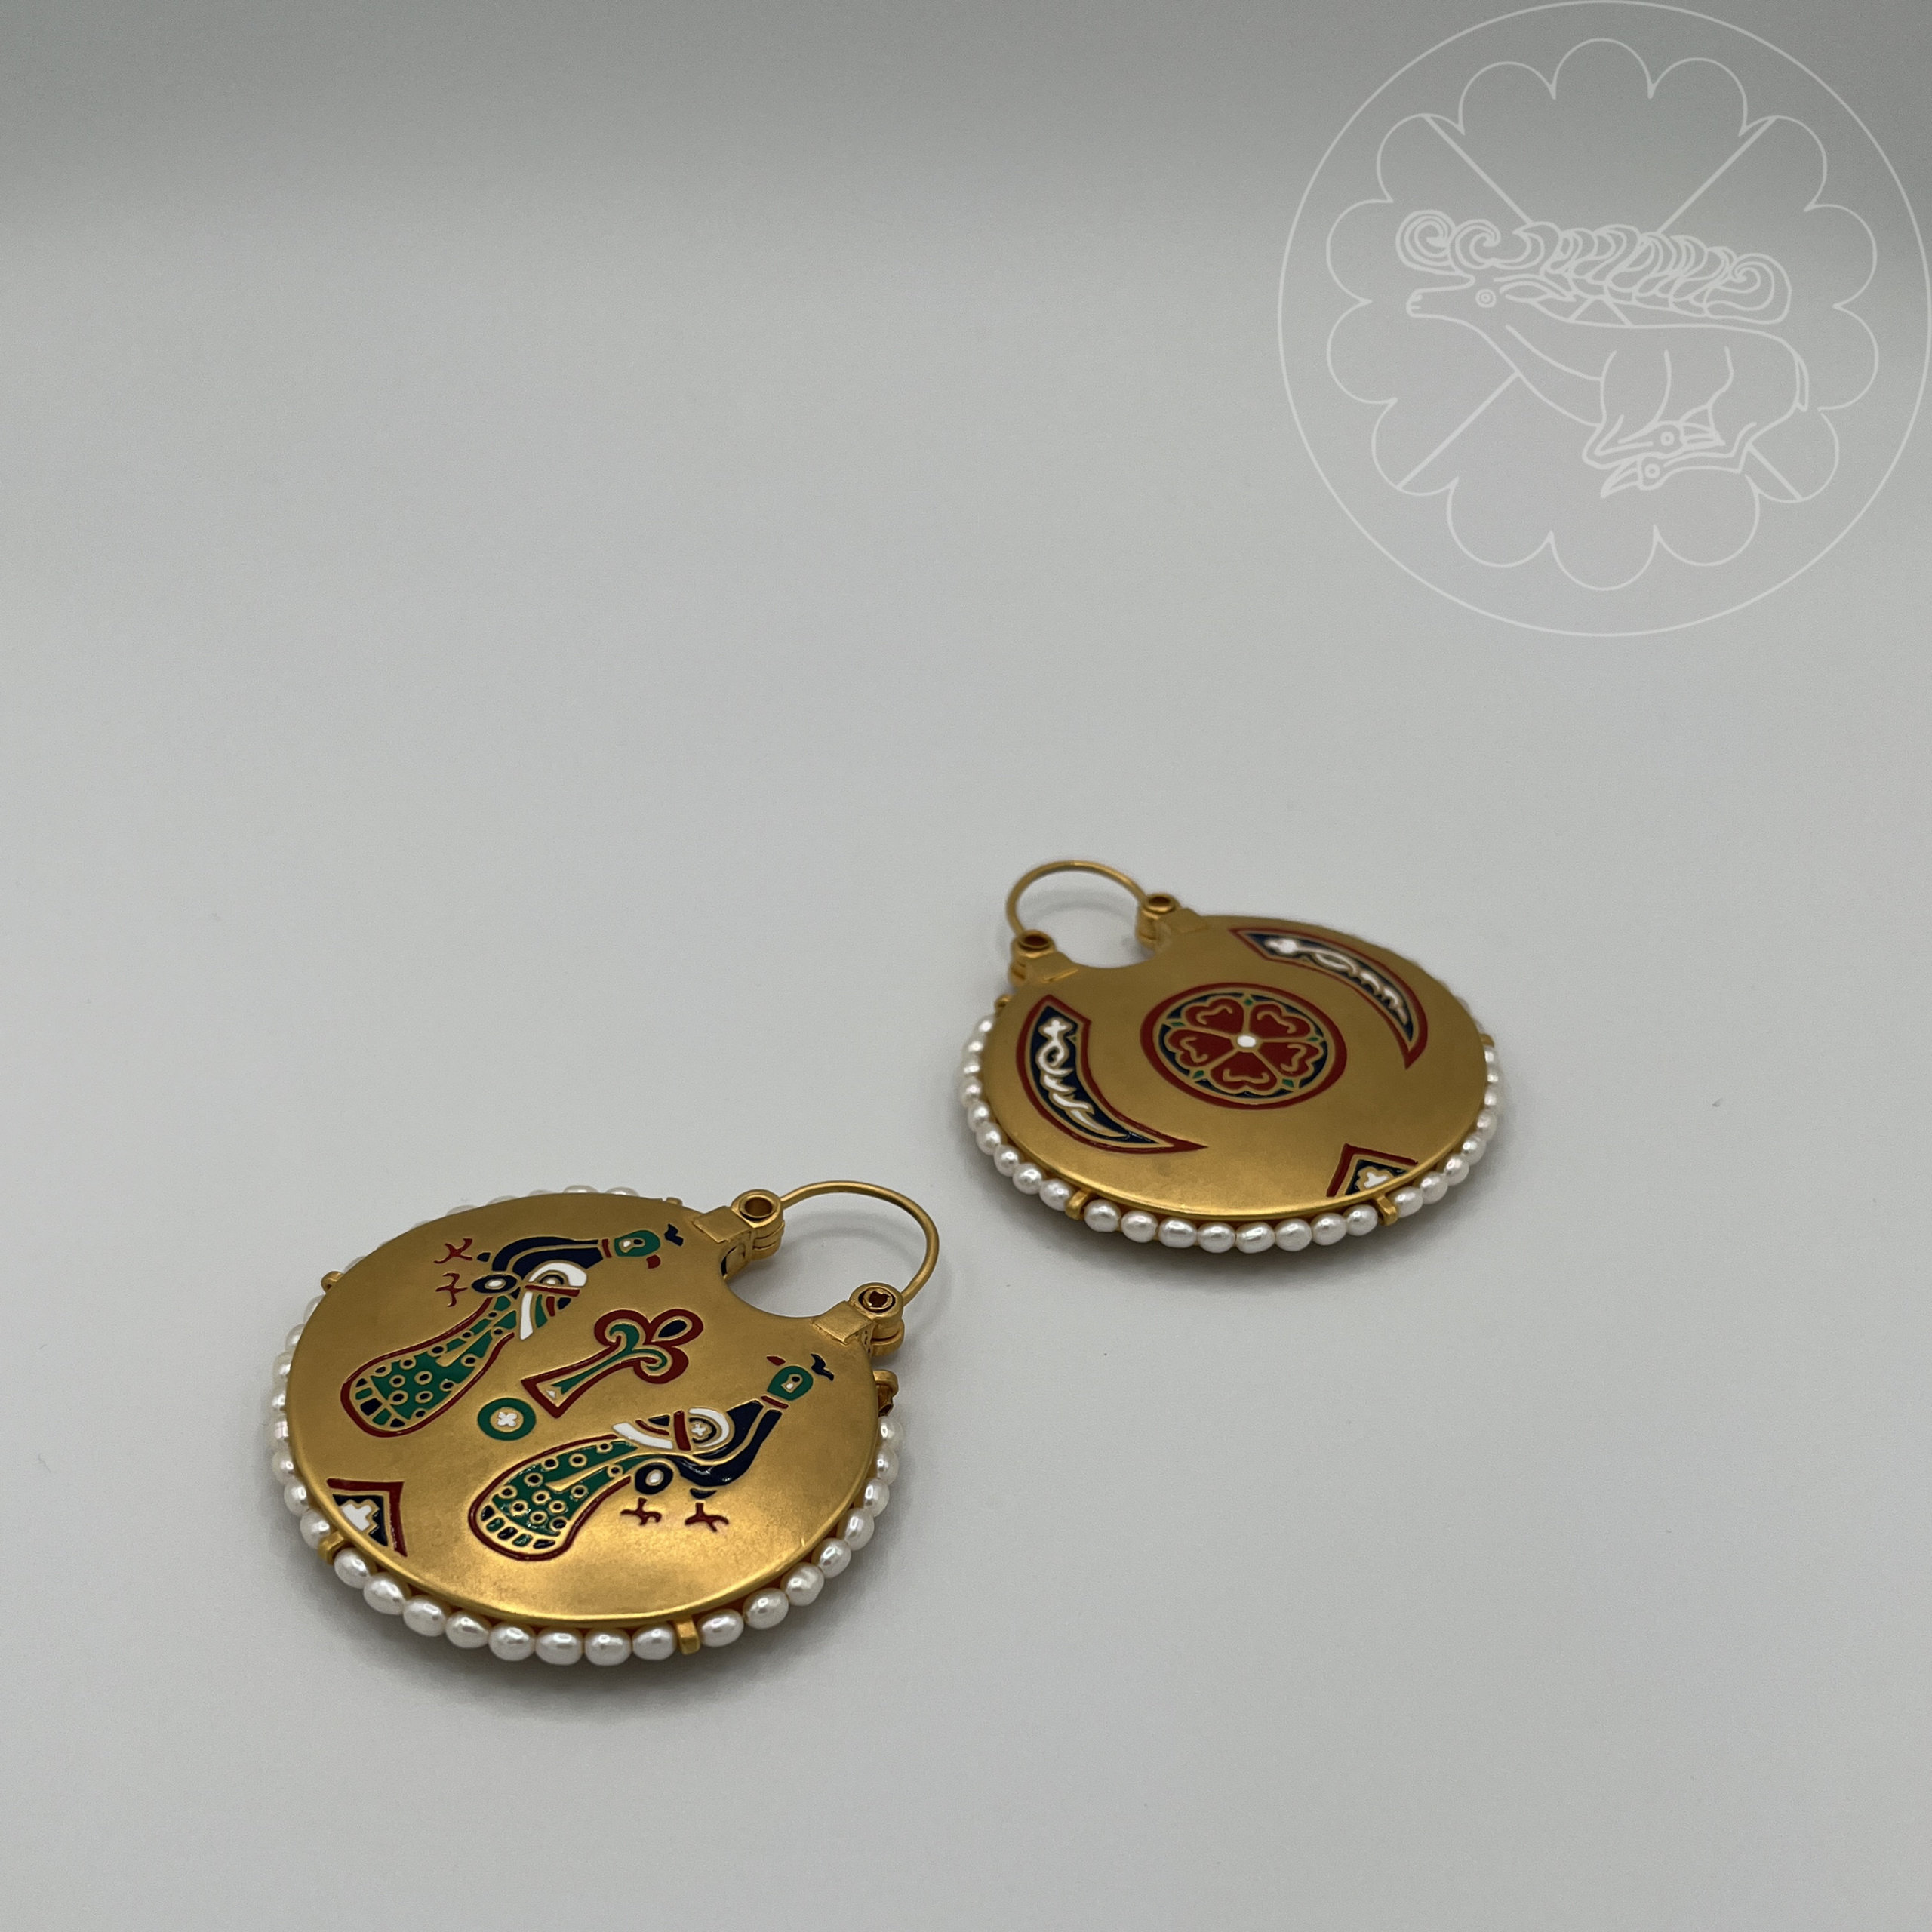
Fold-over pieces that would support the tube hinges were then made and soldered to either side of the top. The hinges are made from 5.5mm, 1mm wall brass tubing which was cut, filed (flat on the bottom and rounded edges), then soldered to the top of the fold overs [PIC]. While soldering, a center tube was used to space the hinge pieces and align them properly for the hoops to be added later.
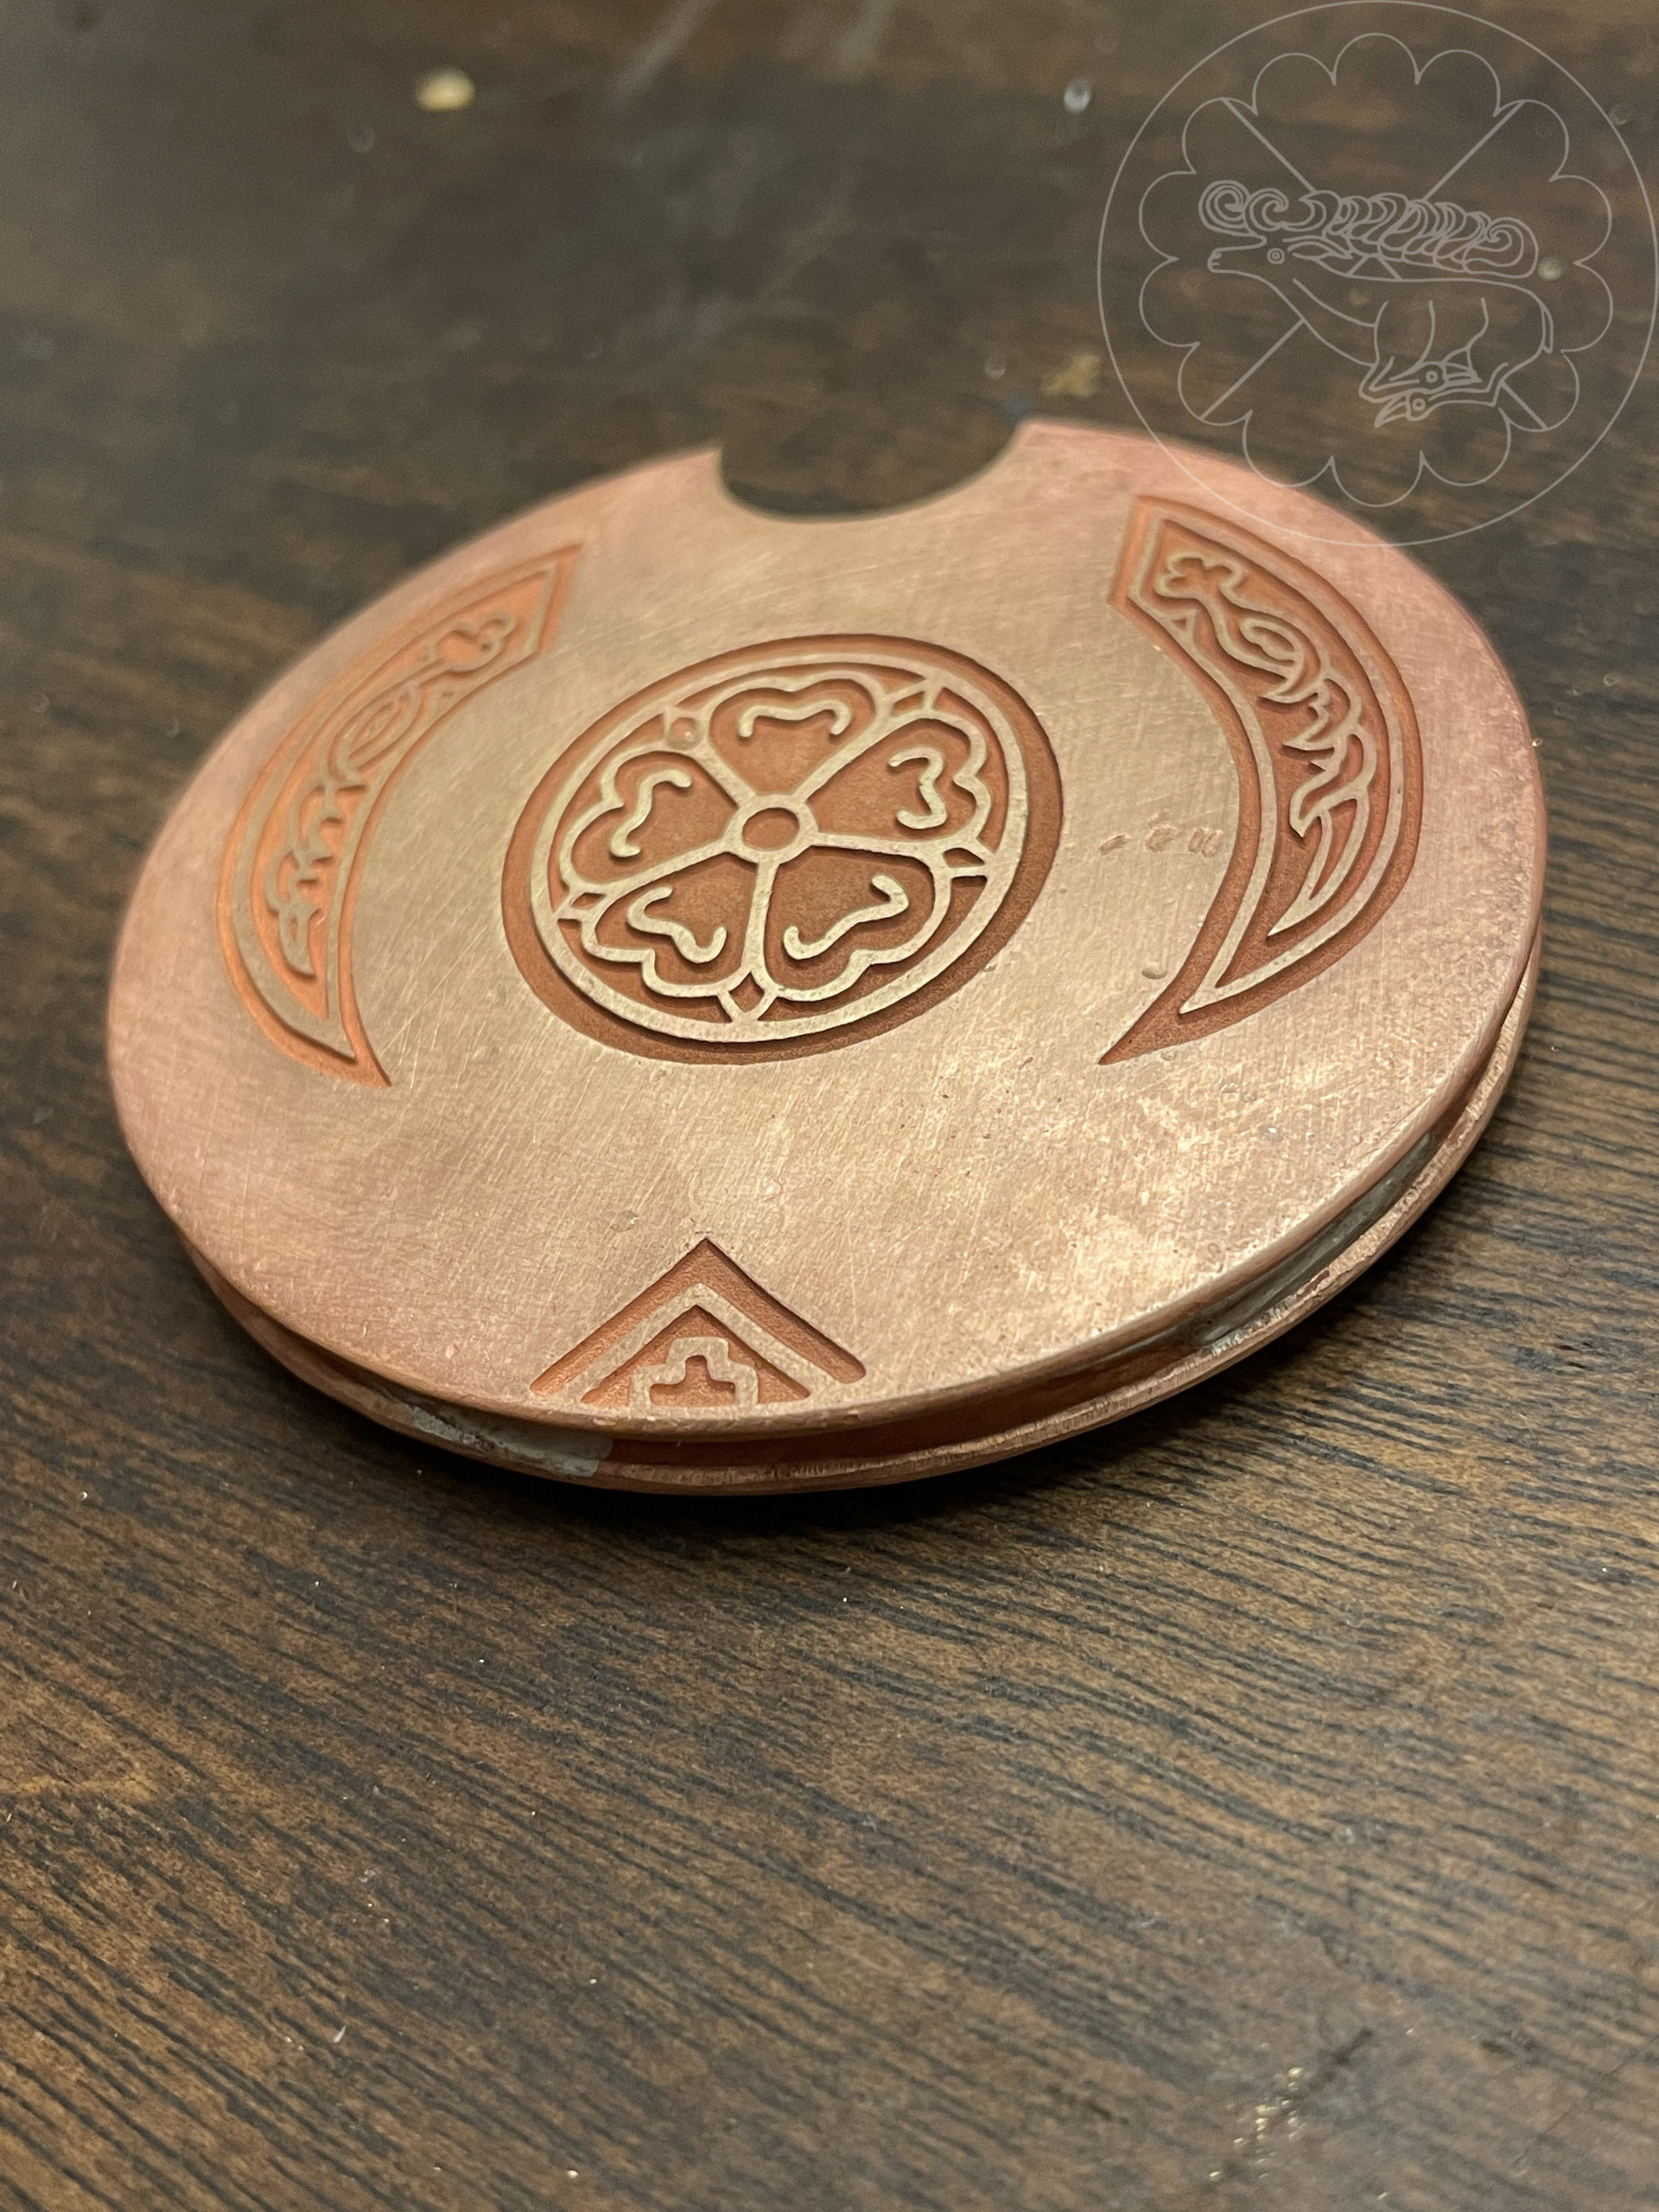
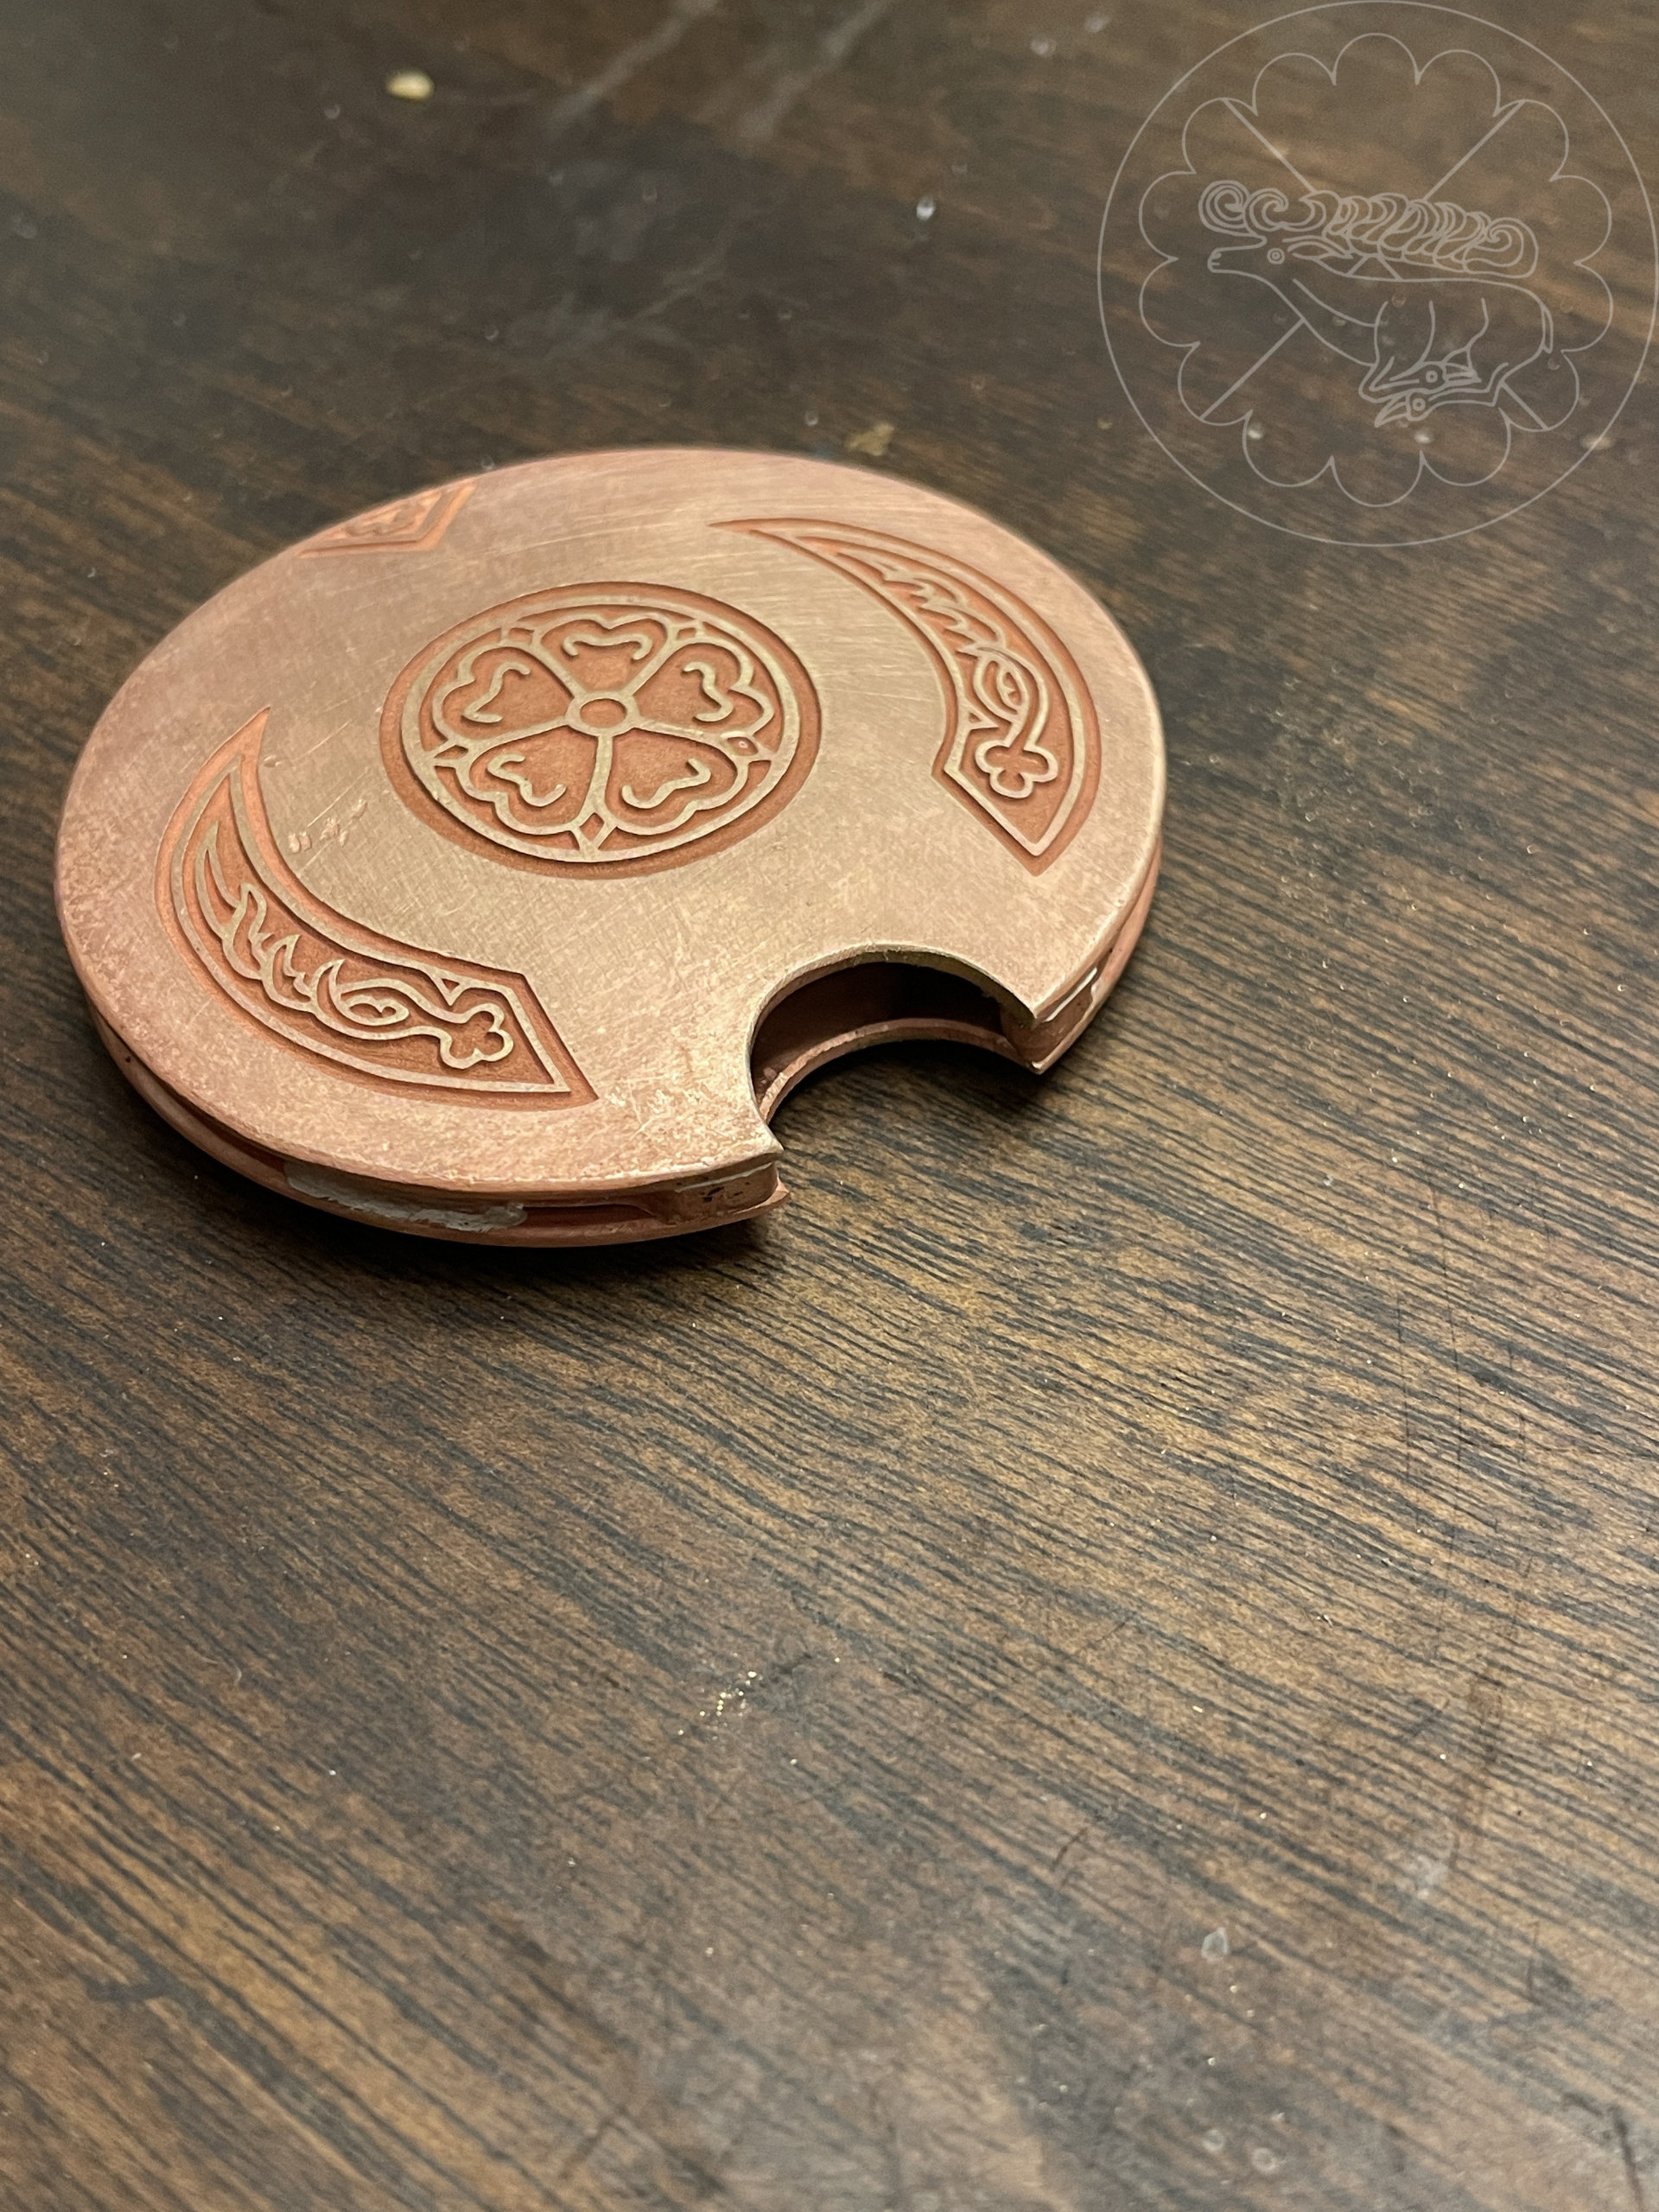
Here’s some pictures of the first completed kolt before the hoop and edge wires were added after pickle, and after clean-up. The solder is not the prettiest, but I wasn’t worried about it since it was all going to be plated in the end.
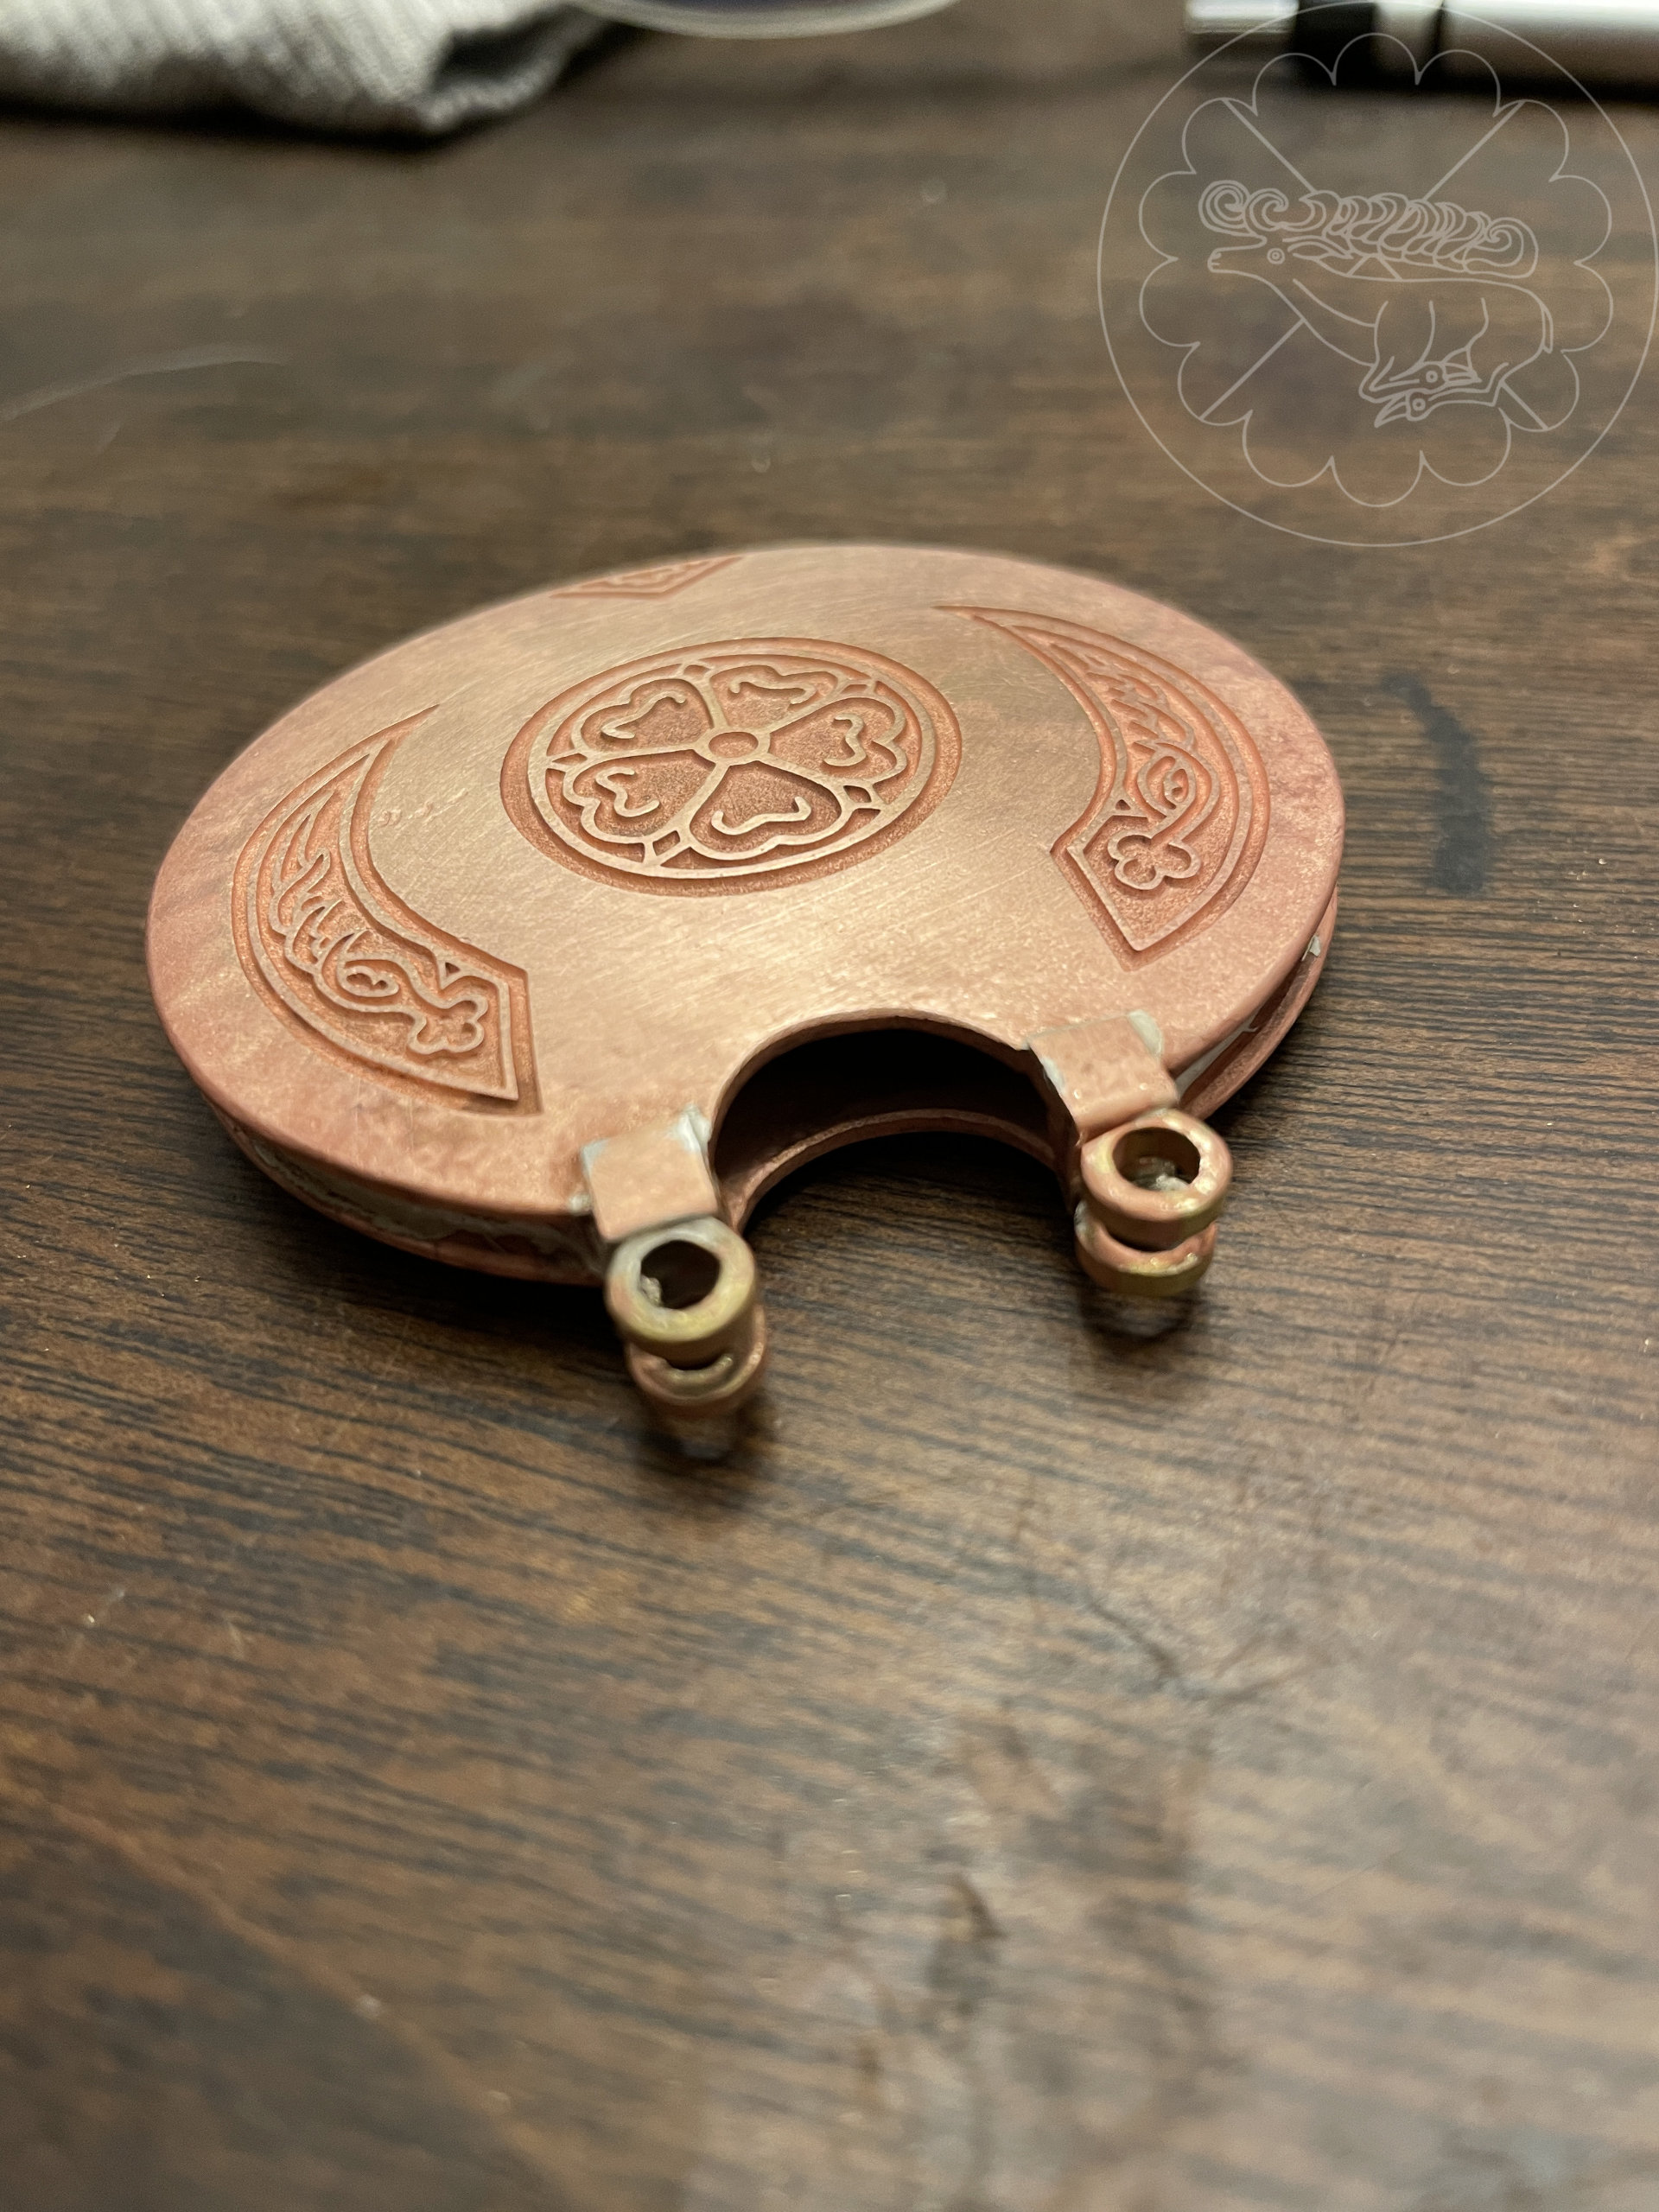
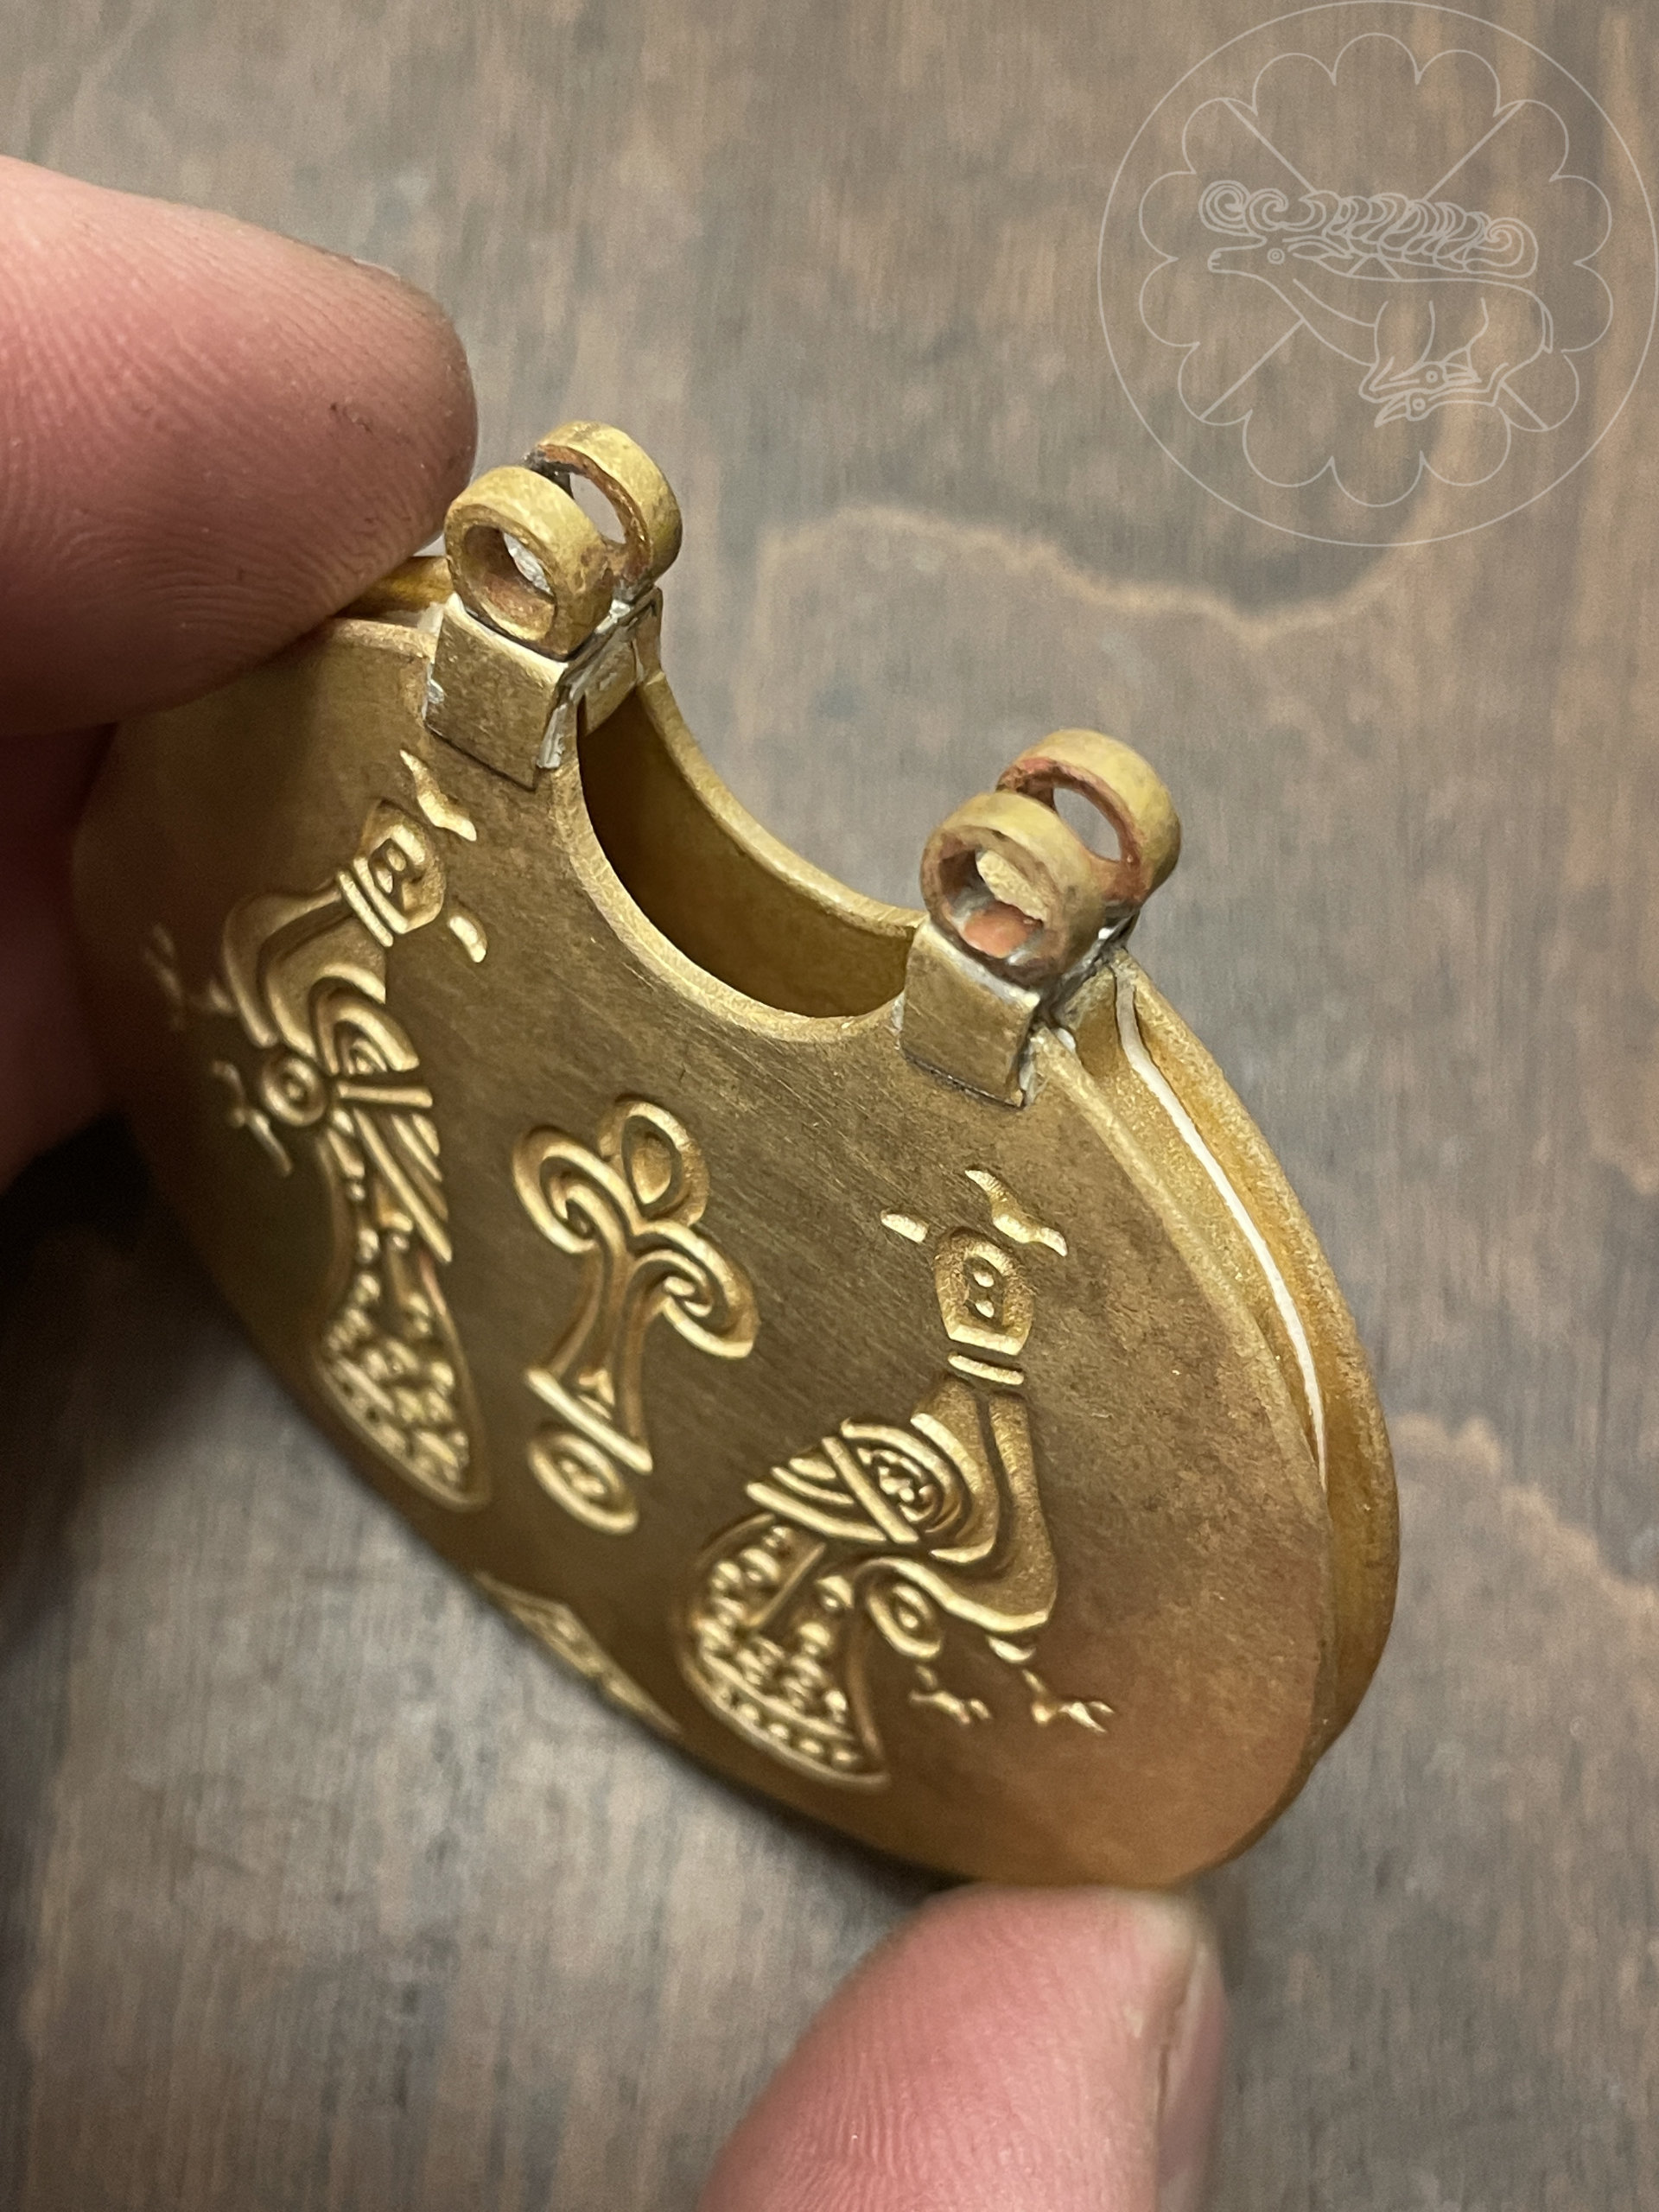
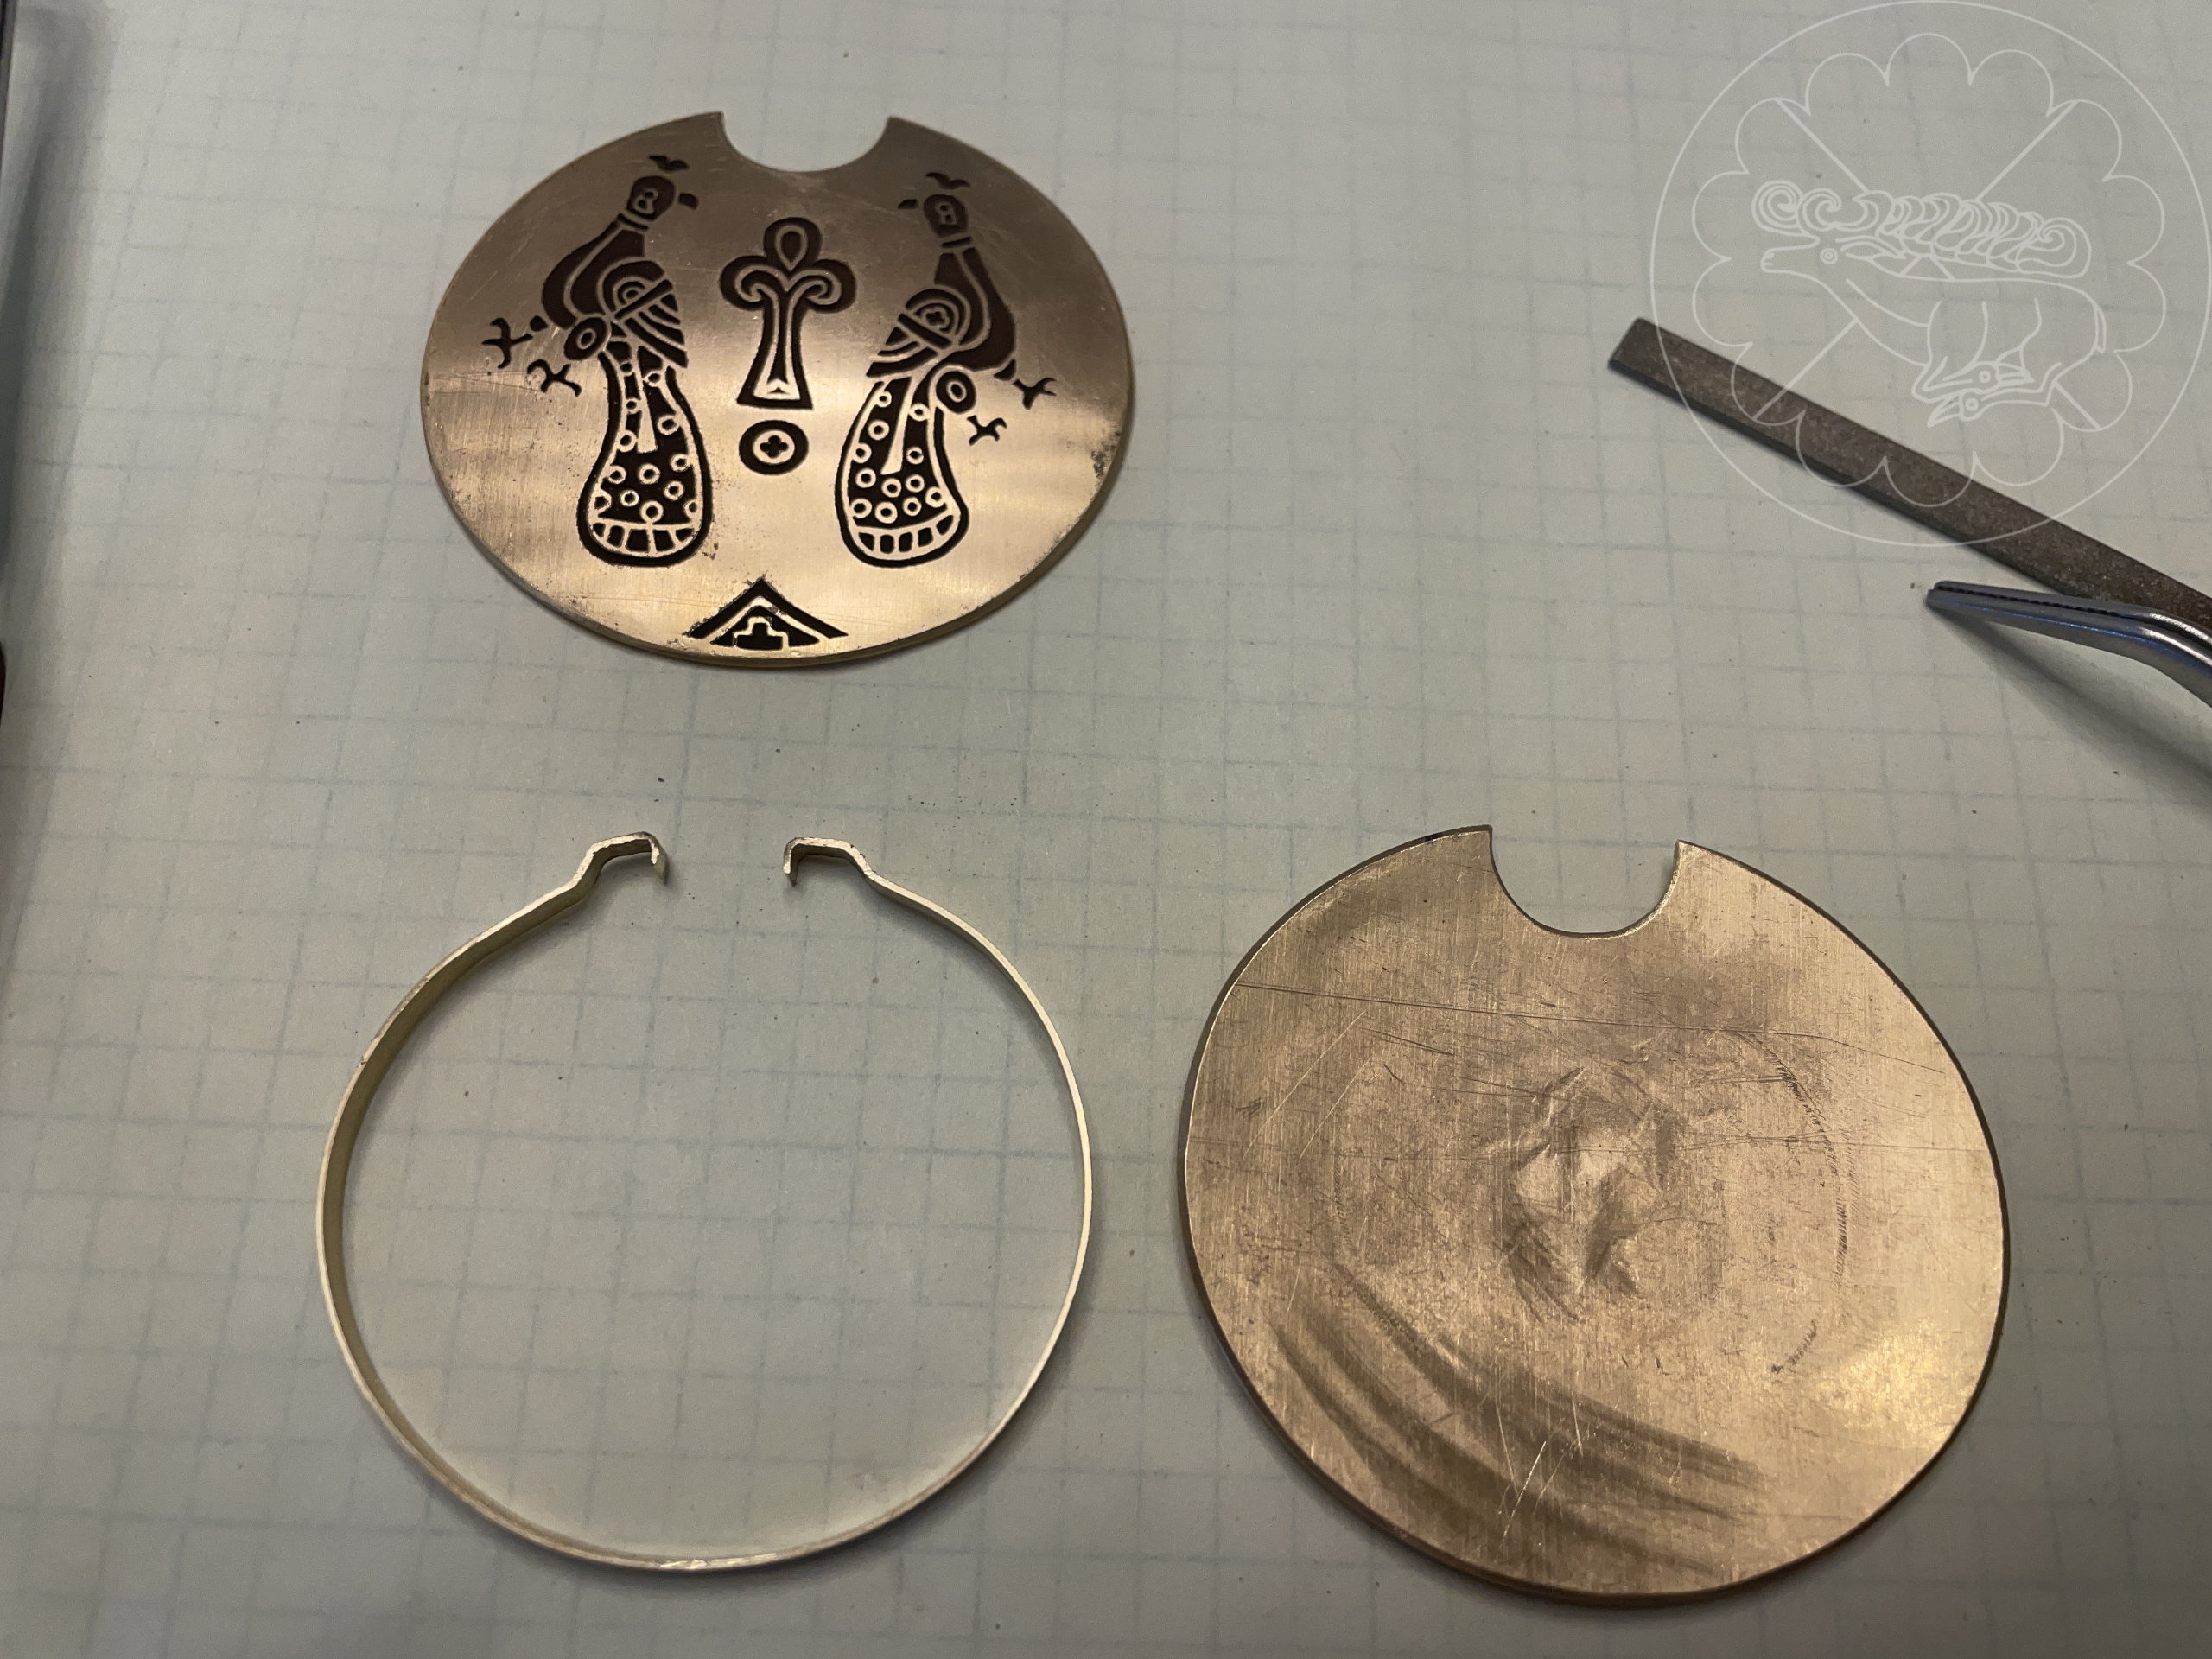
The hoops were formed from 16 gauge brass wire, then fastened in place with a tube through the center of the hinge pieces. When finished, these tubes would be flared on both sides on one of the hinges and flared on one side on the other hinge so that it can be removed to attach the hoop. [For now, they’re just flared on one side so that I can slide them in and out.
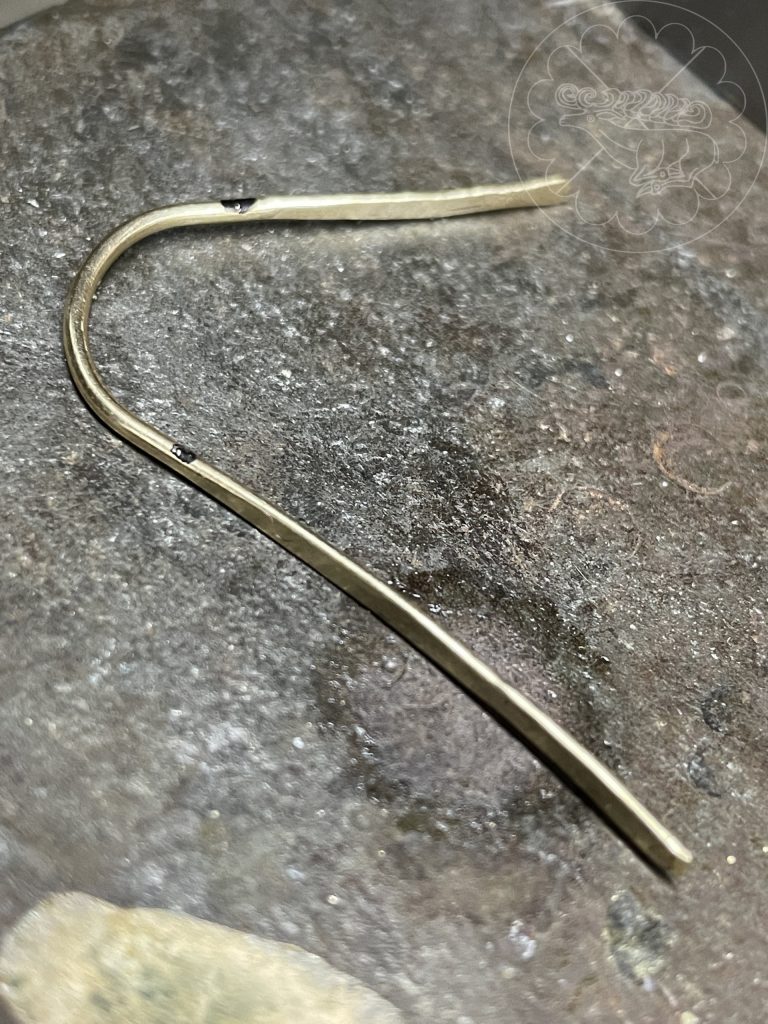

Finally, I soldered on the side hoops that would hold the wire for the pearls on the edges of the kolti in place. These were made from 20 gauge brass wire that was flattened and bent and folded.


The second kolt was made following the same methods as the first.
Next they were cleaned up by sanding and polishing. Now they’re ready for plating.

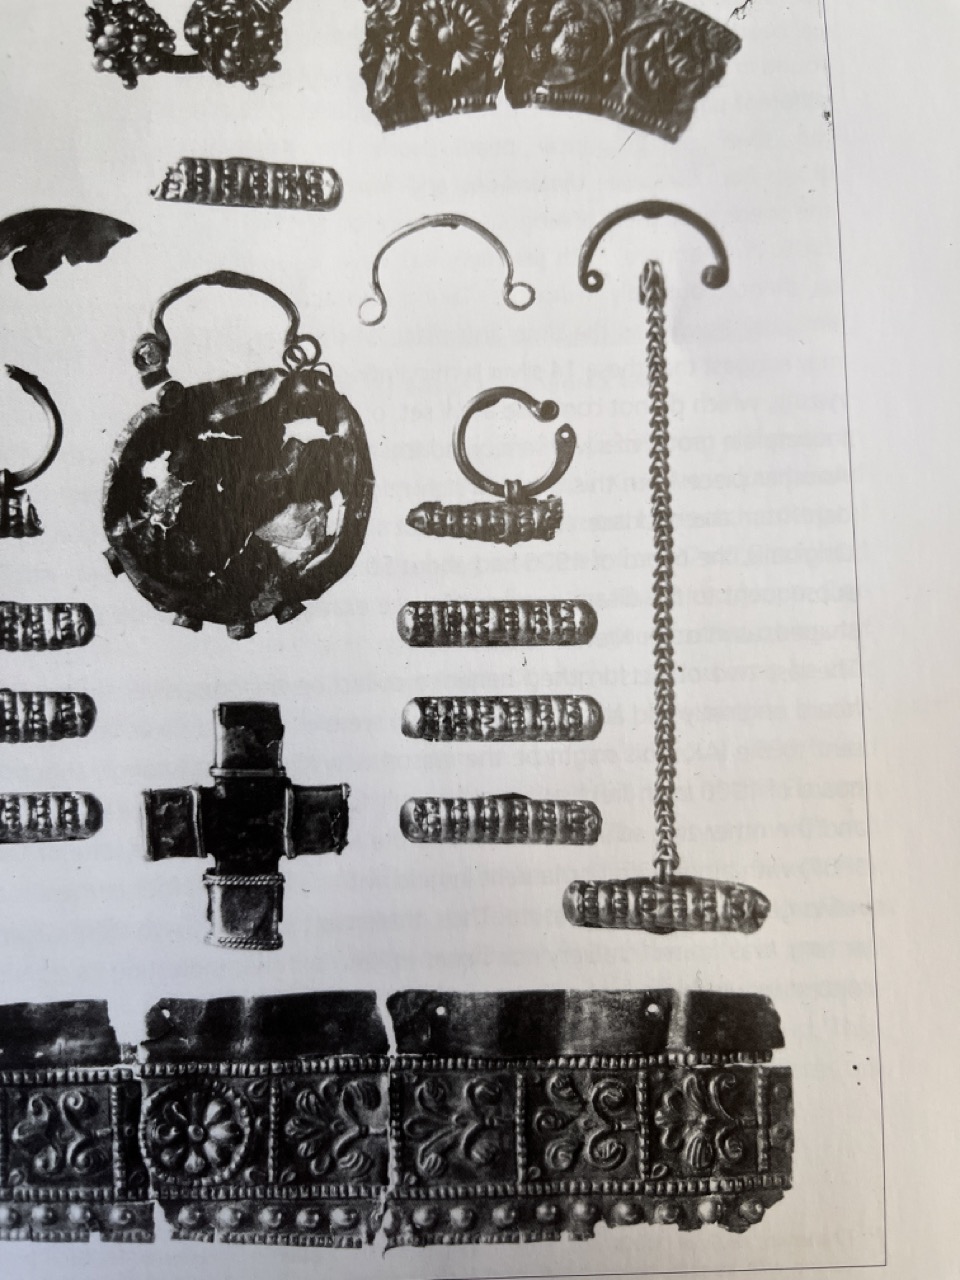
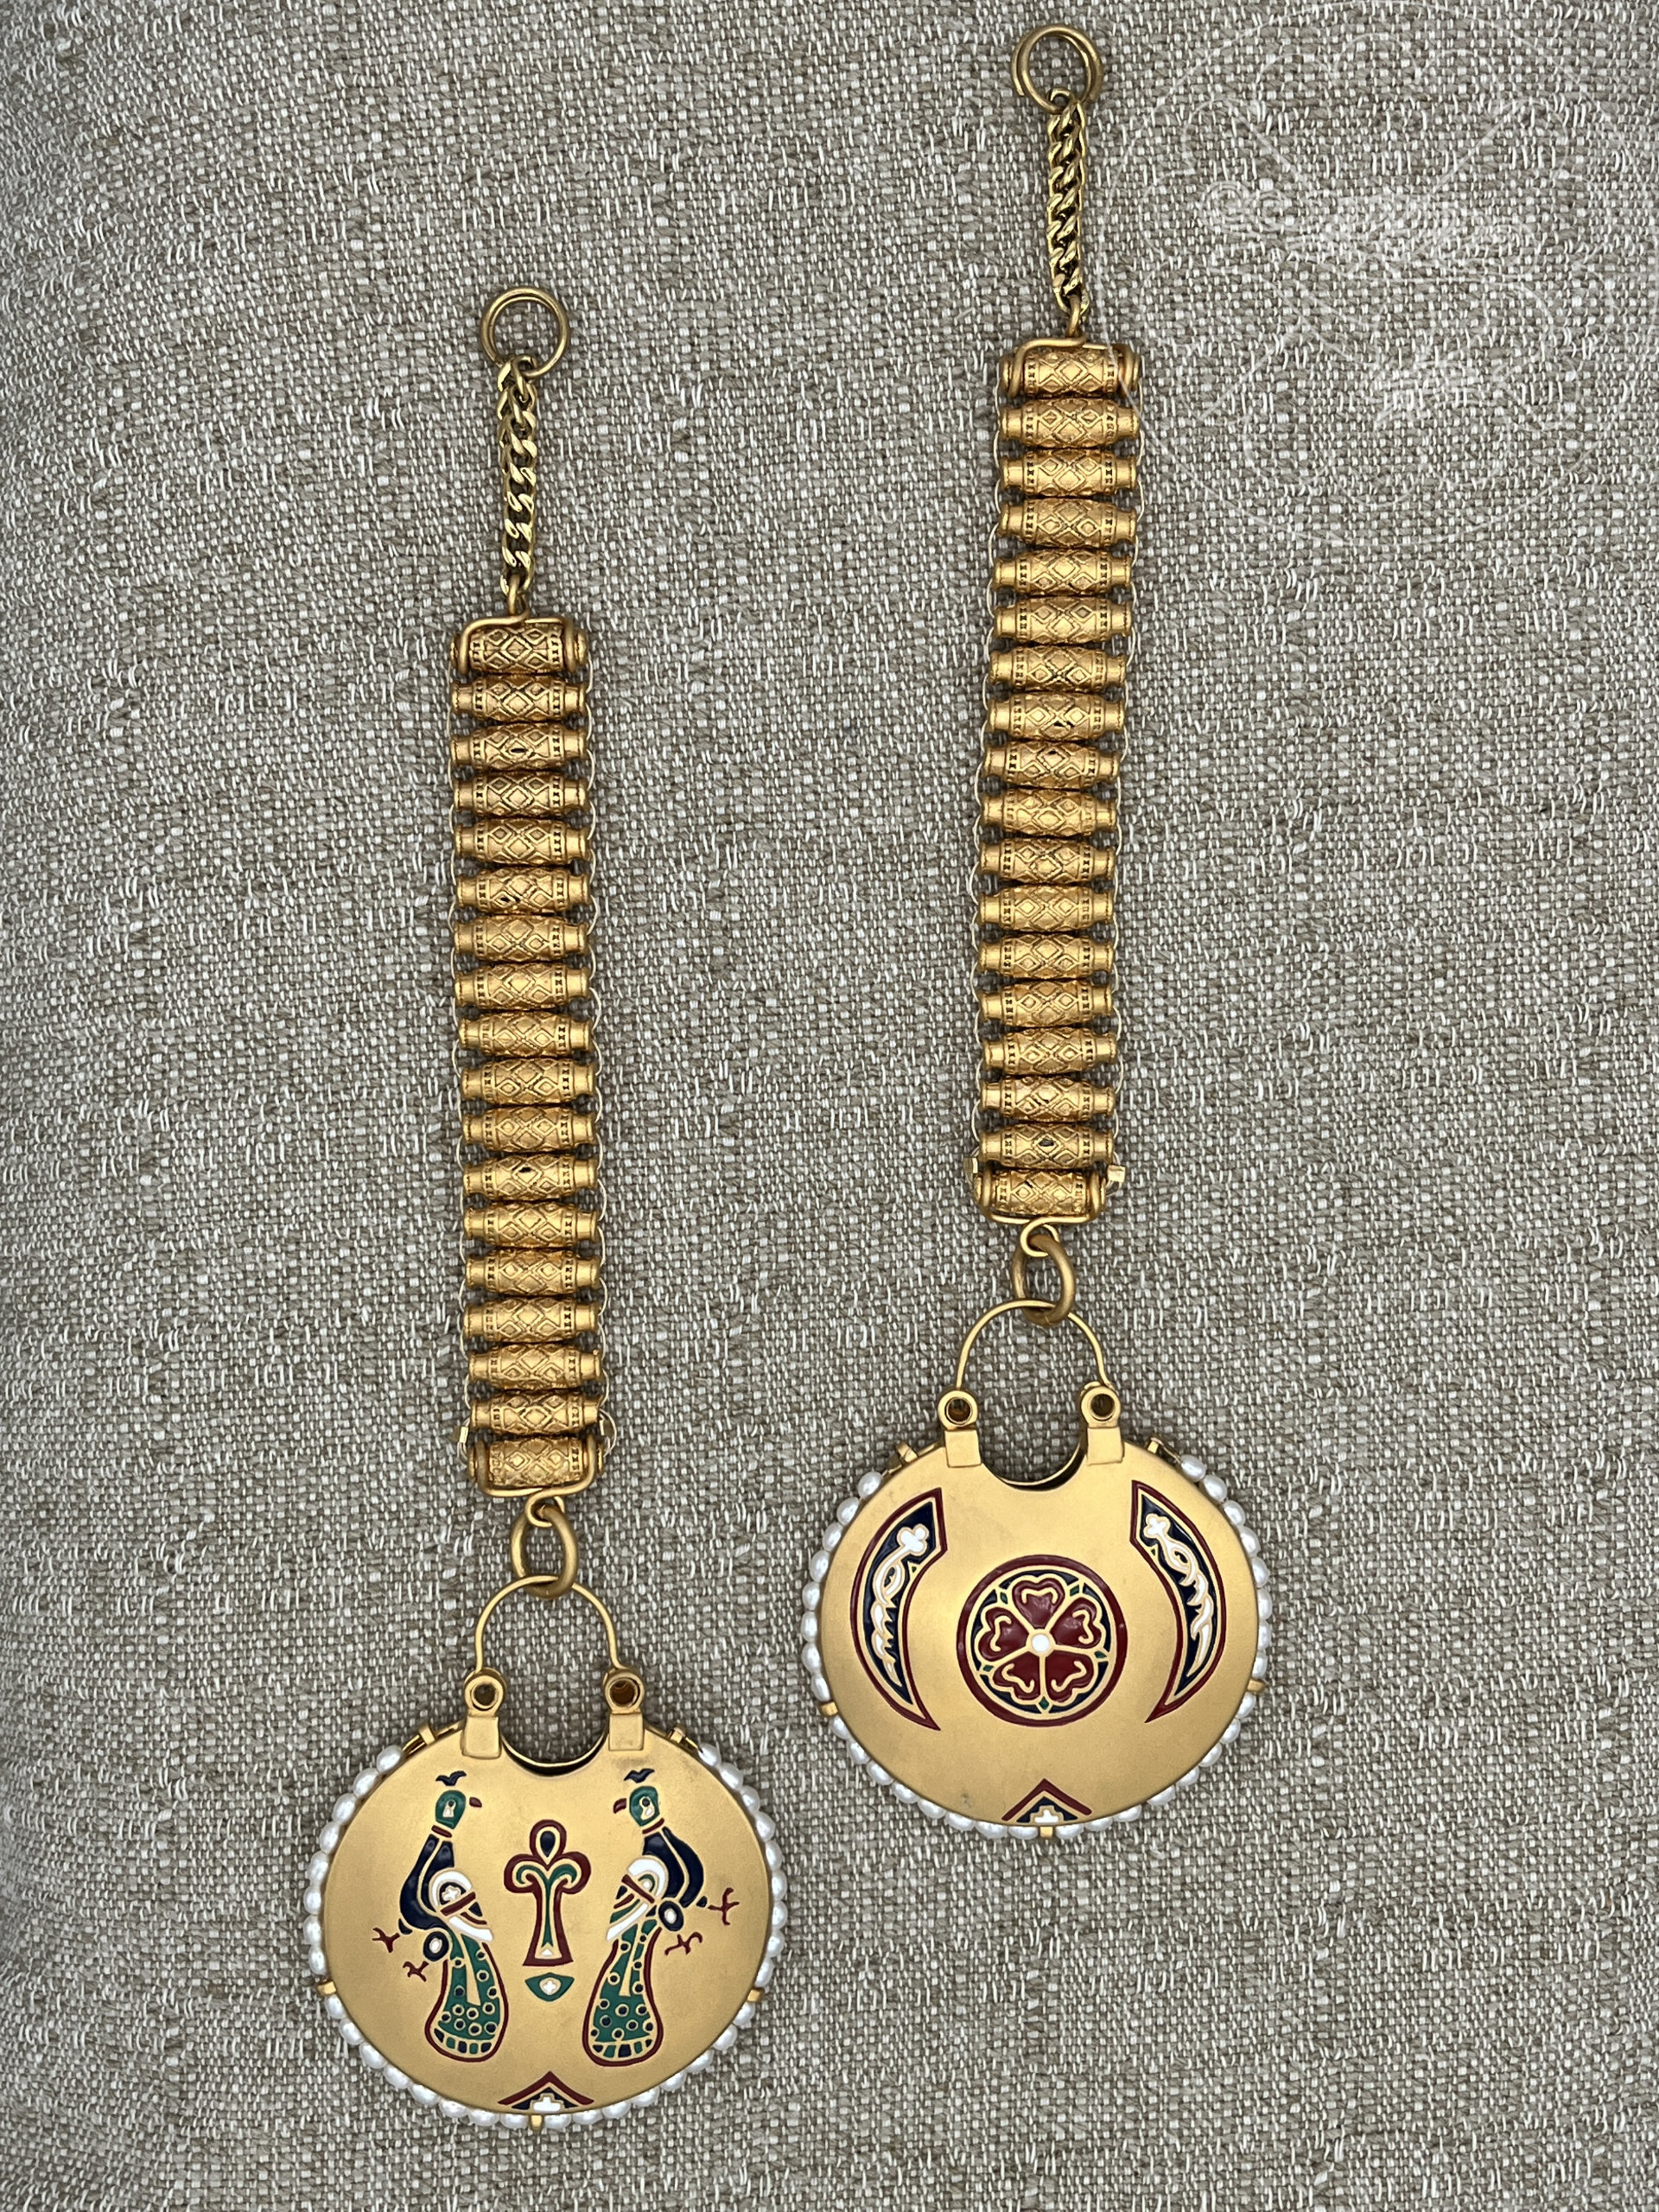
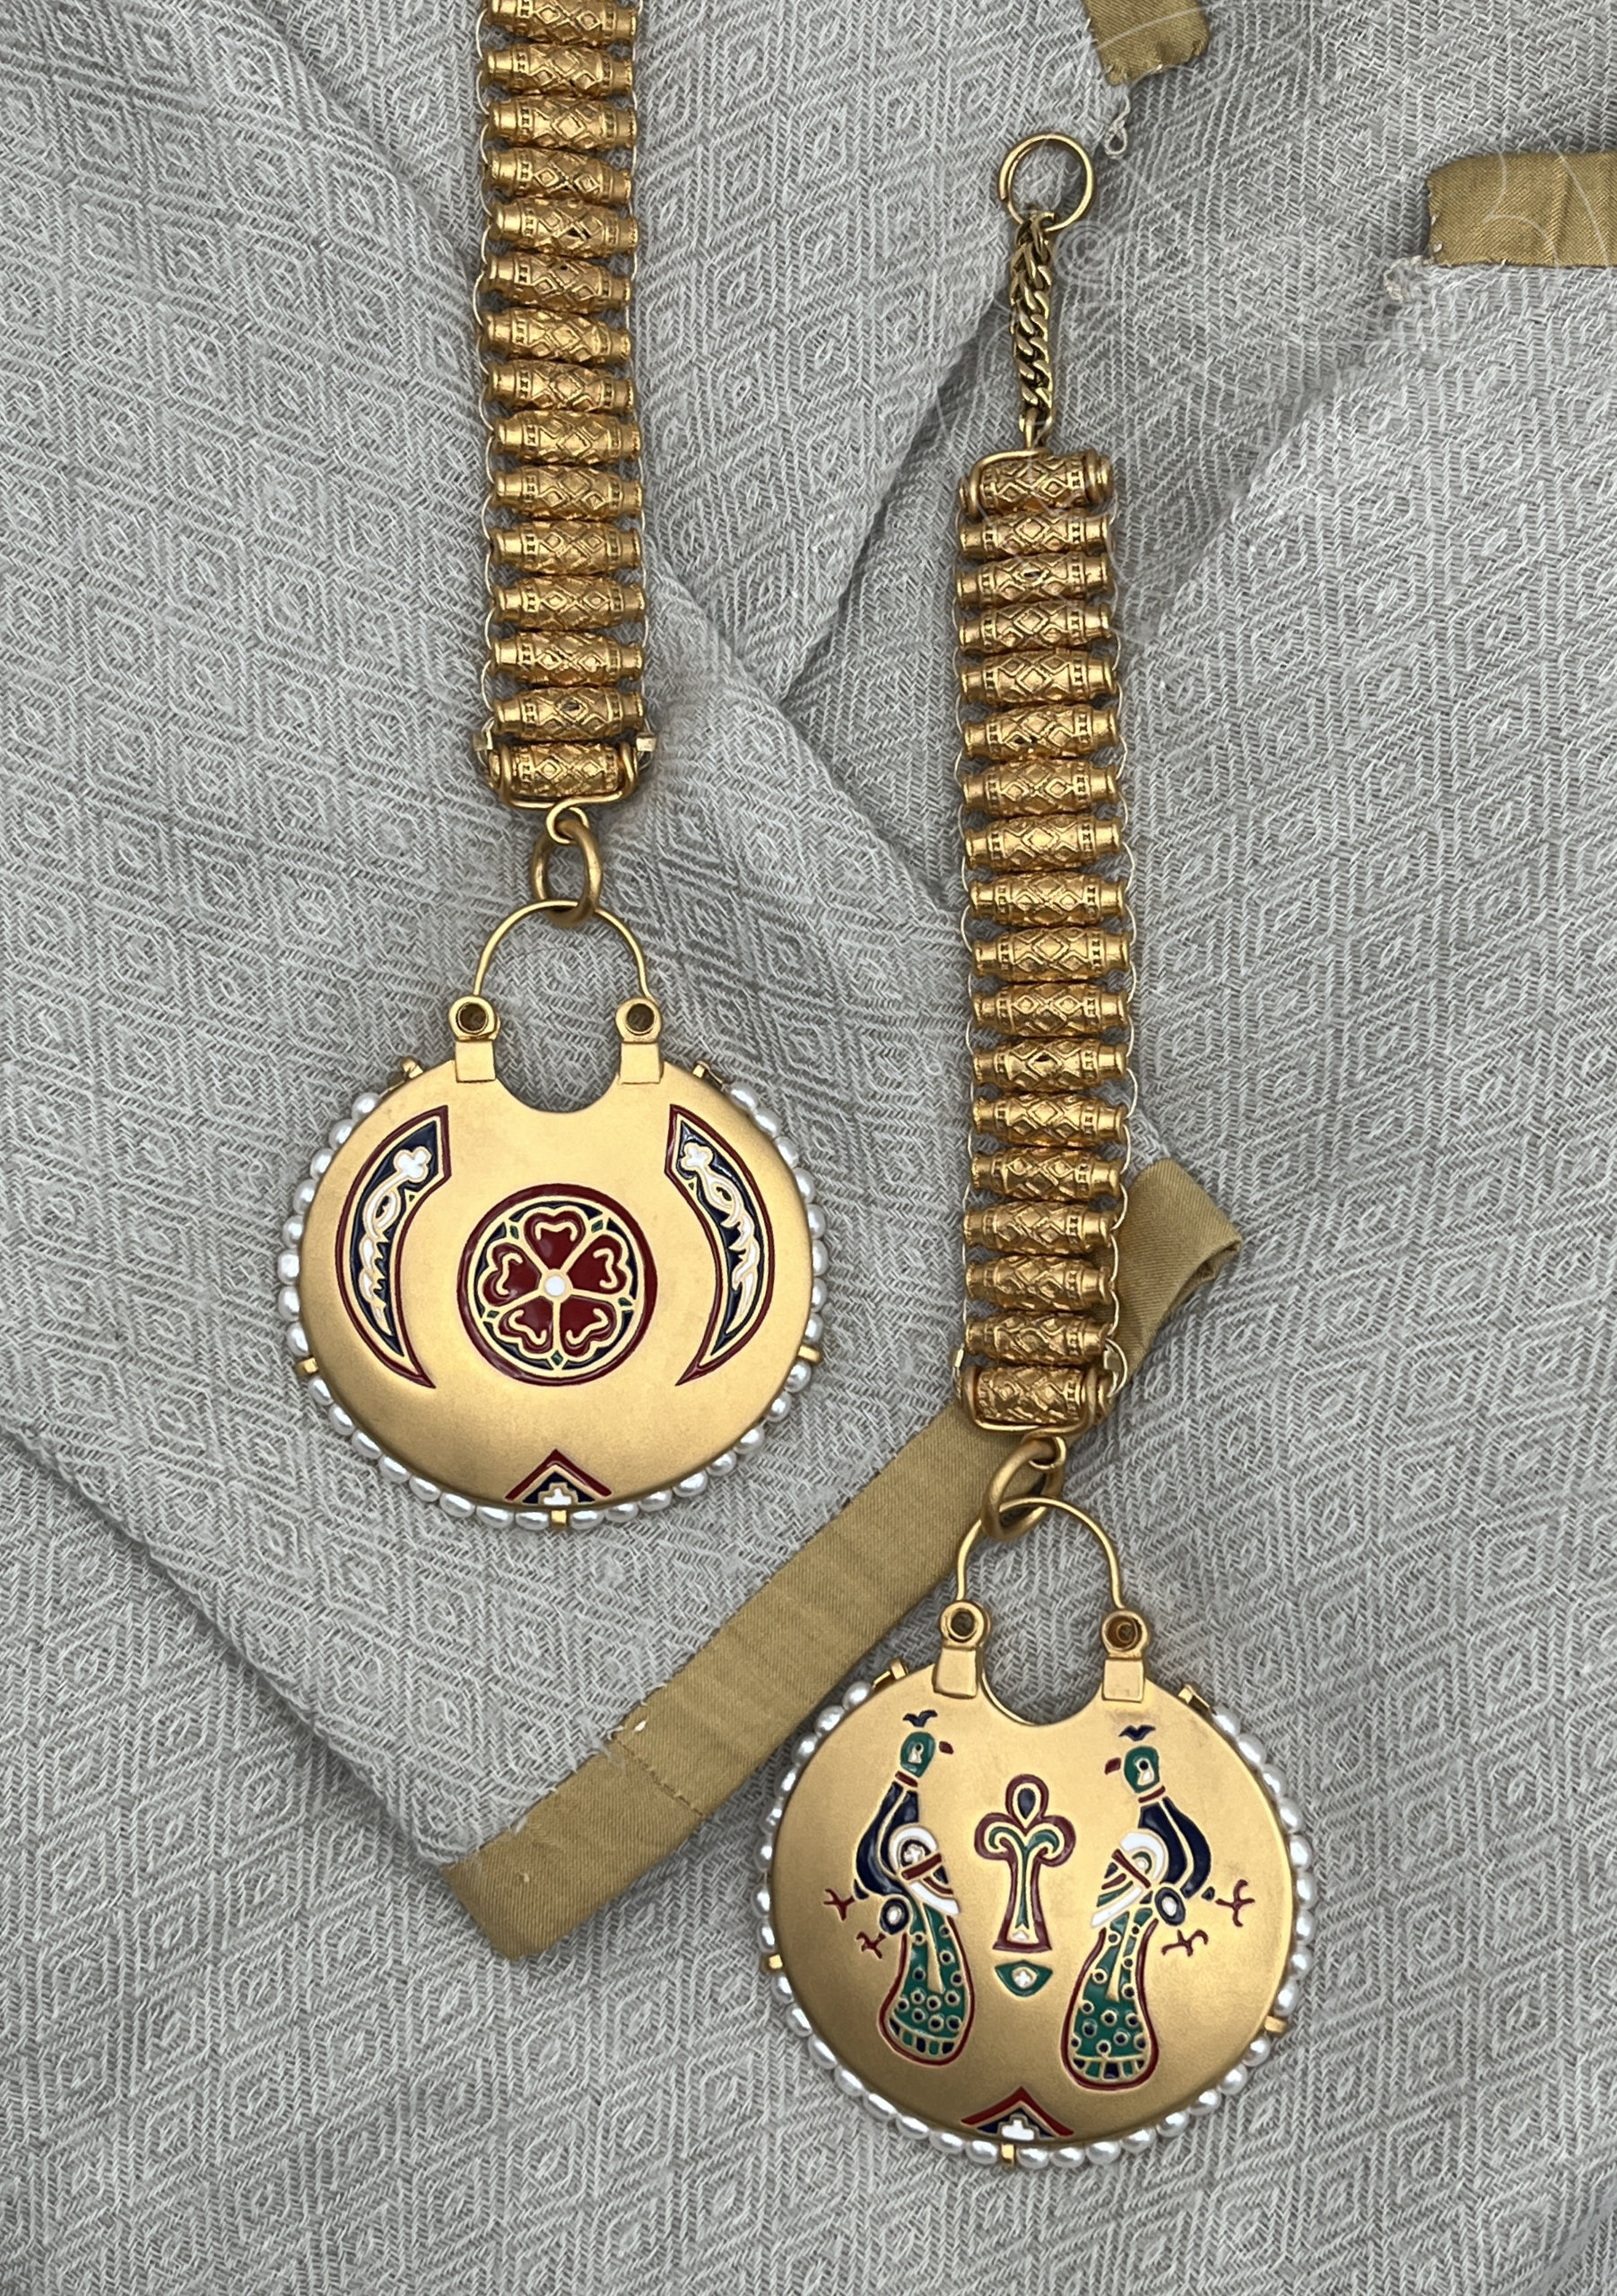
One type of ryazni found with these kolti were a “semicylindrical tube” type of bead that was a thin tube of gold, presumably hammered into shape with holes through the narrow dimension stringing them together.
While I contemplated making (and still may) a reproduction of the design and casting it (a lot easier than hand hammering 36 of the tiny things), I was in a hurry to see the project finished at this point so I found some metal beads with a good approximation of the shape to use instead. I had the beads gold plated along with the kolti.
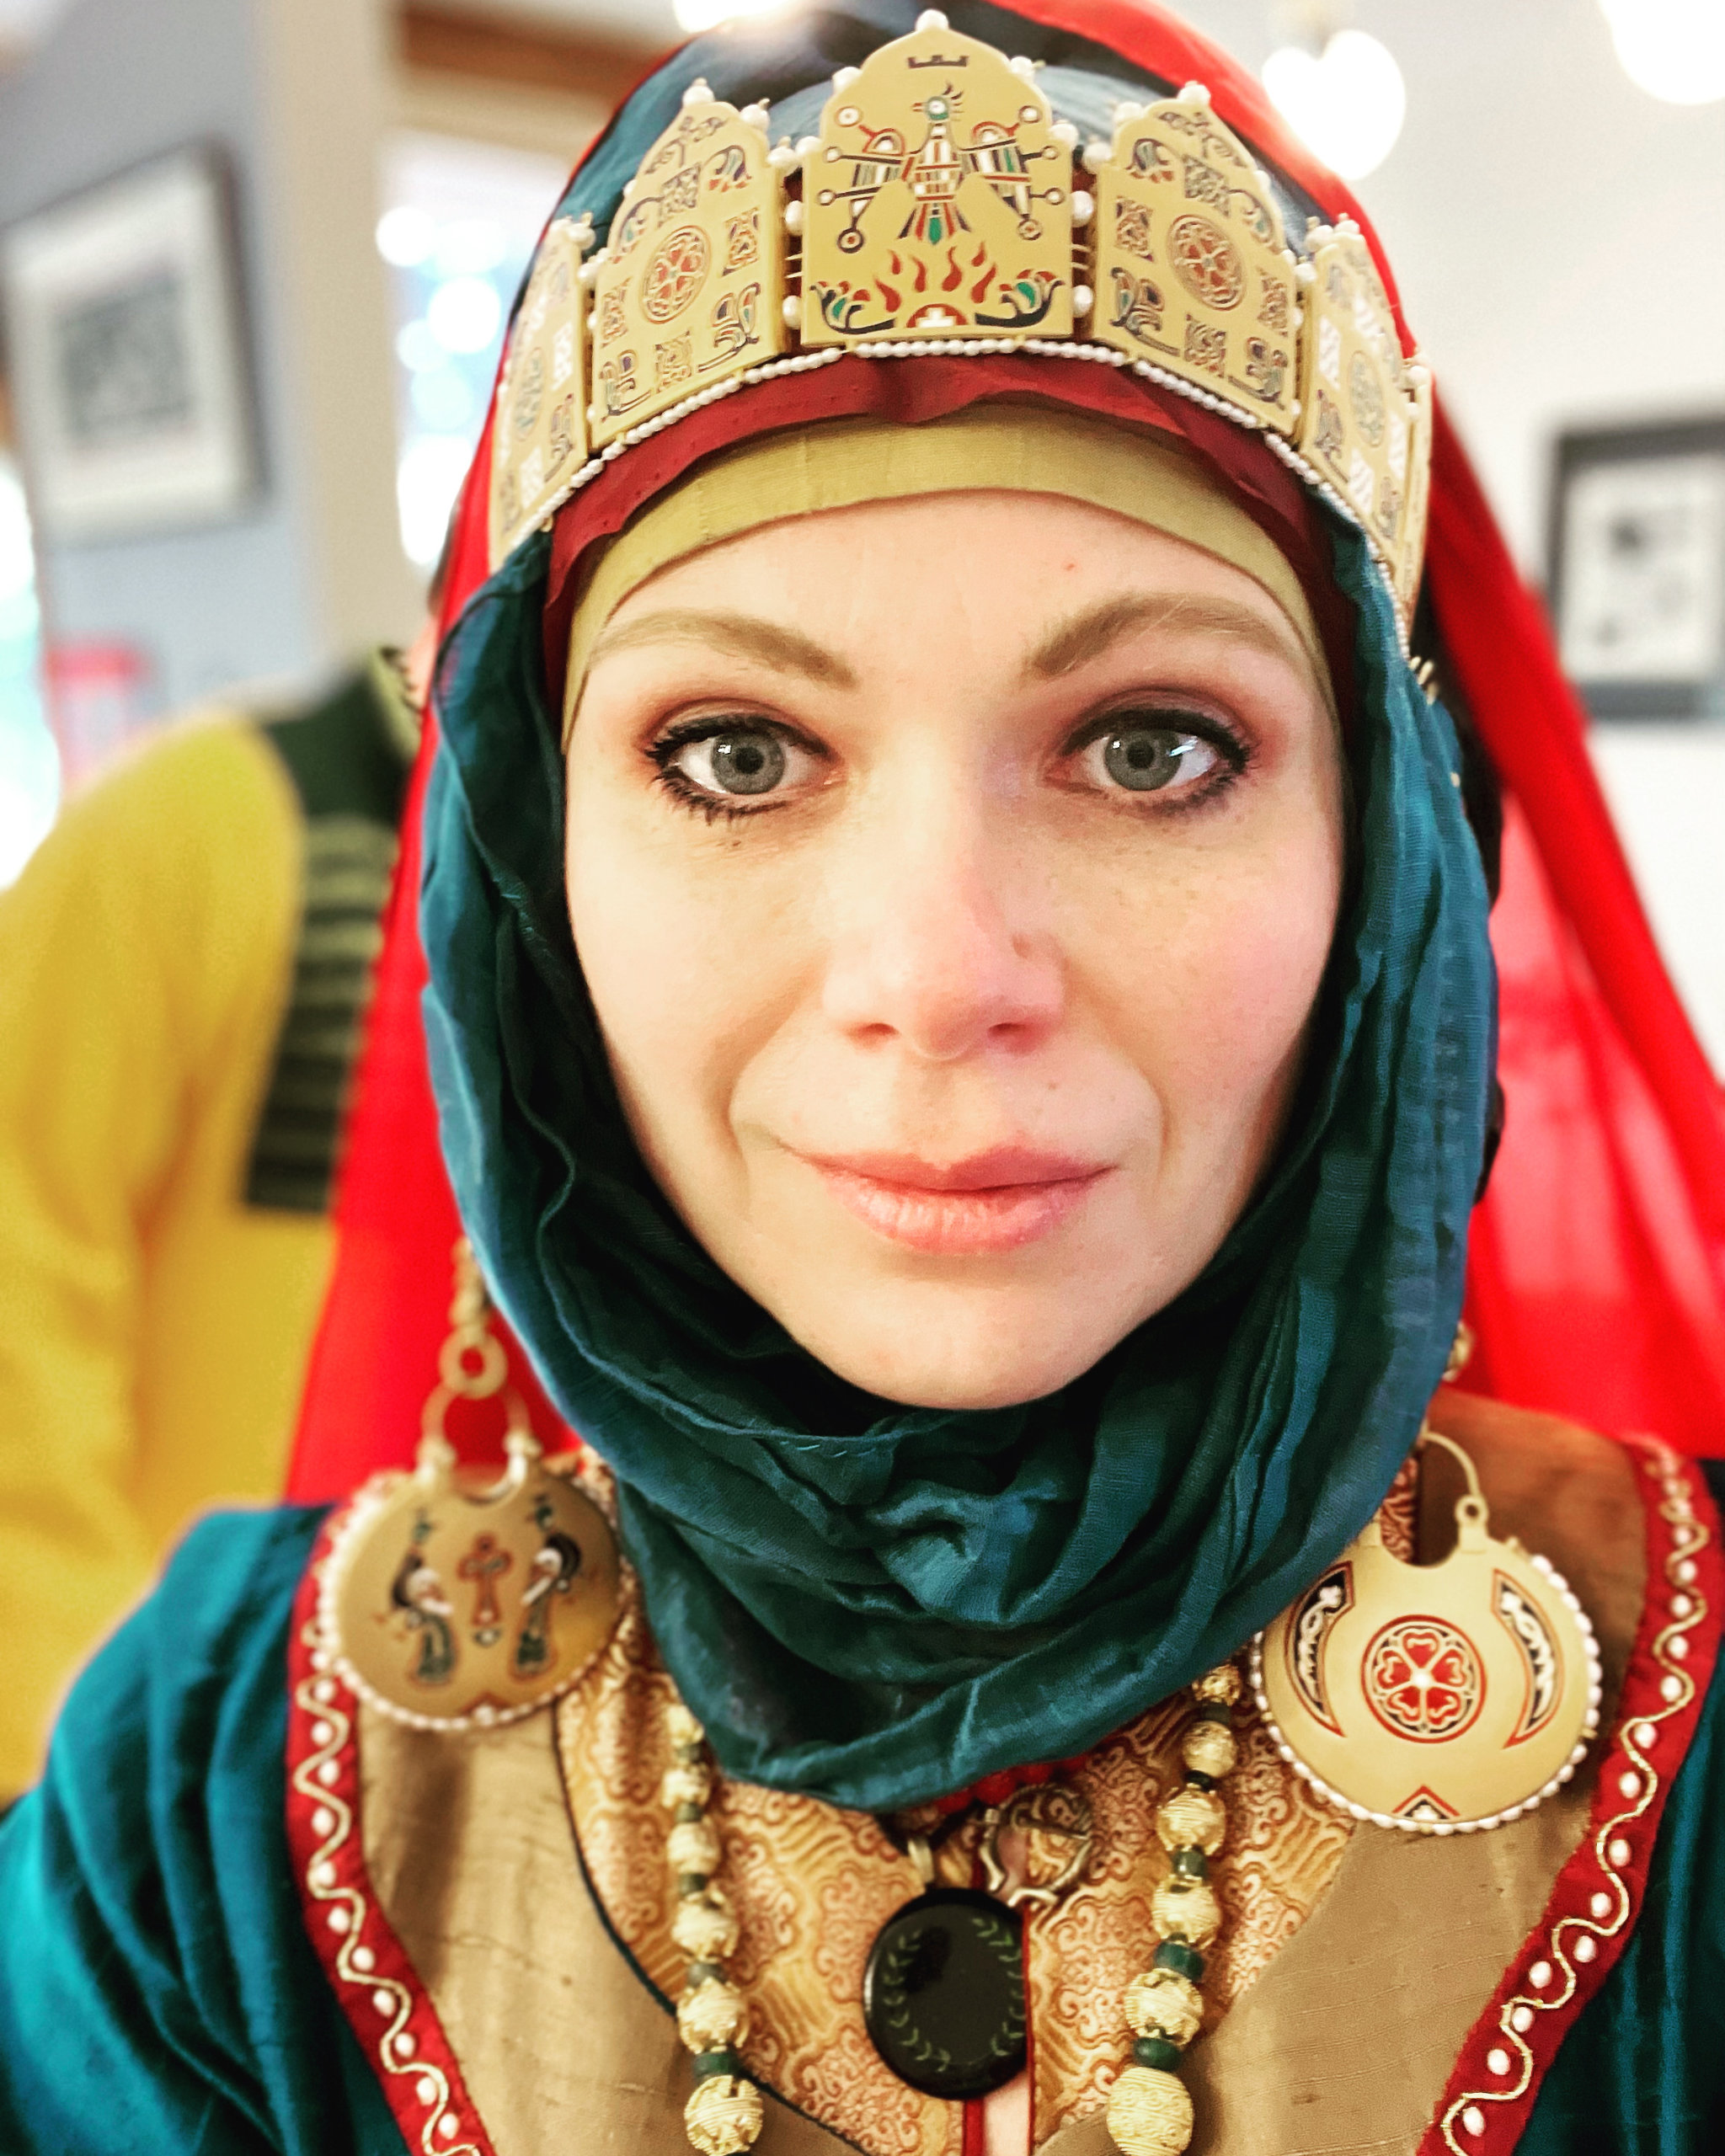
The kolti, ryazni, and diadem were all plated with 24k gold, because I liked the richness of the color of the 24k as compared to 14k or 18k. For personal aesthetic reasons I chose a slightly matte finish rather than highly polished For durability they were plated to 3.5 microns thickness.

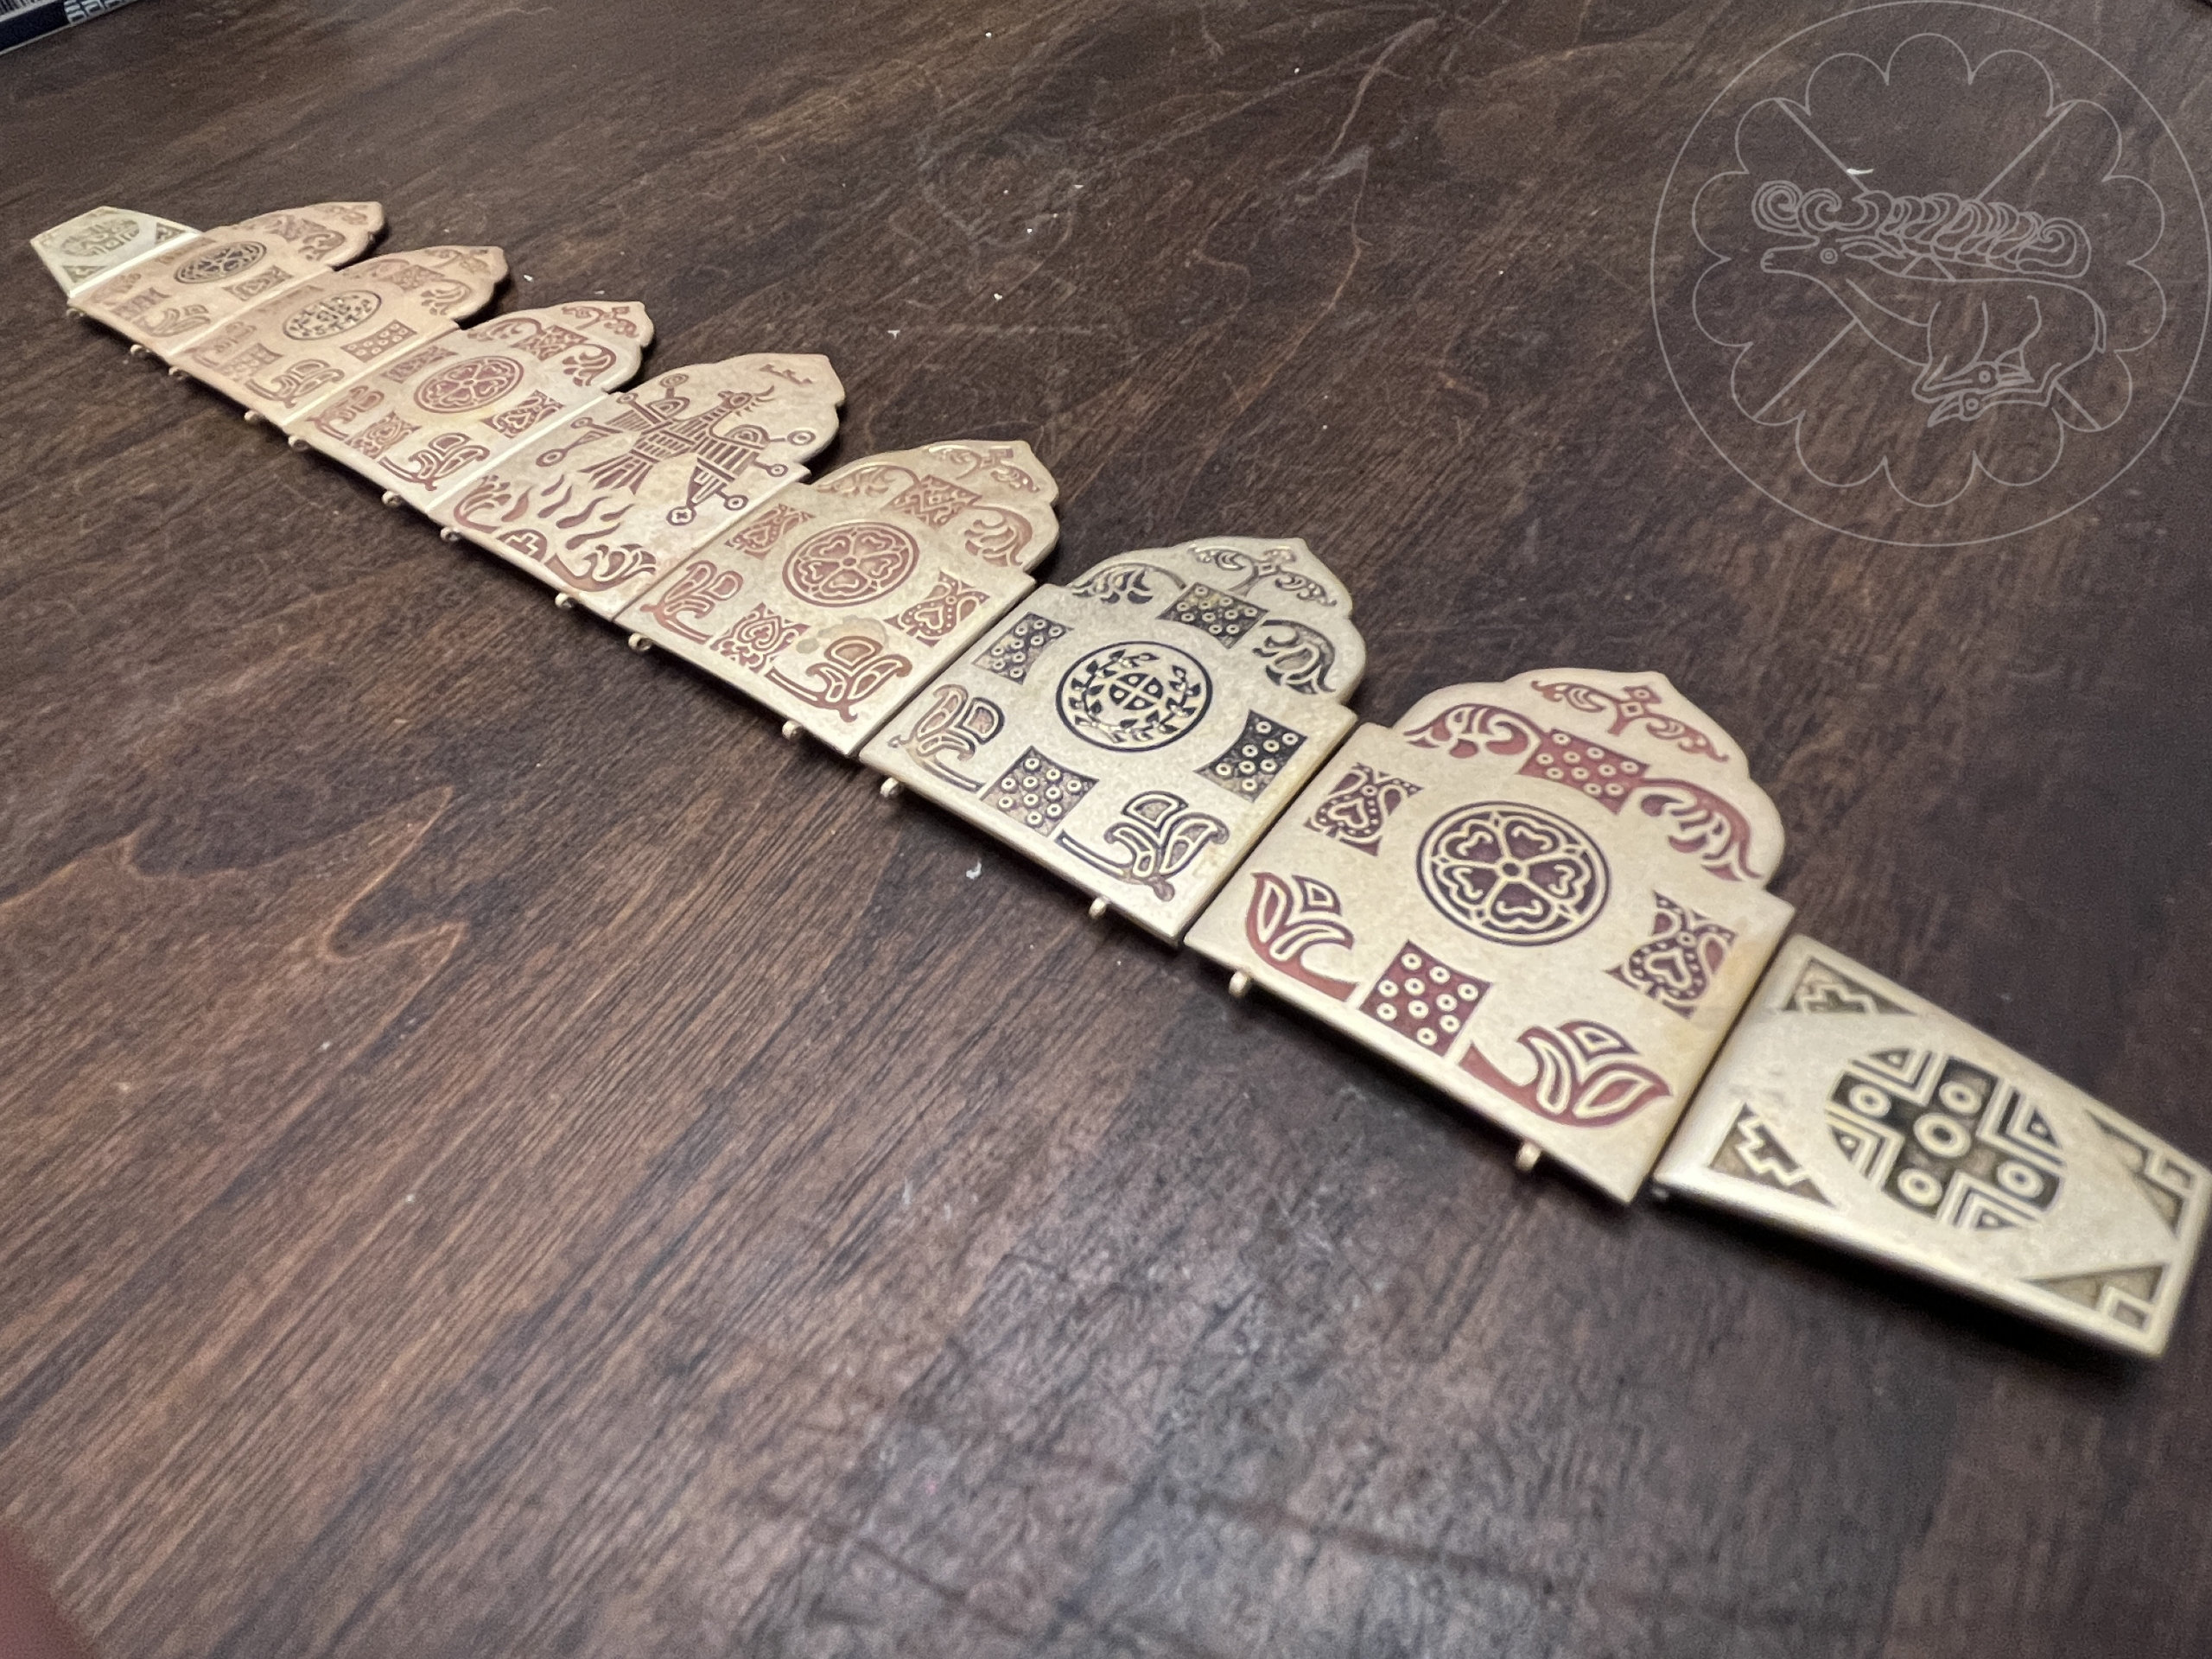
After plating came the “enamel”. The cold enamel I used was a 2 part epoxy using the thick hardener from riogrande.com. I did some tests with the thin hardener, but it wicked too easily in the fine designs and was difficult to control. Most kolti found use a very similar color palette of just 4 colors for the enamel – dark blue, a turquoise-ish green, white, and red. I mixed the colors to achieve a palette as similar to the originals as I could, mixing in large enough quantity that I would have enough for the whole project, so as not to have mismatched colors anywhere. Working time with the epoxy was a bit more than 30 minutes, though it could be stretched longer, it just became more difficult to apply. Having an assortment of needle dispense tips was key, a very fine gauge for the detail and a larger gauge for the more open areas. Additionally, figuring out a good technique to clean up mistakes was crucial since mistakes are inevitable. I ended up using the 2 spare etched plates to practice the enamel and I’m glad I did – it really helped me get a feel for the curing time and clean up my technique. I worked one side of each kolt at a time with the same color, then let them cure before applying the next color, and used an oven set to 150°F to speed the curing time. Even with this, because of the long curing time and my care in only applying one color at a time on one side at a time, it took several full days to complete. Below are the kolti after the enameling was completed.
Finally I added the pearls to the edges.

Diadem Construction
After finishing the kolti, I moved on to the diadem. Learning from how well the detail on the kolti came out, I actually was able to refine the detail on the artwork for the diadem, with thinner “cloisons” separating the features. Although I could have tried with the thinner 18 gauge, I continued with 16 gauge for the diadem as well since I had the material on hand and it had worked well for the kolti.
Although I was able to find the dimensions of the plates, any other details such as the weights, methods of construction, or images of the back and how it is structured are utterly lacking. Mostly. I just had pictures to work from. I did find the dimensions of the plates listed and scaled mine to match.
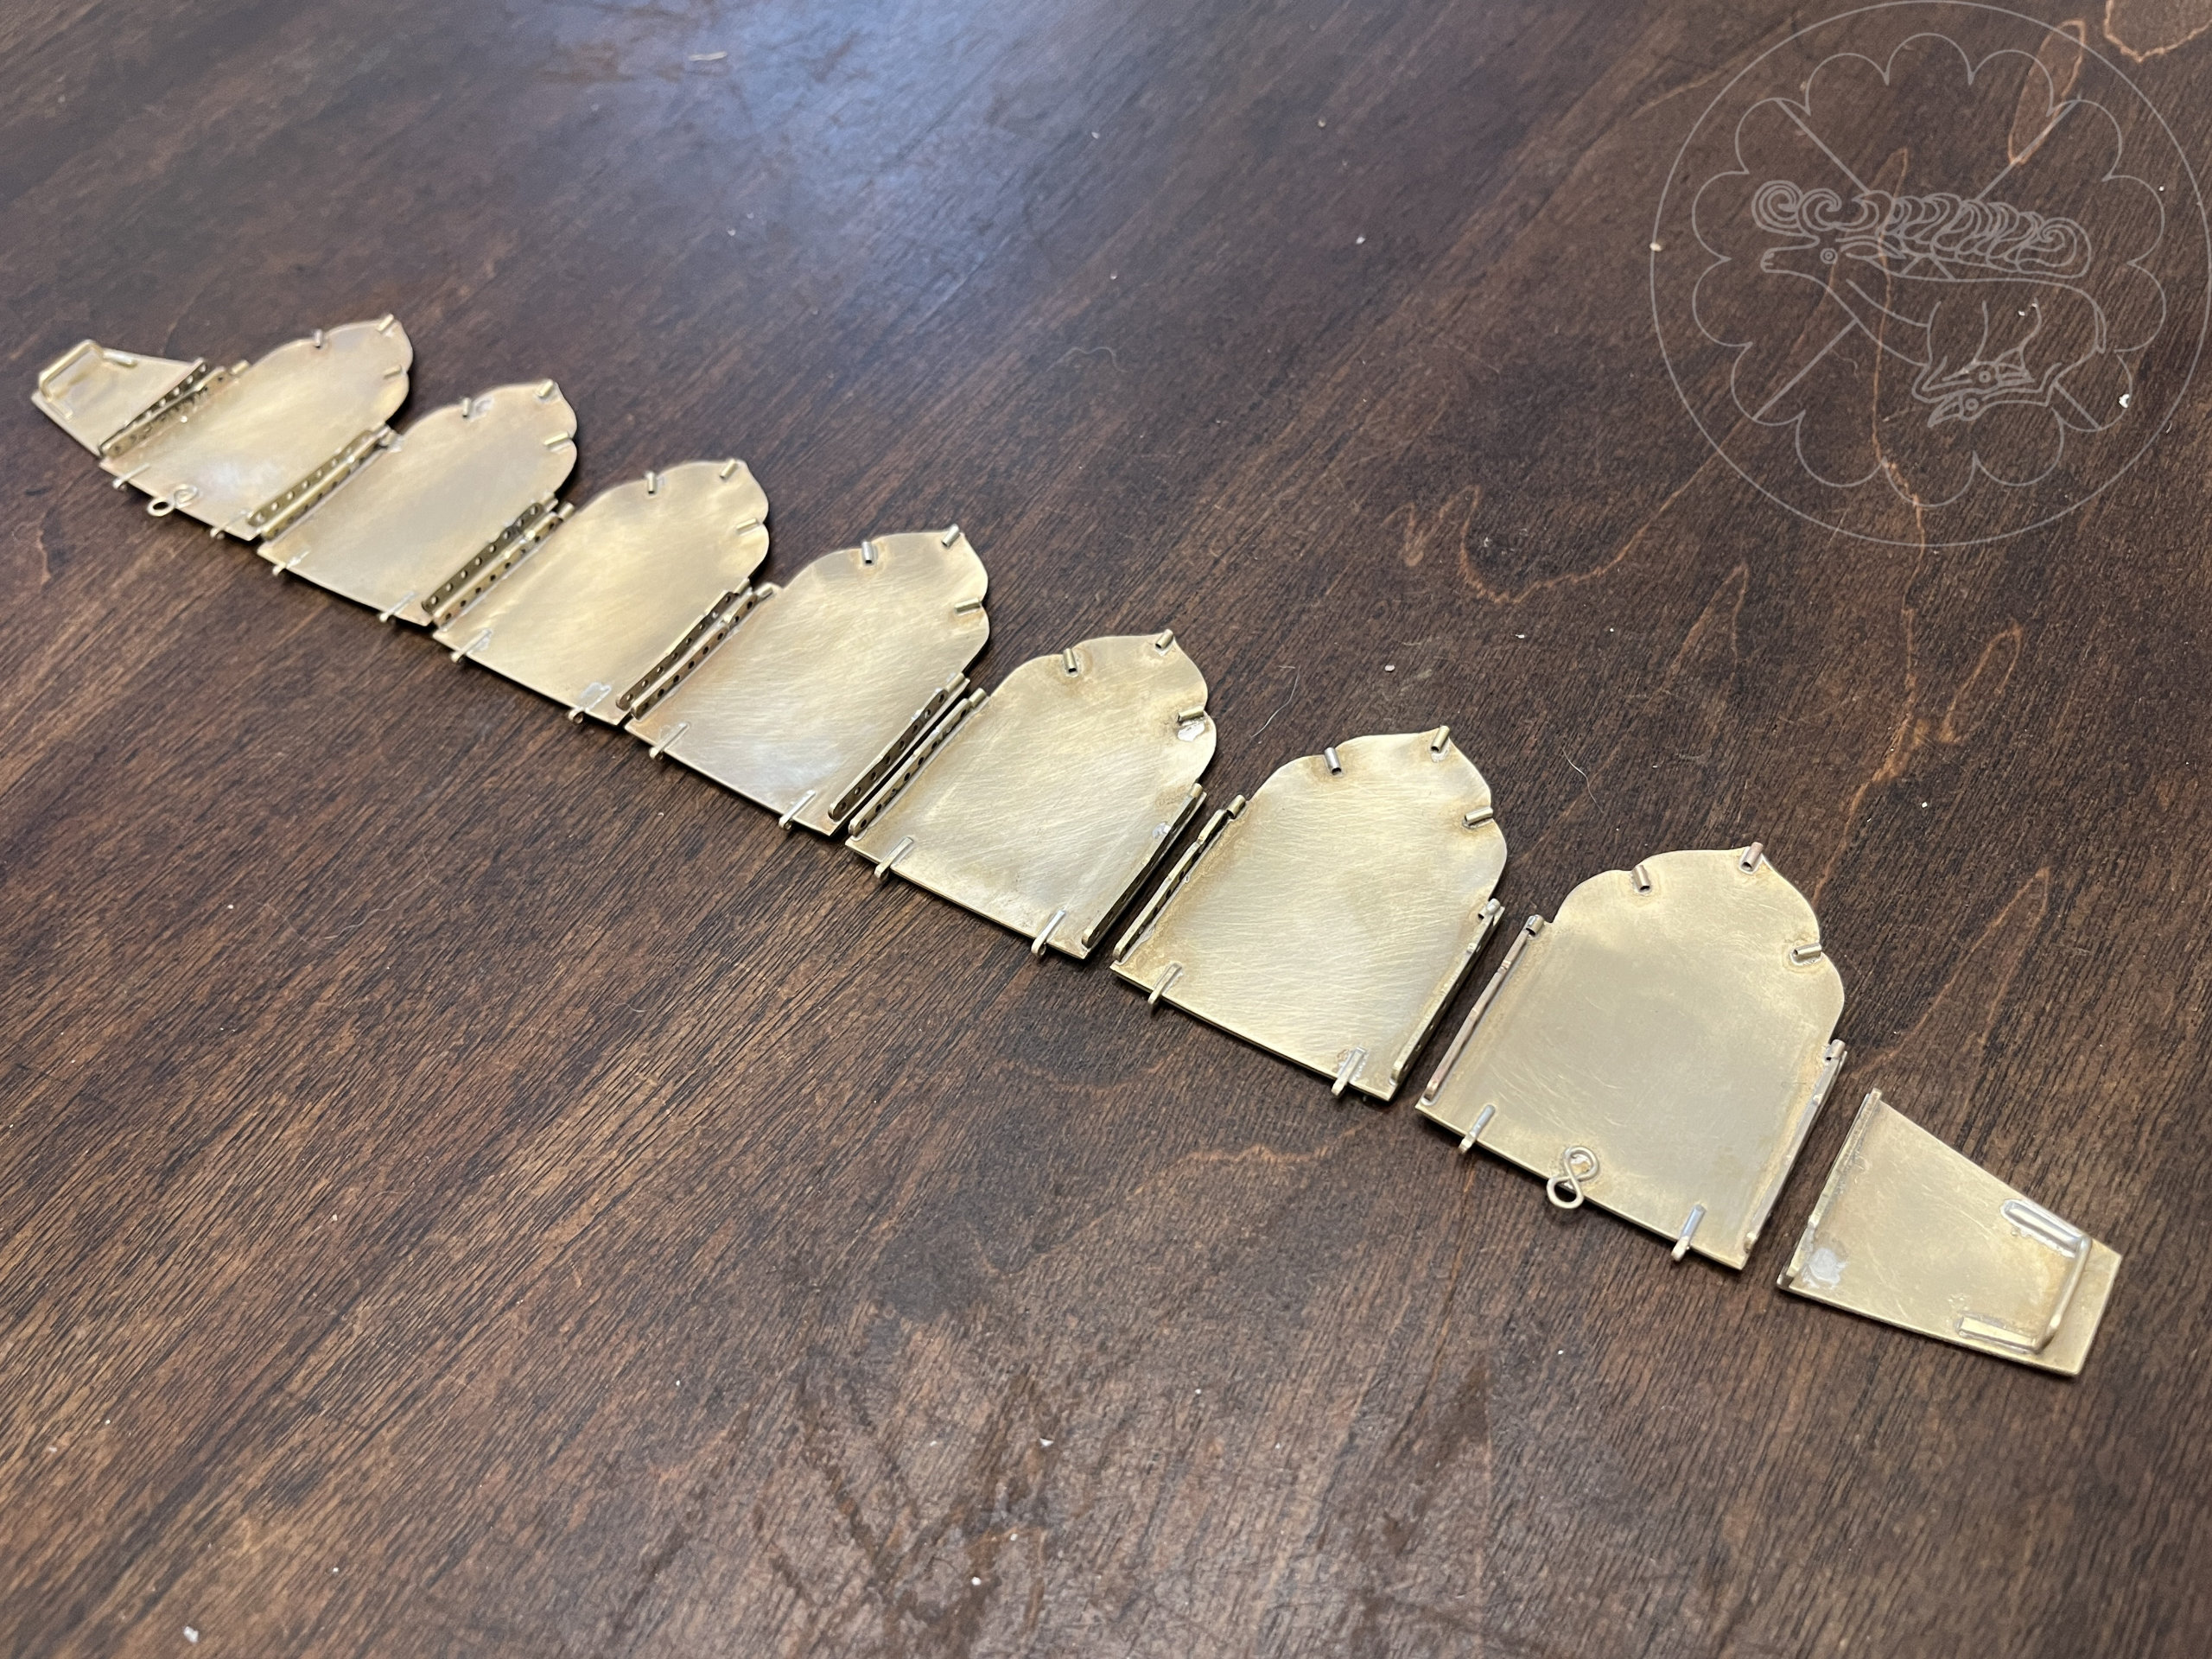
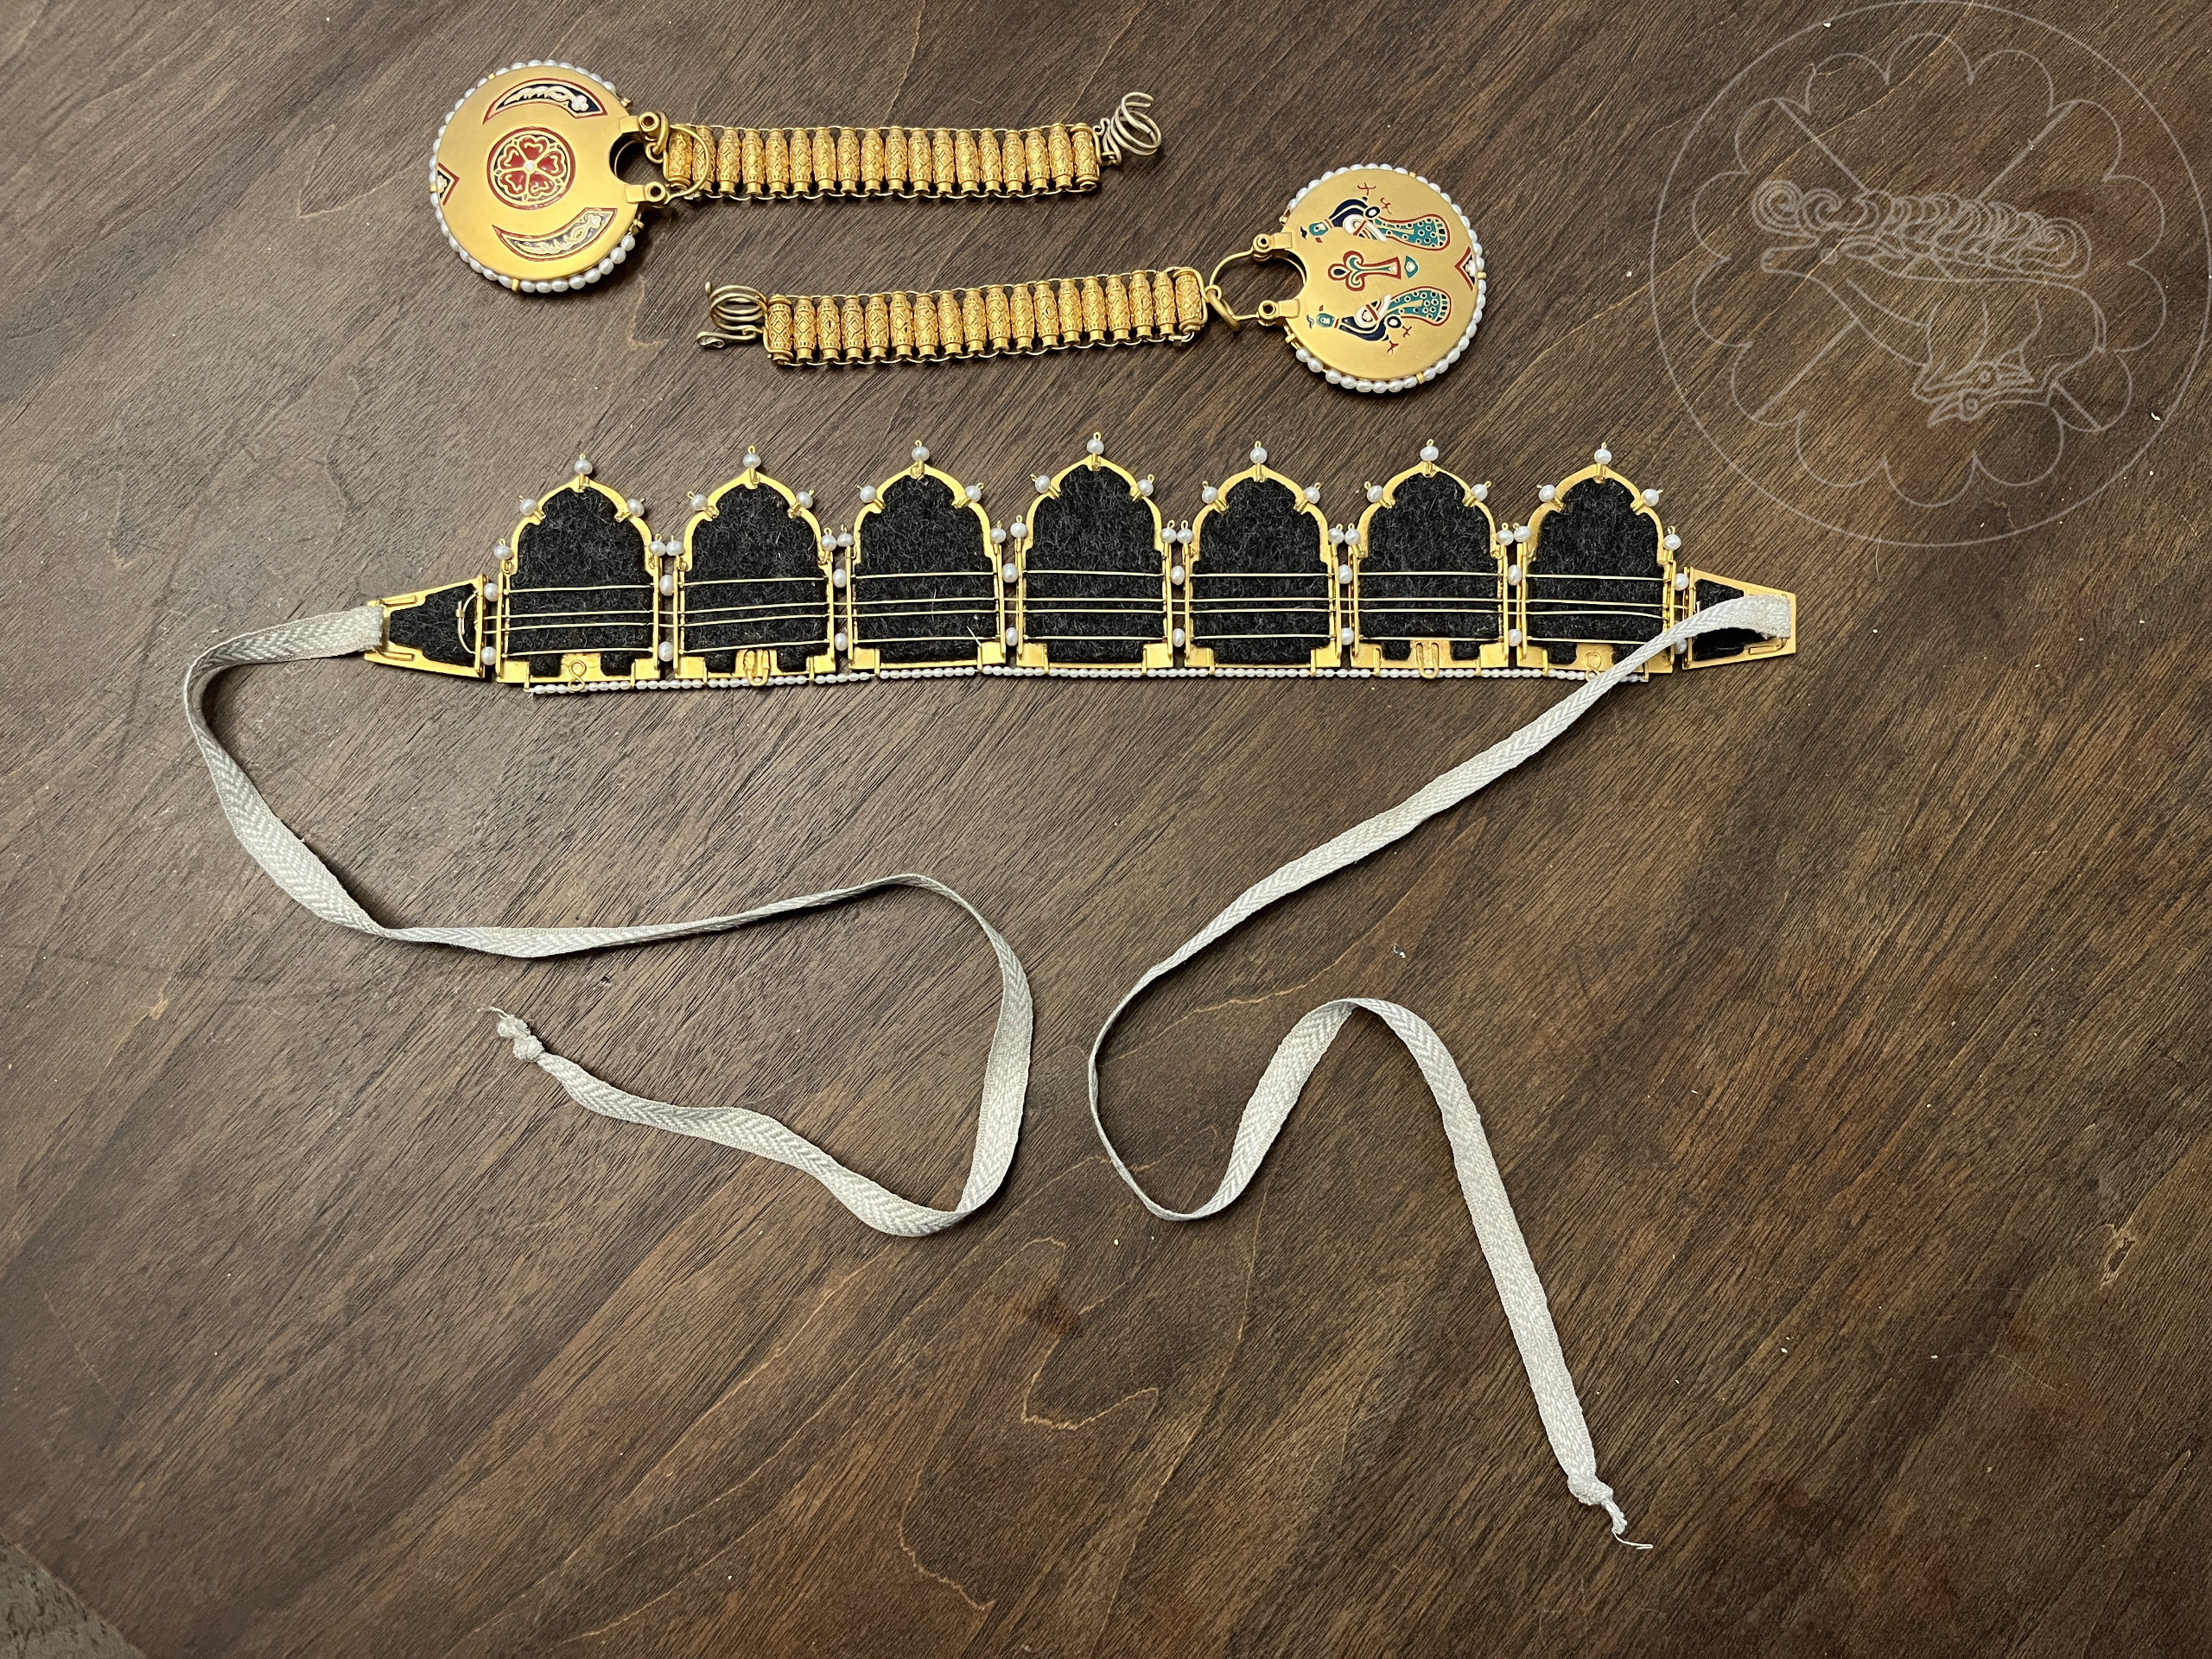
The construction methods used were similar to that of the kolti. Plates were designed, laser etched, cut, and slightly dished. On the back I needed some fixture or fitting that I could use as an attachment point to string the plates together like the extant piece, rather than have them physically attached to one another. One option was bending and drilling pieces with an L profile that would be soldered at on both narrow vertical sides of each plate. I ended up with a brass 6 hole bead separator finding as the basis of the attachments instead. These were thick enough that they could be soldered without the need of a bend. One whole separator, plus a second cut and soldered together, then soldered to the back so that there are 8 holes in total on each side of each plate. While I only needed 4-5 holes for the strings or wires to attach the diadem together, the extra holes would allow it to be easily attached to a circlet if I wanted to give it more physical structure for use.
Similar to the kolti, first the plates were laser etched, then cut, then filed then slightly dished
For the pearls on top, I was worried about the wires bending and breaking over time. Instead of soldering wires directly to the back and fitting the pearls to them, I soldered short tube sections onto the back, and then was able to use basically an eye pin to hold the pearl, fit it through the tube, and then bend the end to secure it. This way I can replace the pins and pearls individually without needing to re-solder anything.
For the bottom loops I made an upside down P shape of flattened wire and soldered it to the back as well. Here’s a picture of the back with the separators, tubes, and bottom loops.

I also added loops to the last 2 plates on each side so that the kolti could be suspended from either plate. These photos just show the first set, but I ended up adding a second to the next inboard set of plates as well. These are mostly hidden behind the pearl strand that hangs below the plates once the diadem is assembled. The end plates have a bent wire to attach the ribbon used to tie the diadem.

Next they were gold plated and enameled, again one color at a time.


Here is the fully colored front plate with its inspiration
And here are the pearls all affixed.
For durability, I used 4 rows of 19 strand .015” gold plated stainless beading wire to secure the plates together. Because of the location of the lowest set of pearls on the plates, there needed to be some space separating the plates, which must have been an issue on the original as well. I decided to use pearls on 2 of the strands as spacers between the plates in addition to the well as on the tops. I wasn’t sure if I wanted the diadem to be straight or to have a slight curve to the final design and tried laying it out both ways. To get the curve I had put a crimp on either side of the top set of spacer pearls.

In the end, the straight design won out, but the nice thing about this construction is that if we want to change it we can just re-string it. I strung it all together and added pearls to the bottom. The diadem is held in place with a woven linen band.

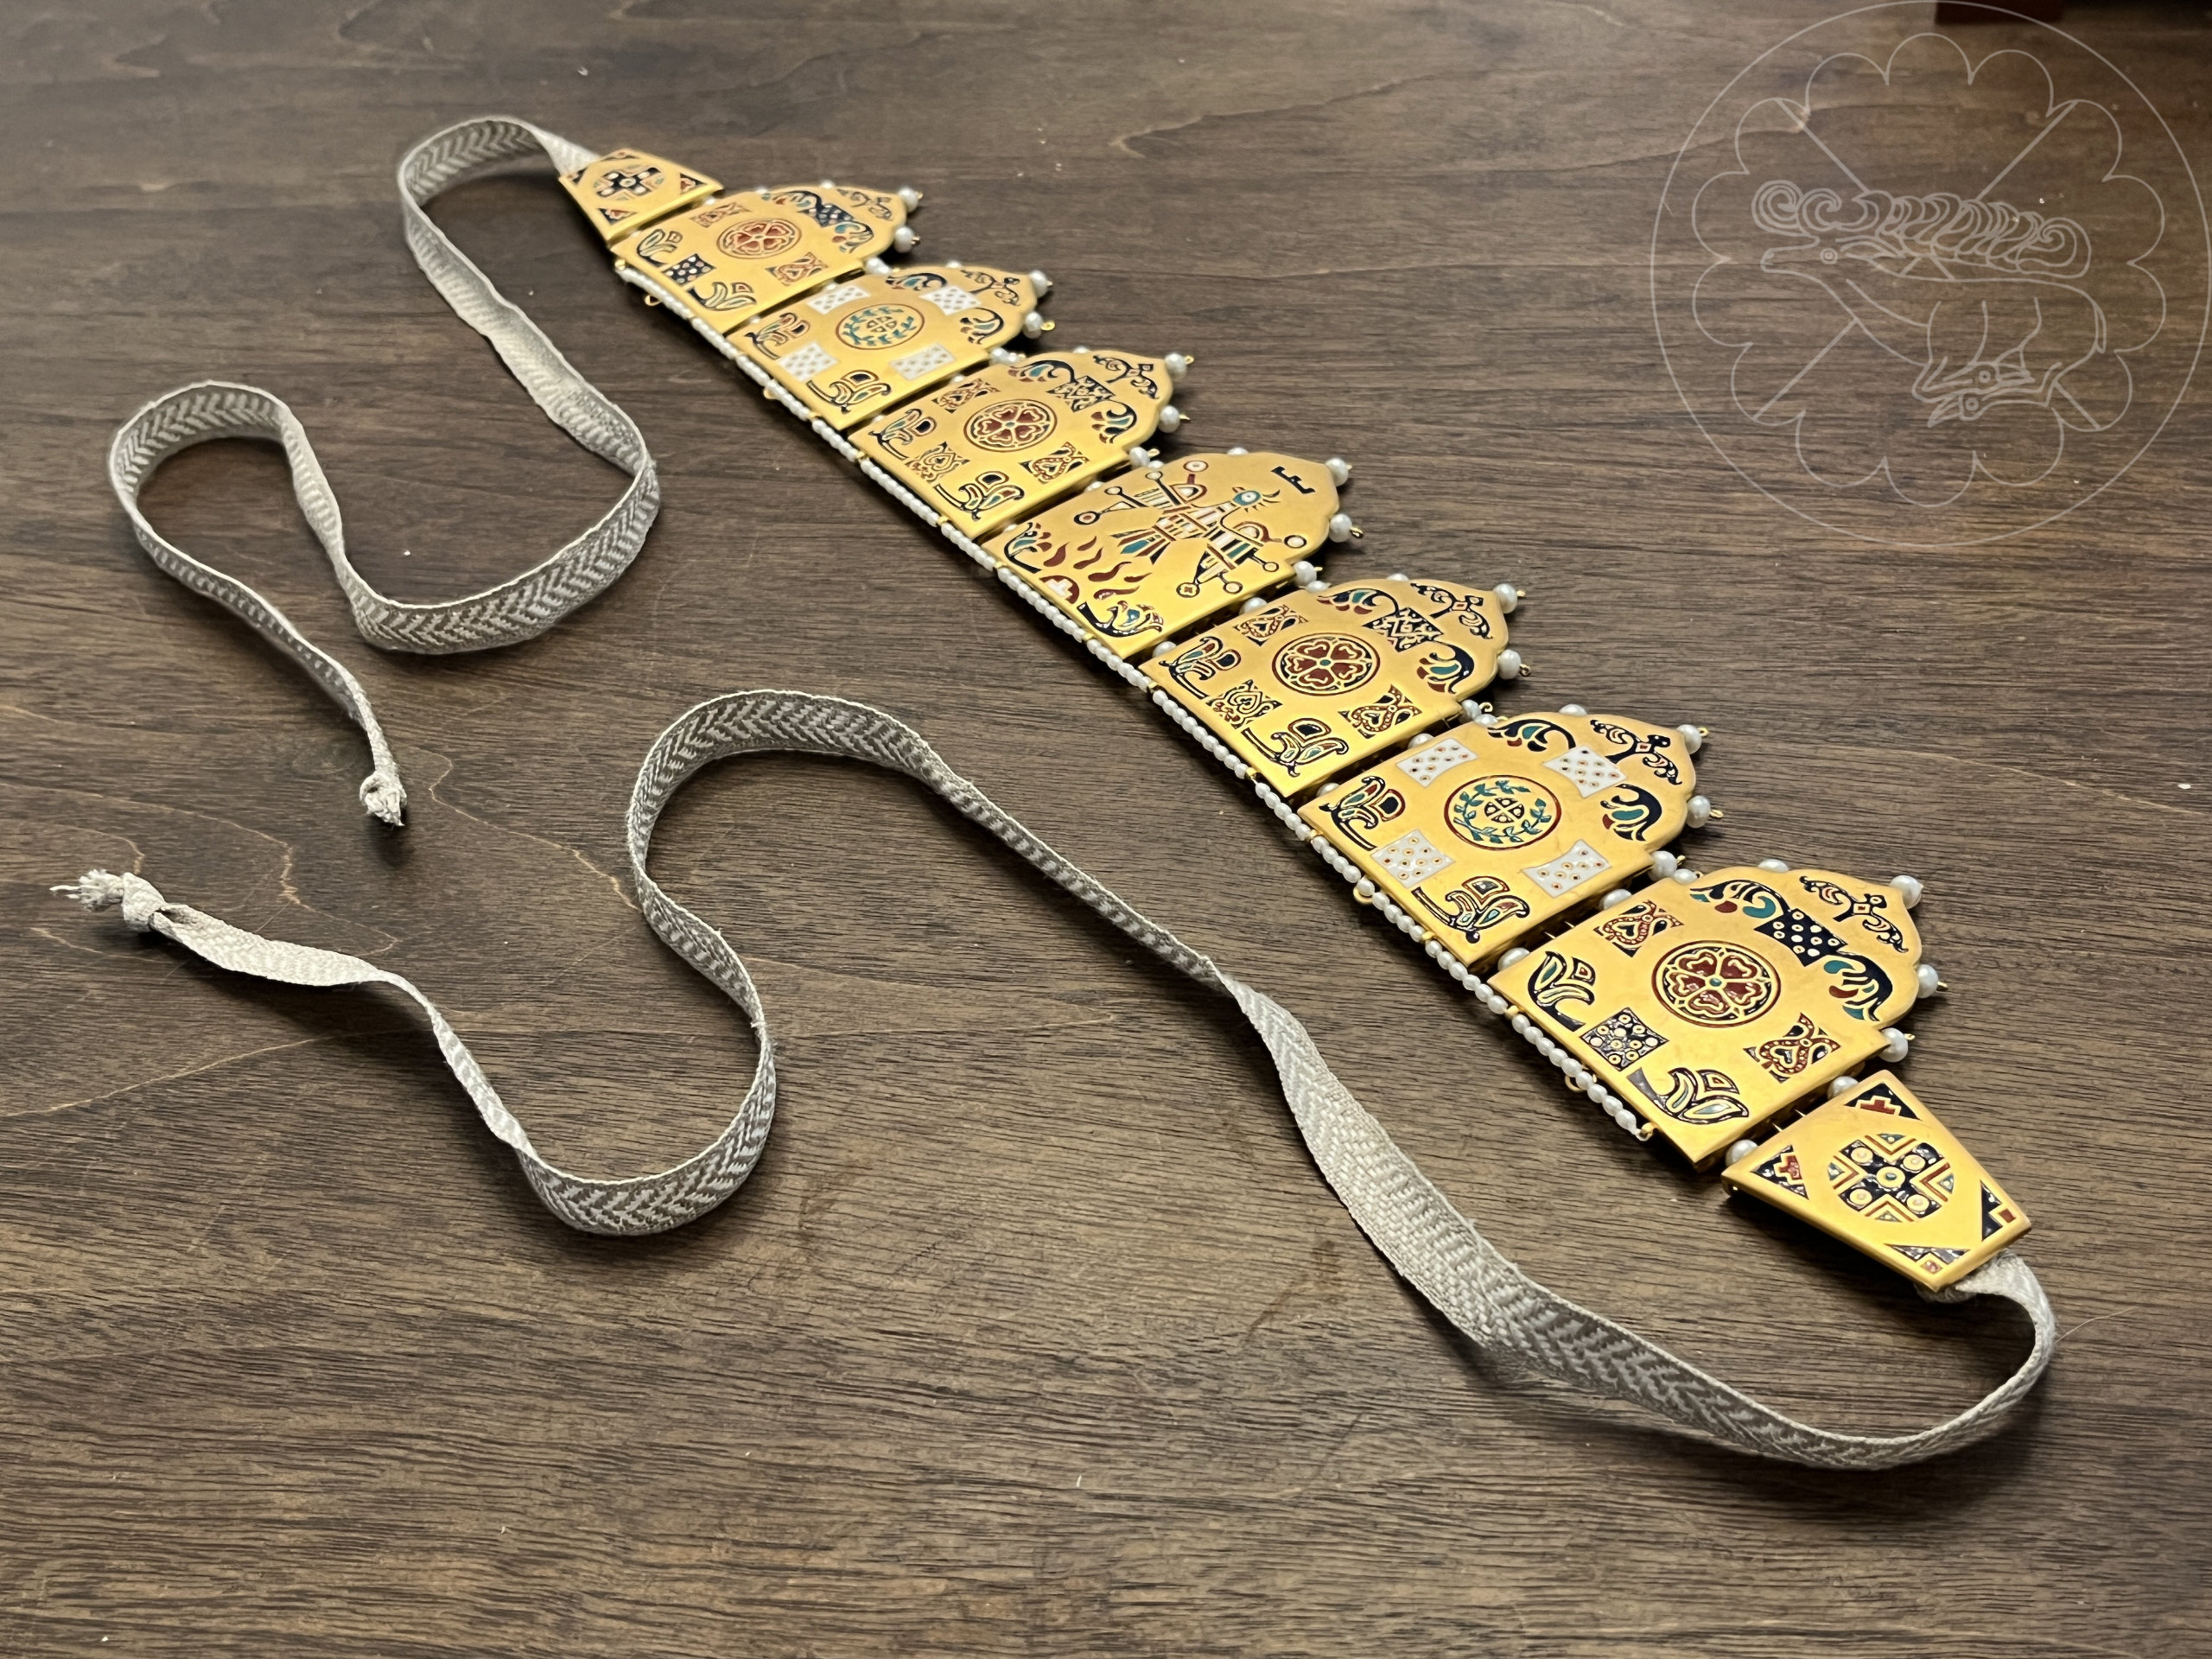

On the backs of the plates, I used 3mm thick merino wool felt as padding, which I cut to fit between the features on the back. The wire hoops at the top of the ryazni are based on some period wire coils that allow the kolti/ryazni to be easily attached and removed from the diadem.
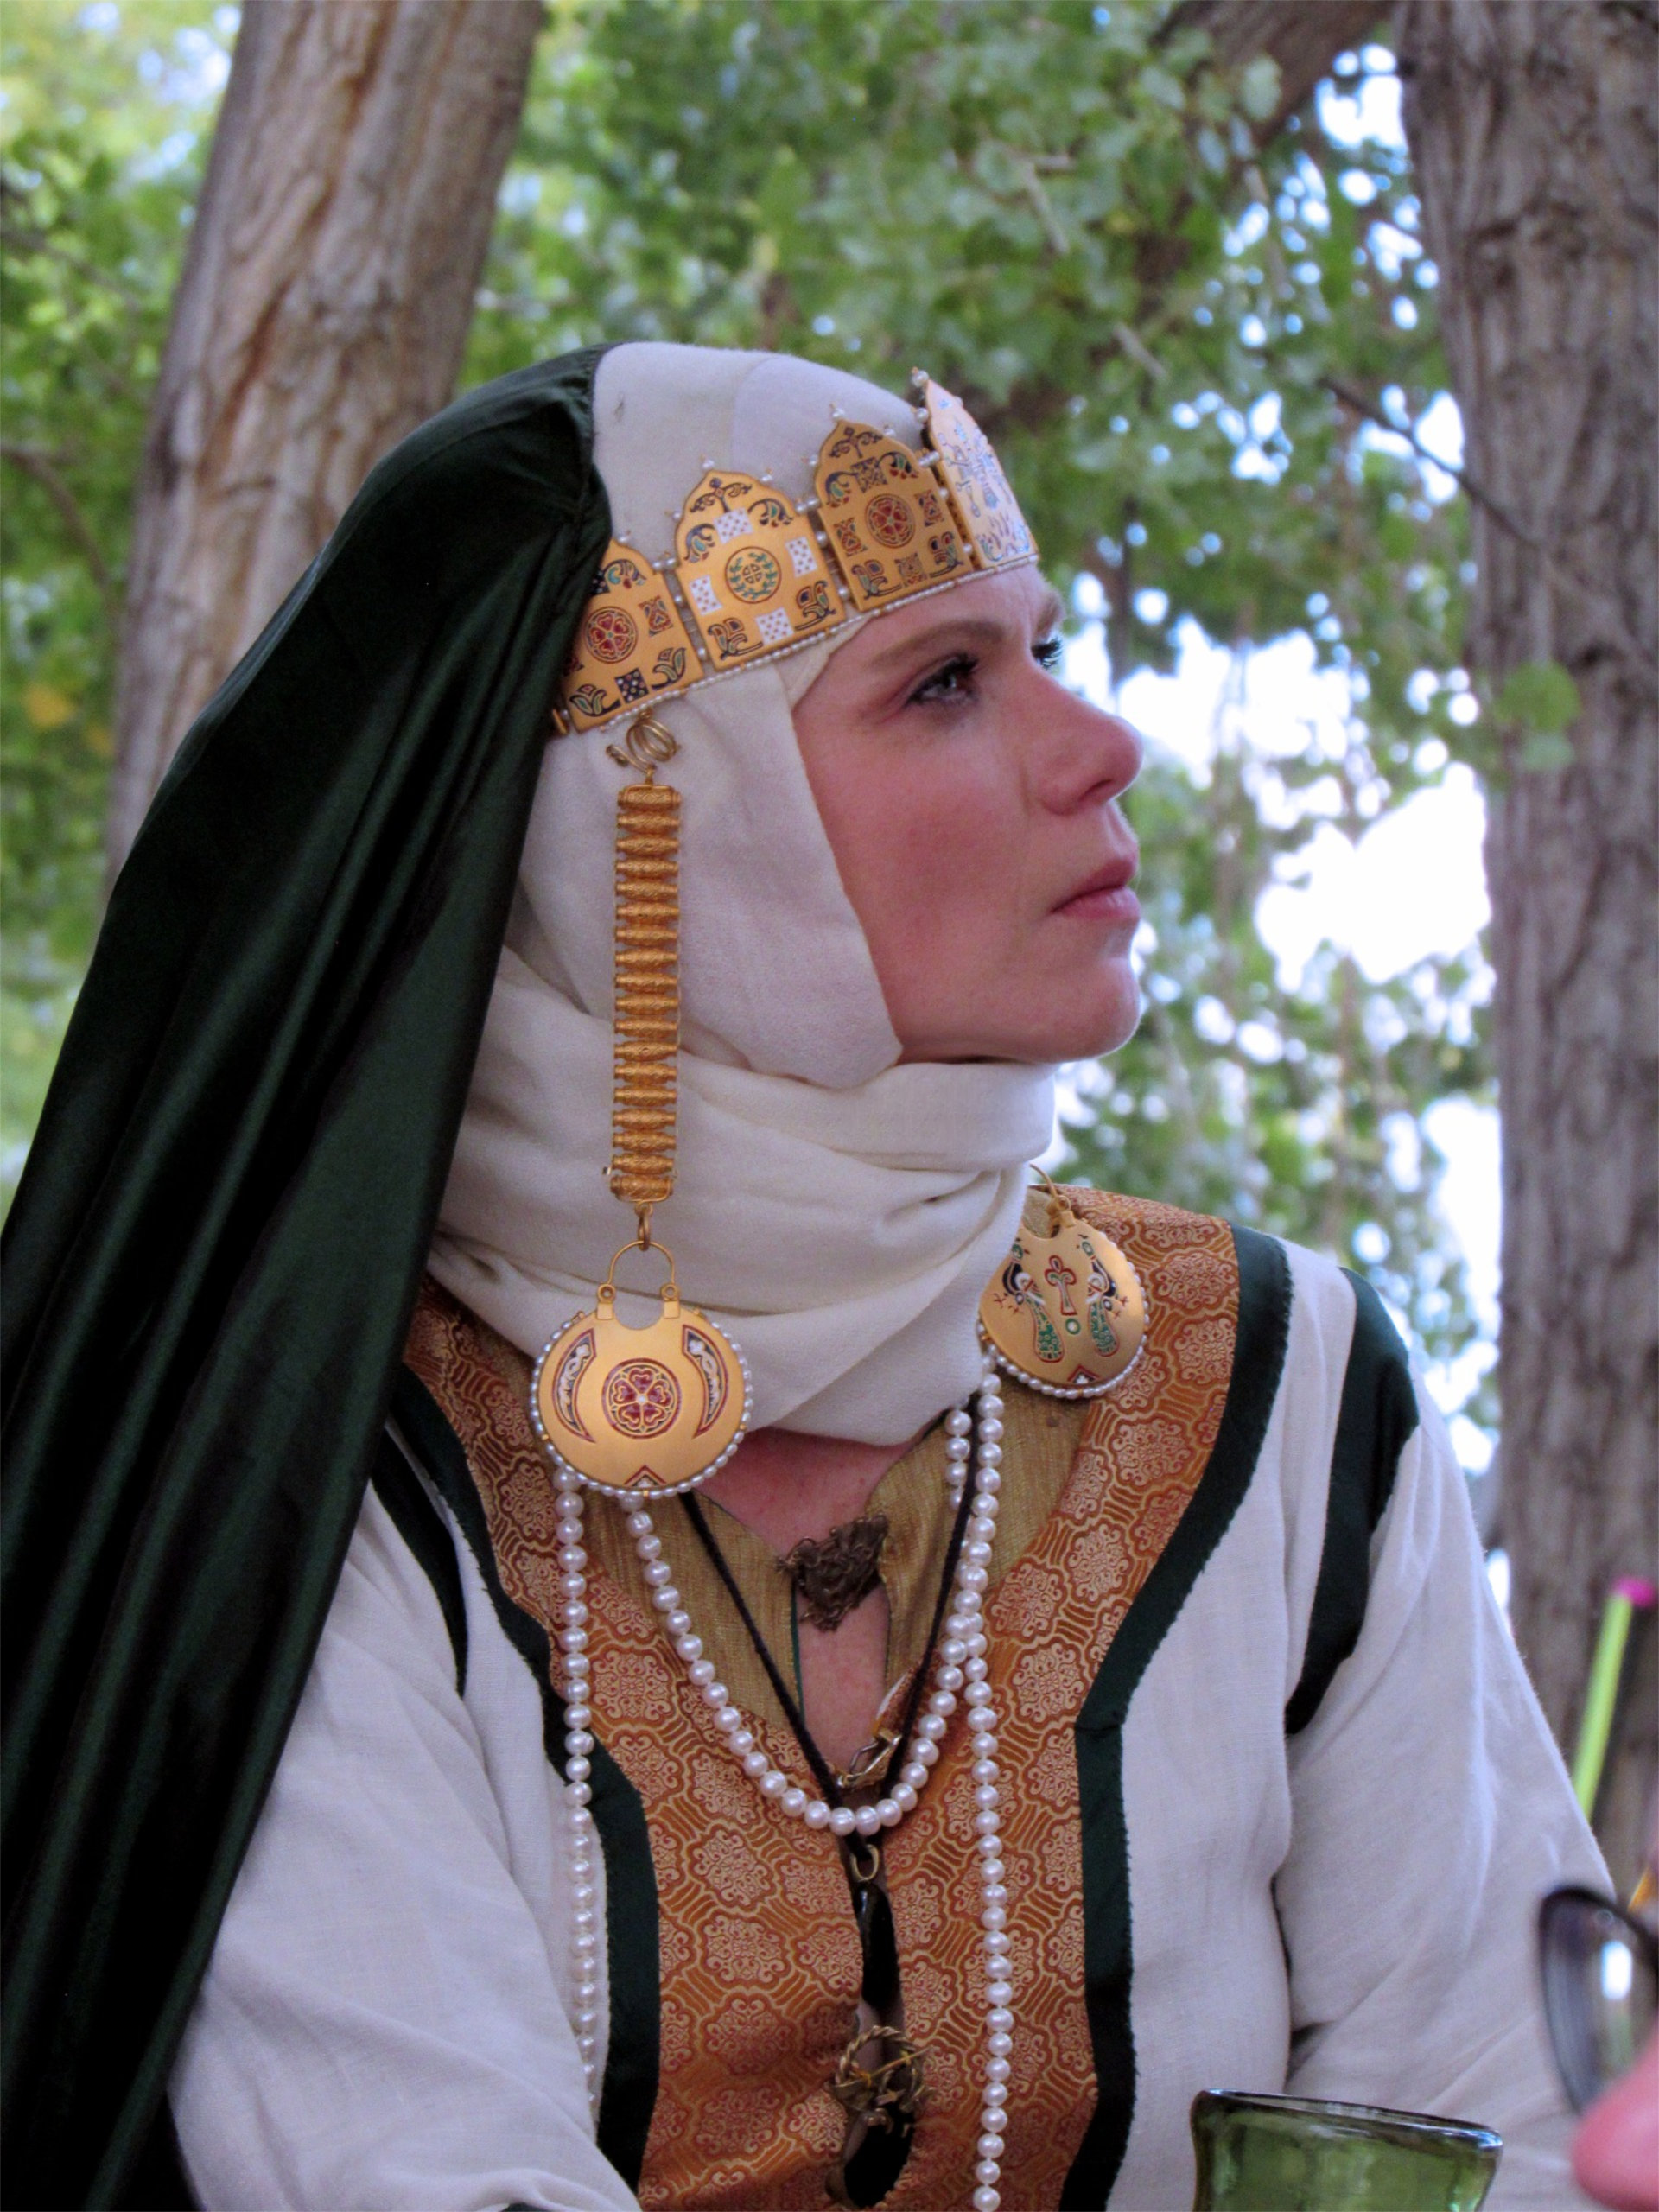
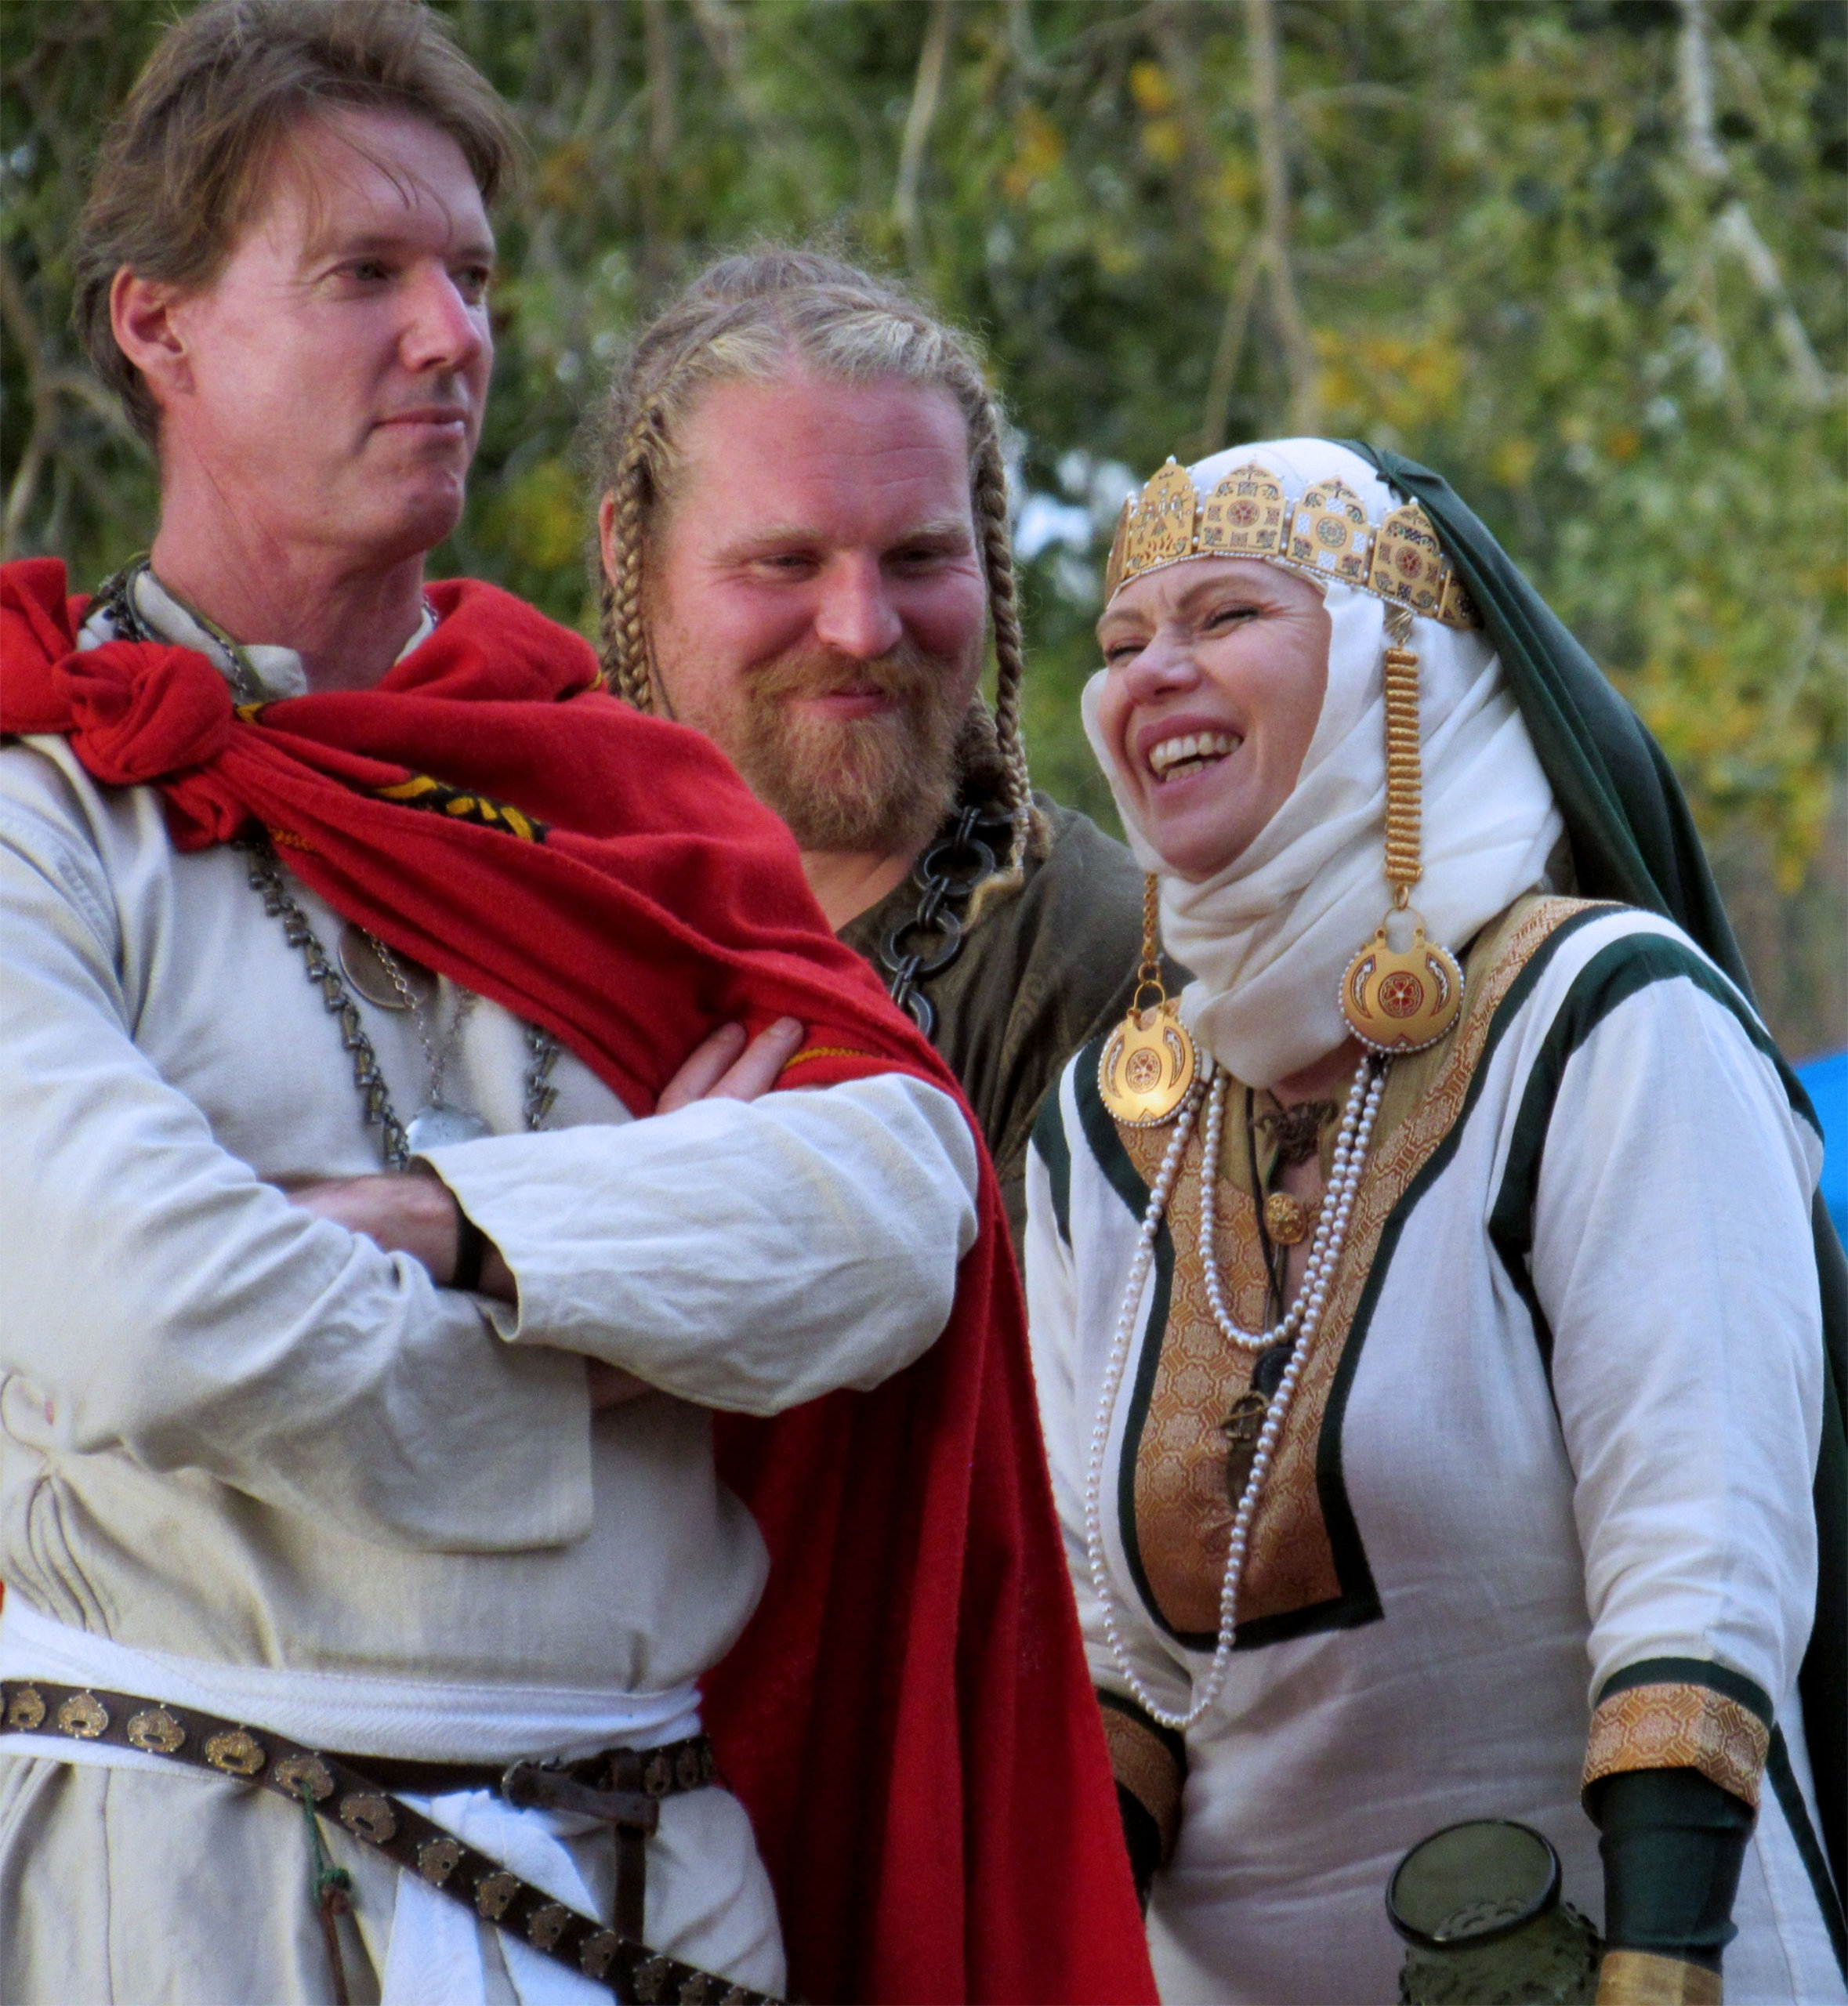
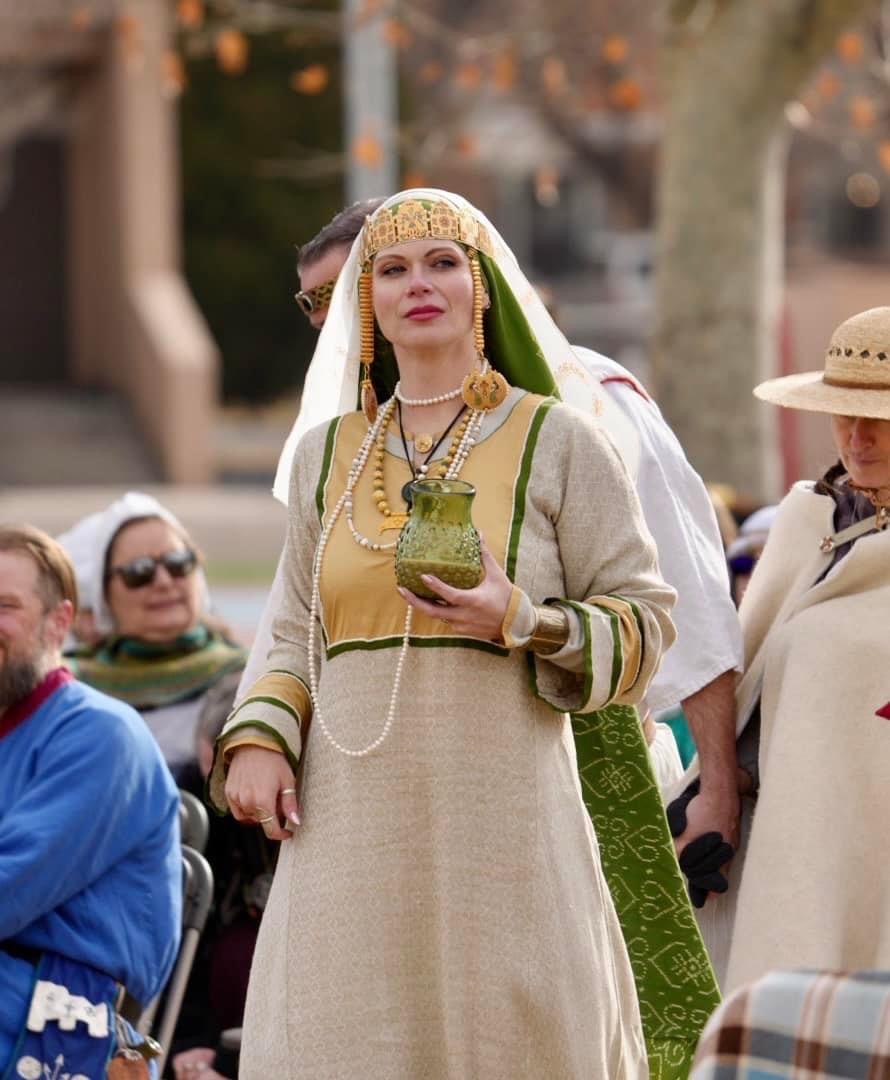
I did make a simple circlet that the band can be tied to as well, which holds in place sturdily without needing to sew through the additional holes in the back, but so far it has proven comfortable and easy to wear enough that tying it on is all that’s needed. And here’s a couple of pictures of the completed diadem and kolti being worn.
You did a really wonderful job of outlining the understandings of the extant pieces and your approach to interpretations and concession to modern techniques. All around a really wonderful interpretation and a real homage to the diadem and Kolti of the Kievan Rus.