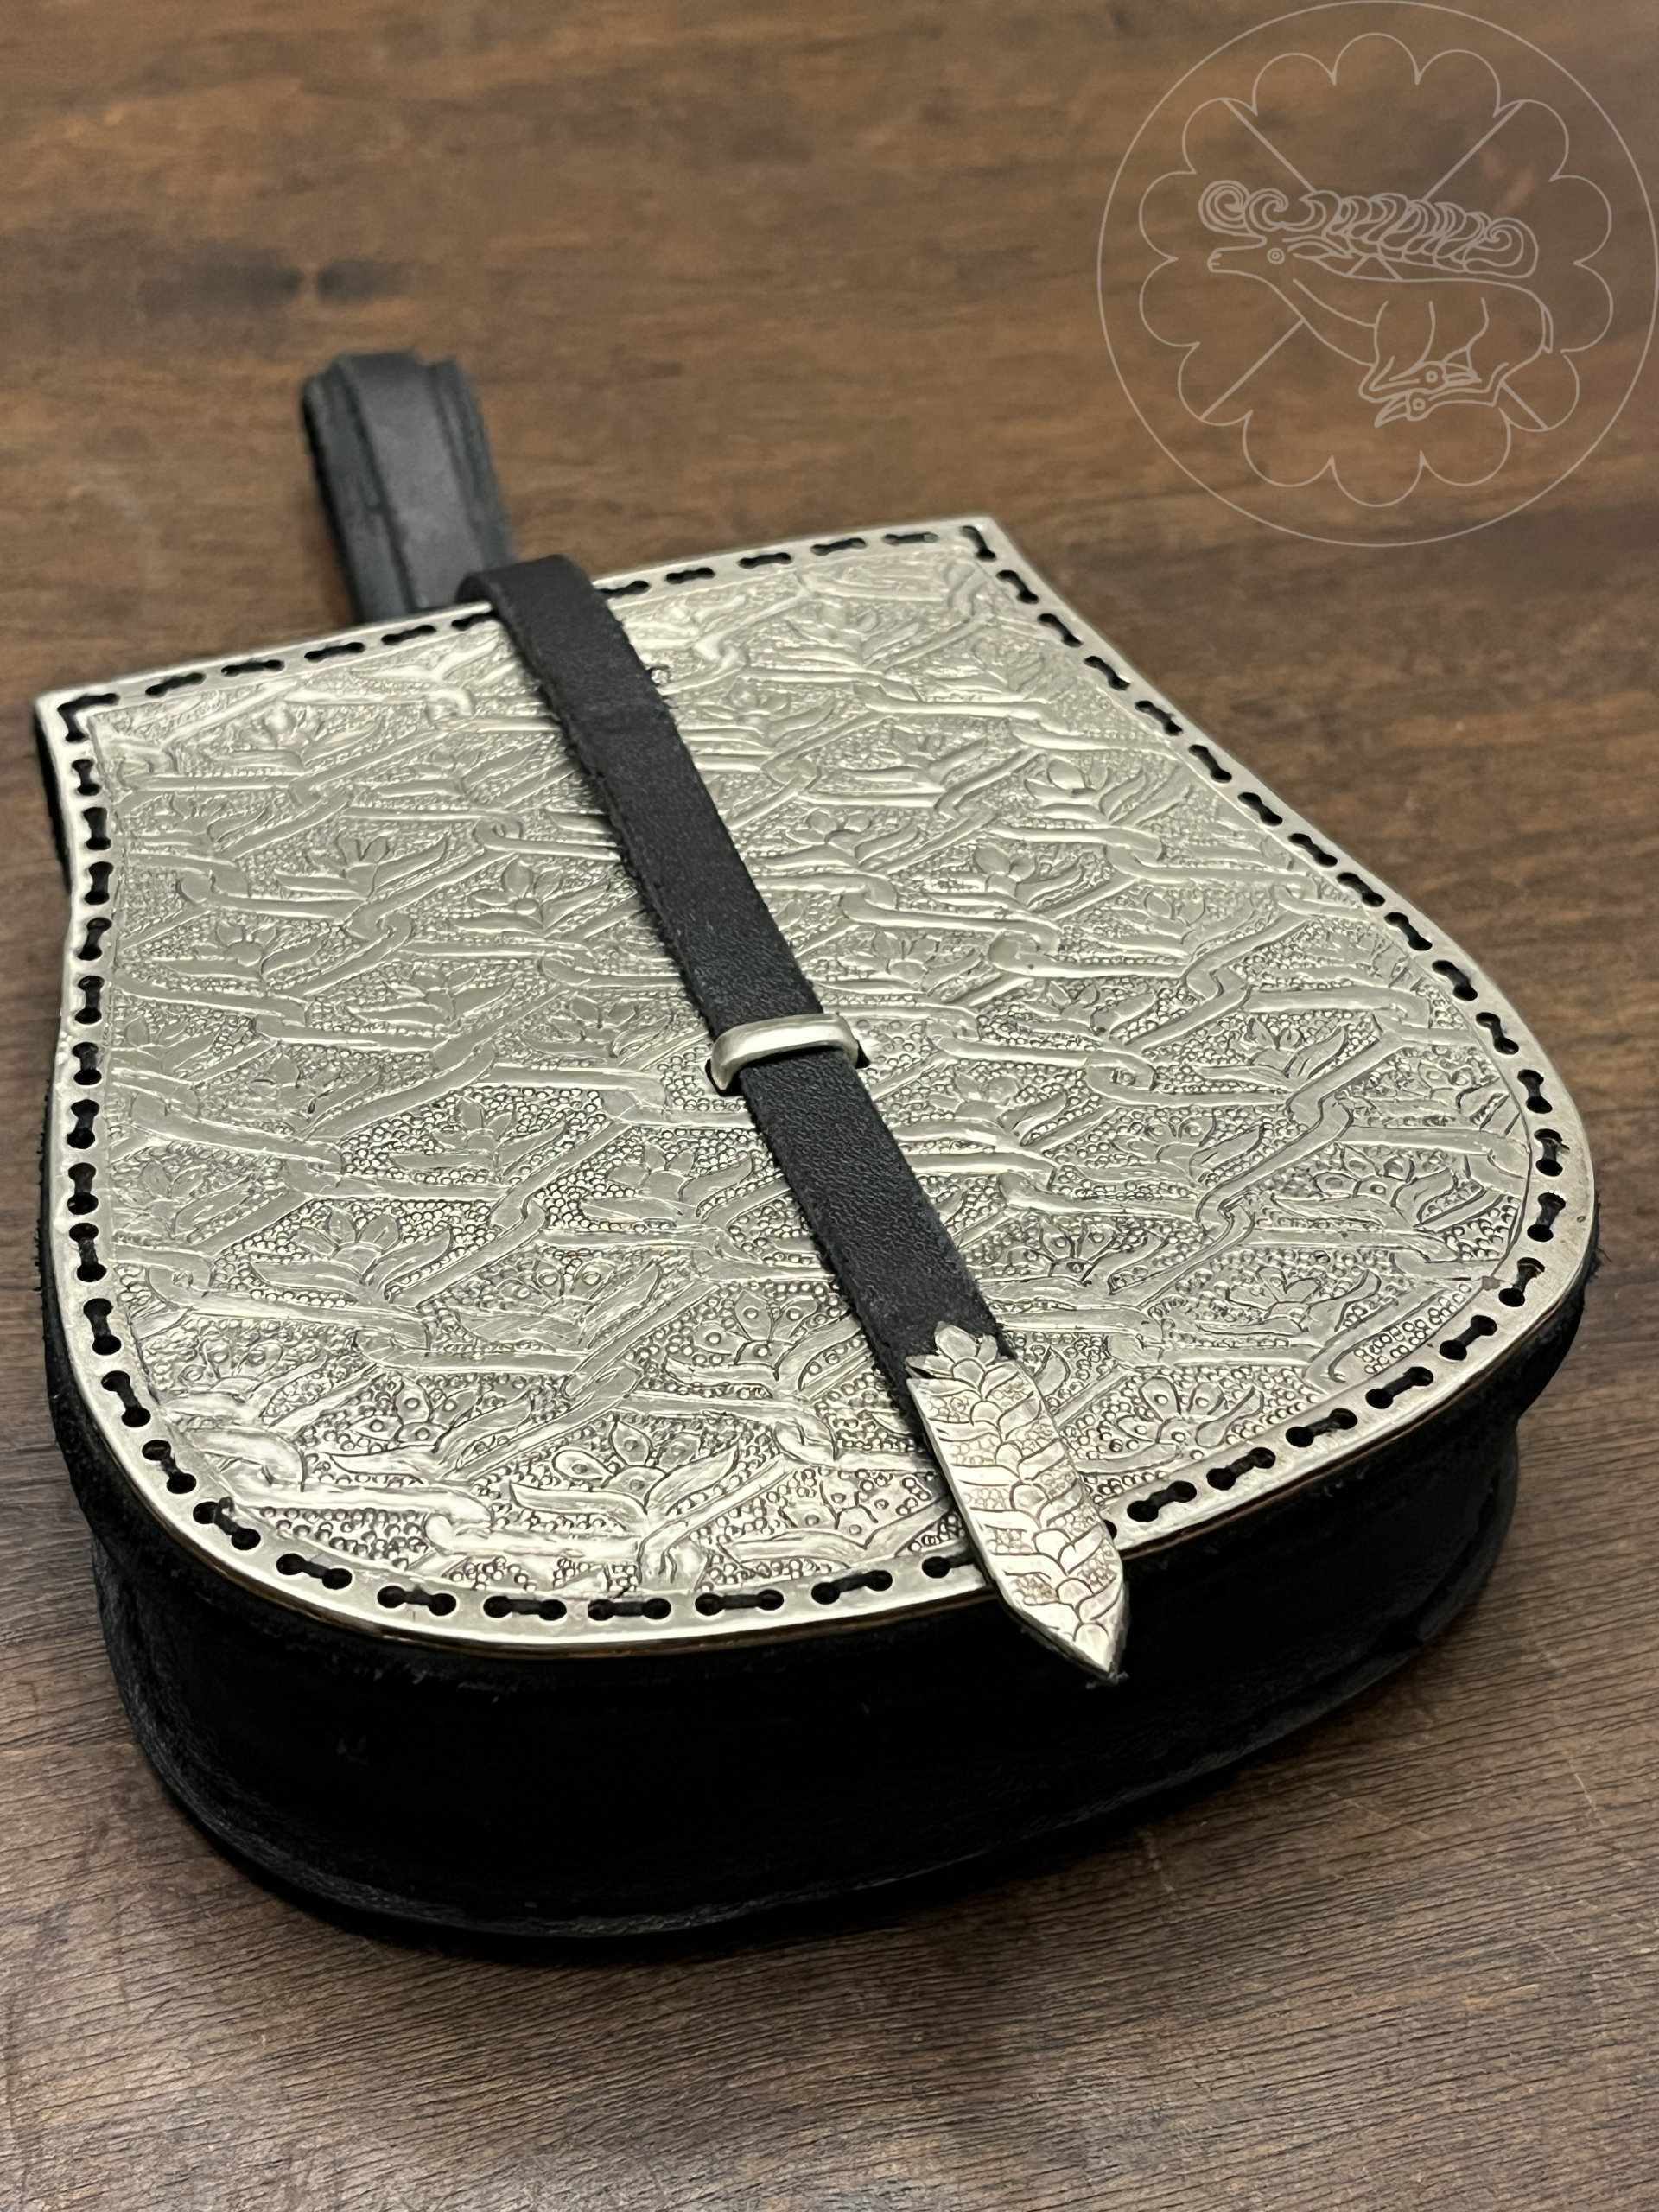
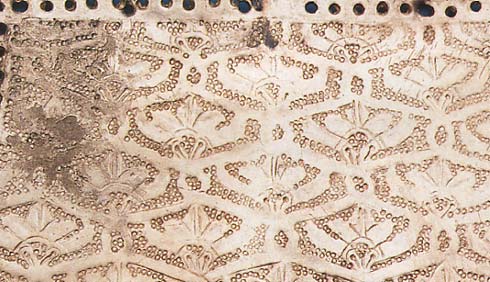
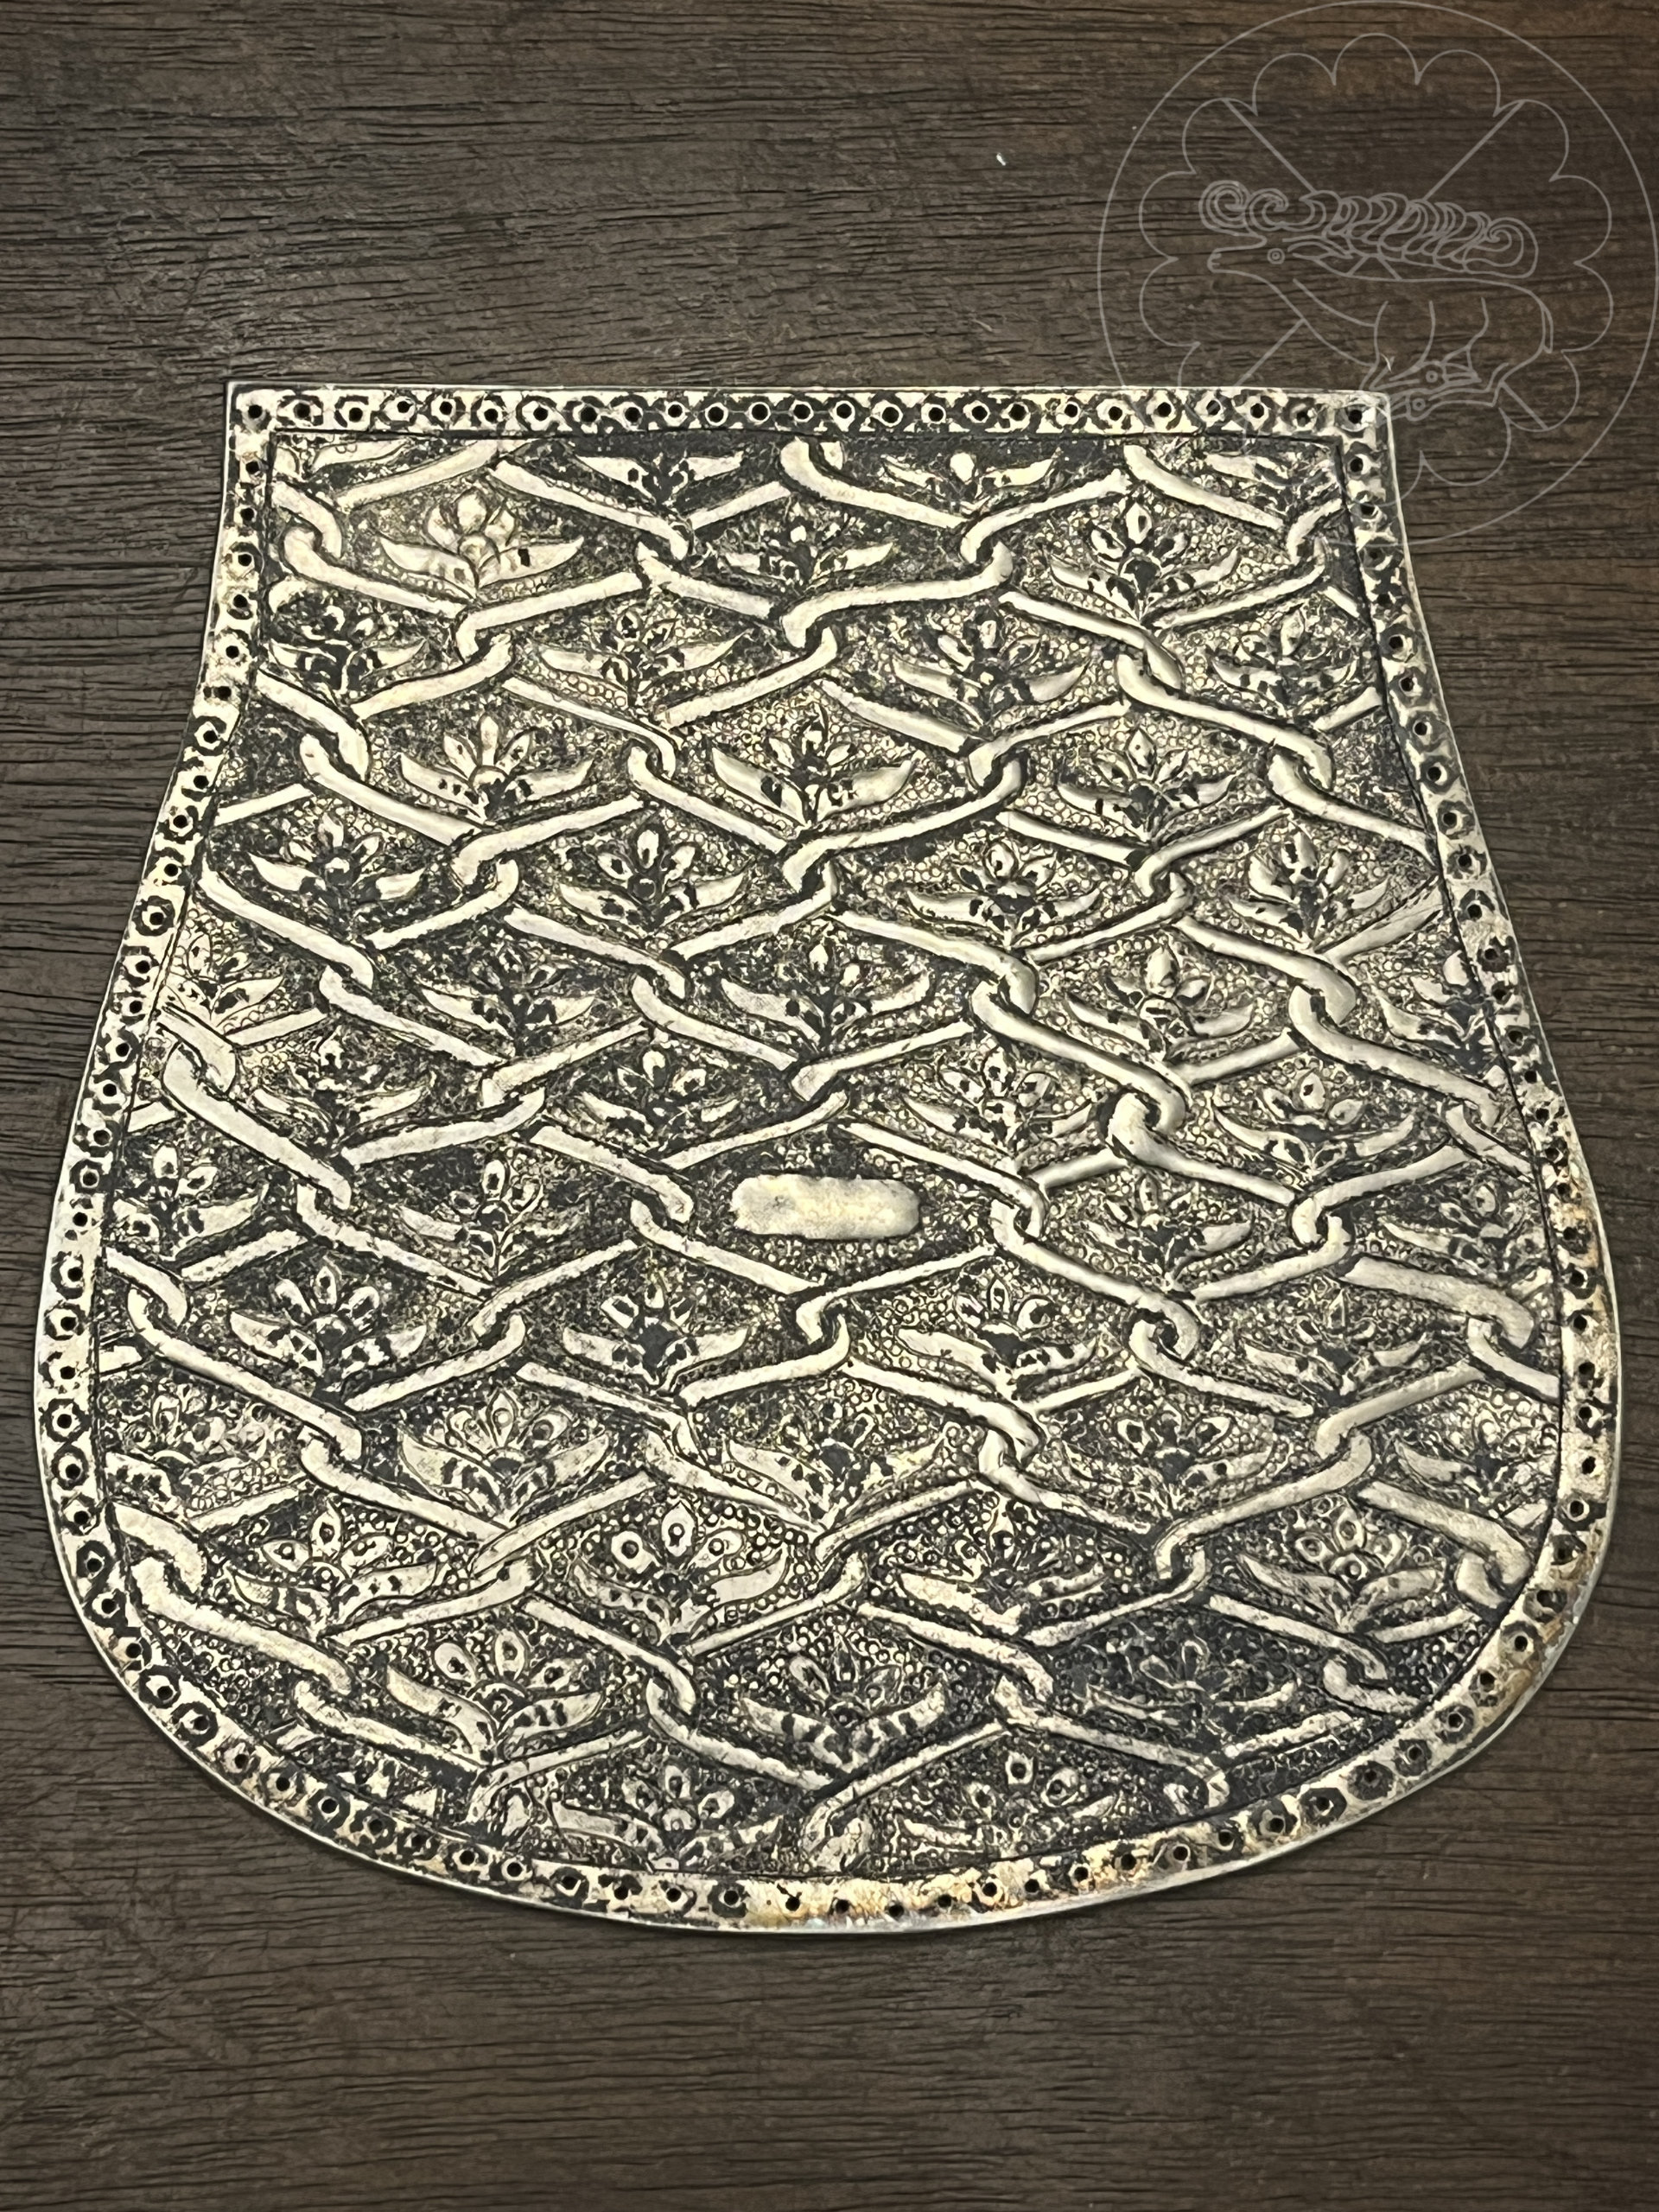
Another tarsoly – the original consists of a lightly graved silver plate that is highly worn from years of use. The graving, even on the best preserved bottom section of the plate, is not very deep compared to other examples. The background is stippled with an array of very small circles. Also, the entire surface is silver where most of the examples with engraved patterns are gilded.
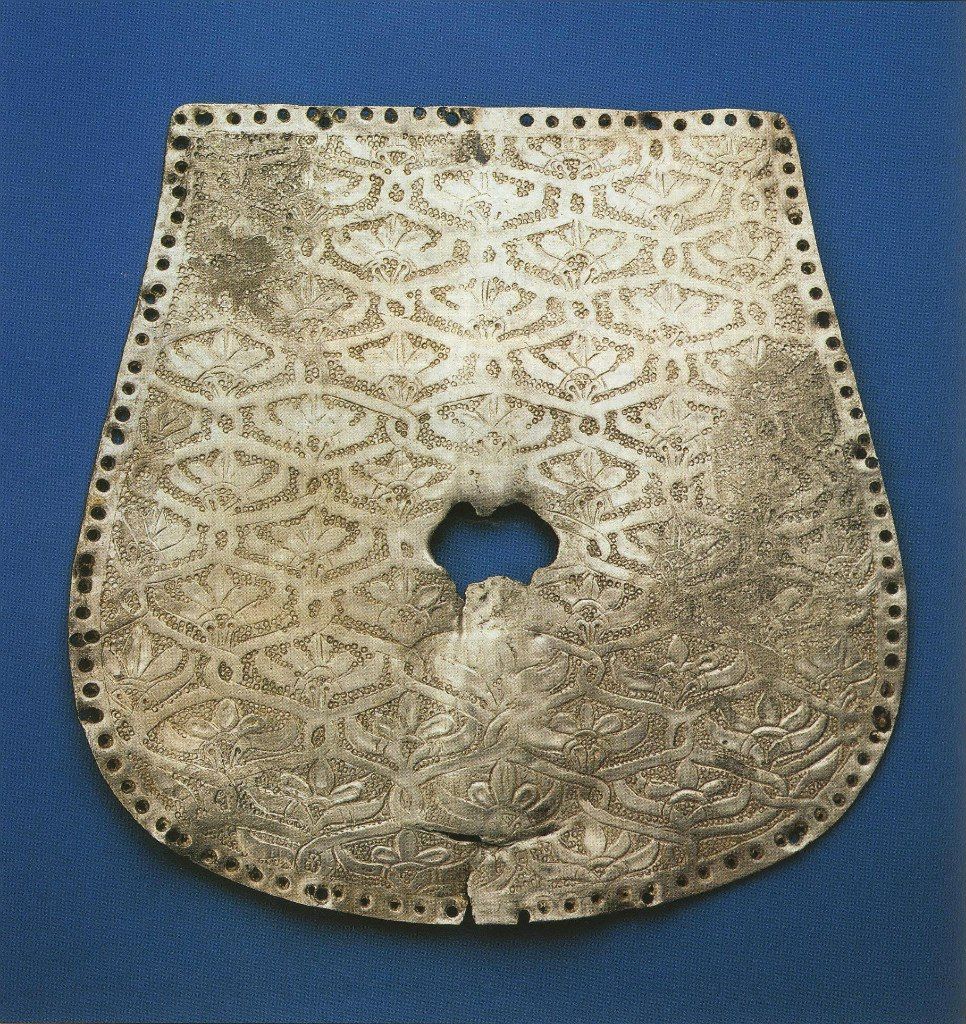
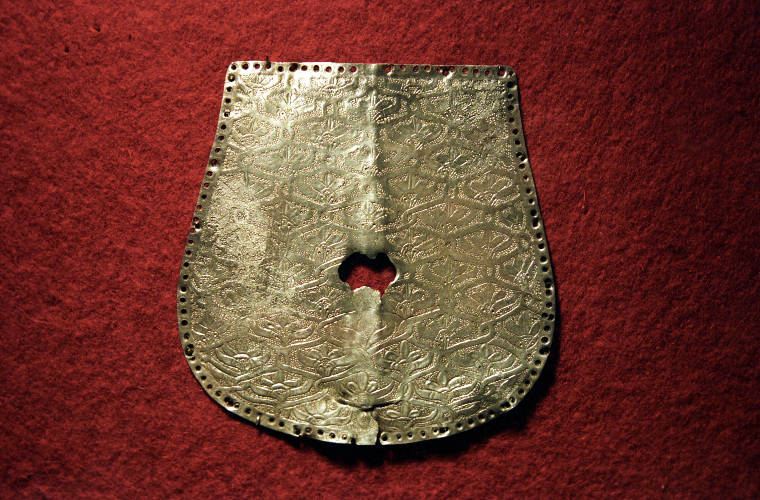
I always liked the look of this piece and wanted make a piece inspired by it to practice my chasing skills. There was a great website with details of many of the extant tarsoly finds from Hungary, but all that remains is an archive of it in the Wayback Machine (https://web.archive.org/web/20181026171305/http://tarsolyosok.hu/eng/banai.htm). This tarsoly was found near Bana, Hungary near the present Slovakian border, and is thus referred to as the Banai tarsoly. According to the site it is housed in the Magyar Nemzeti Múzeum in Budapest.
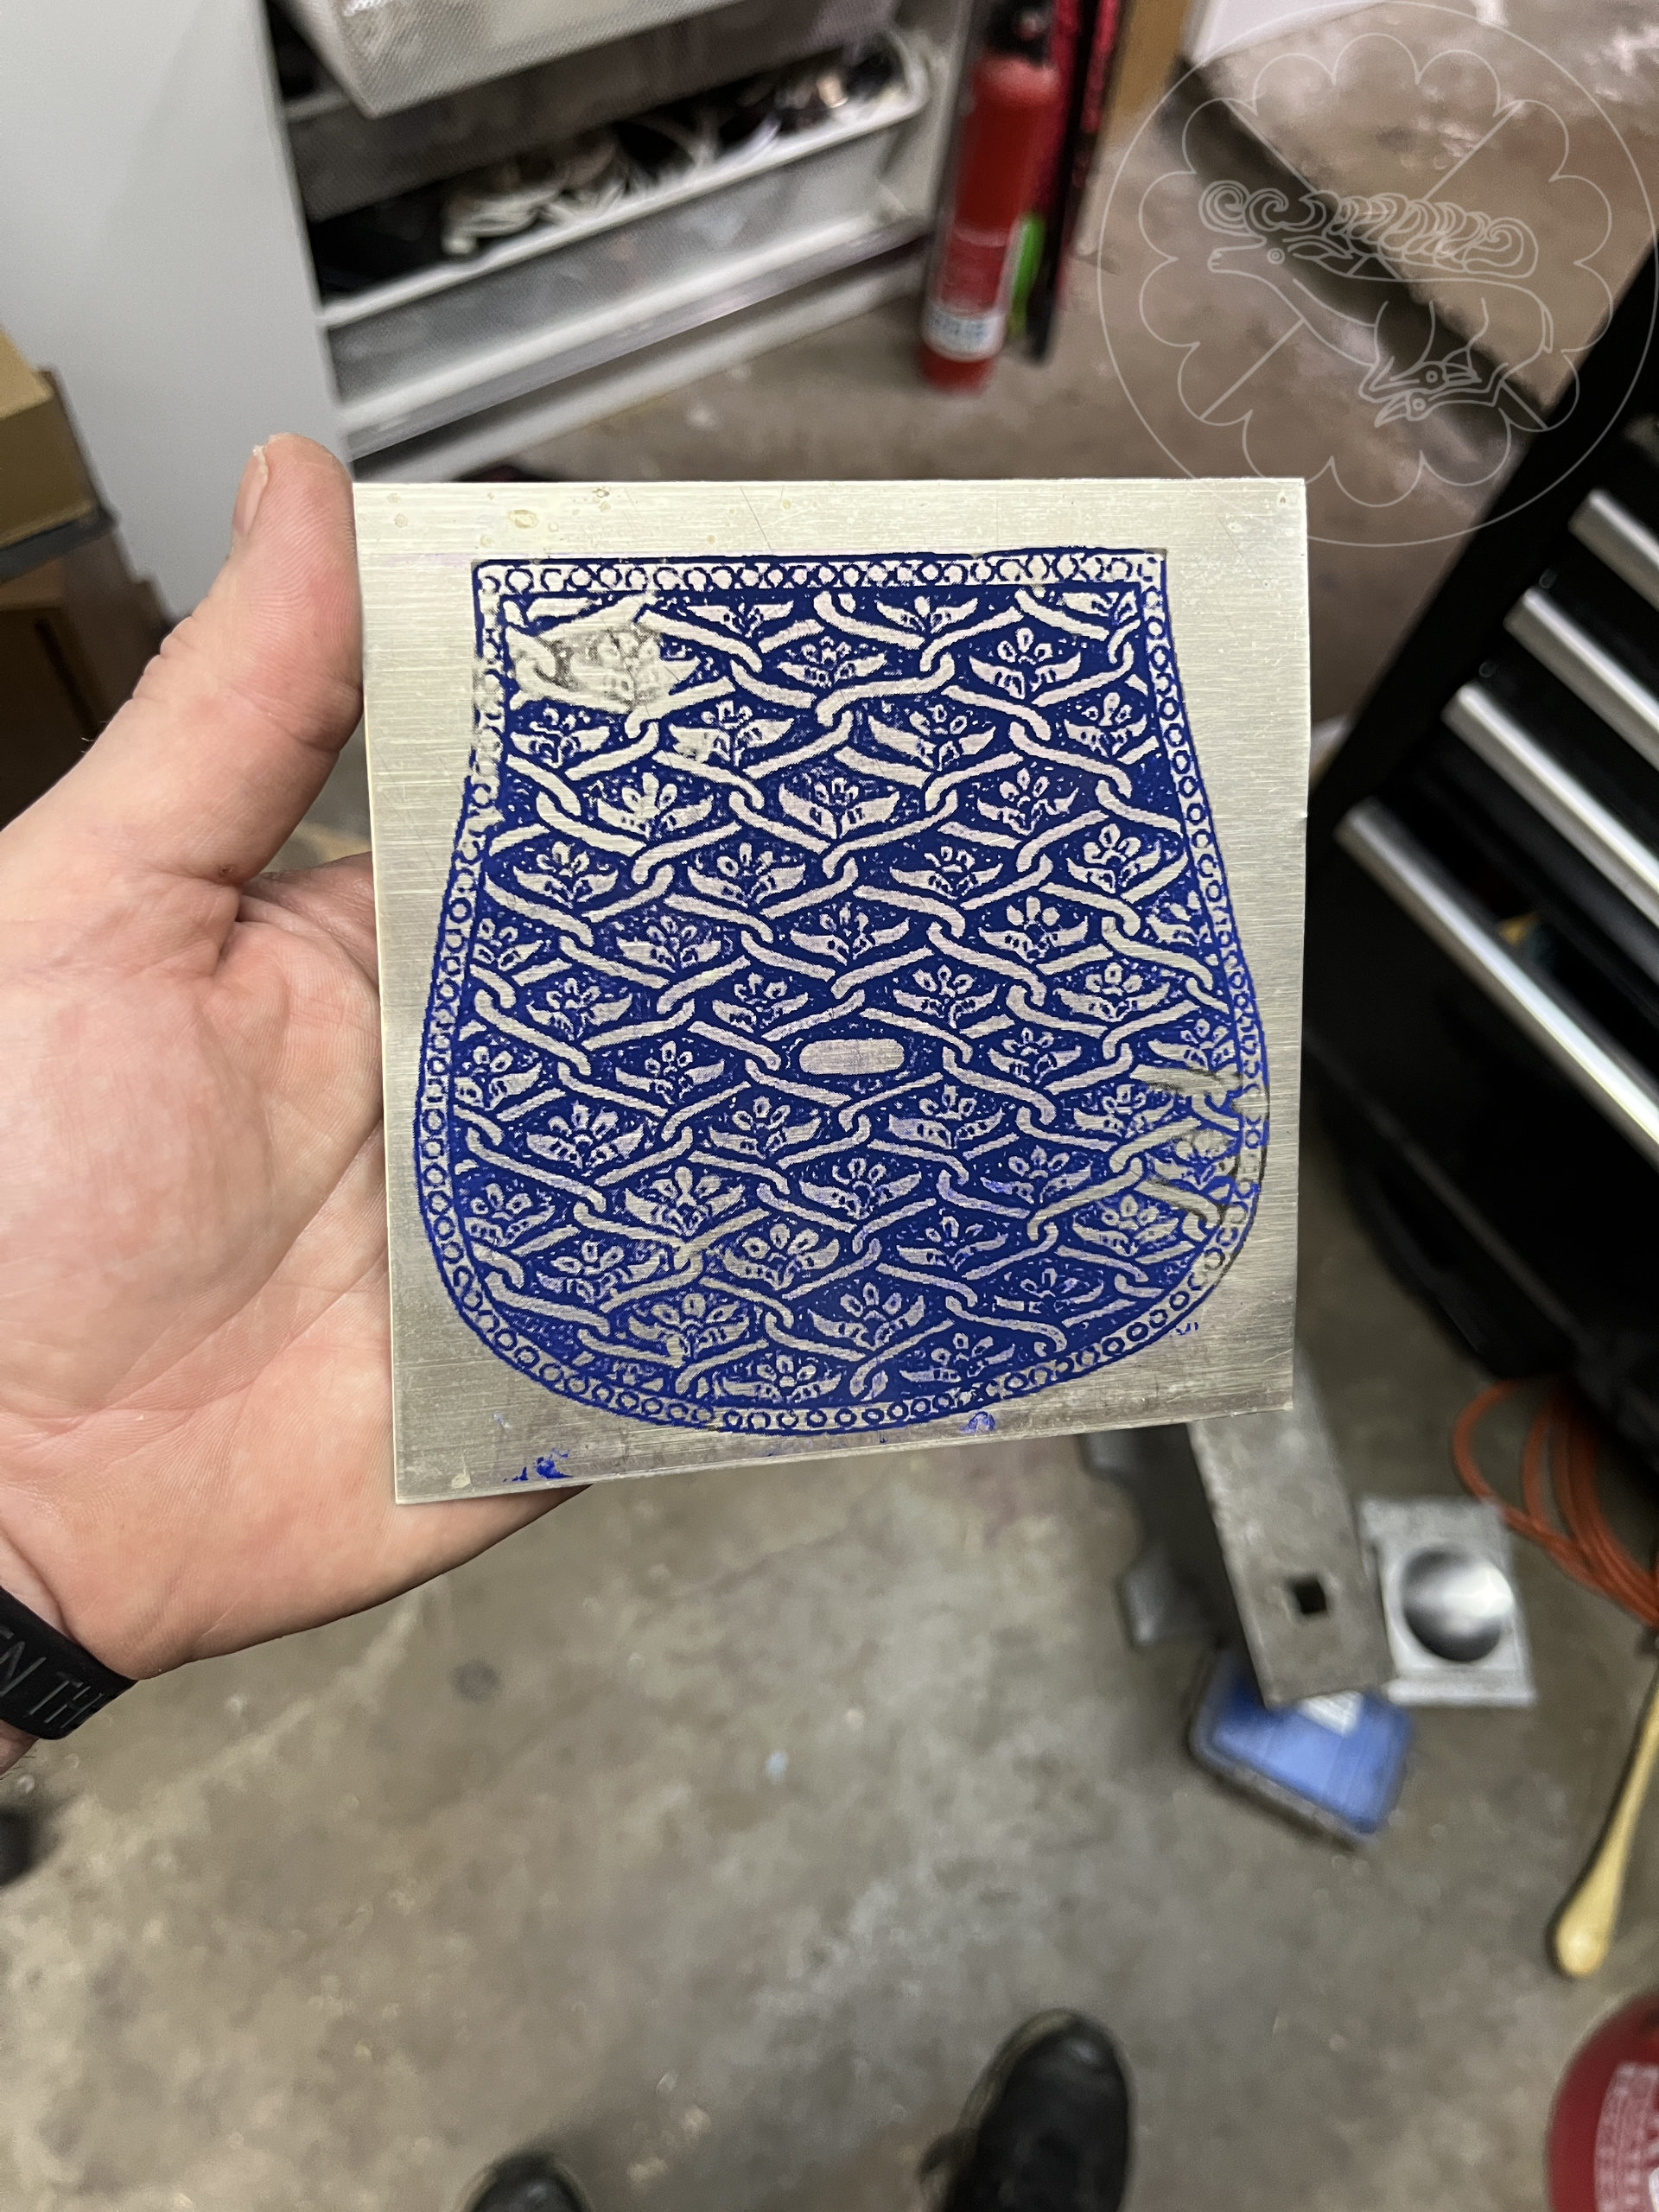
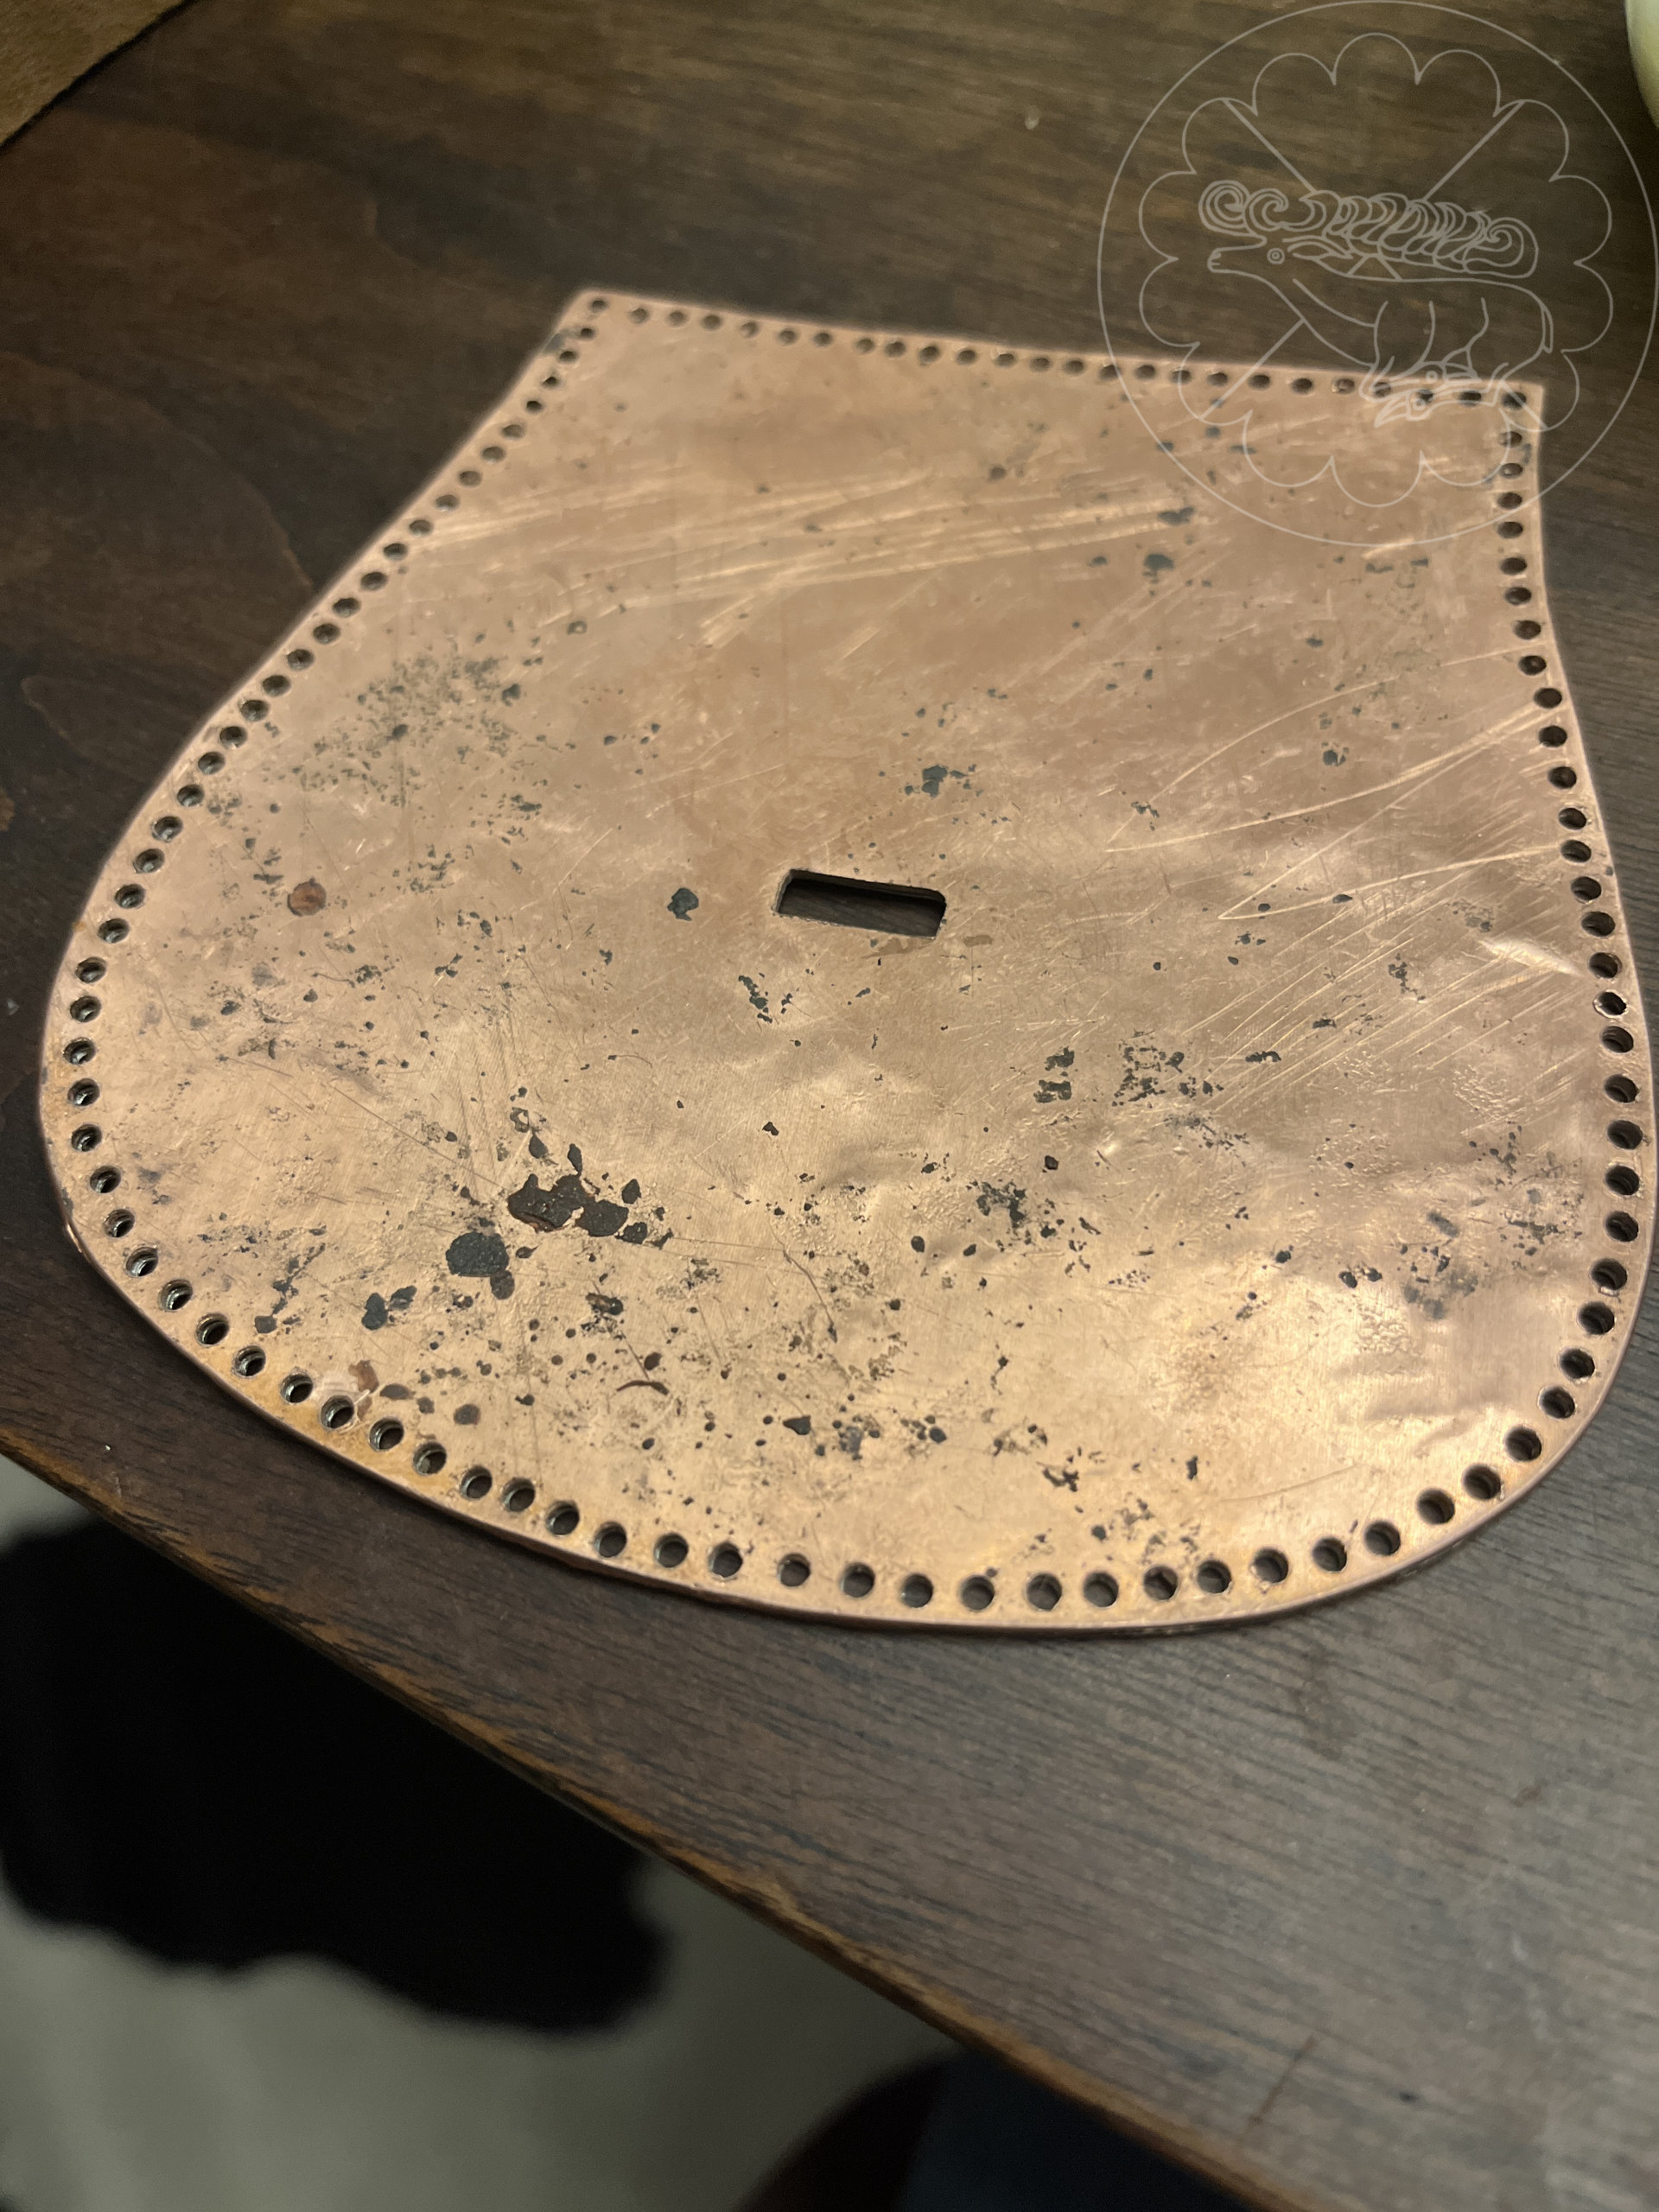
I started by printing the artwork of the piece and transferring it to a piece of 24 ga. nickel silver I had on hand. The pattern is ~115mm x 115mm. I affixed this to a piece of 20 gauge copper as a backing plate with Barges cement. My goal was to do the chasing with both plates stacked, so that if any impression or distortion occurred during the chasing, both pieces would still fit together well without significant separation. To do the chasing, I melted a thin layer of jeweler’s pitch onto a small piece of MDF and smashed the glued plates onto the pitch. In order to further prevent the layers from delaminating, I fixed the corners with screws and washers.
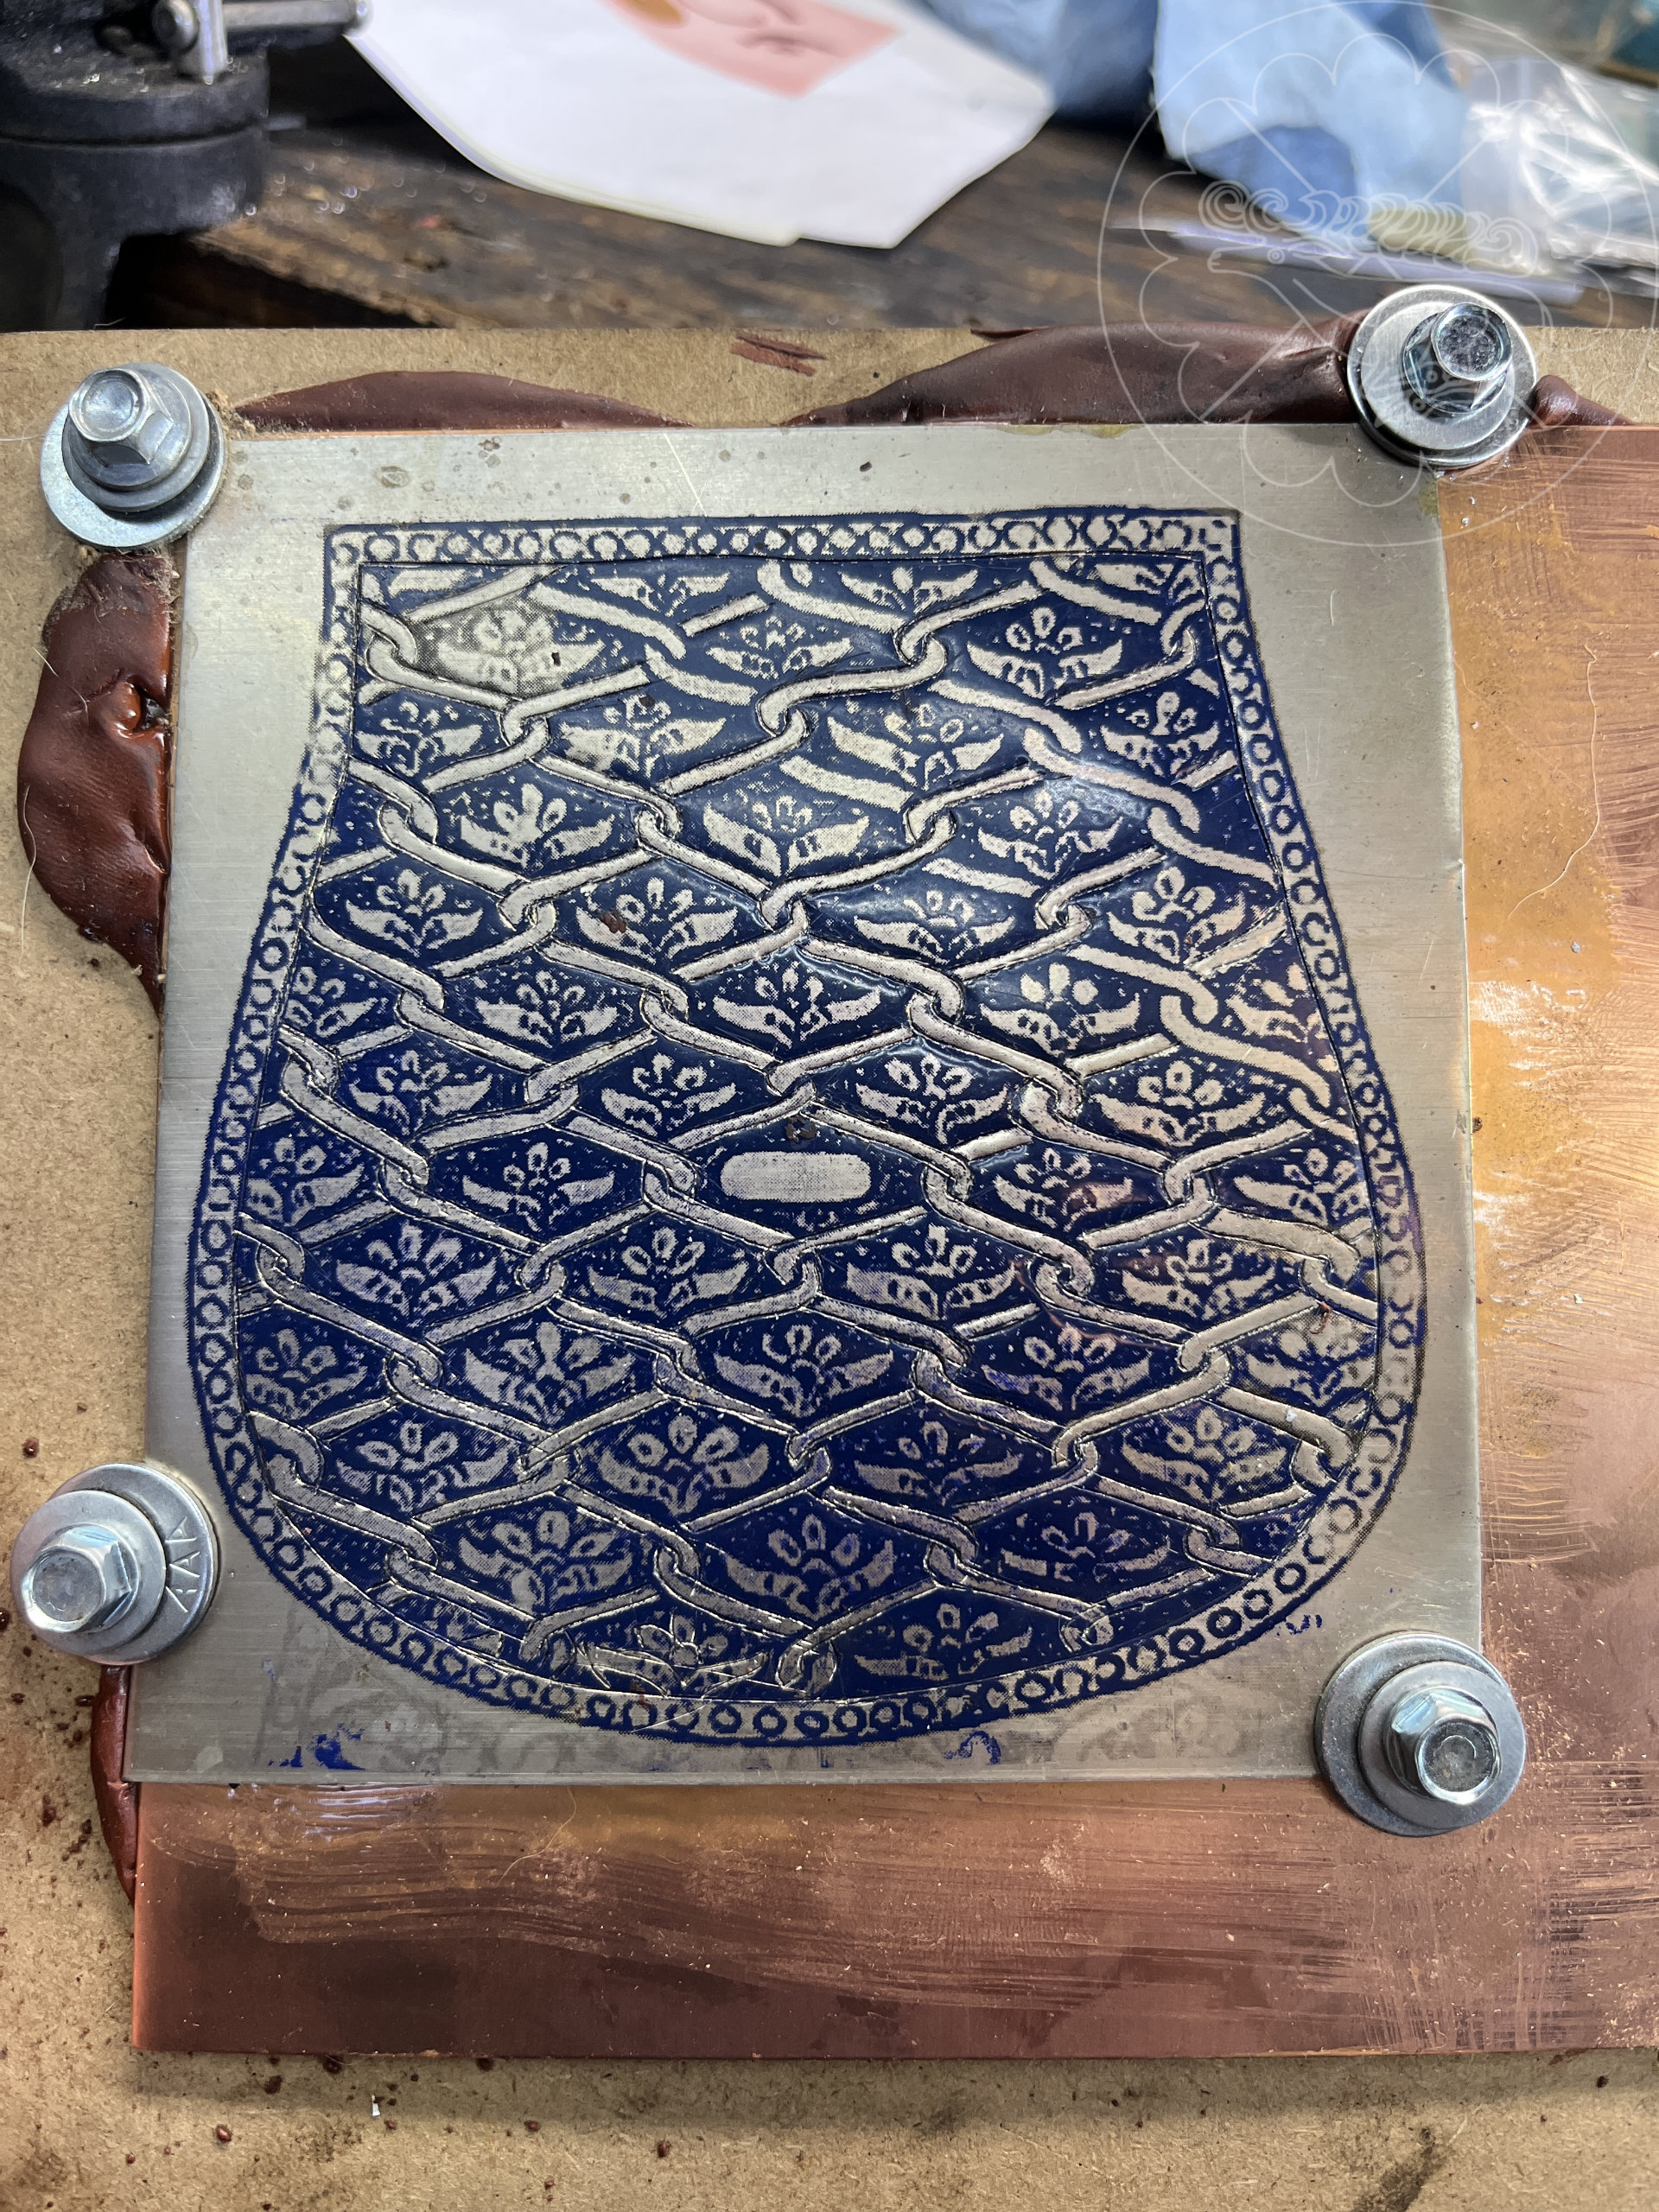
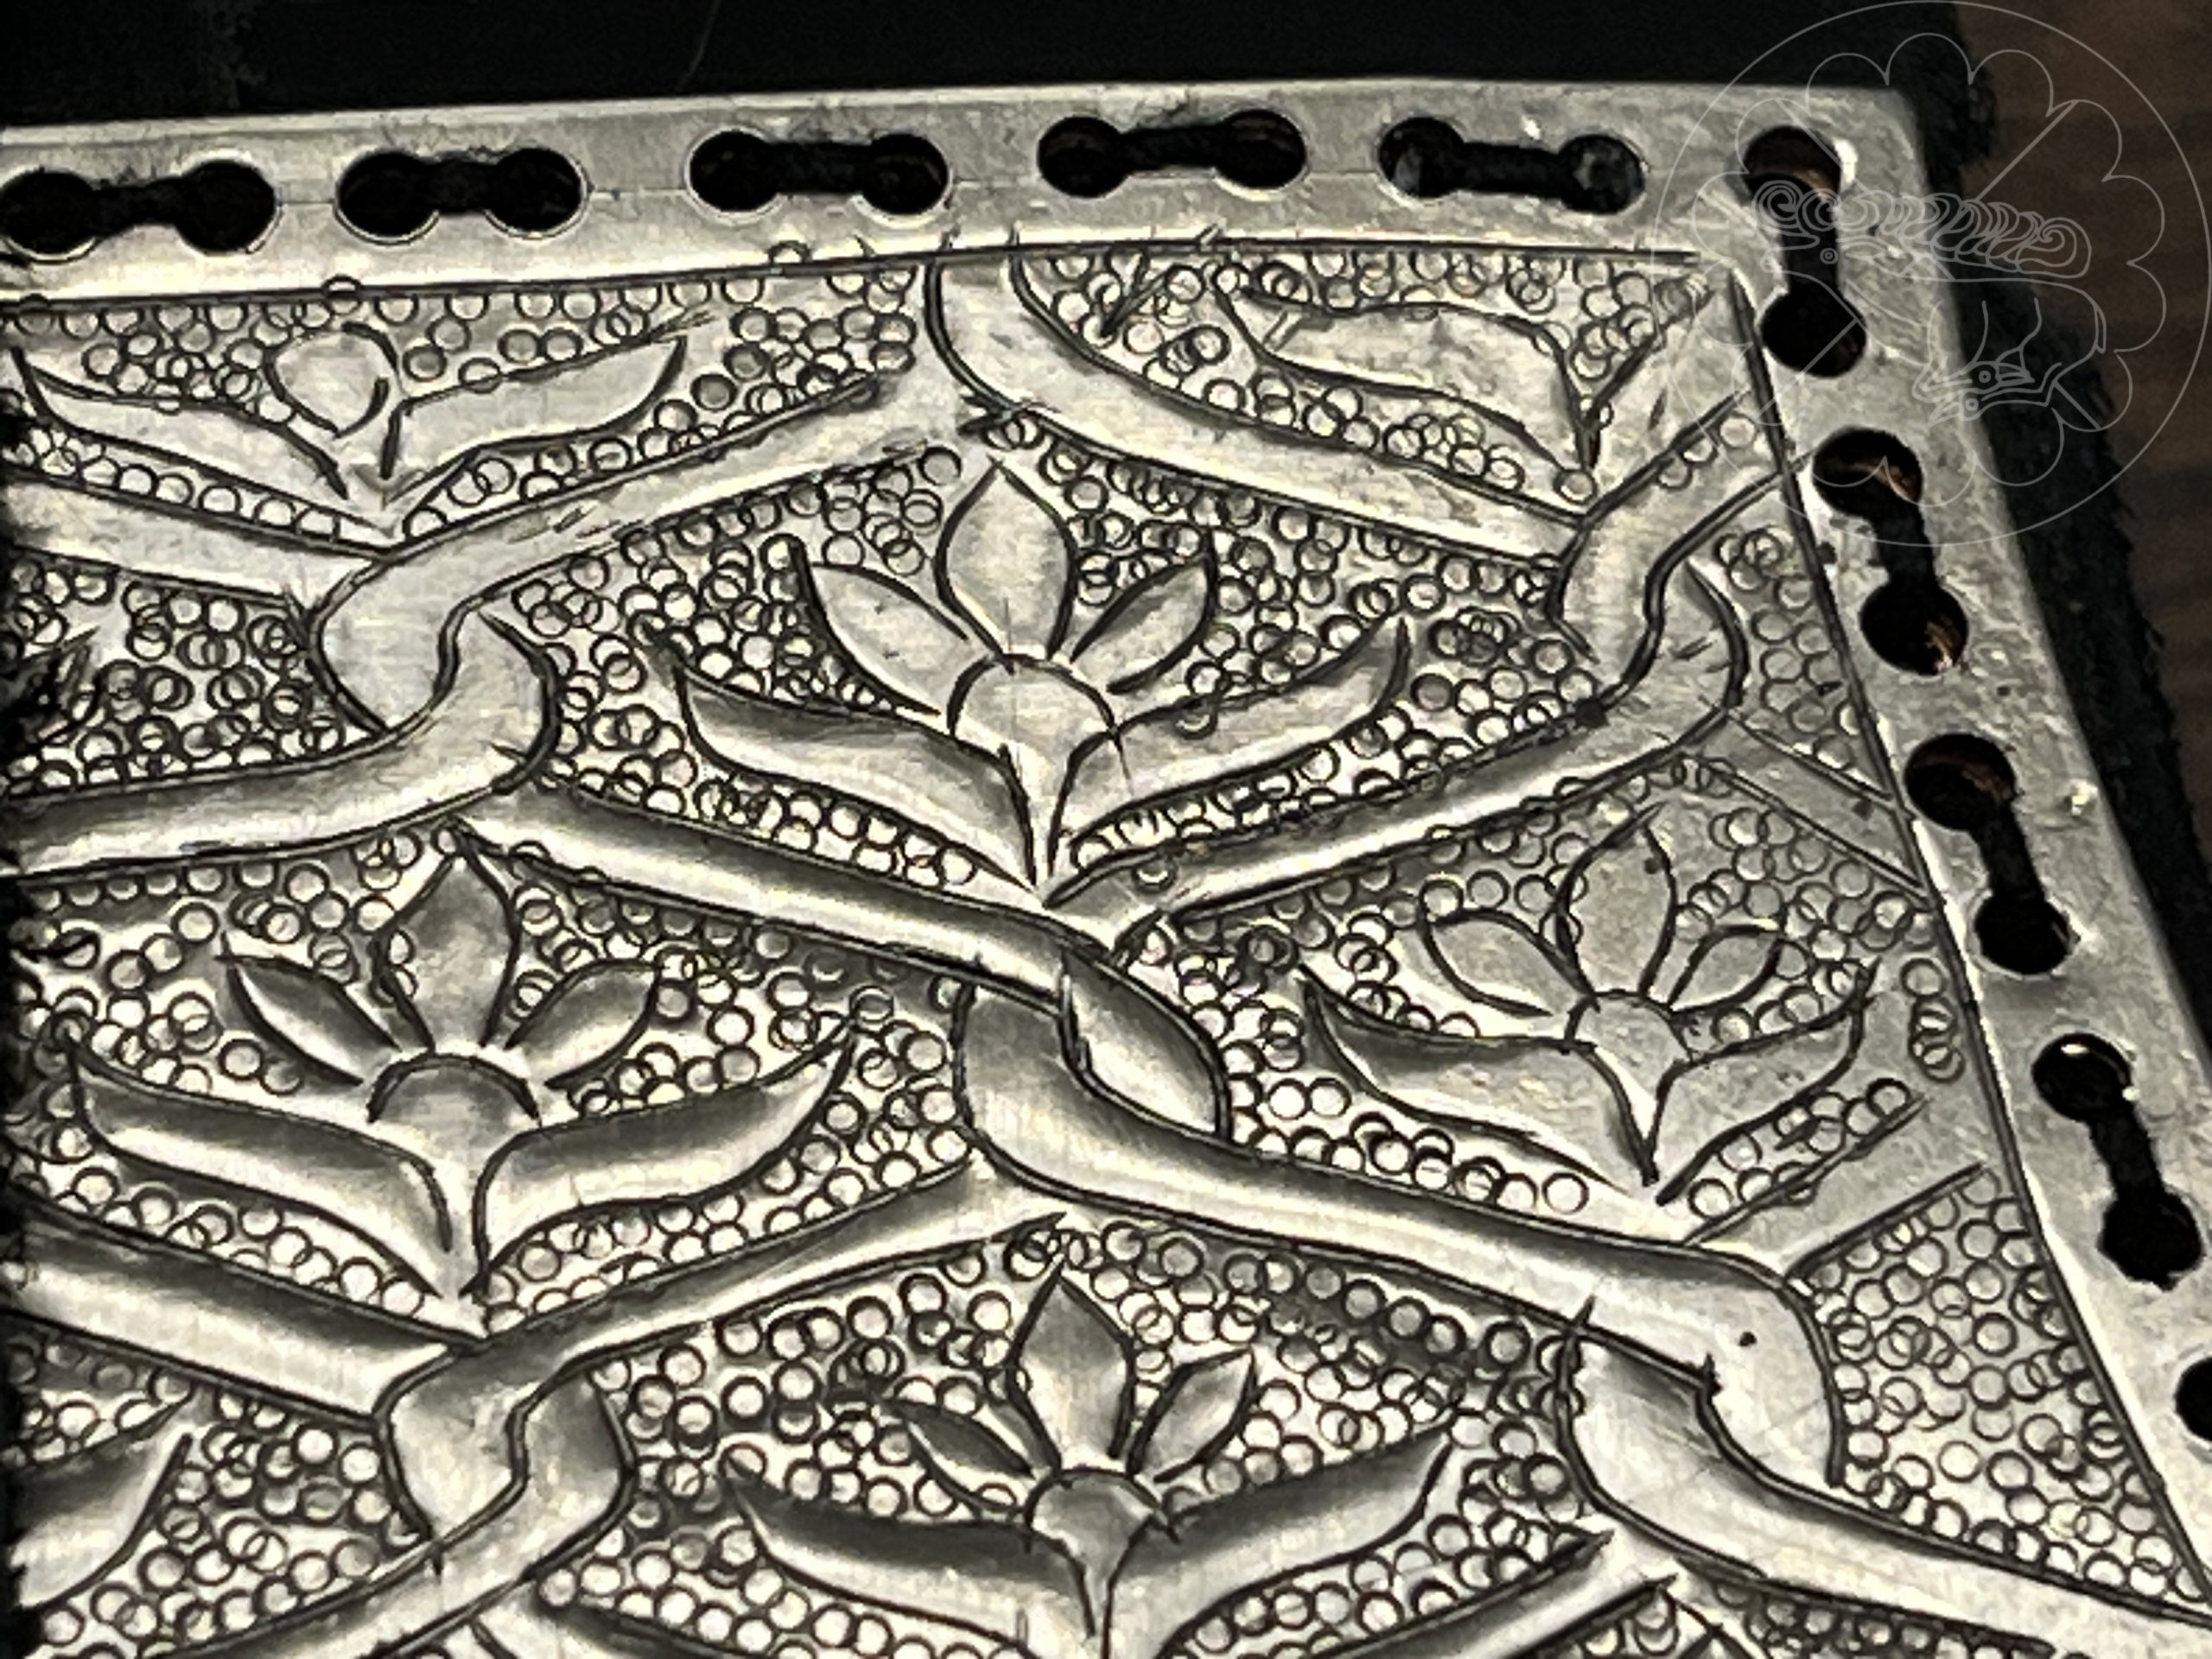
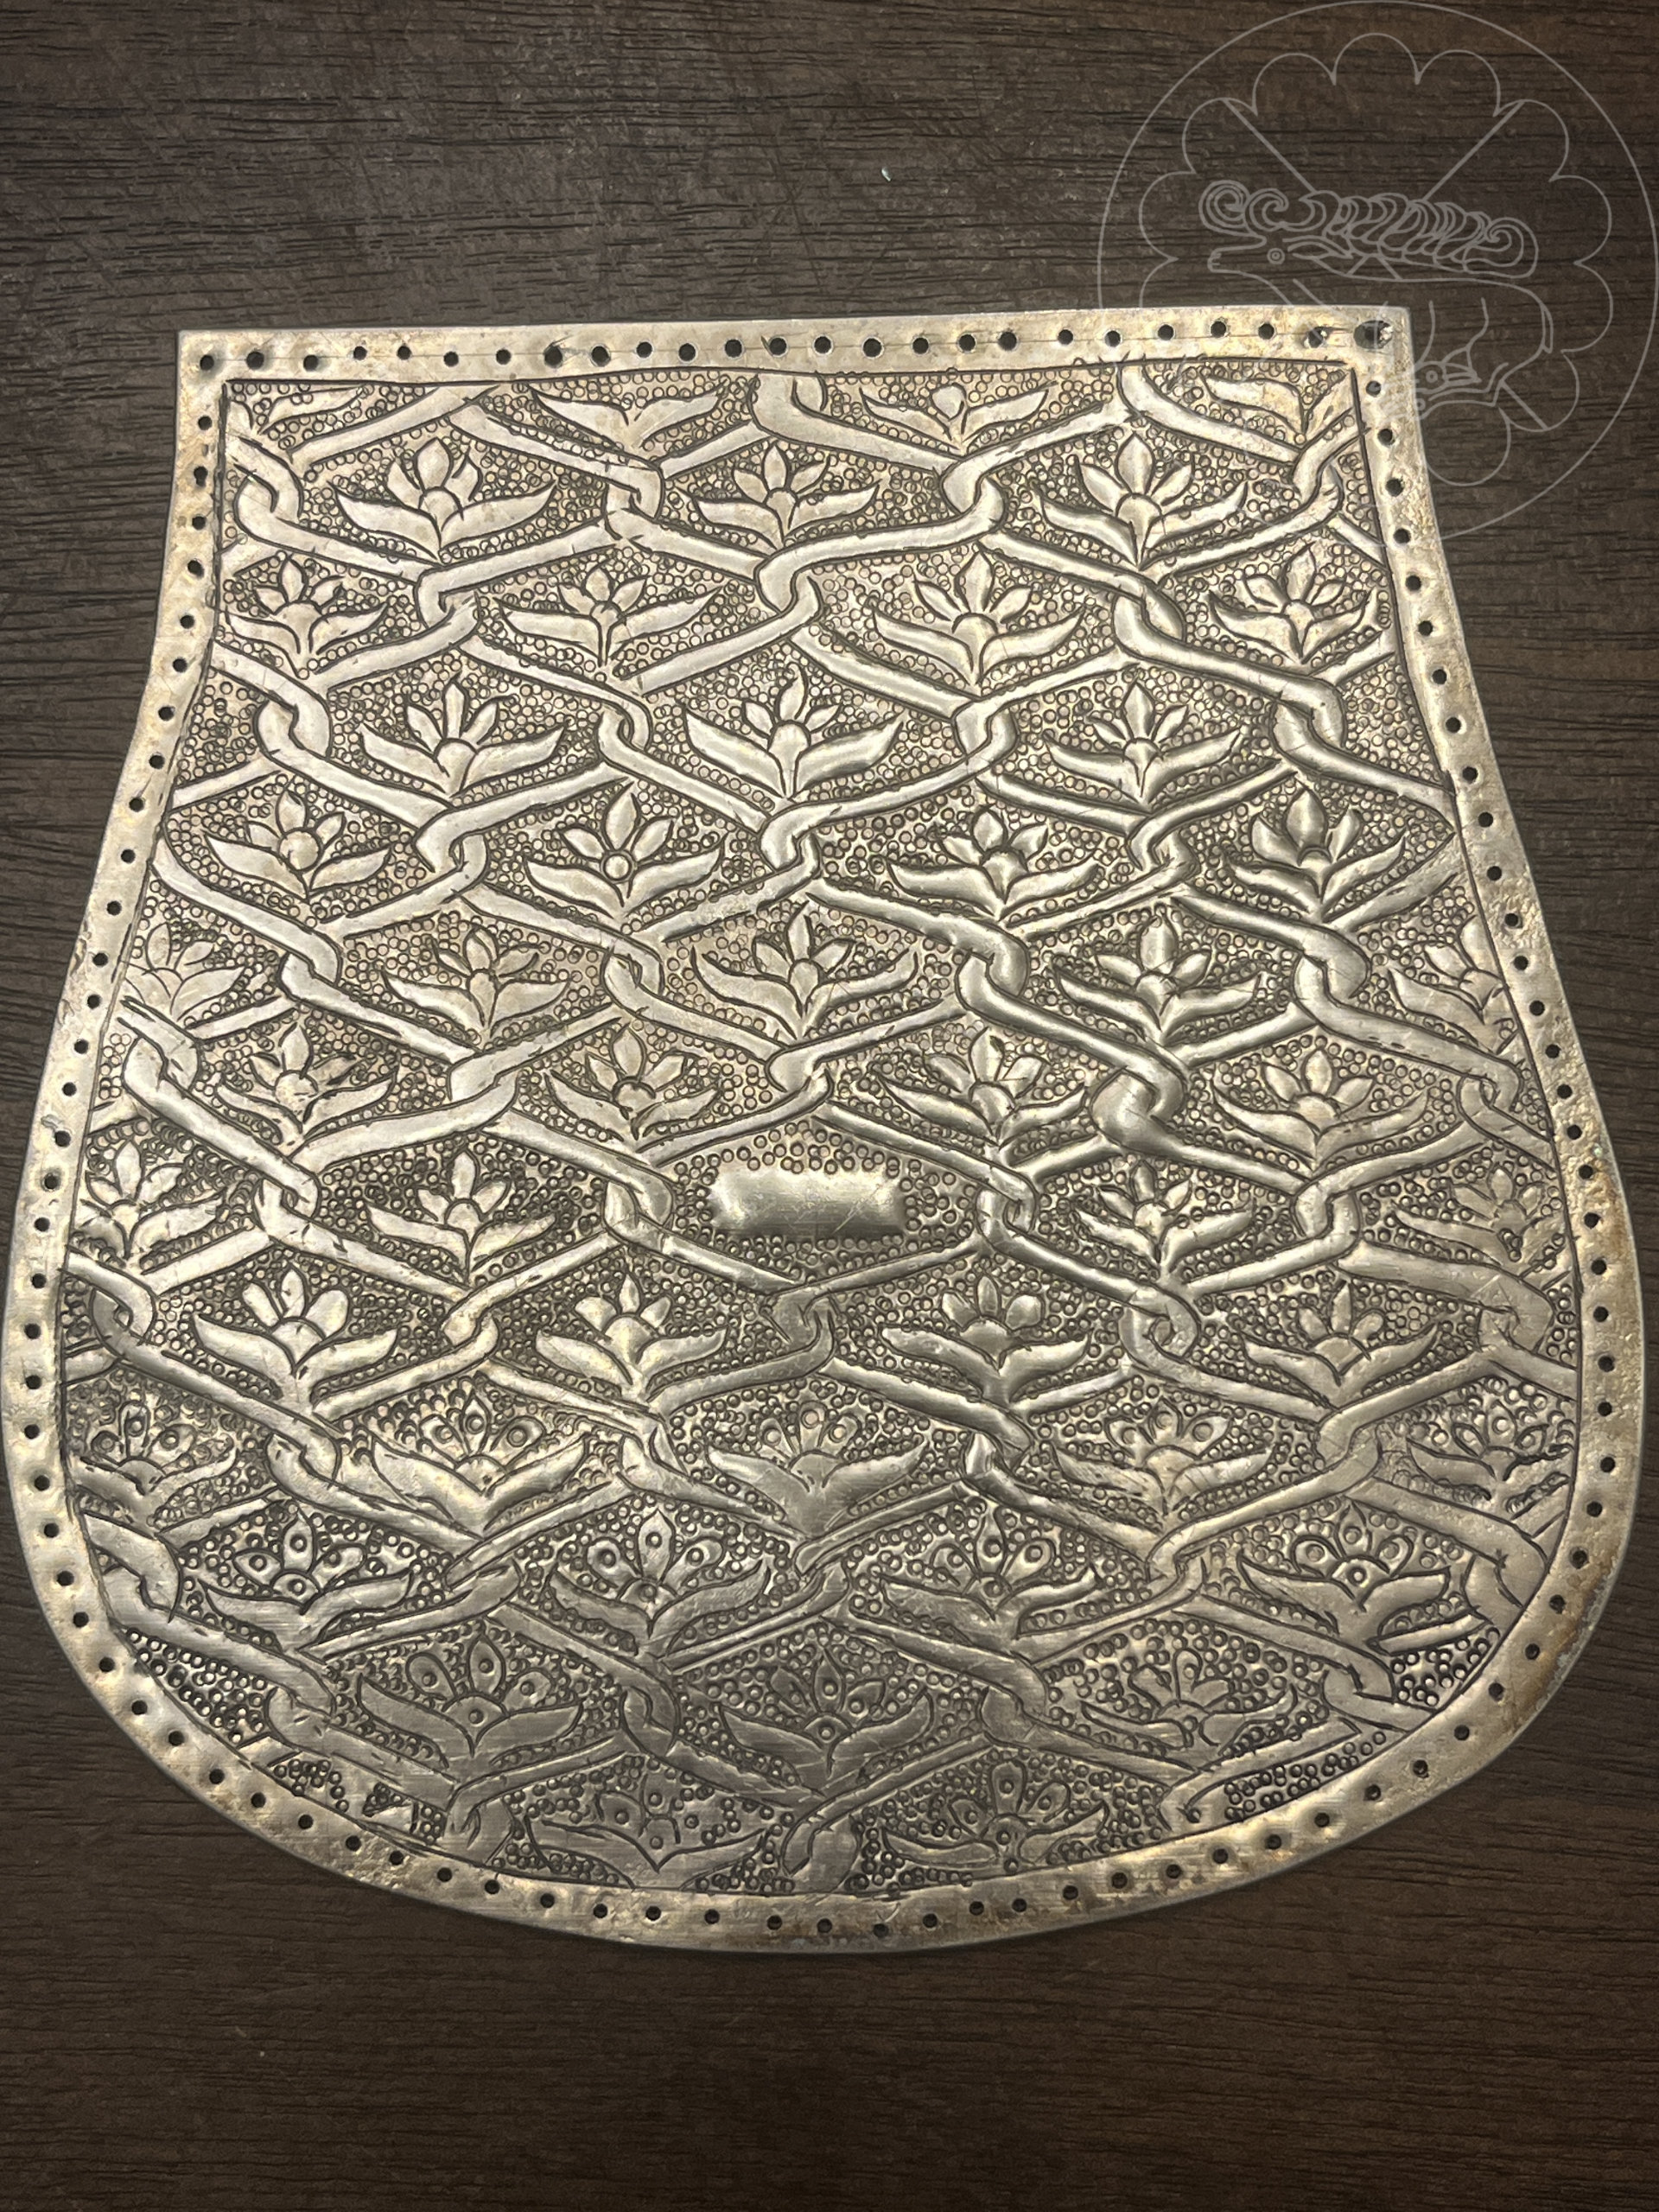
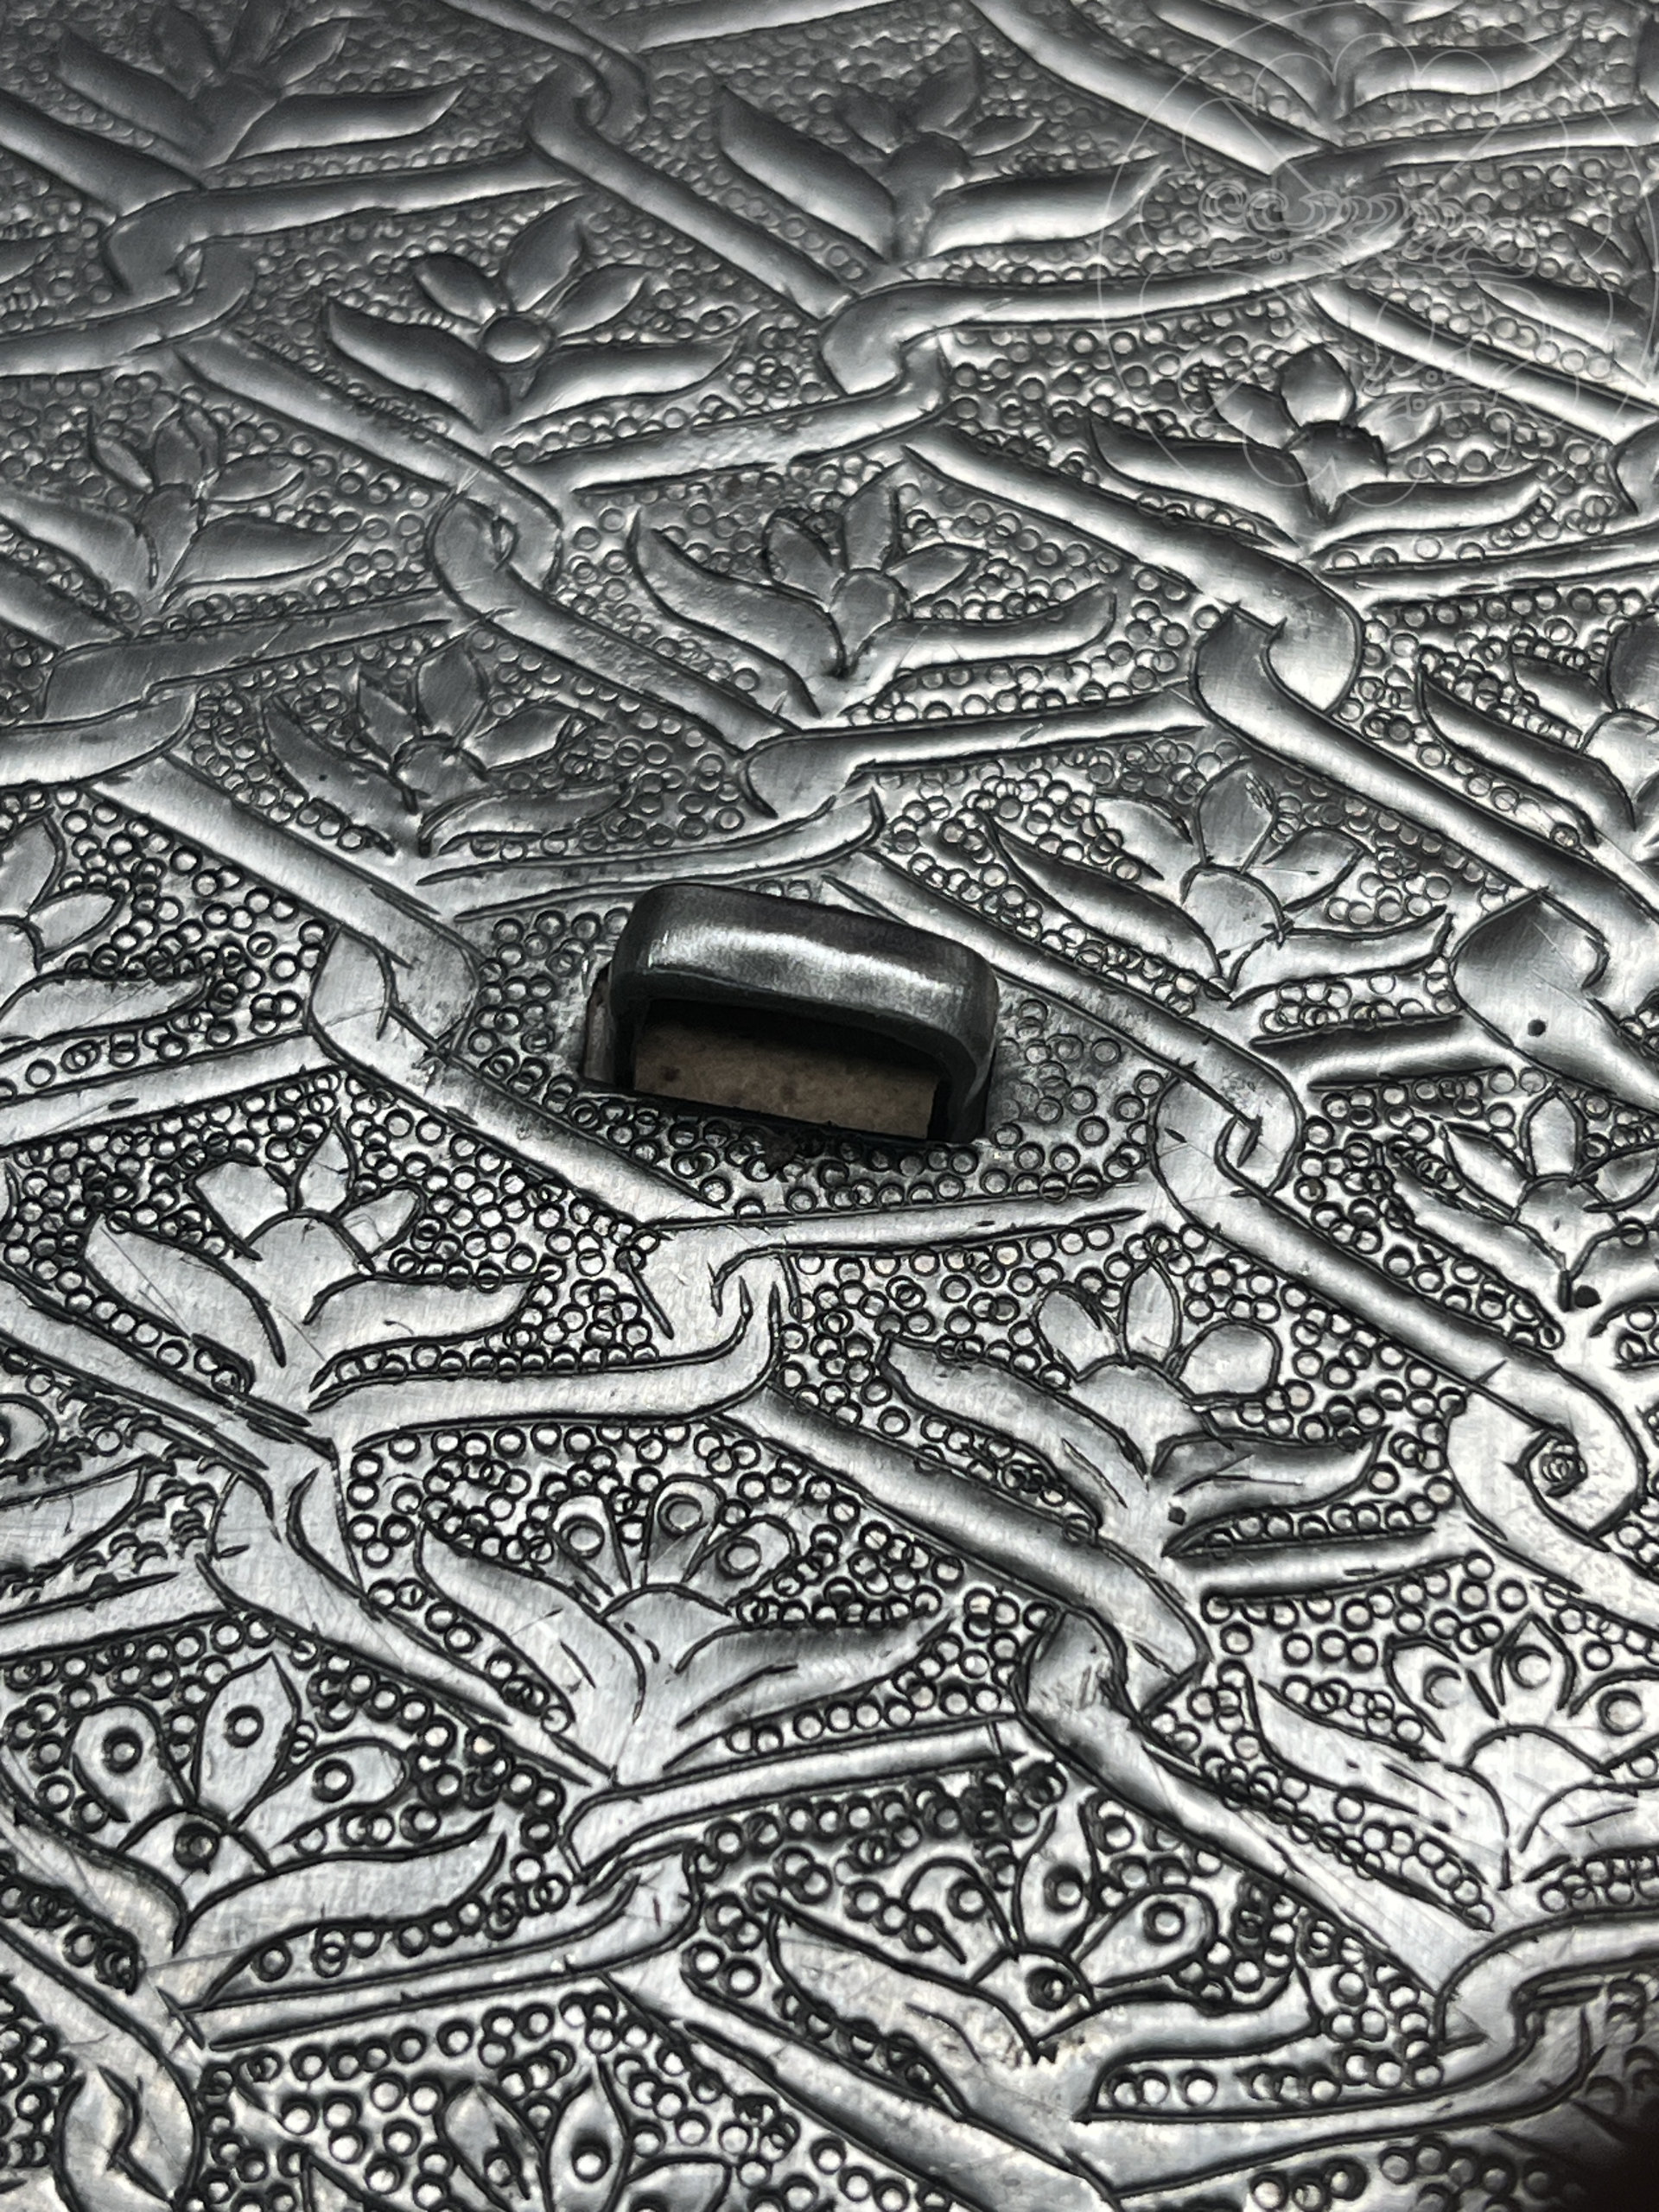
With the piece firmly seated, I began chasing the design, starting border, and following with the “looped tendril” pattern which separates each of the palmettes starting from the bottom and working my way to the top.
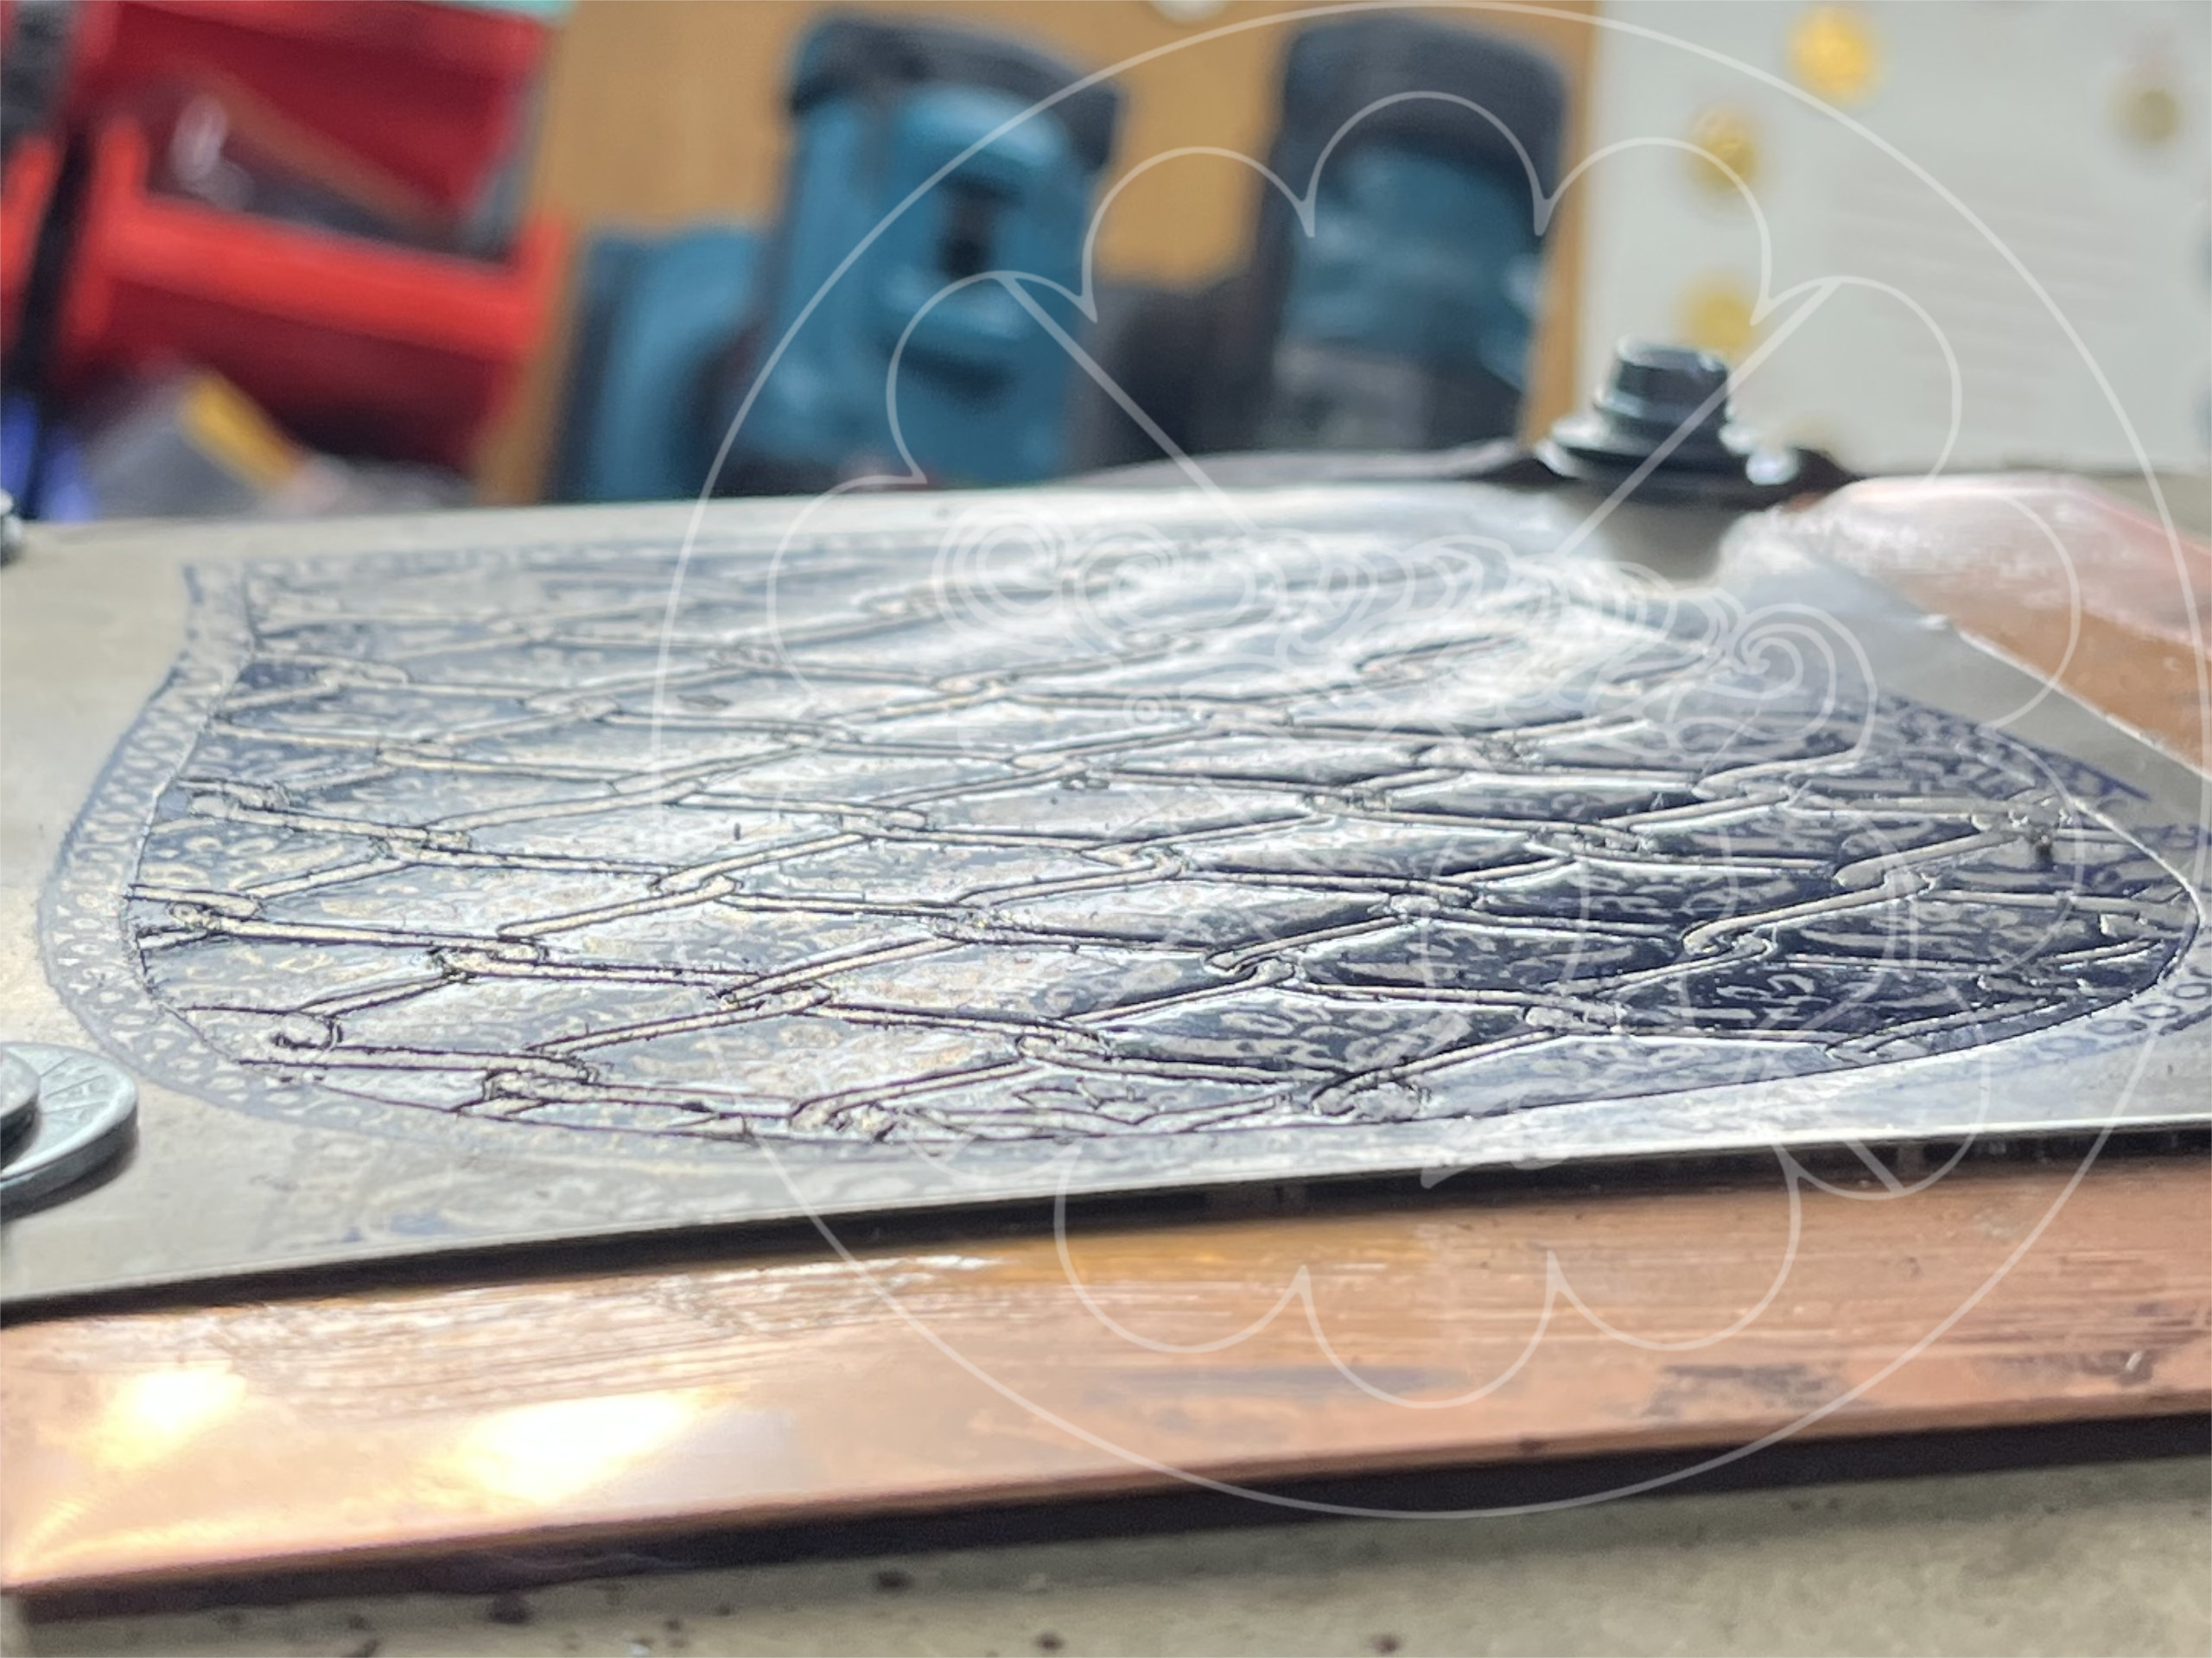
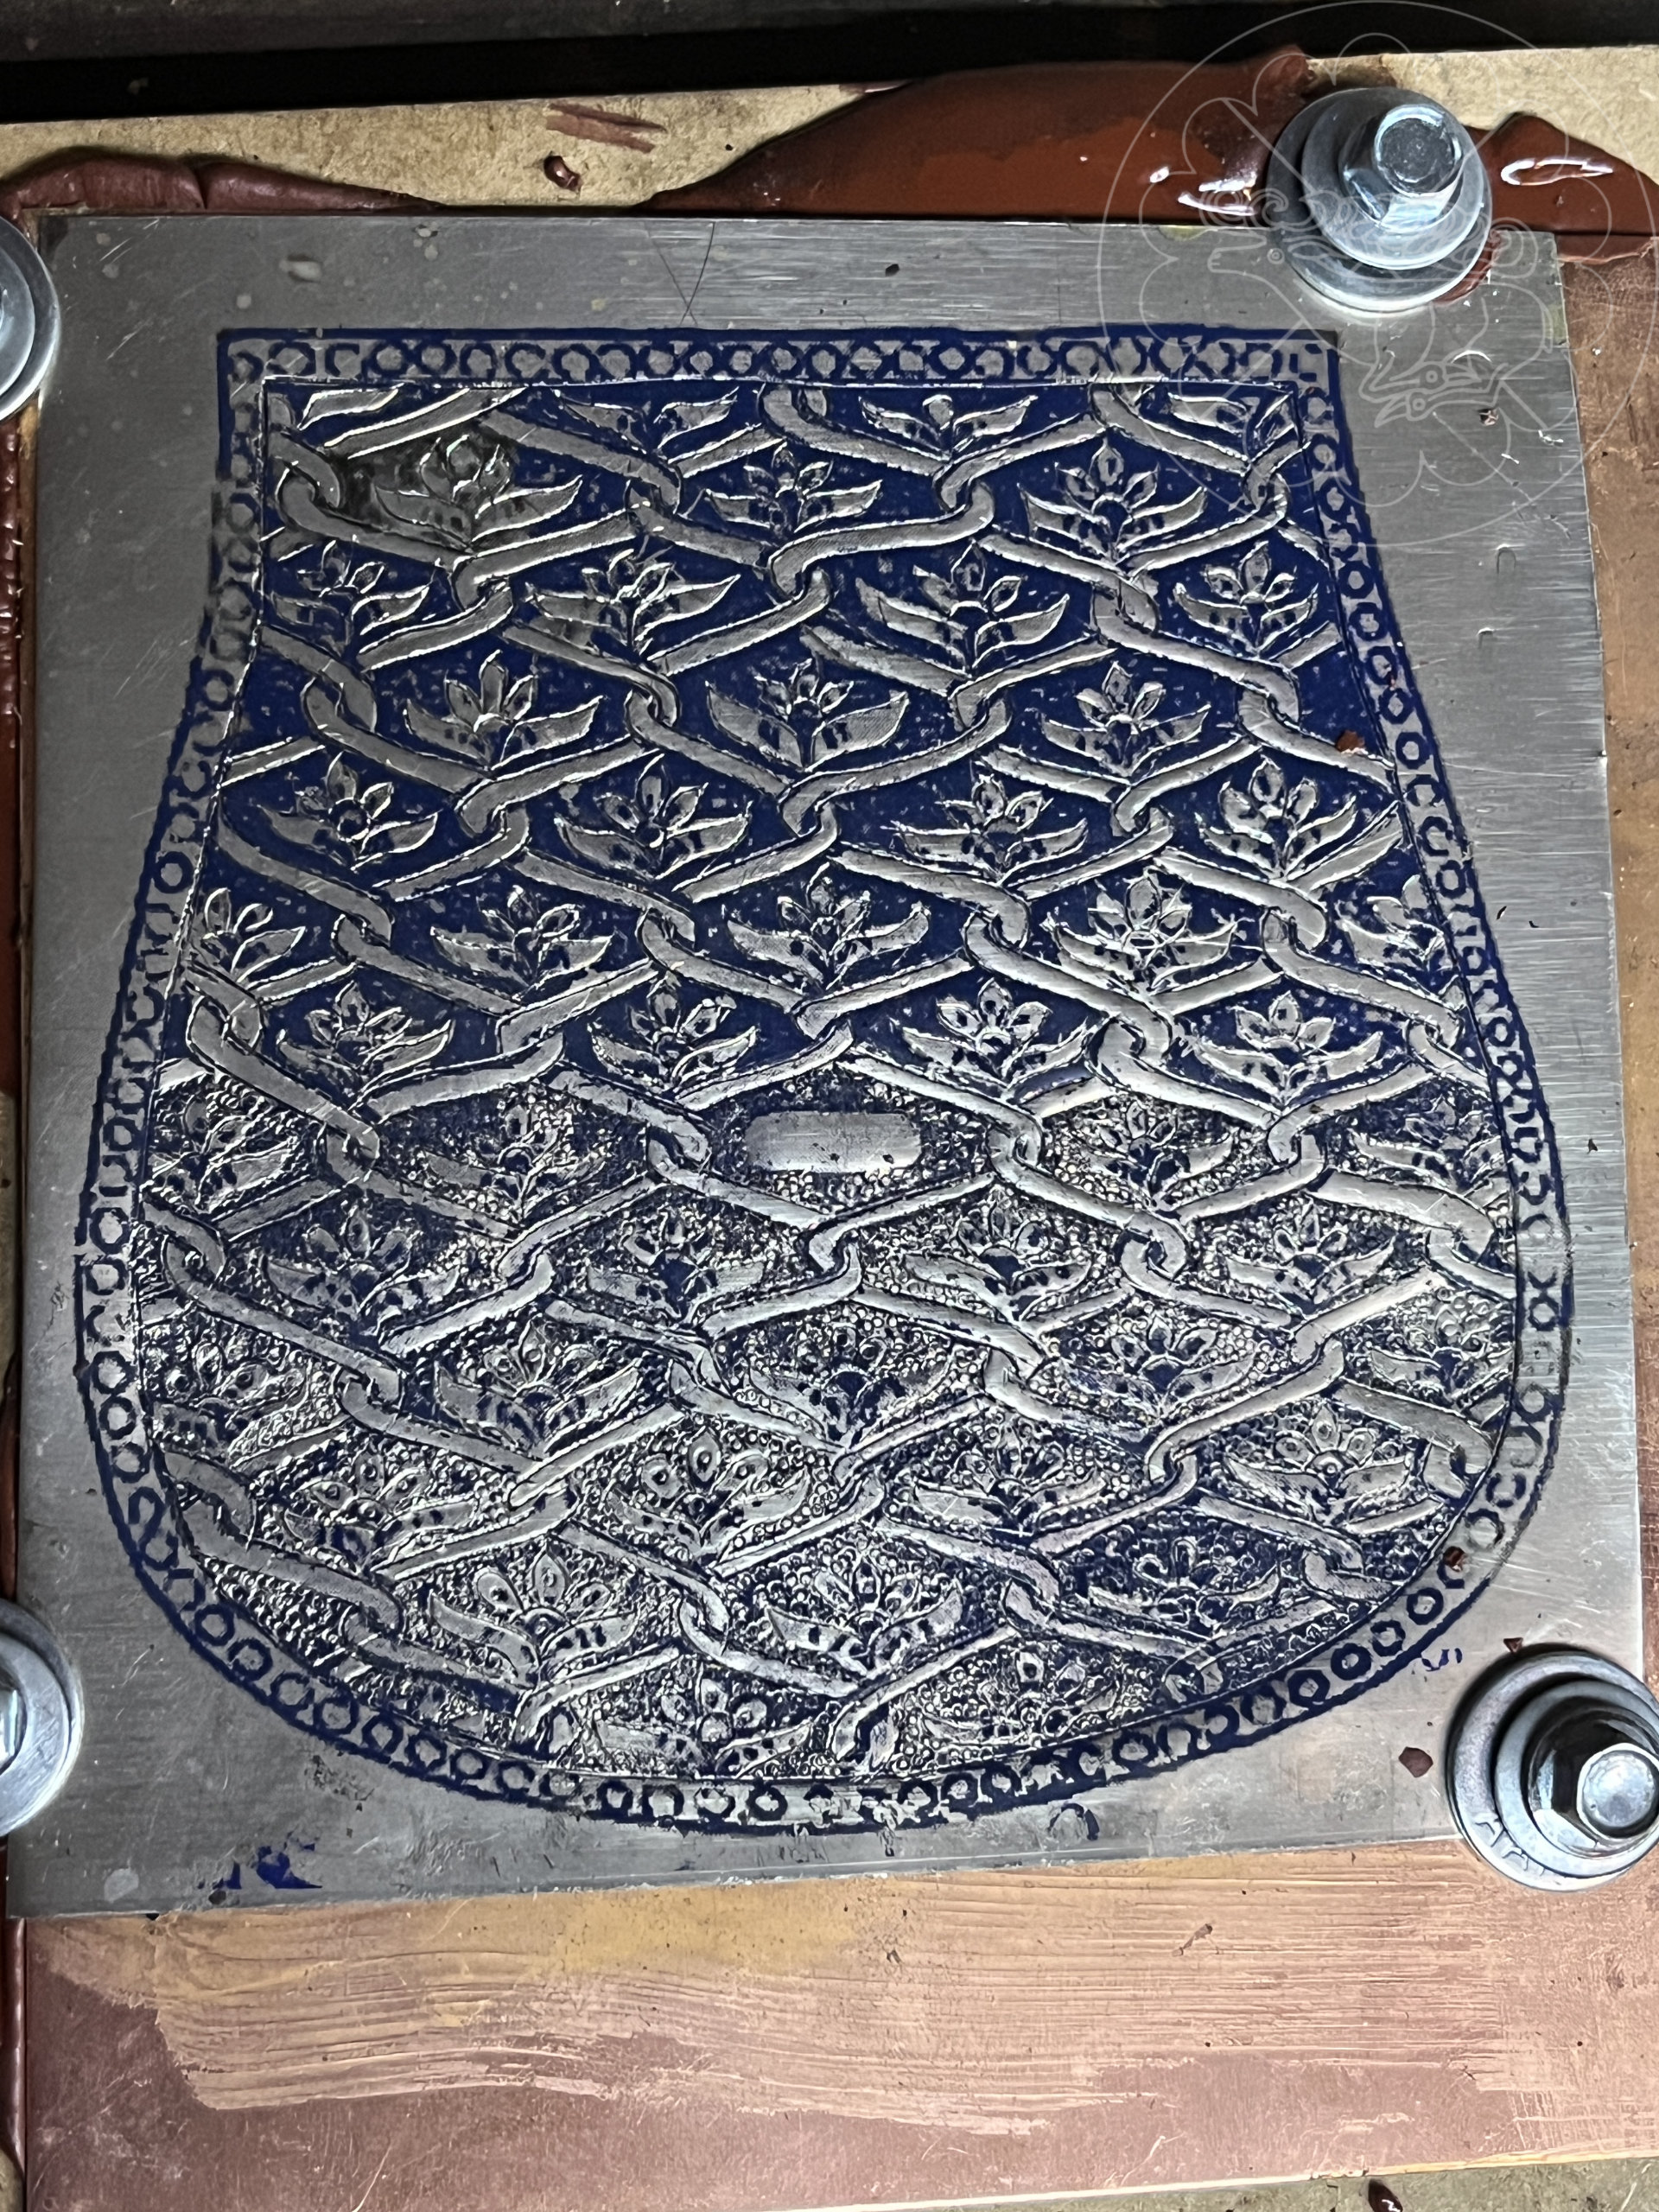
I then chased each palmette, again bottom to top. Being impatient, I also began to stipple the background to see how it turned out. On the extant piece, I calculated the dots of the stippling to be ~0.4mm in diameter. I opted to use a 0.5mm leather punch to recreate the effect. After this I drilled out the perimeter holes while the piece was still affixed to the pitch.
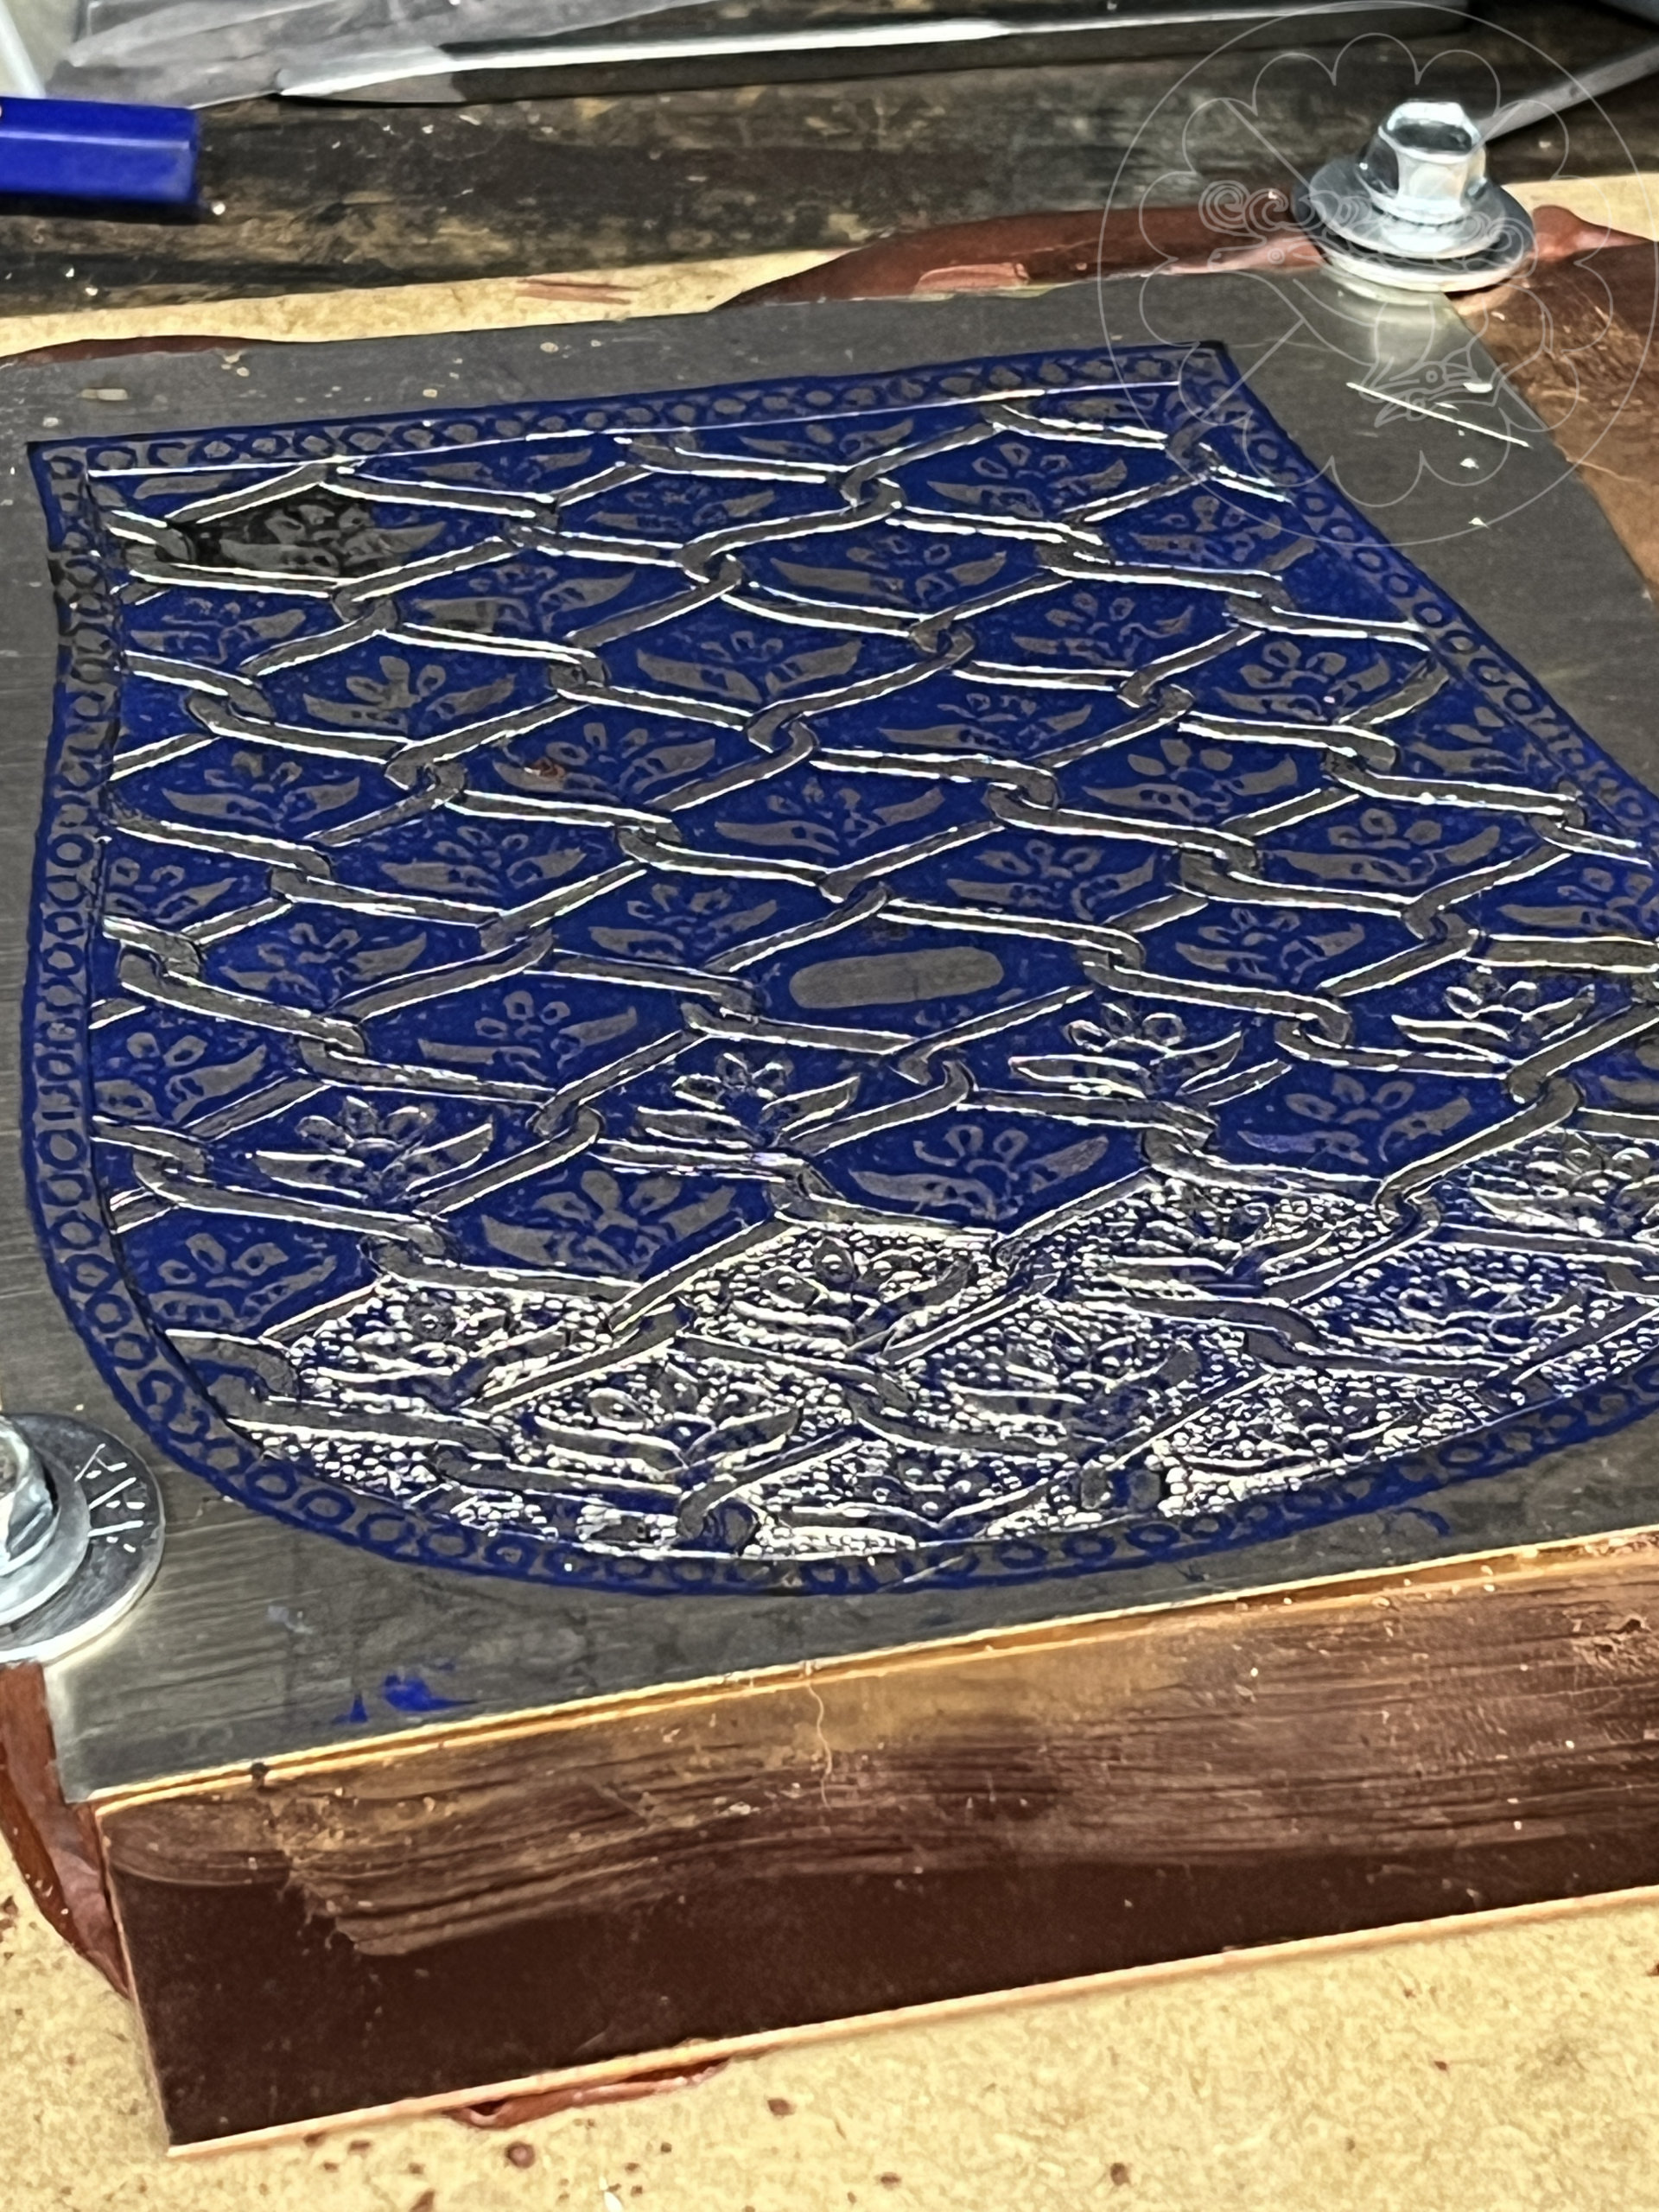
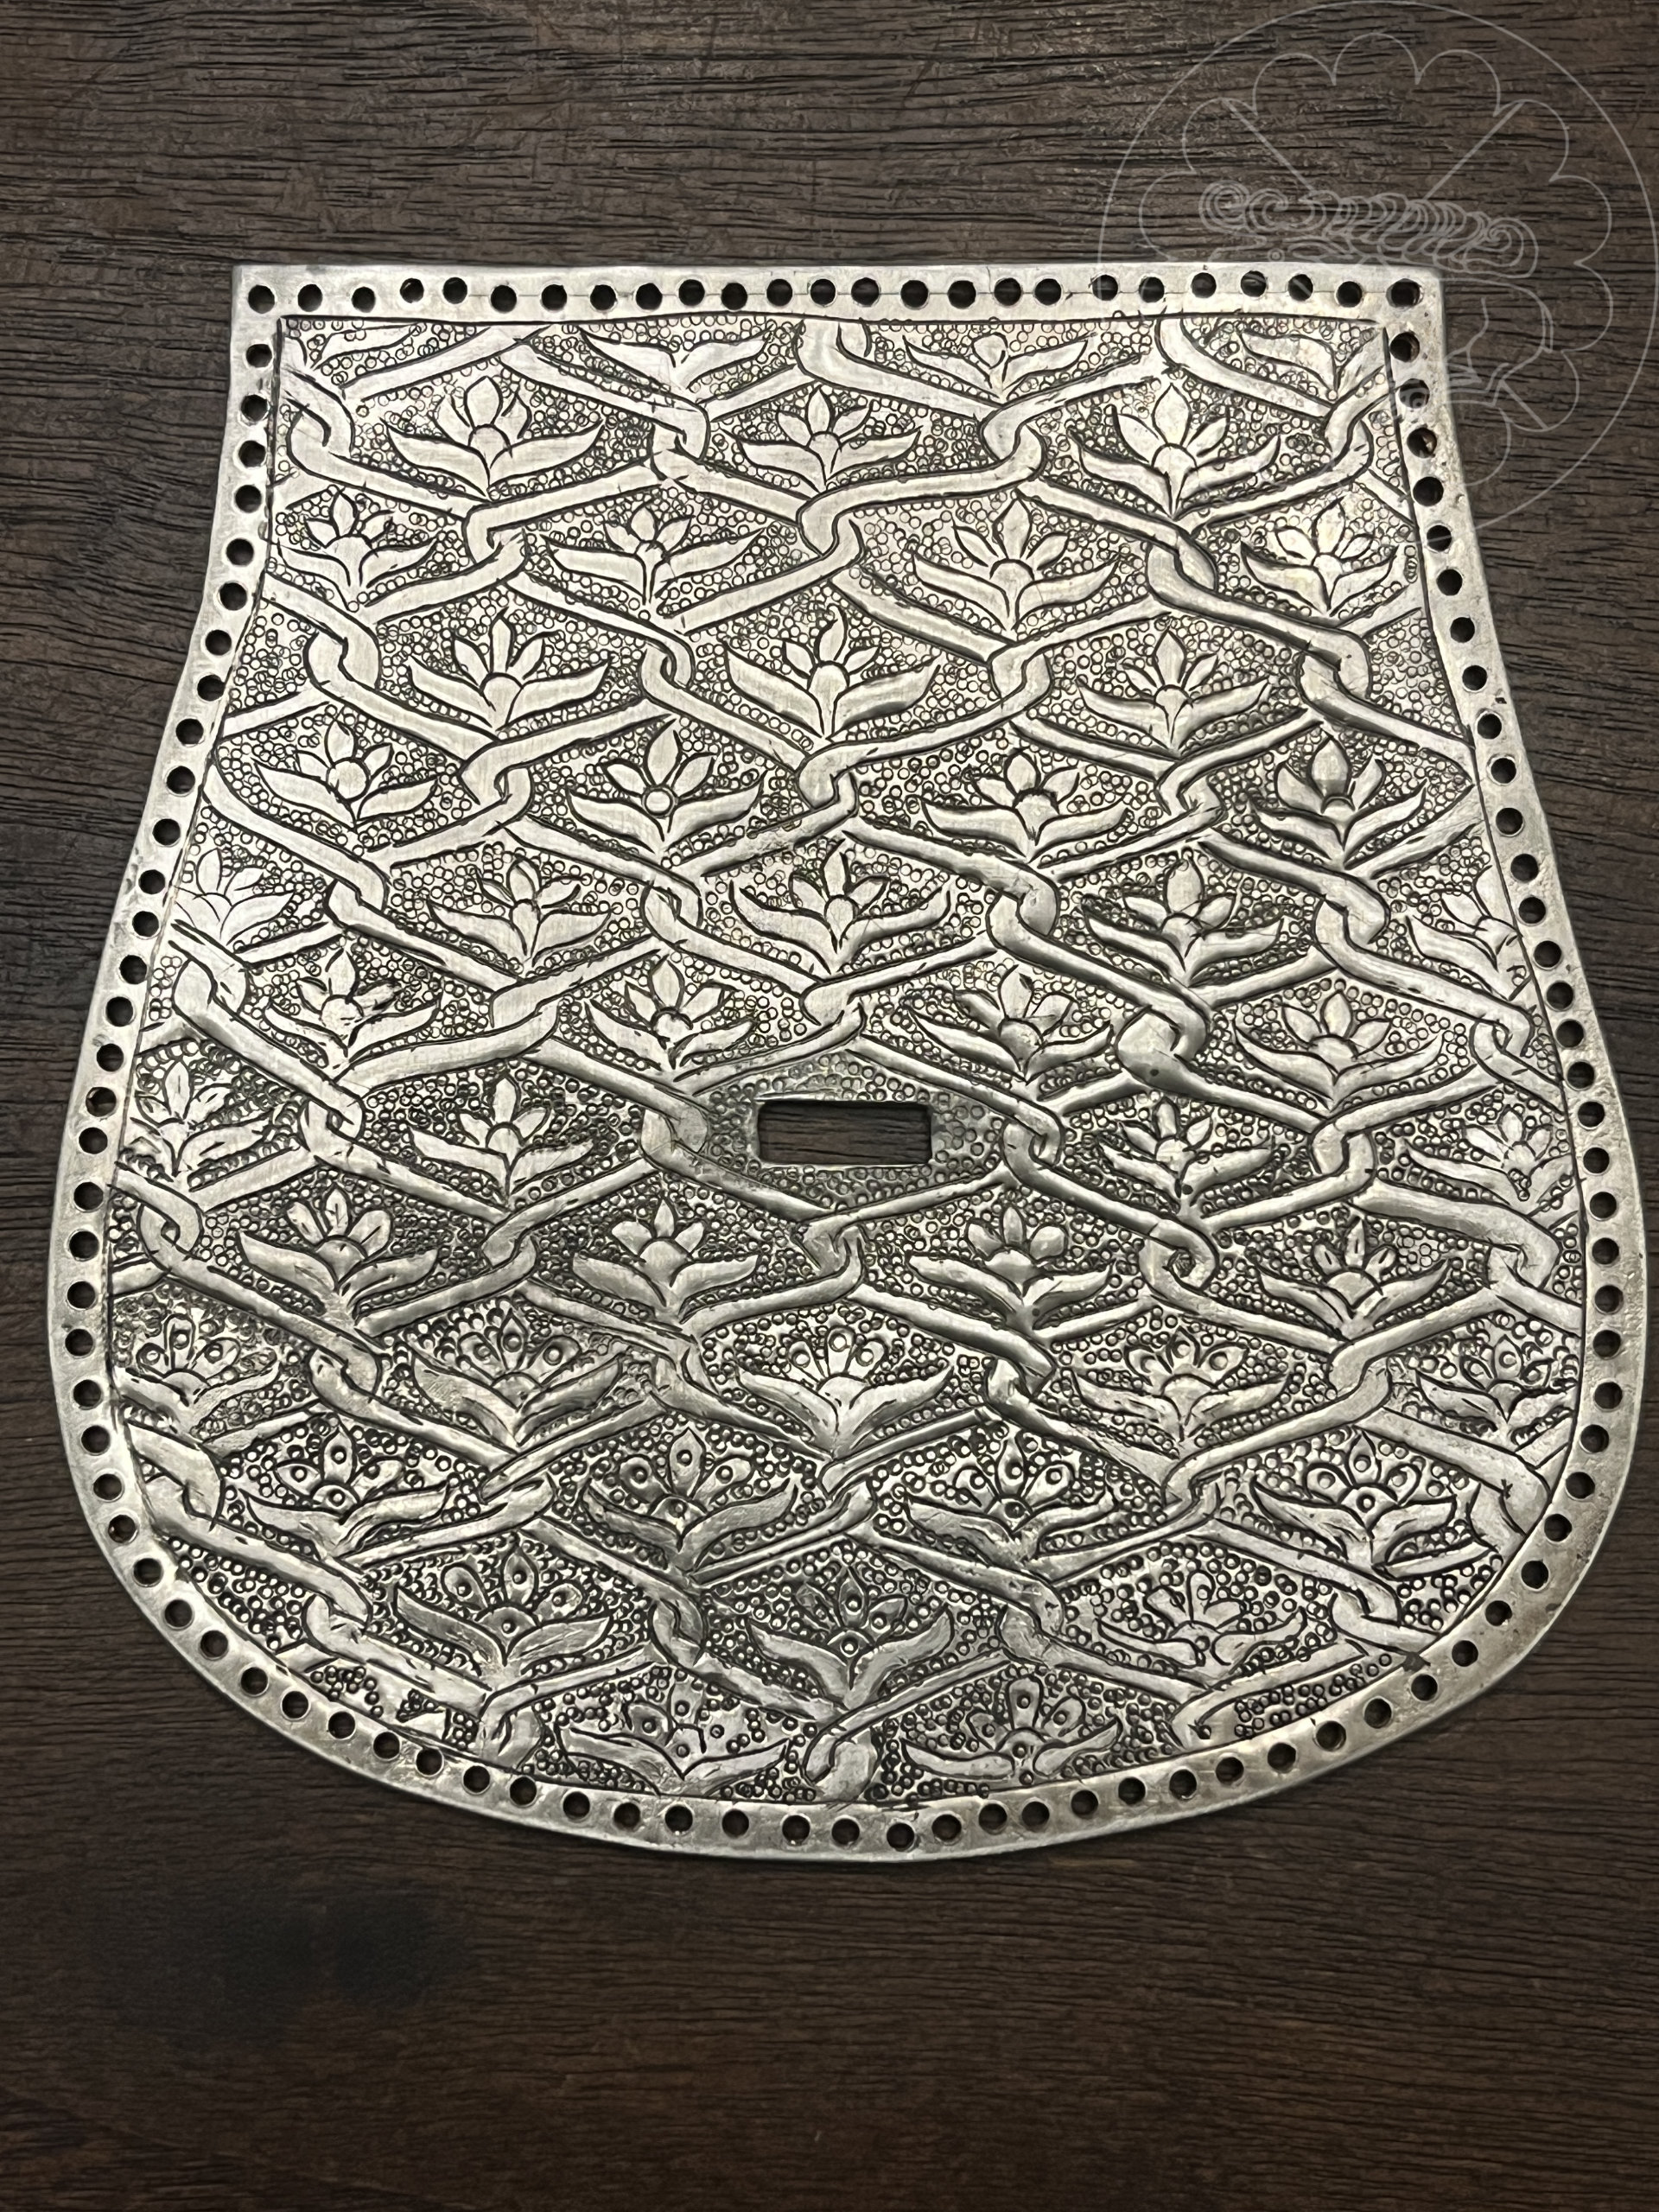
After all the chasing and stippling work, the piece was cut out.
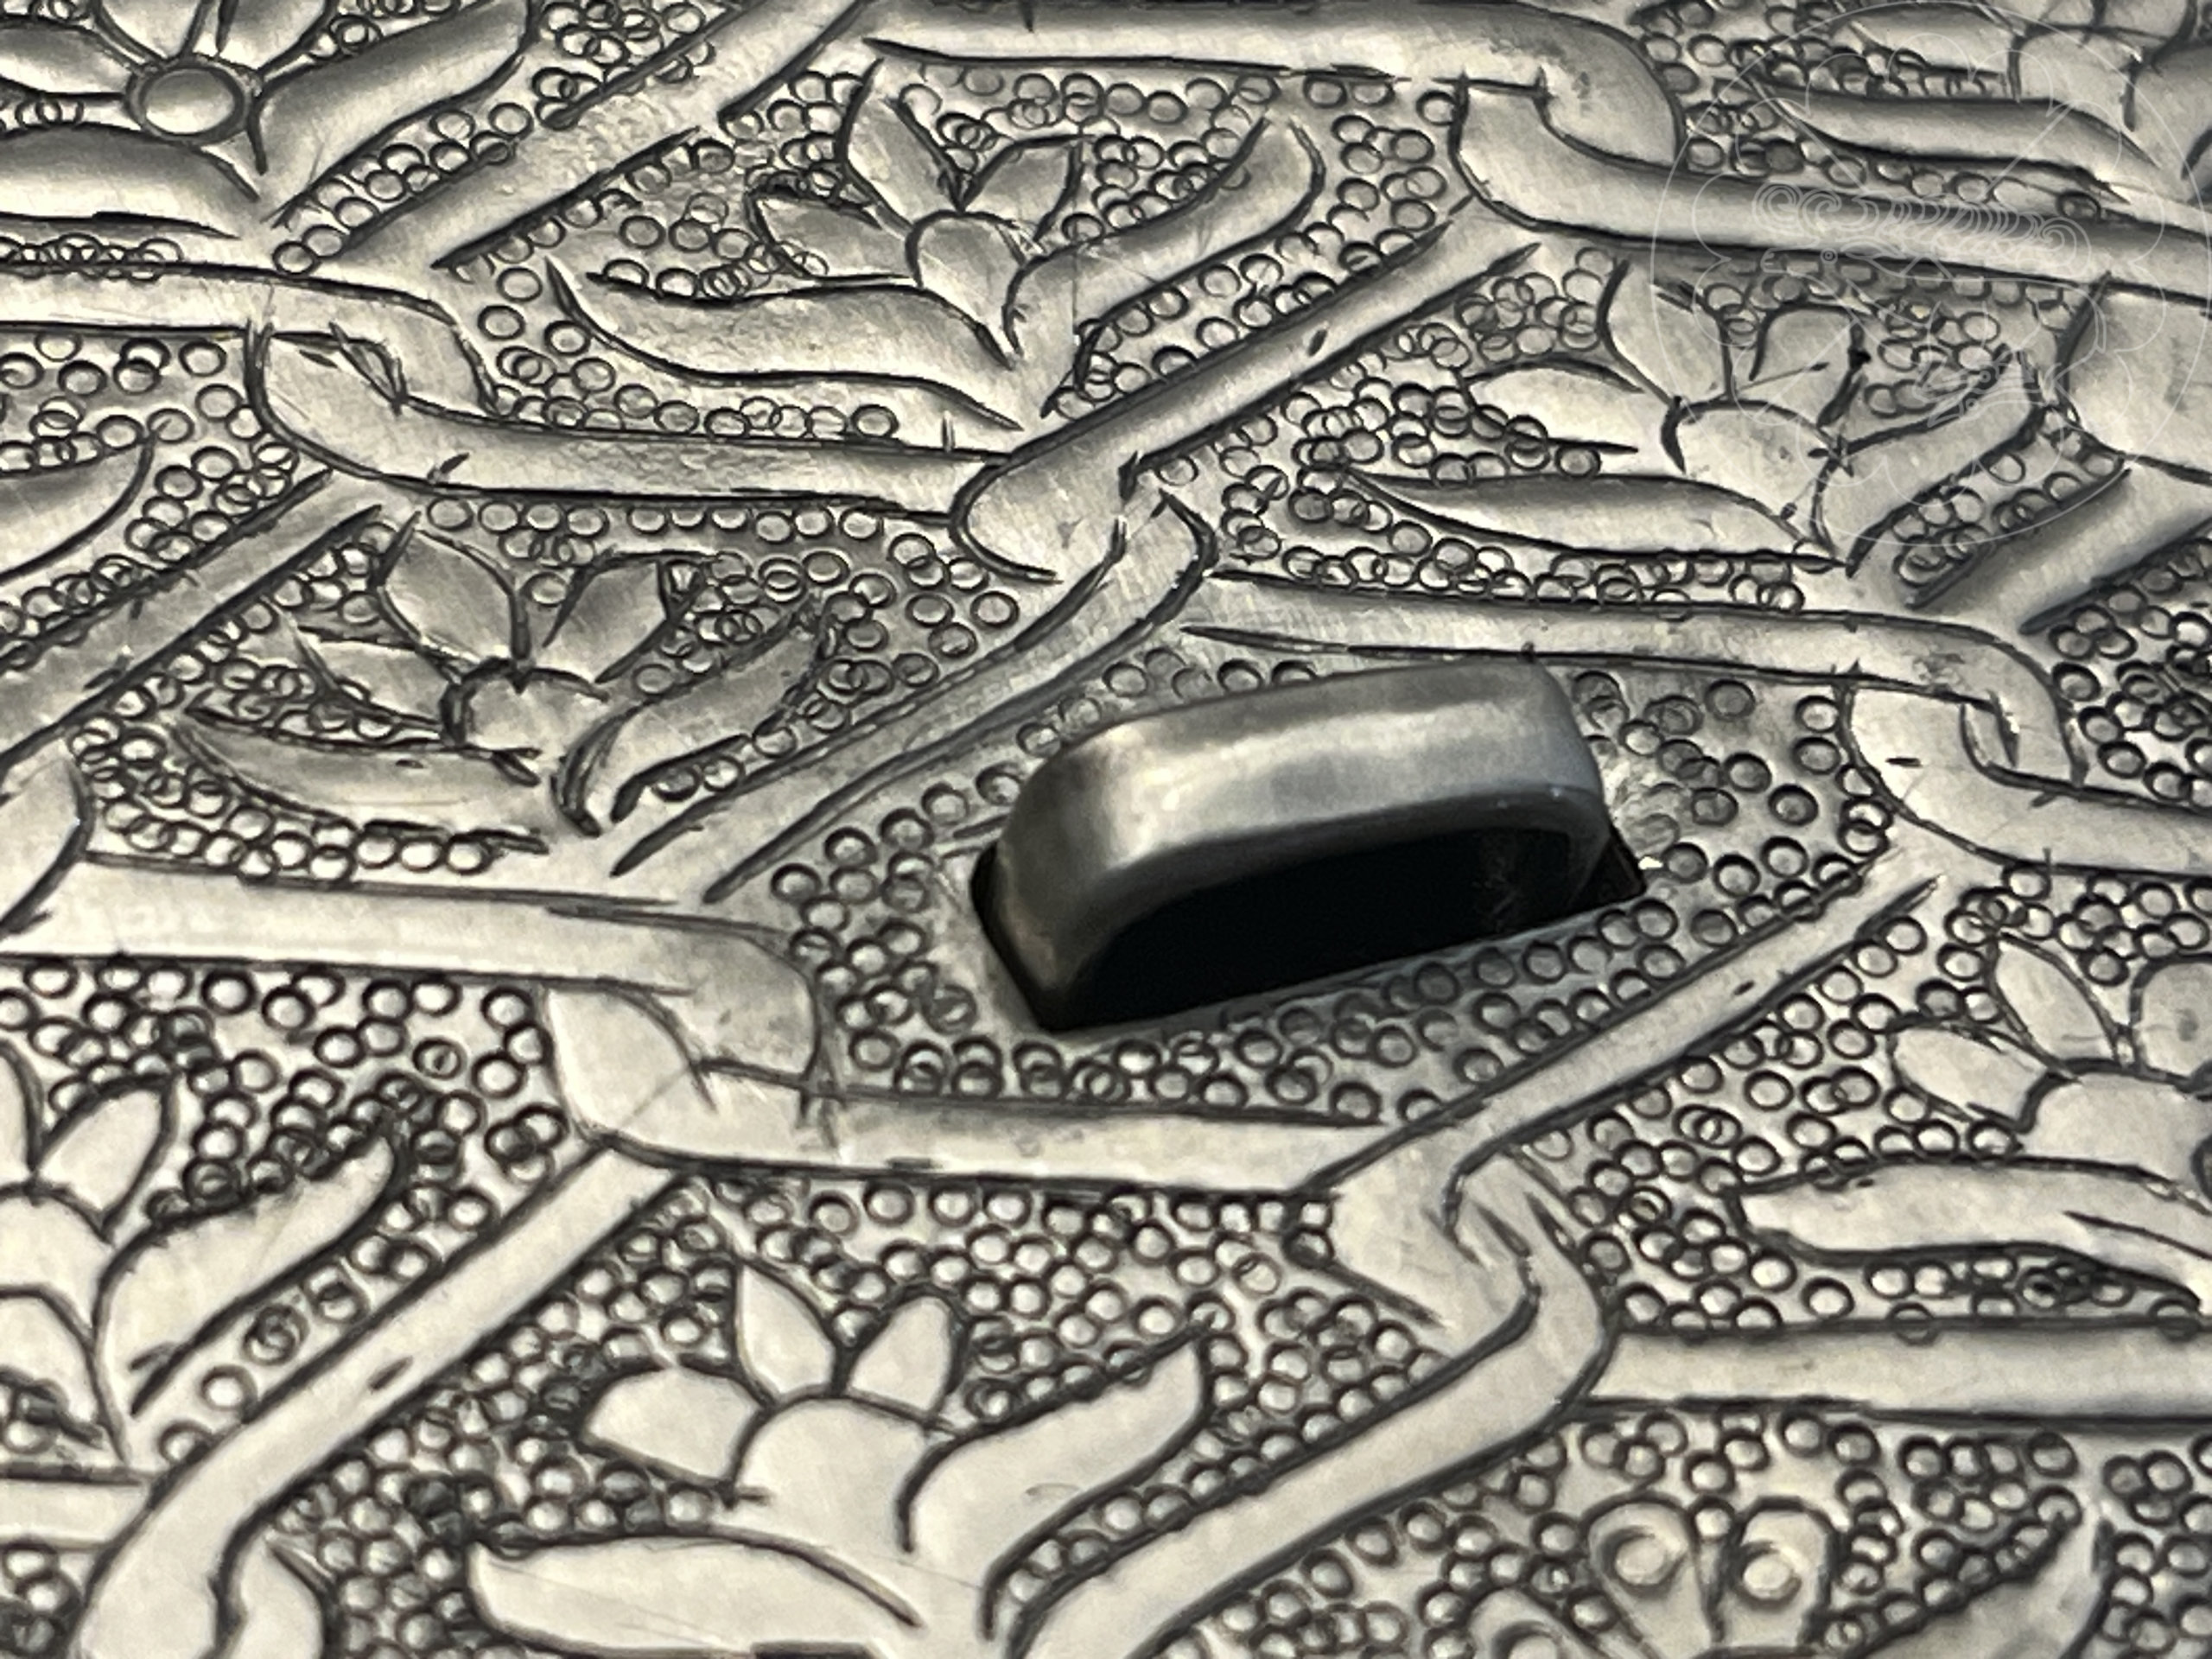
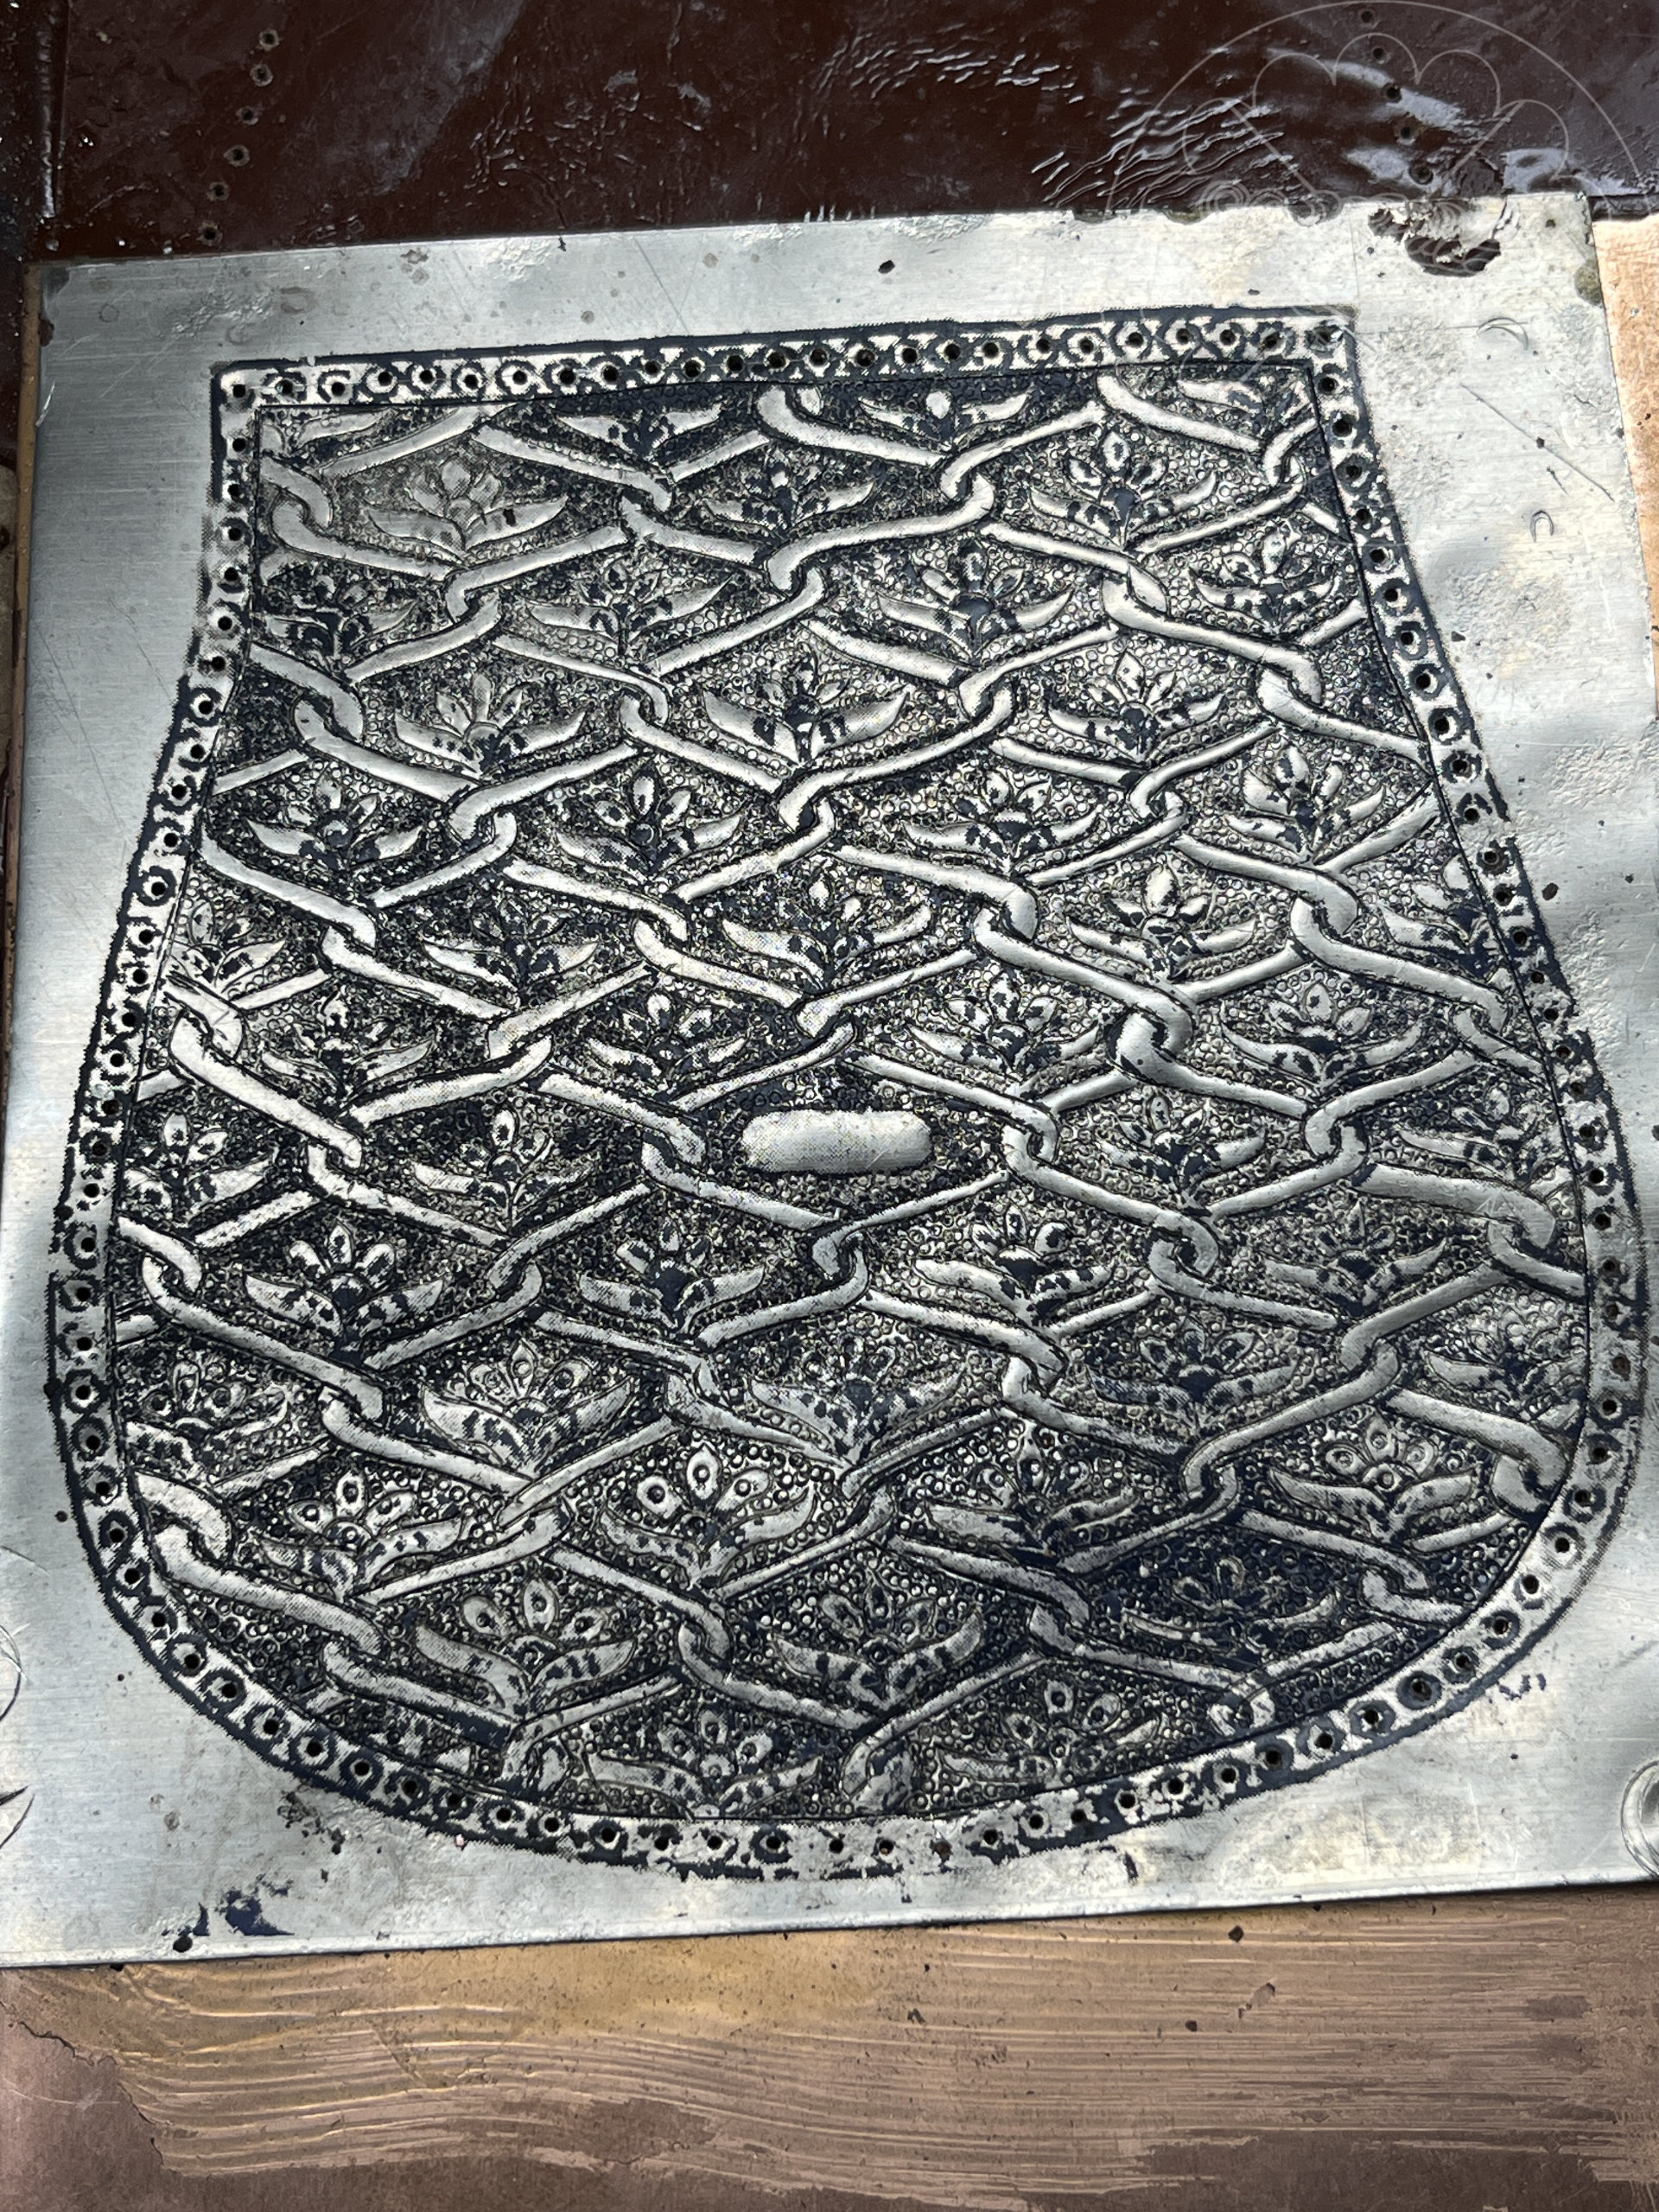
The moment of truth came when removing the marking ink. Although I could get an idea of how the designs looked by holding it up to the light at an angle, it was not clear whether the work had translated well with the ink still on the surface, but when I wiped the surface clean with acetone, the end product looked great and hit the aesthetic that I was shooting for,
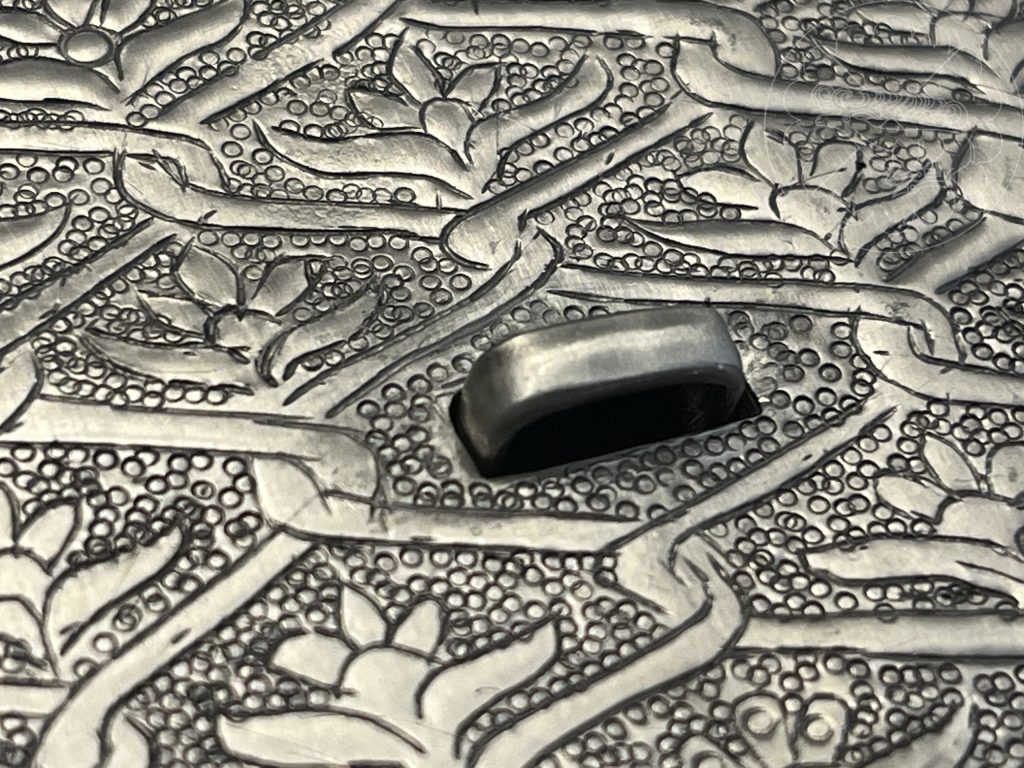
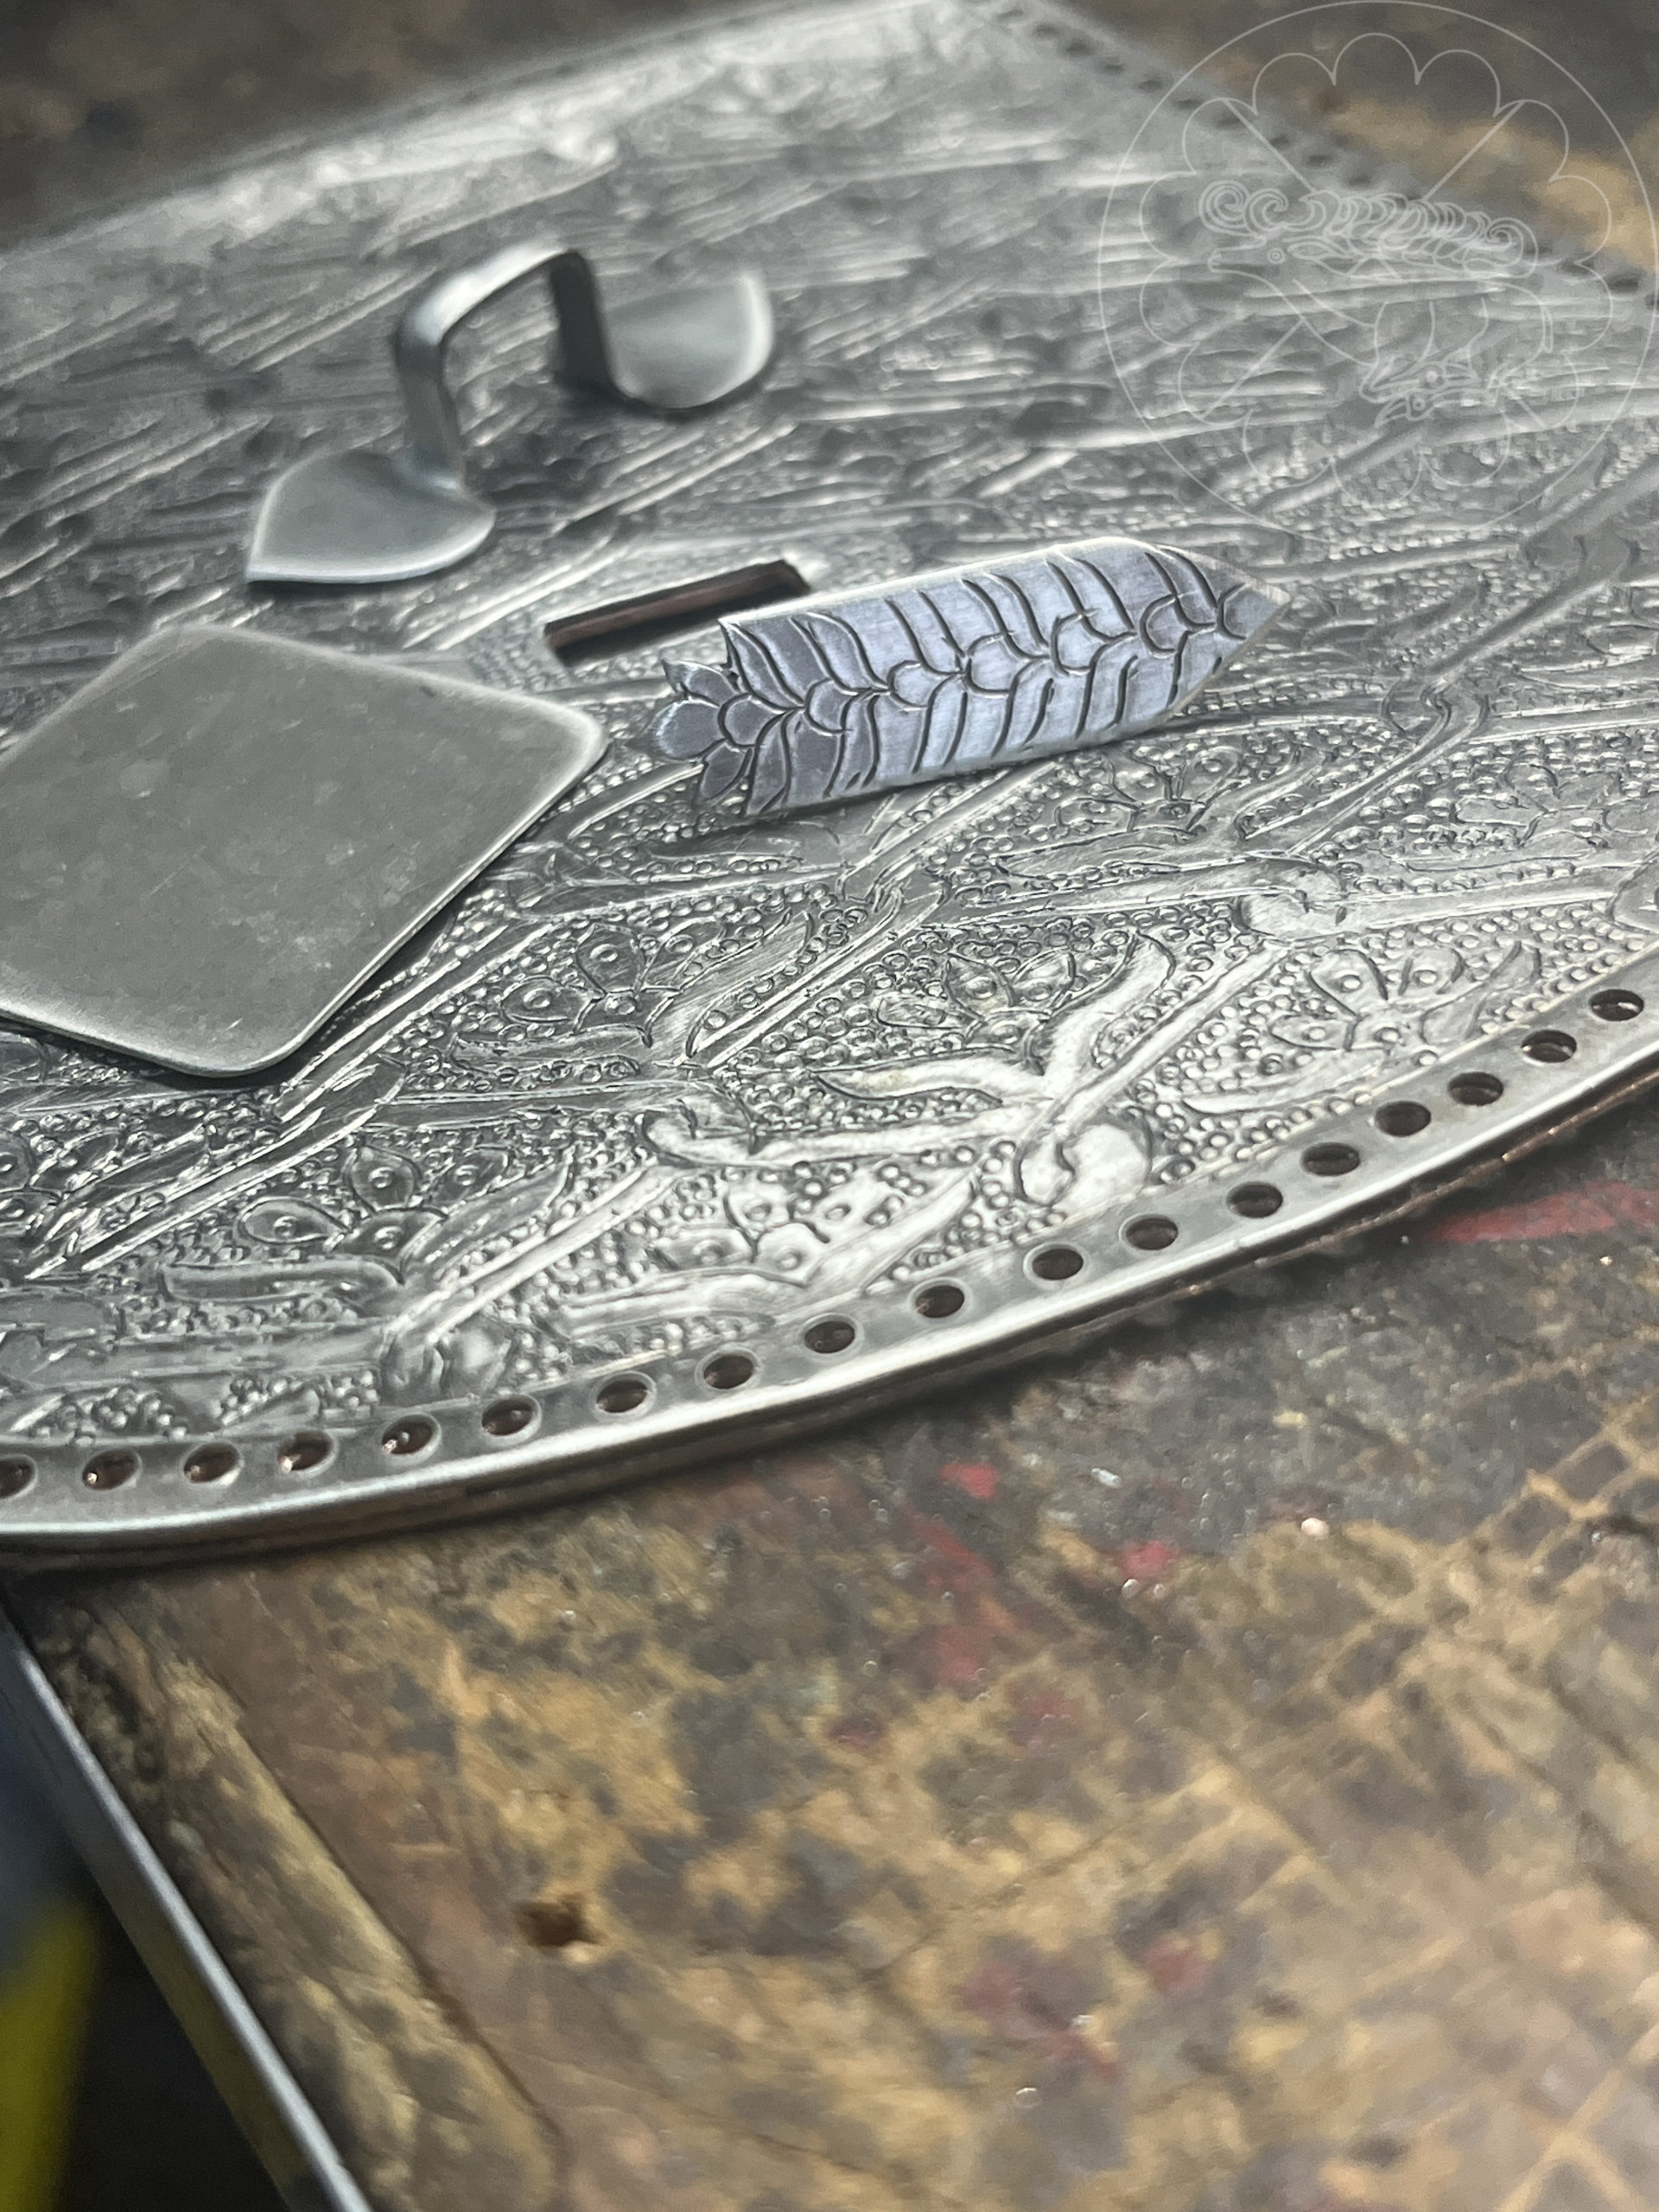
I then cut out the center hole and enlarged the perimeter holes to better match the original.
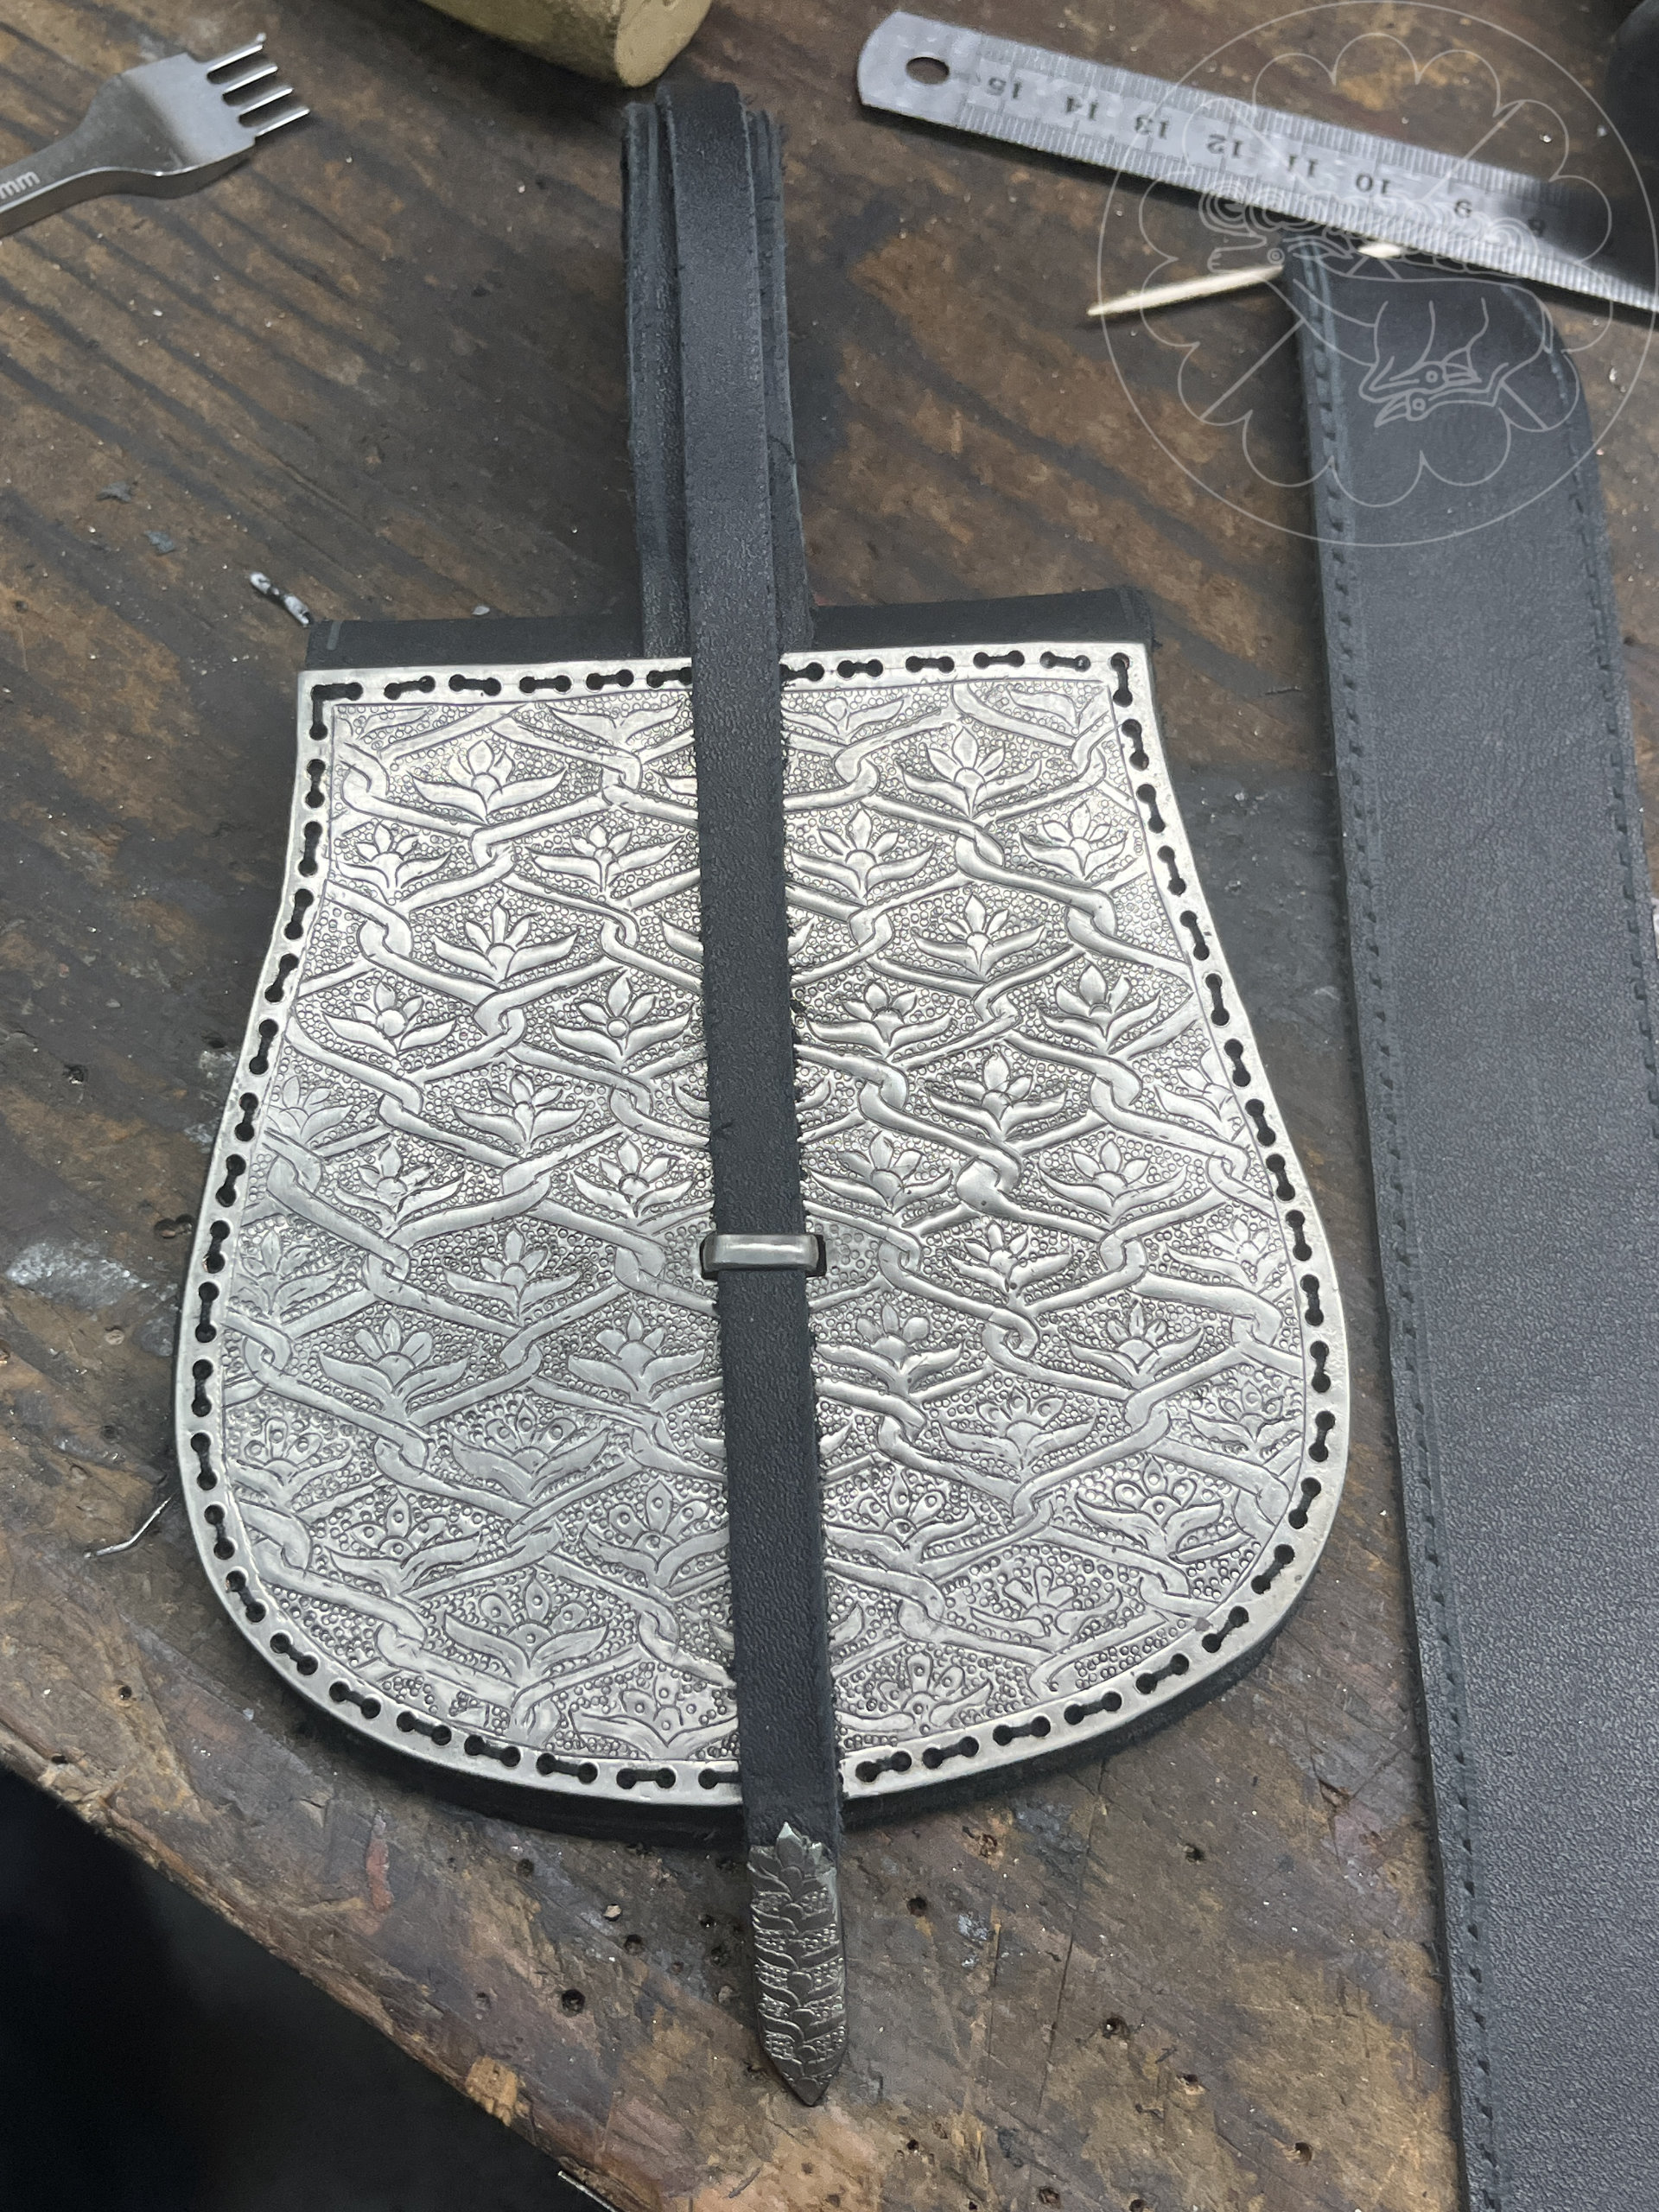
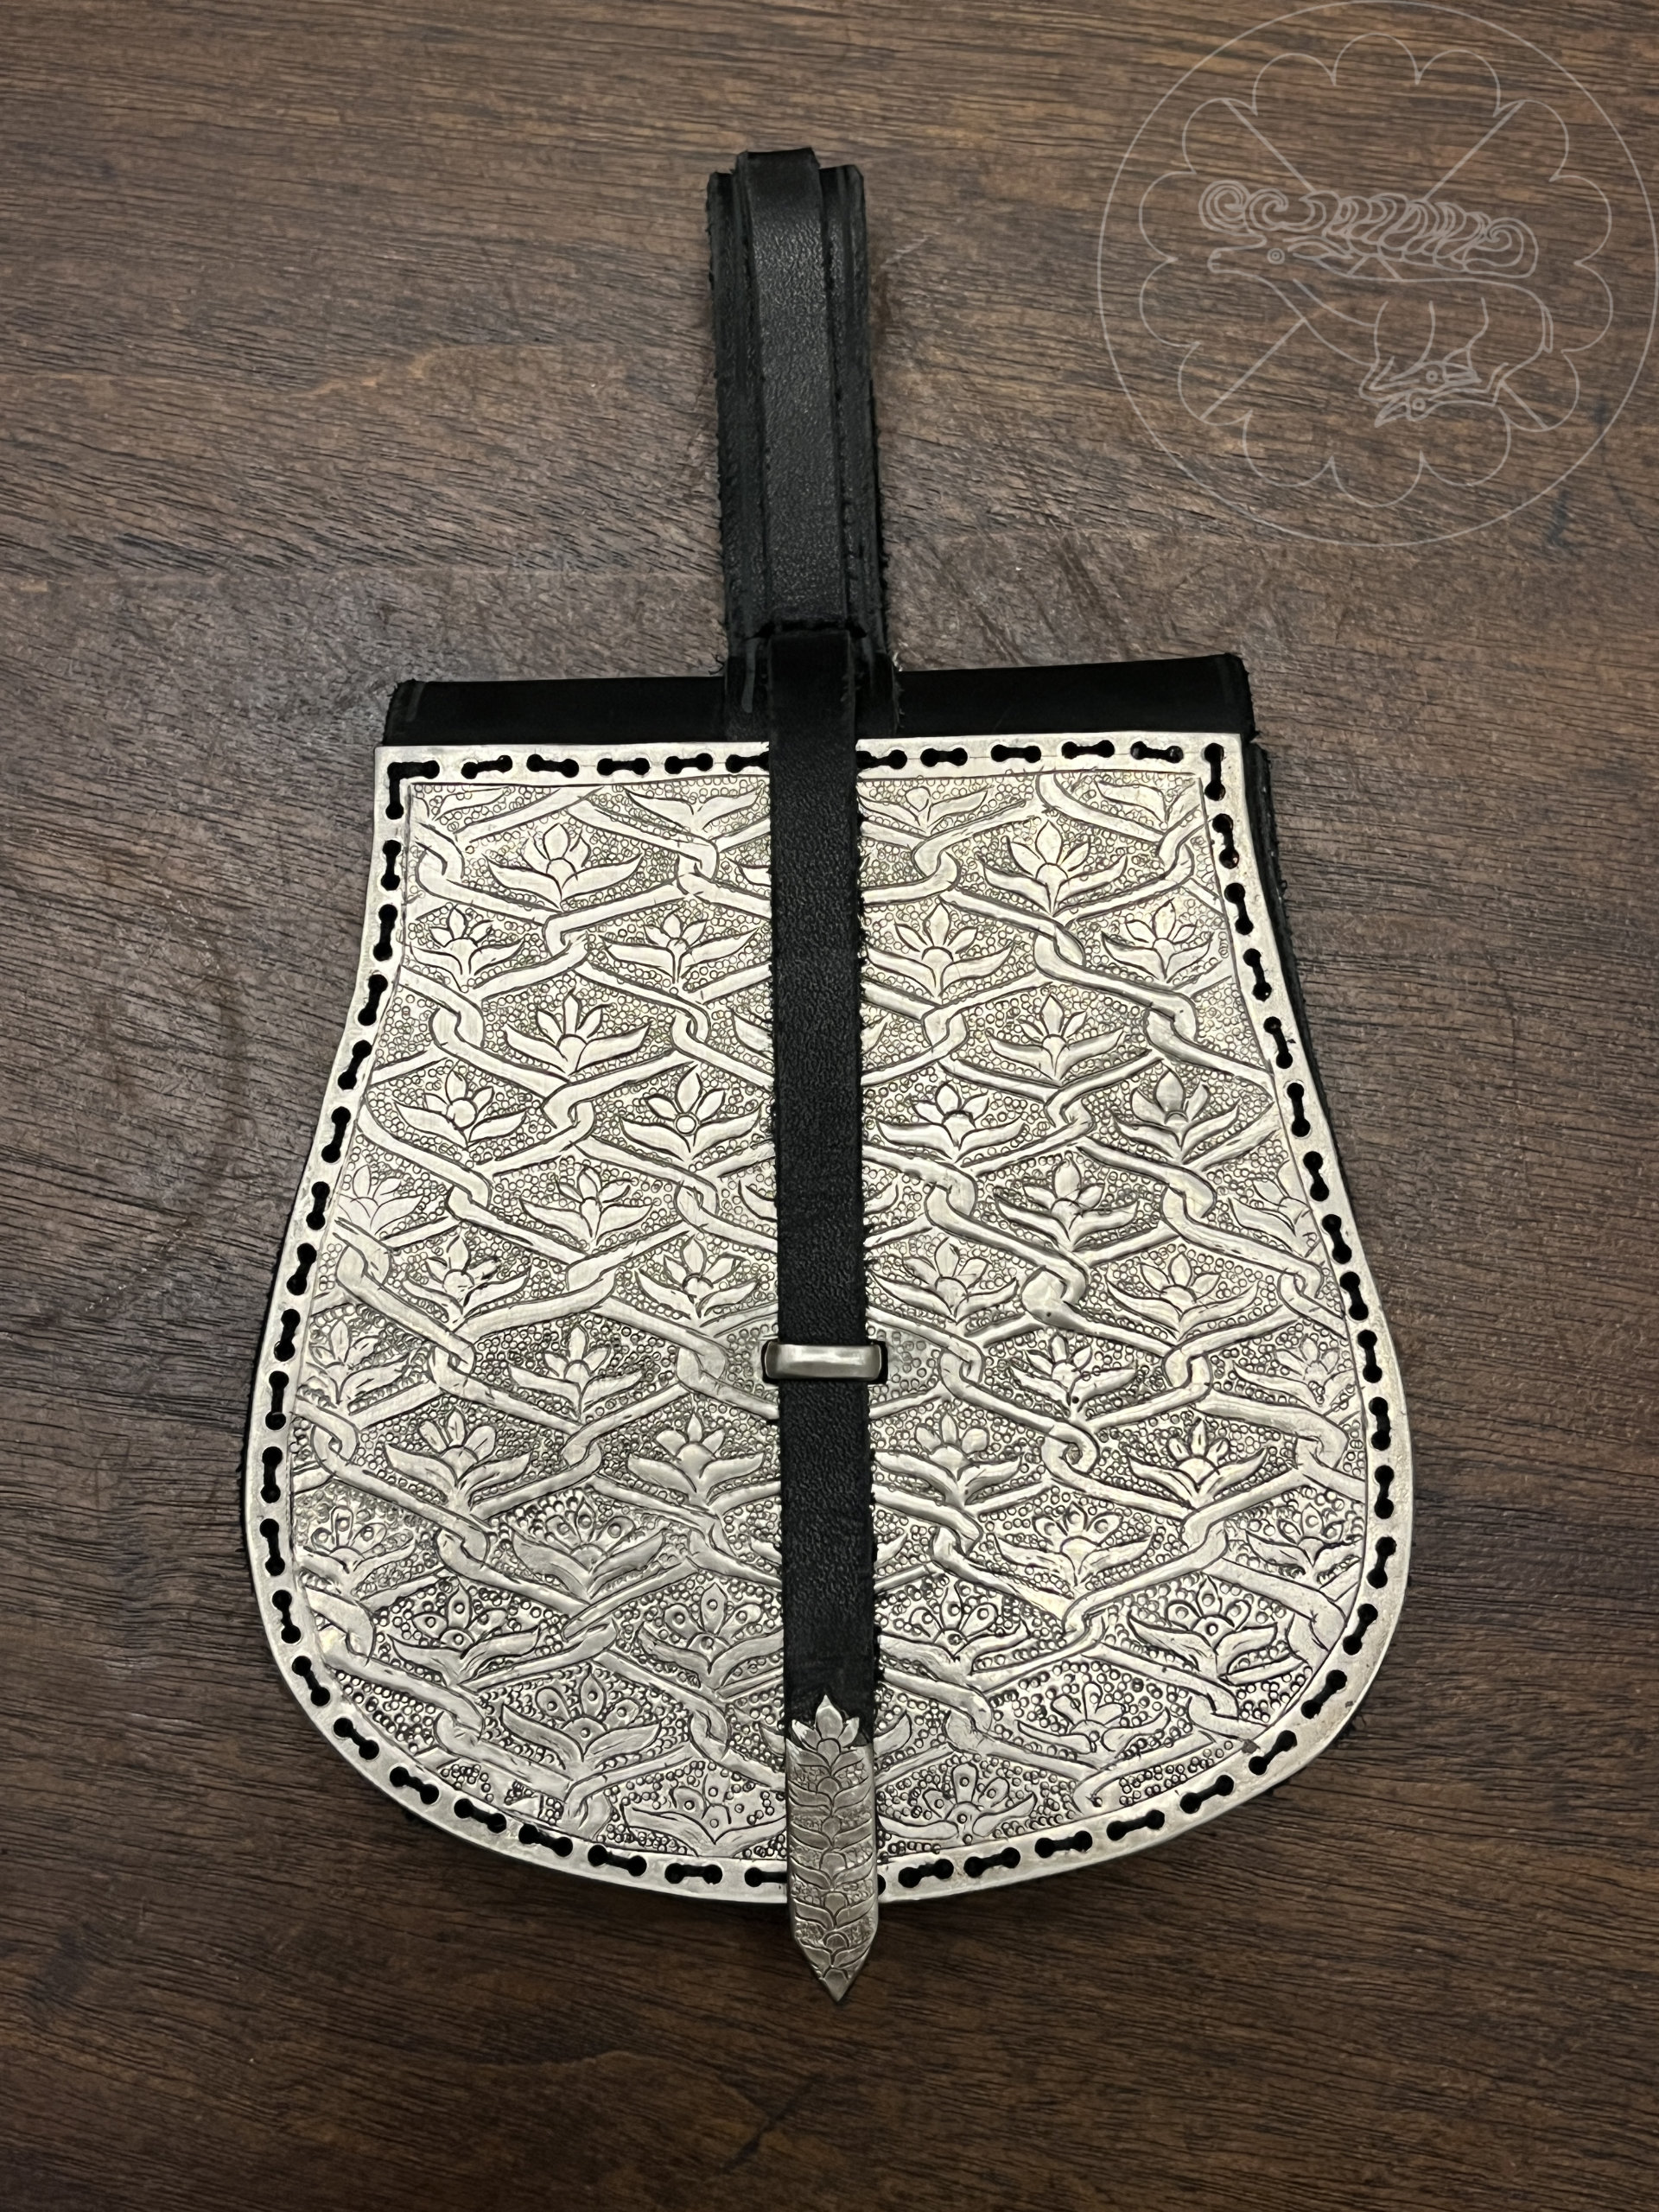
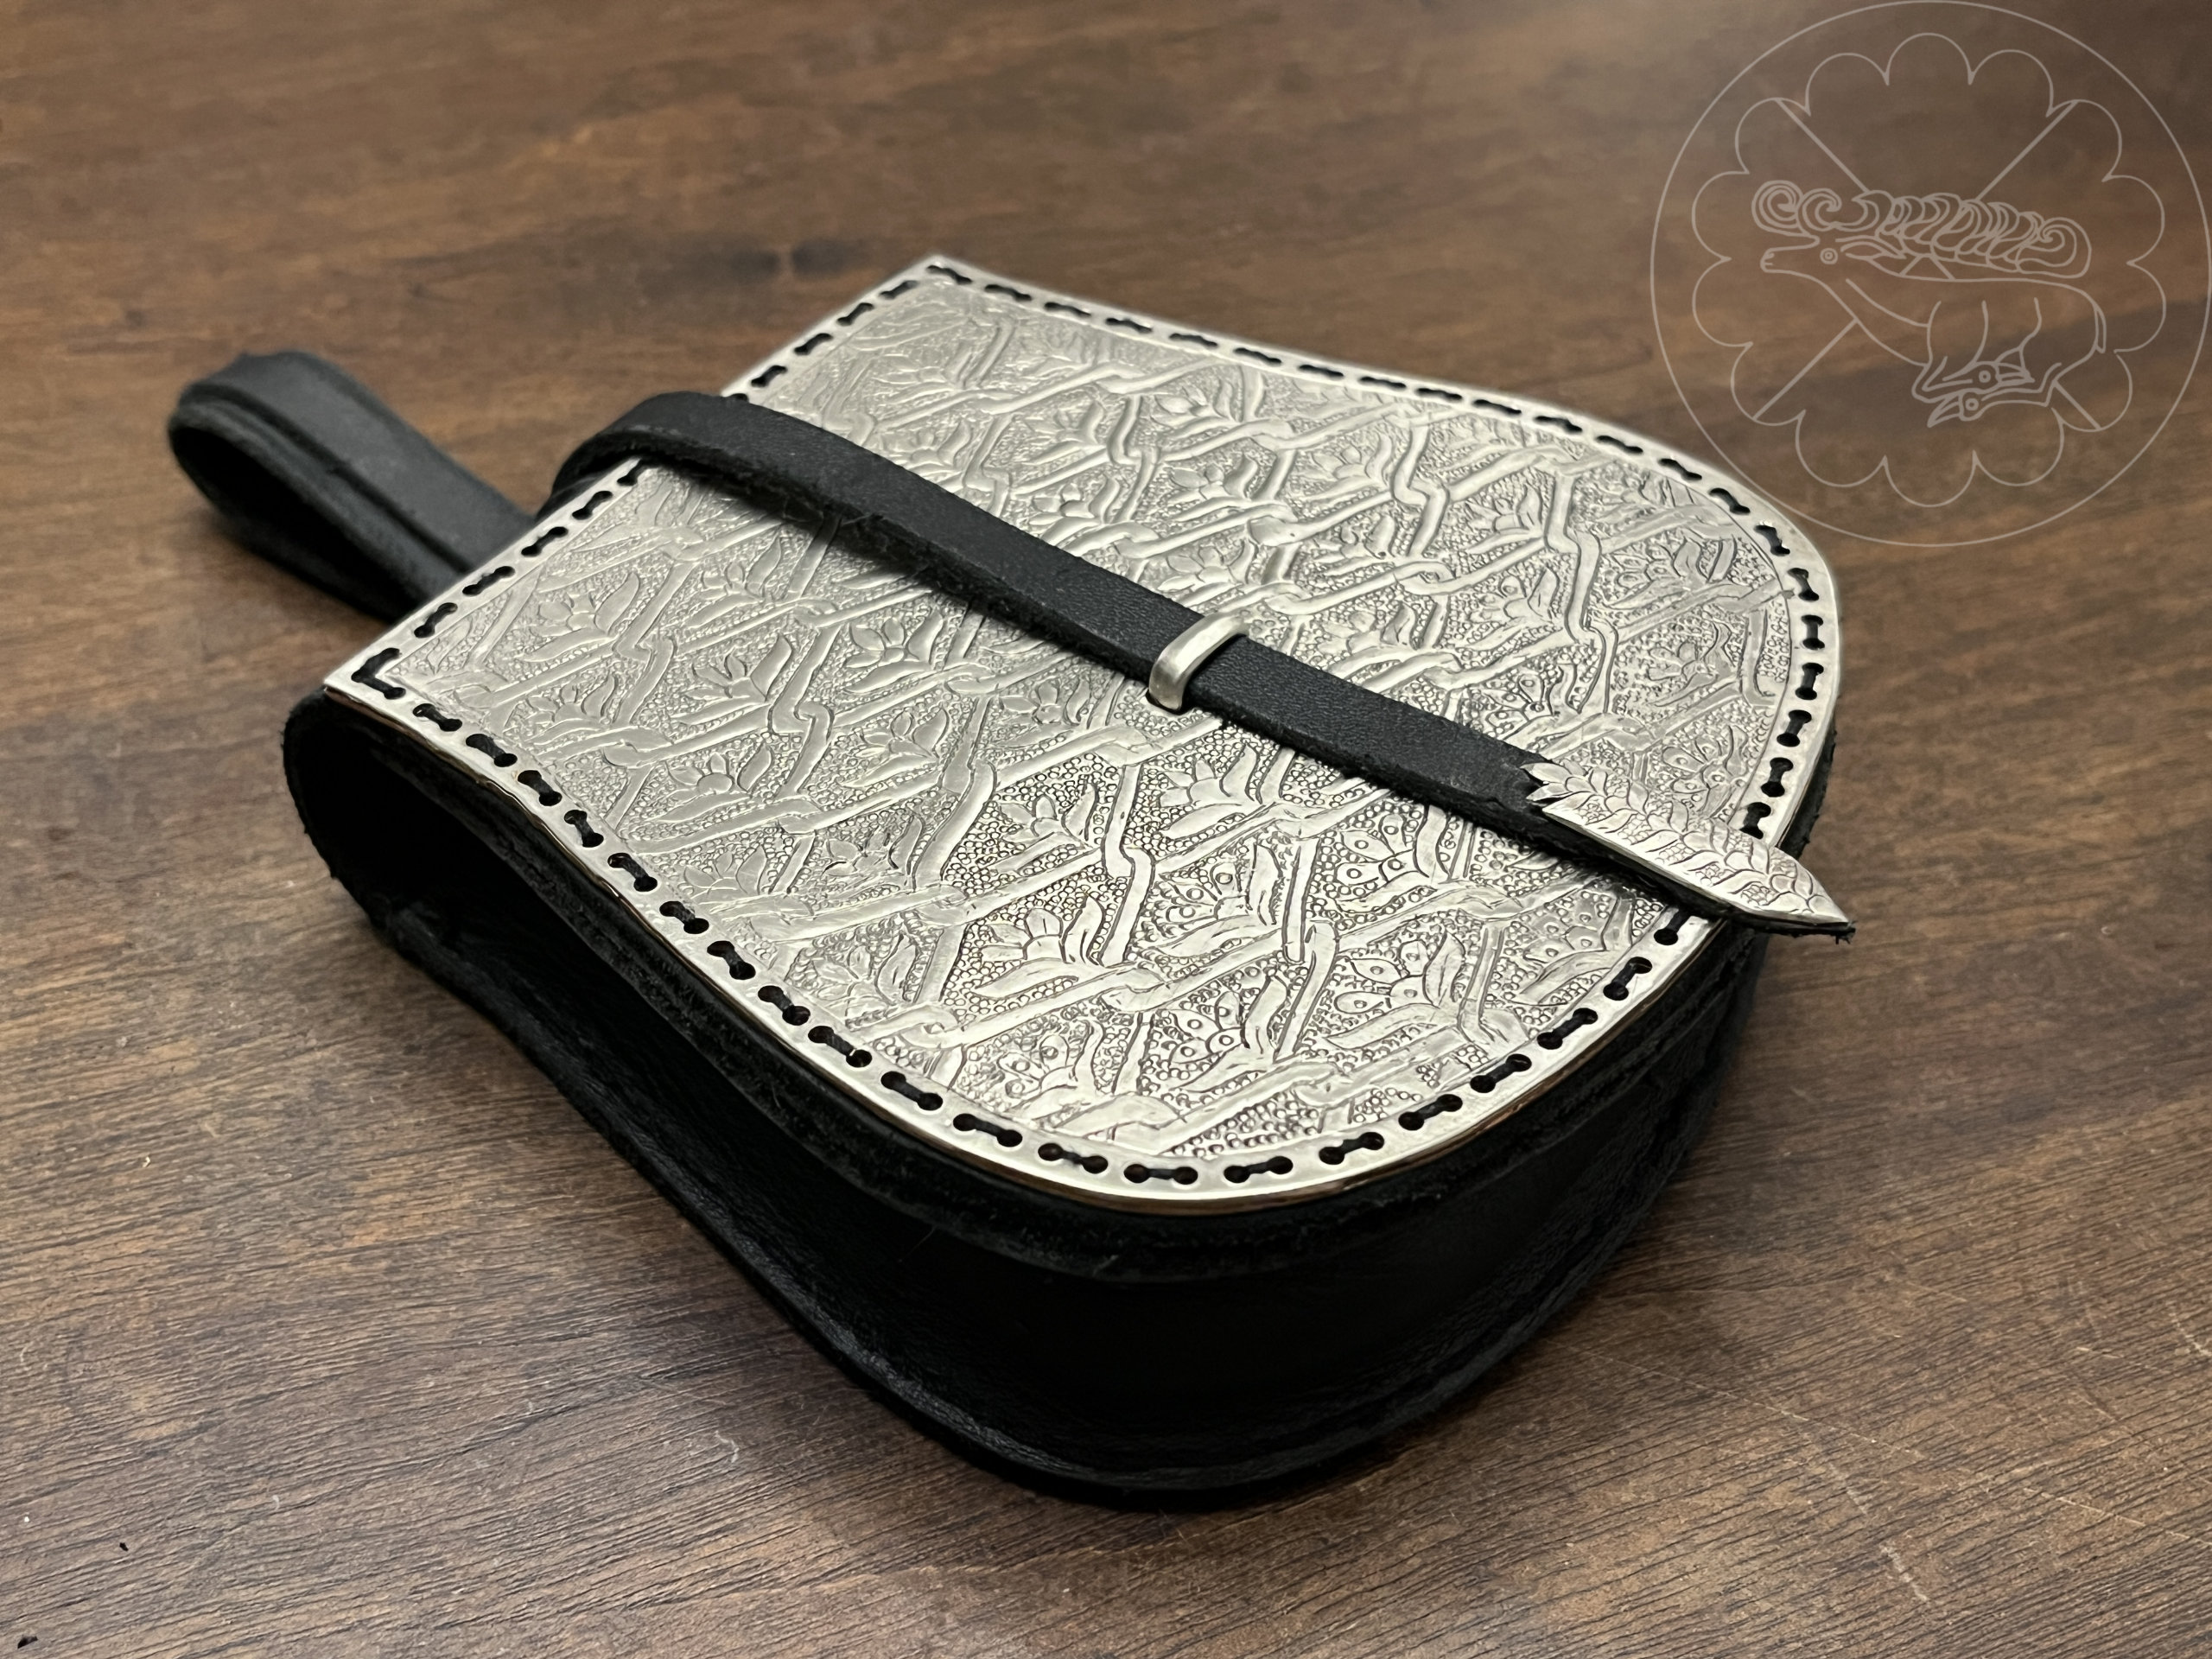
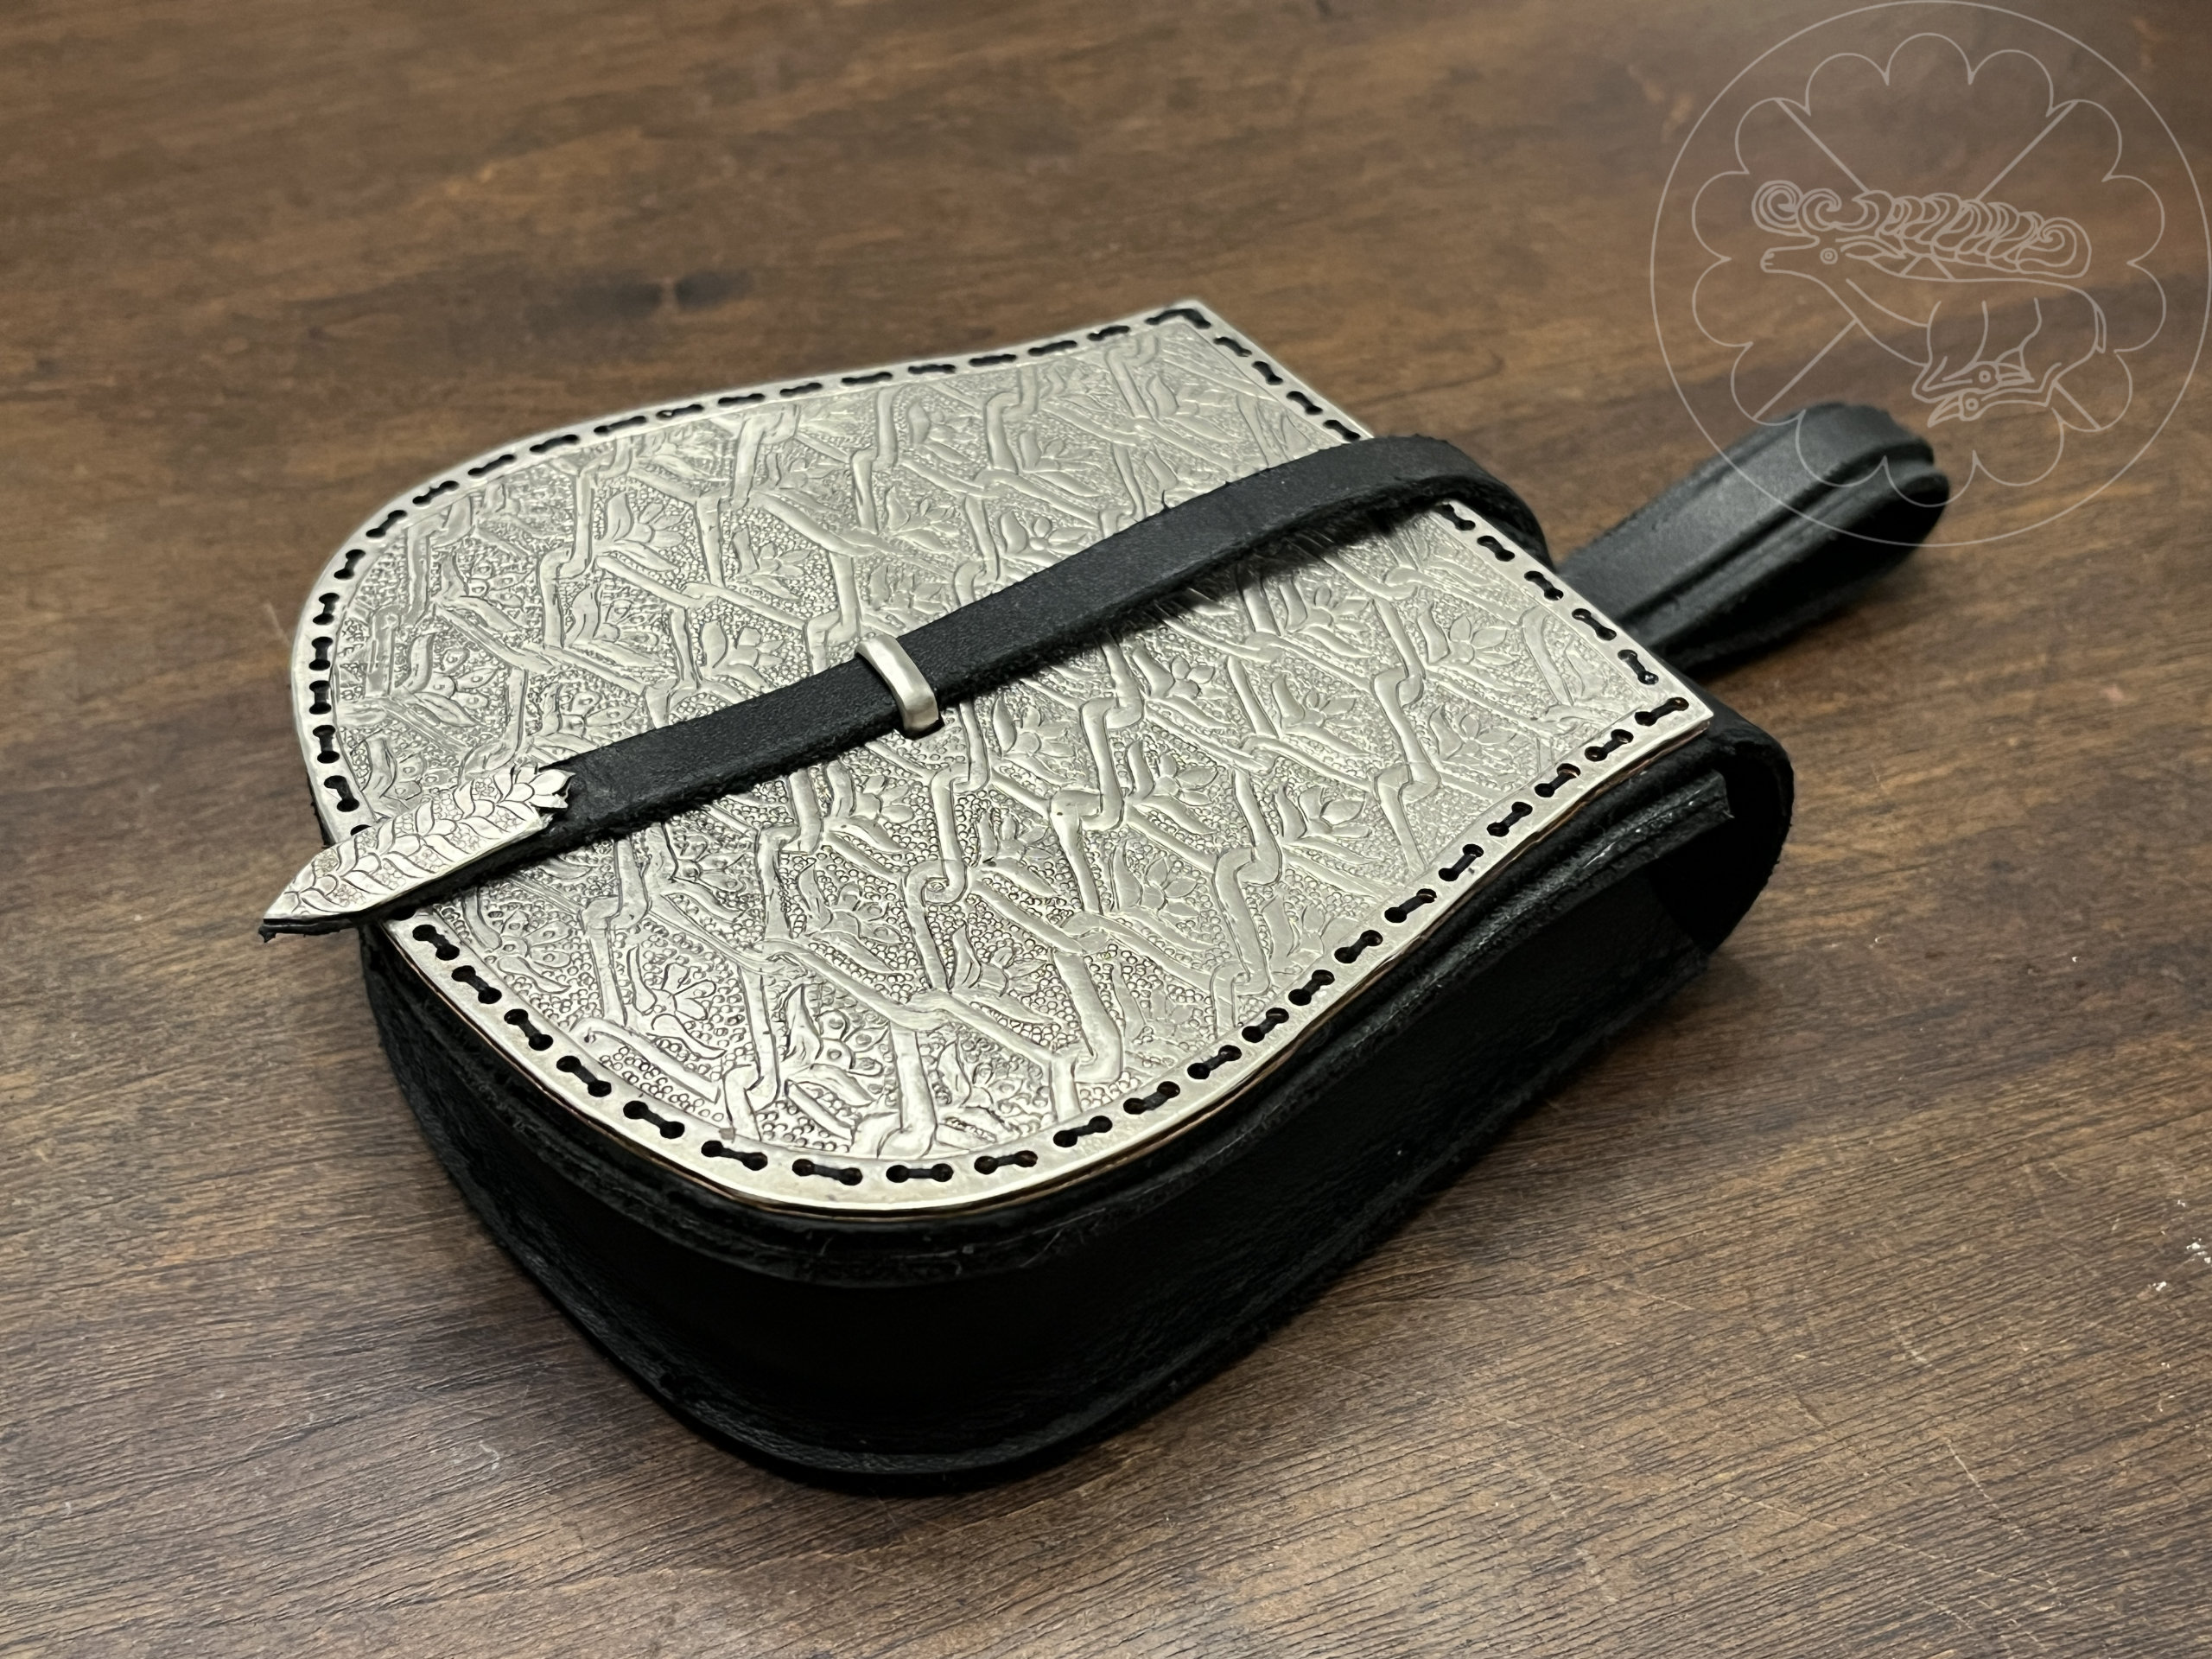
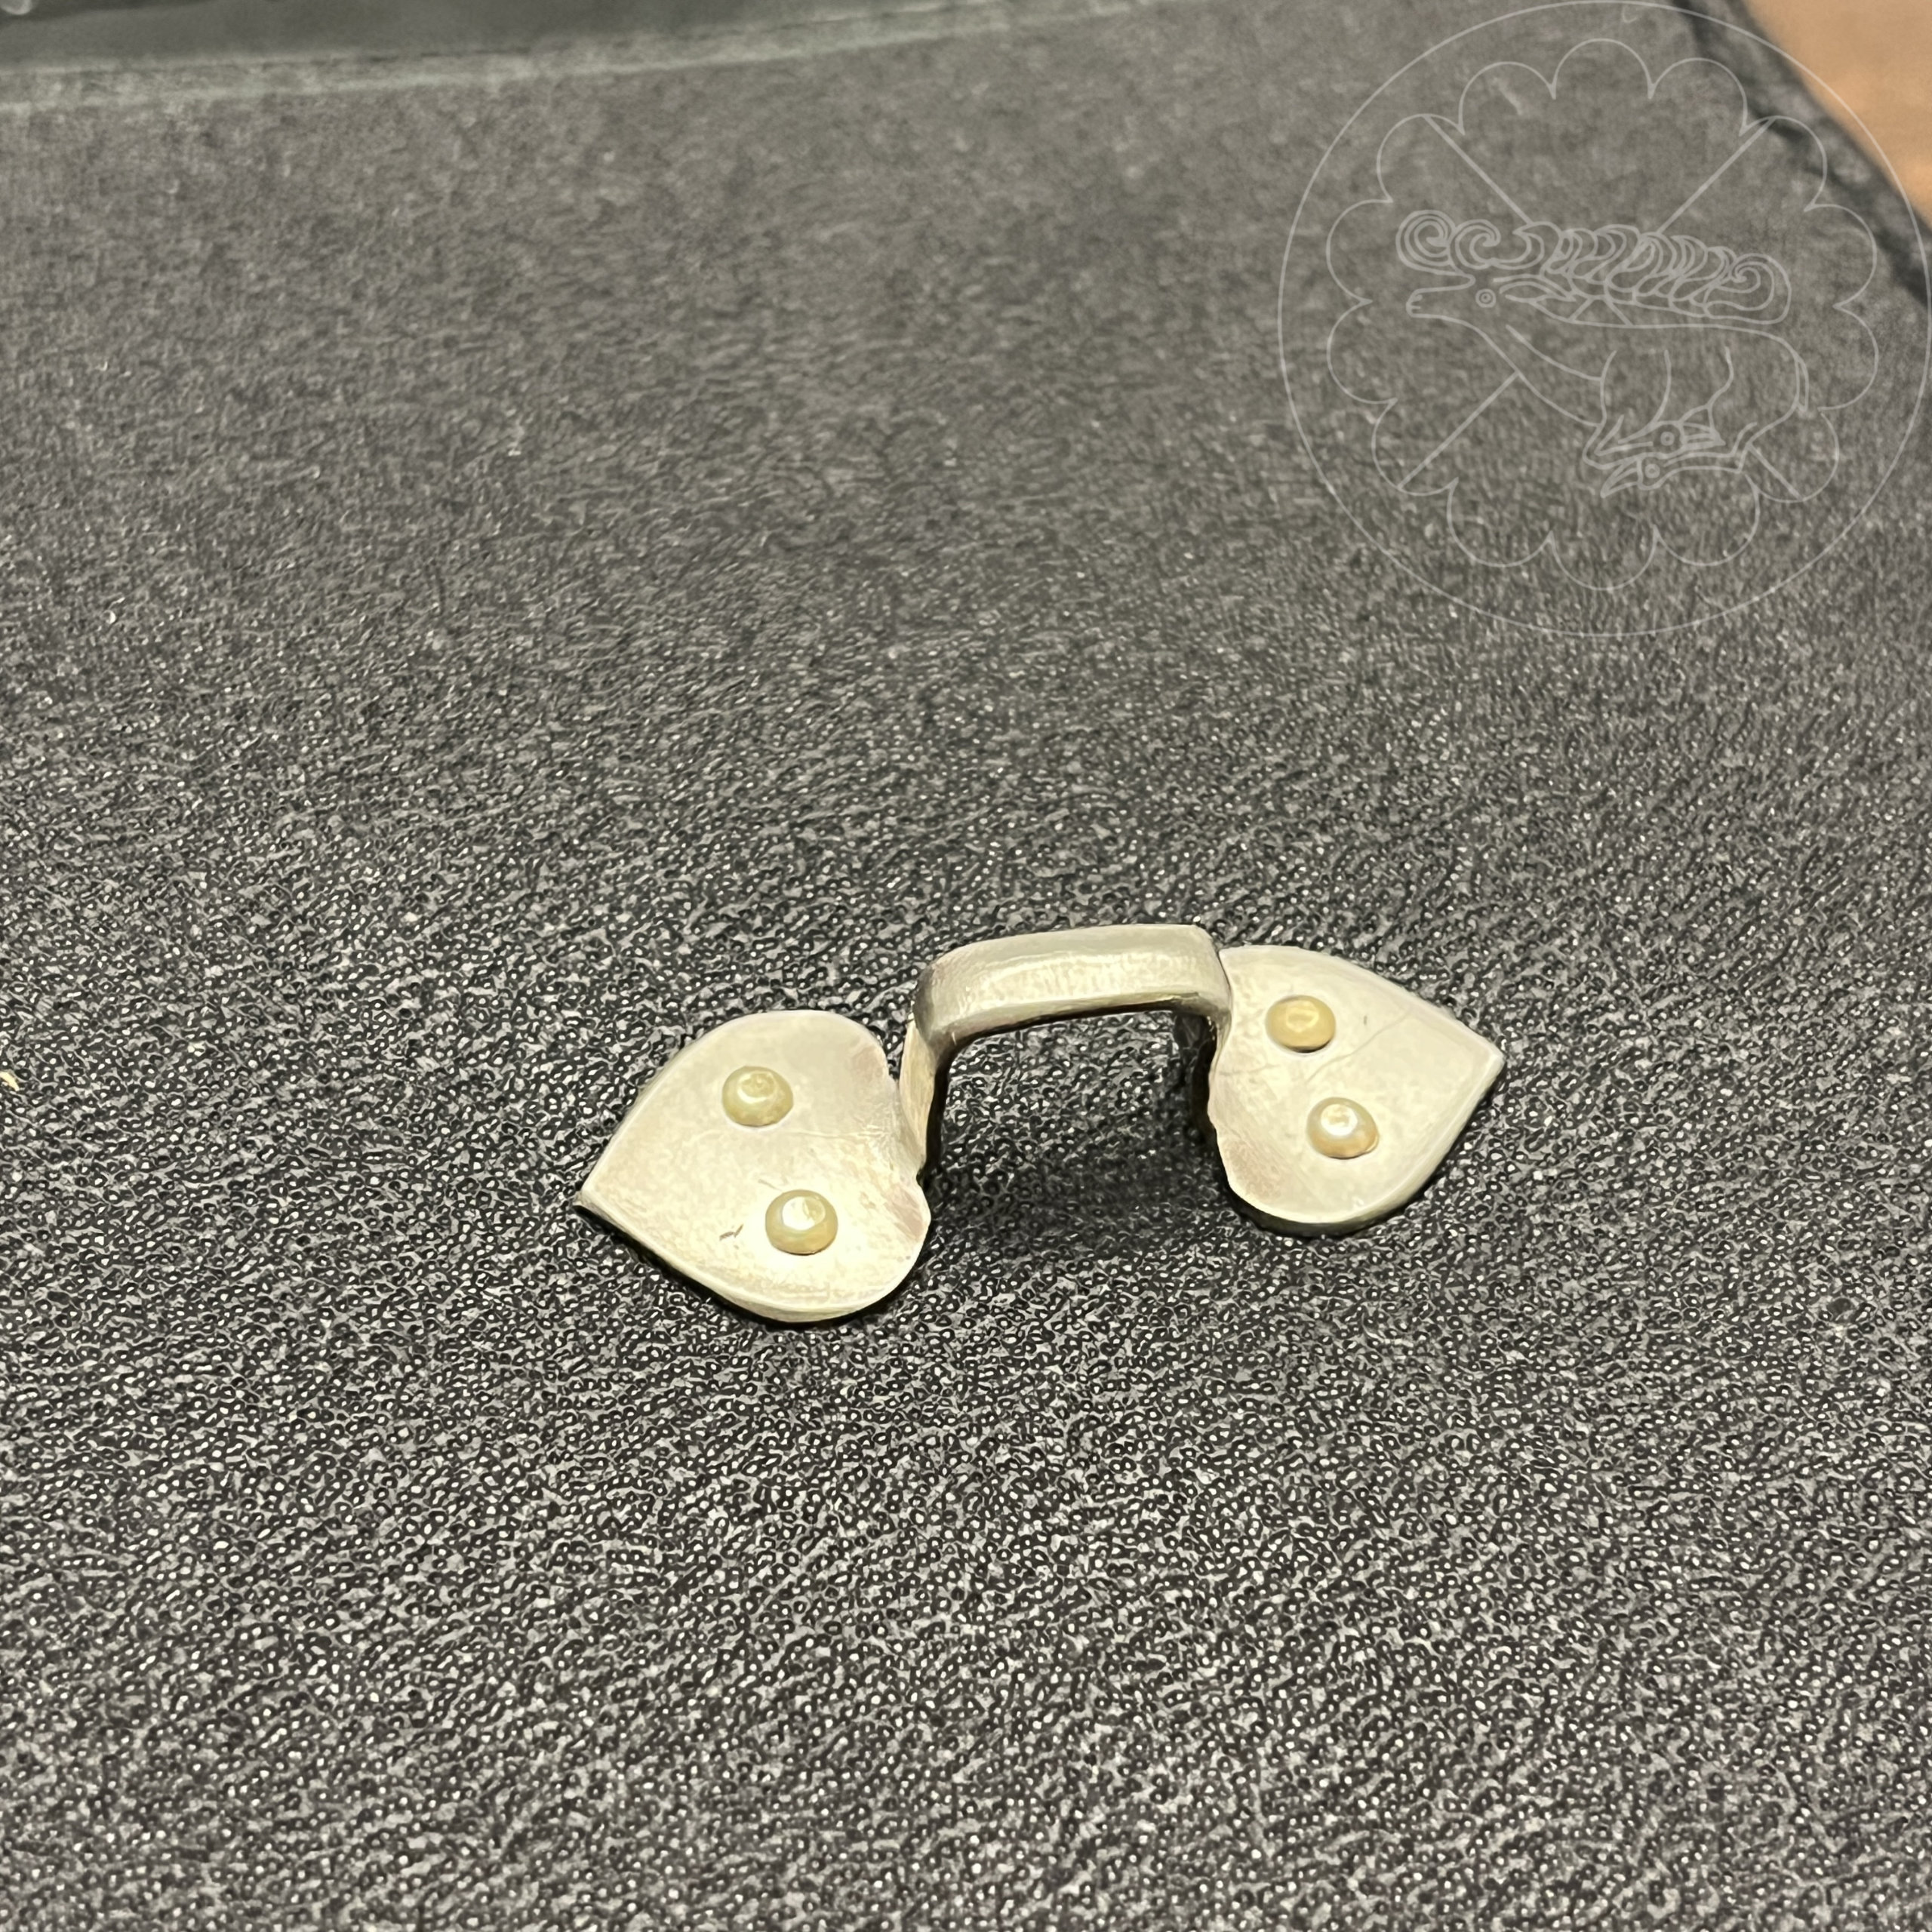
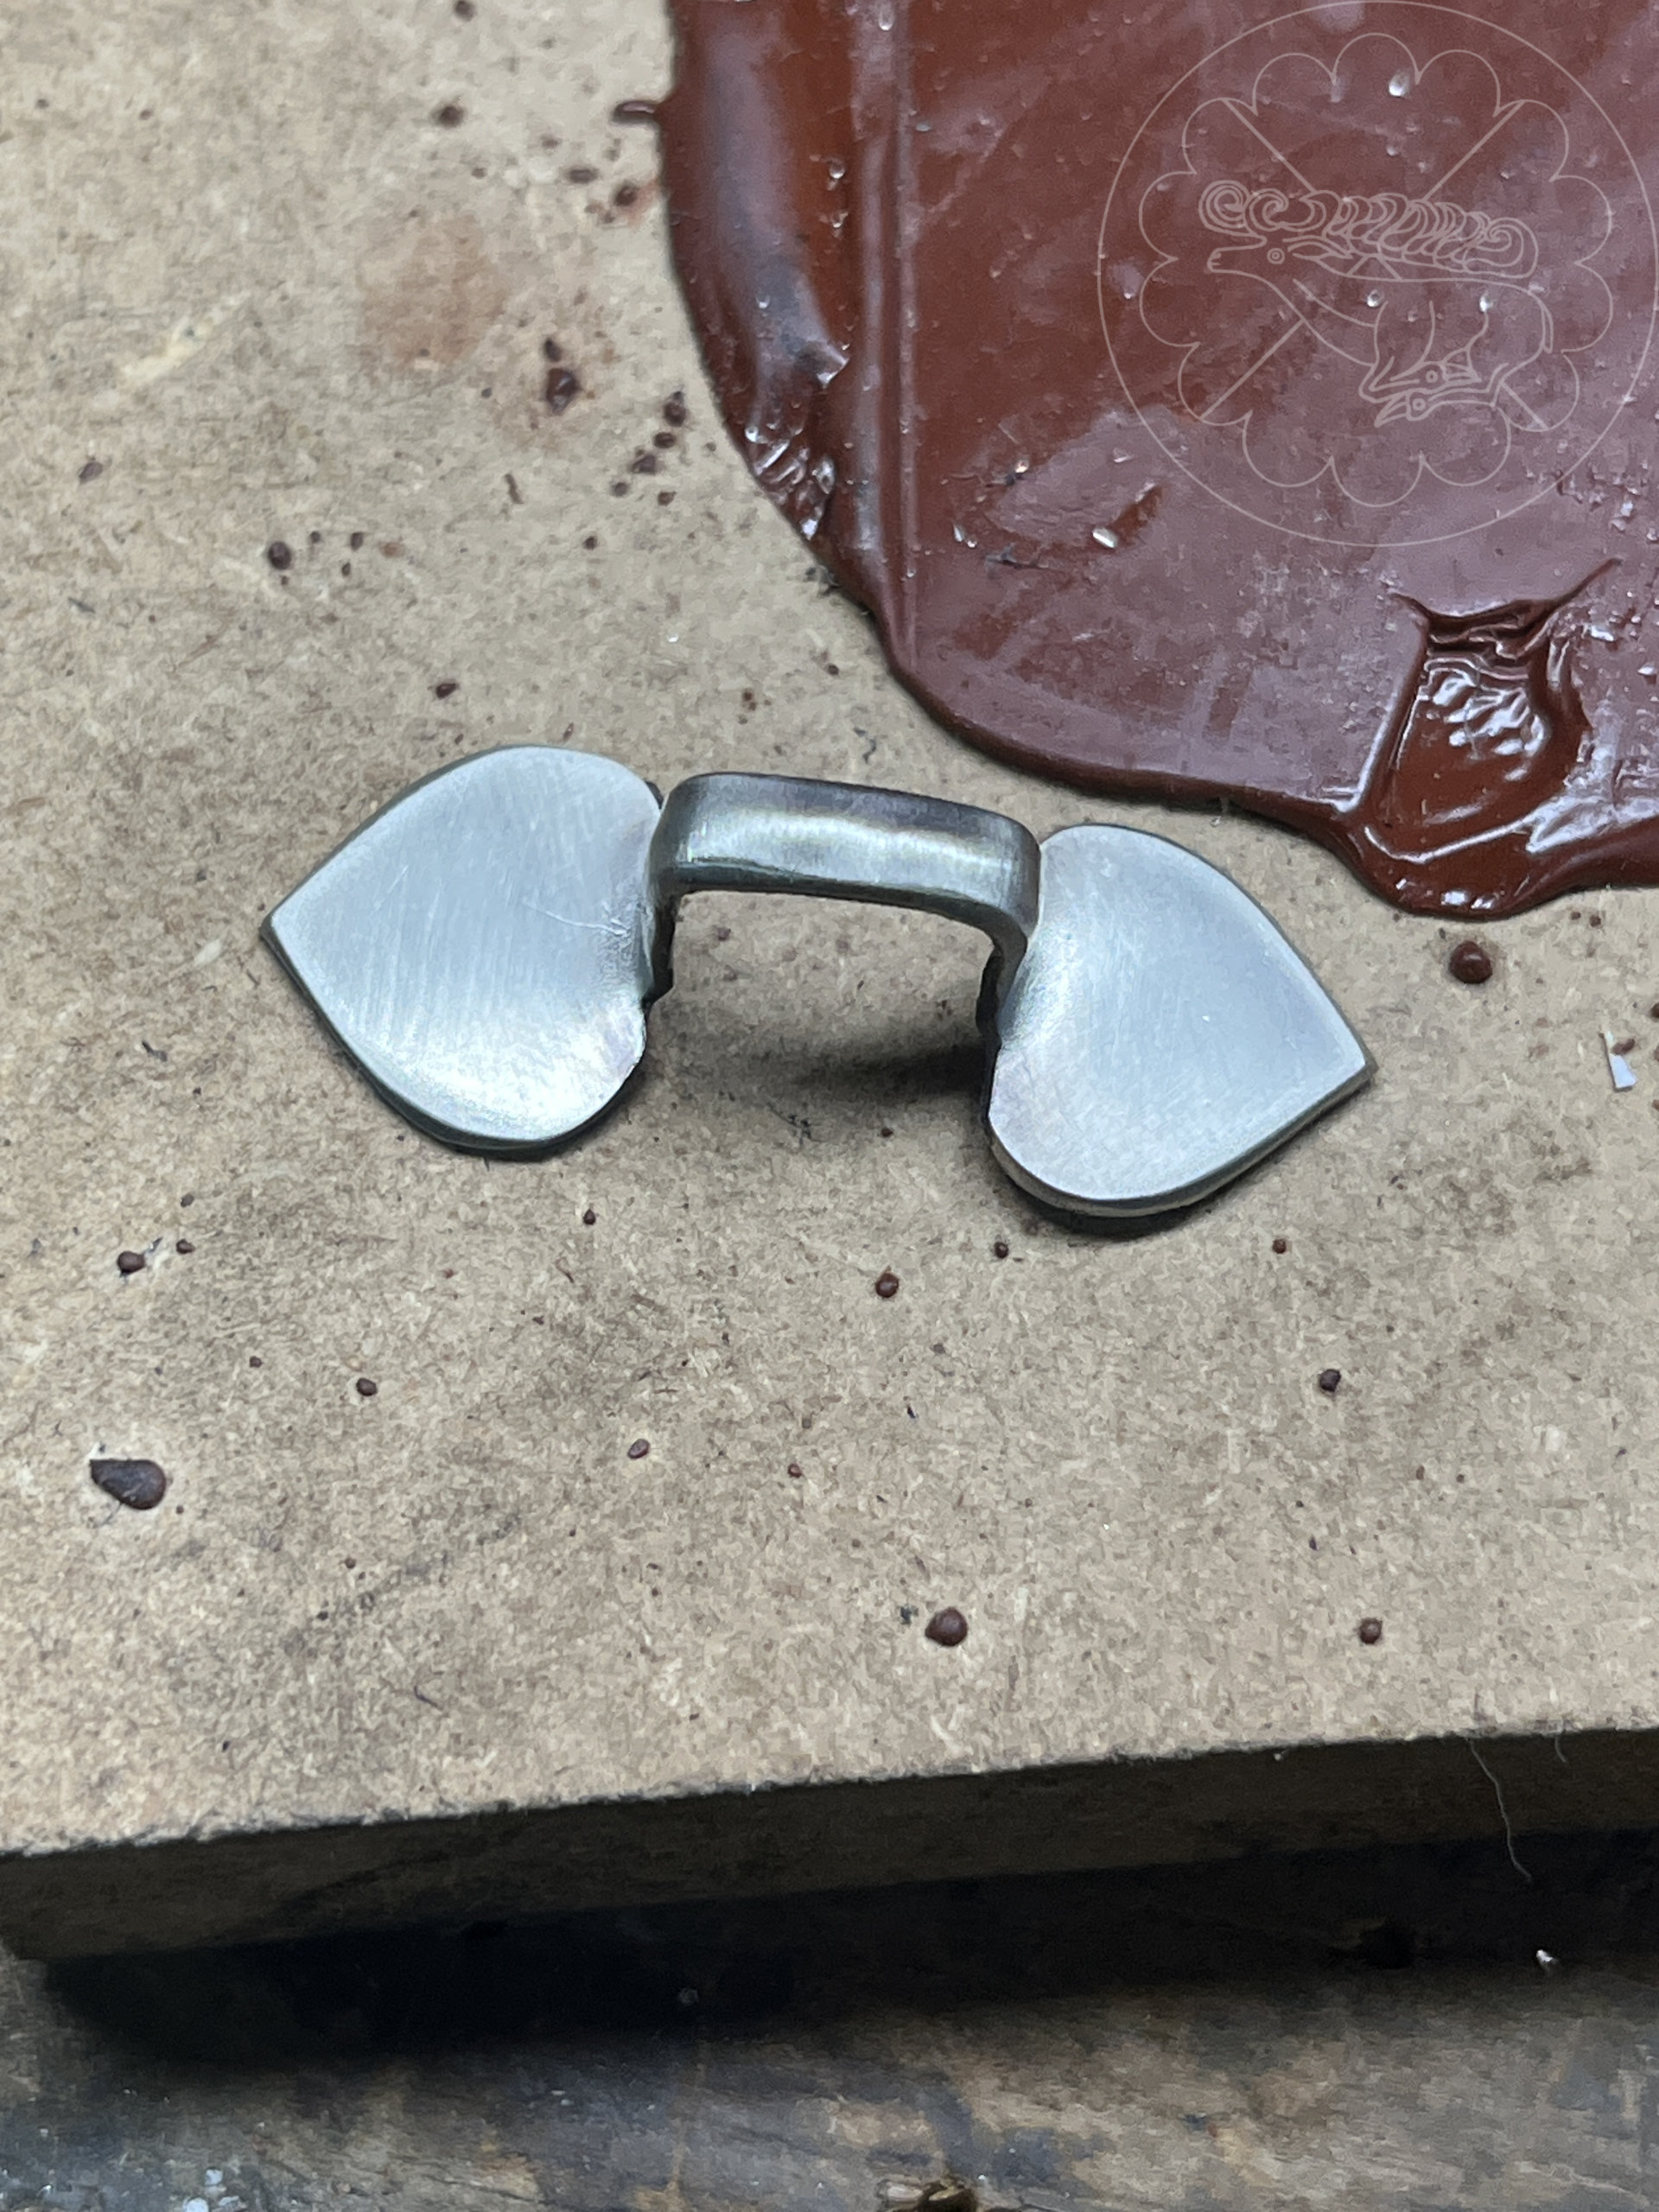
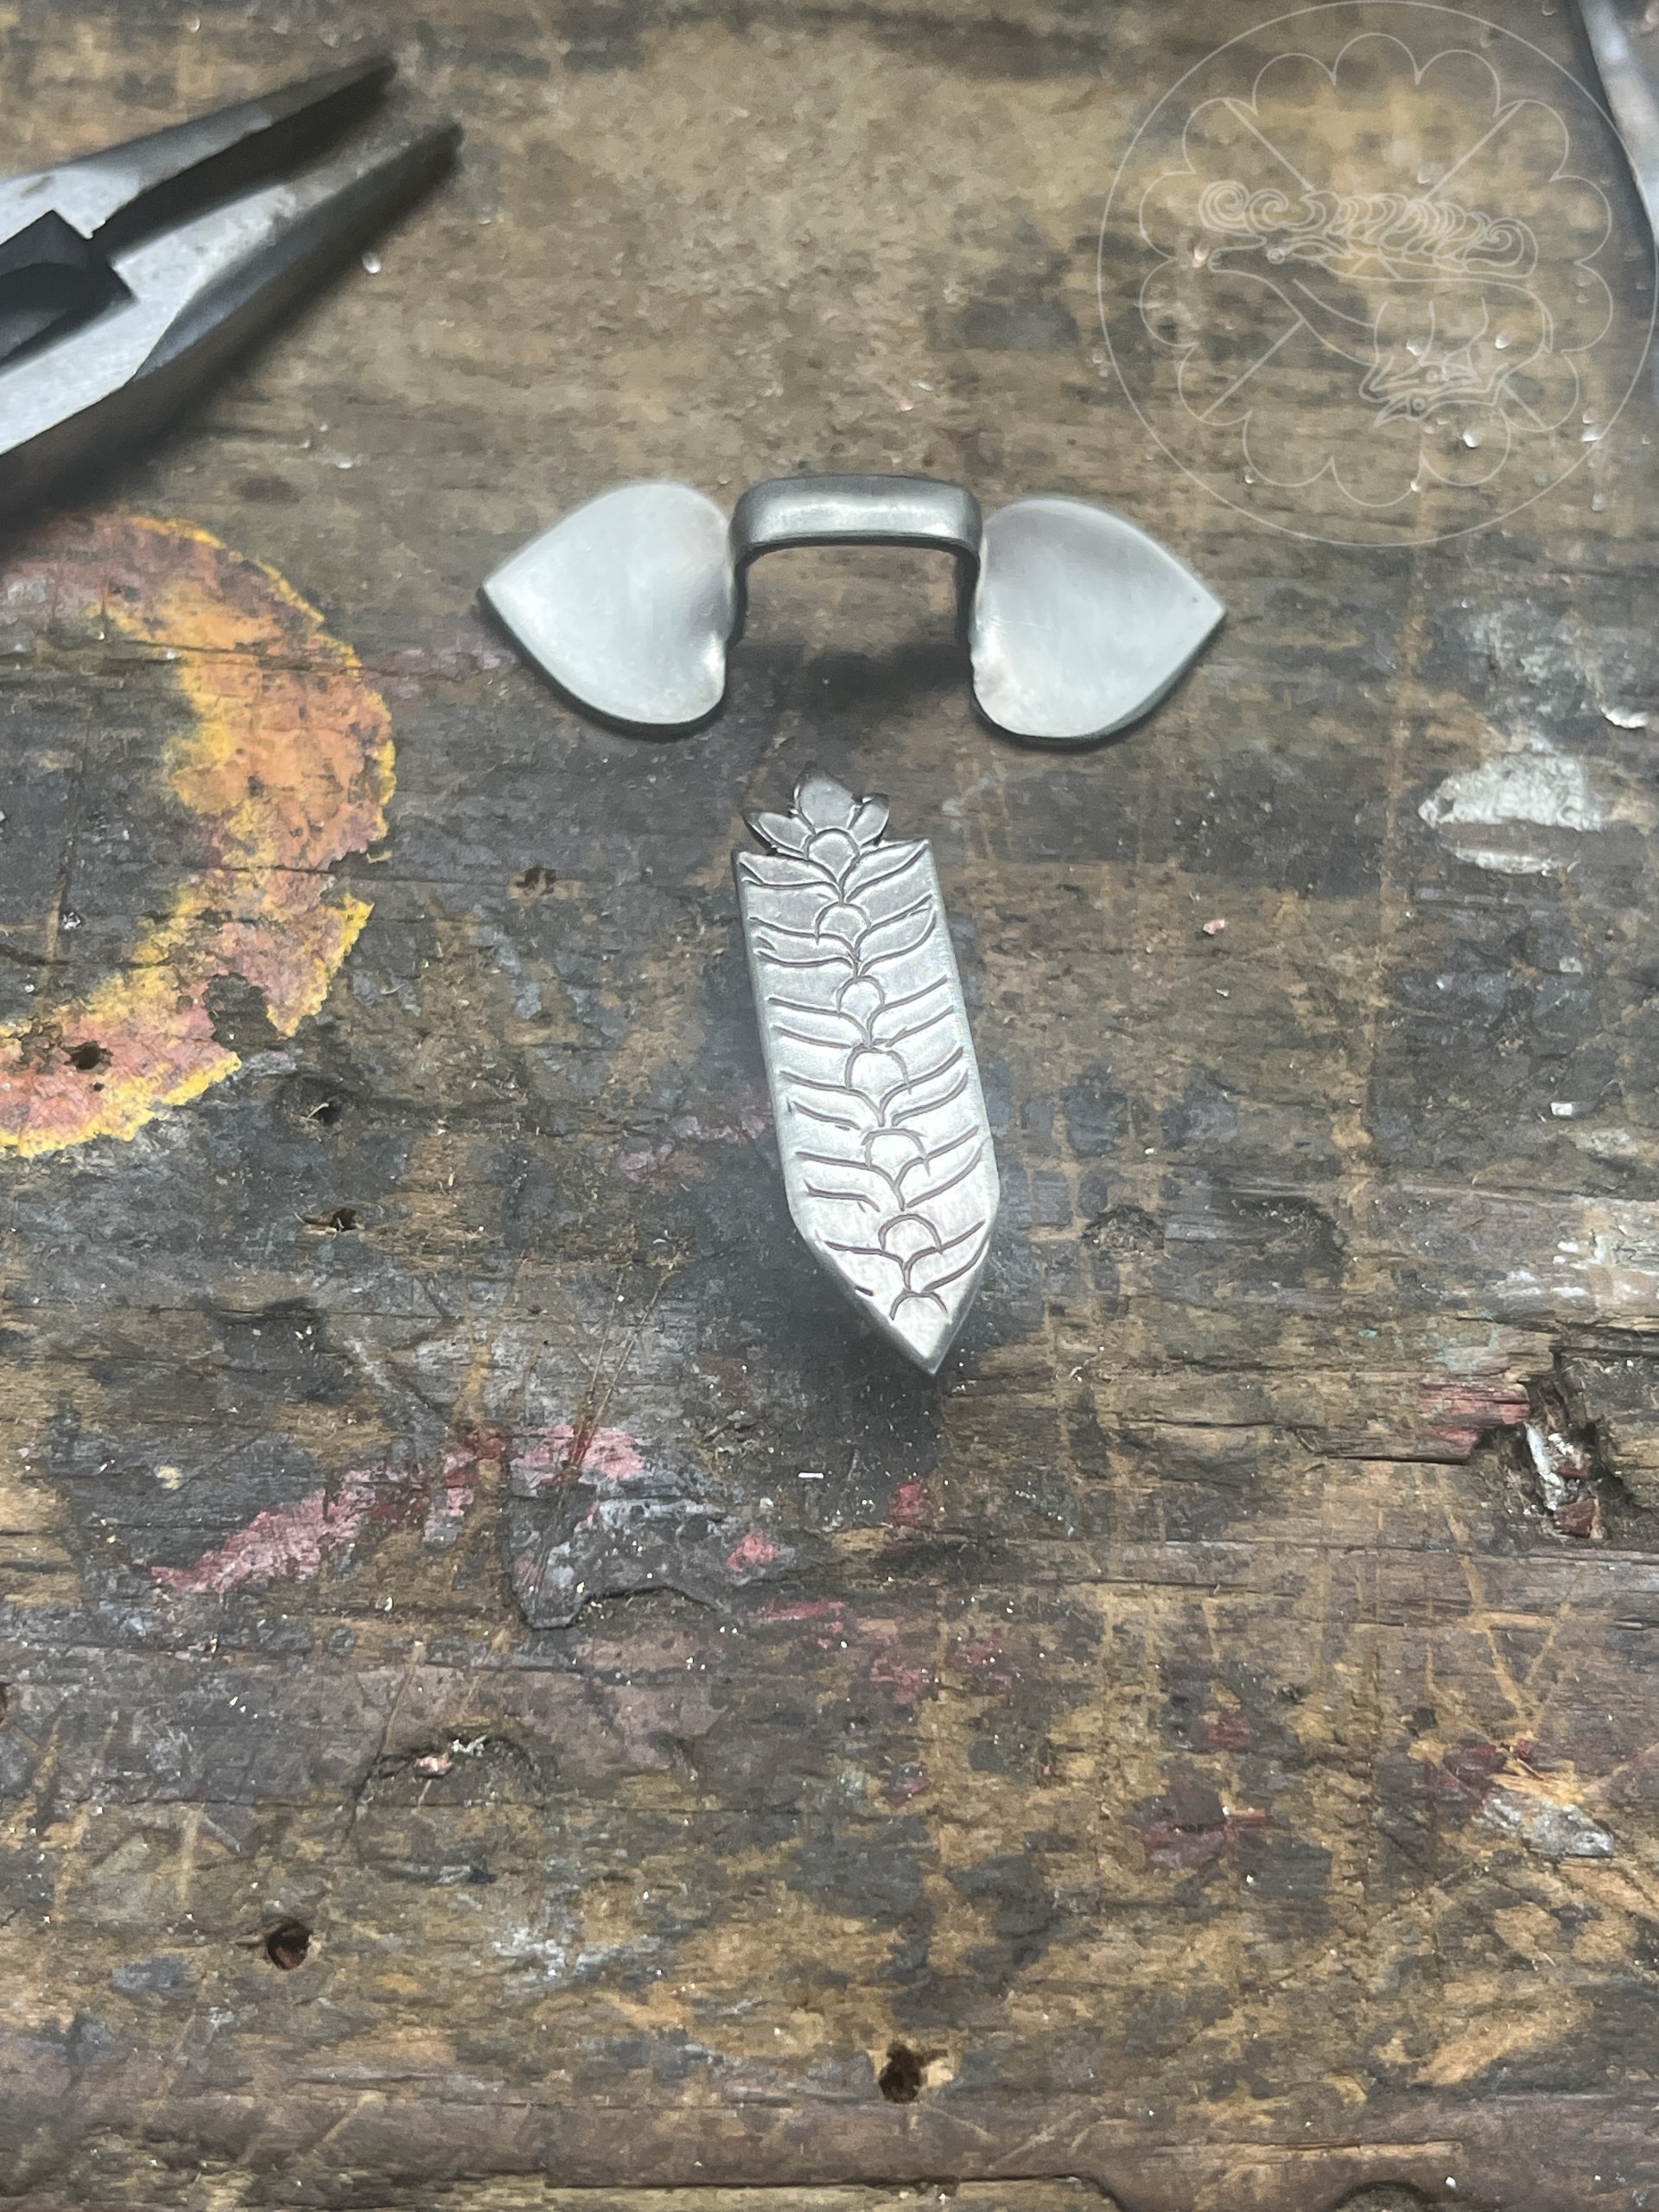
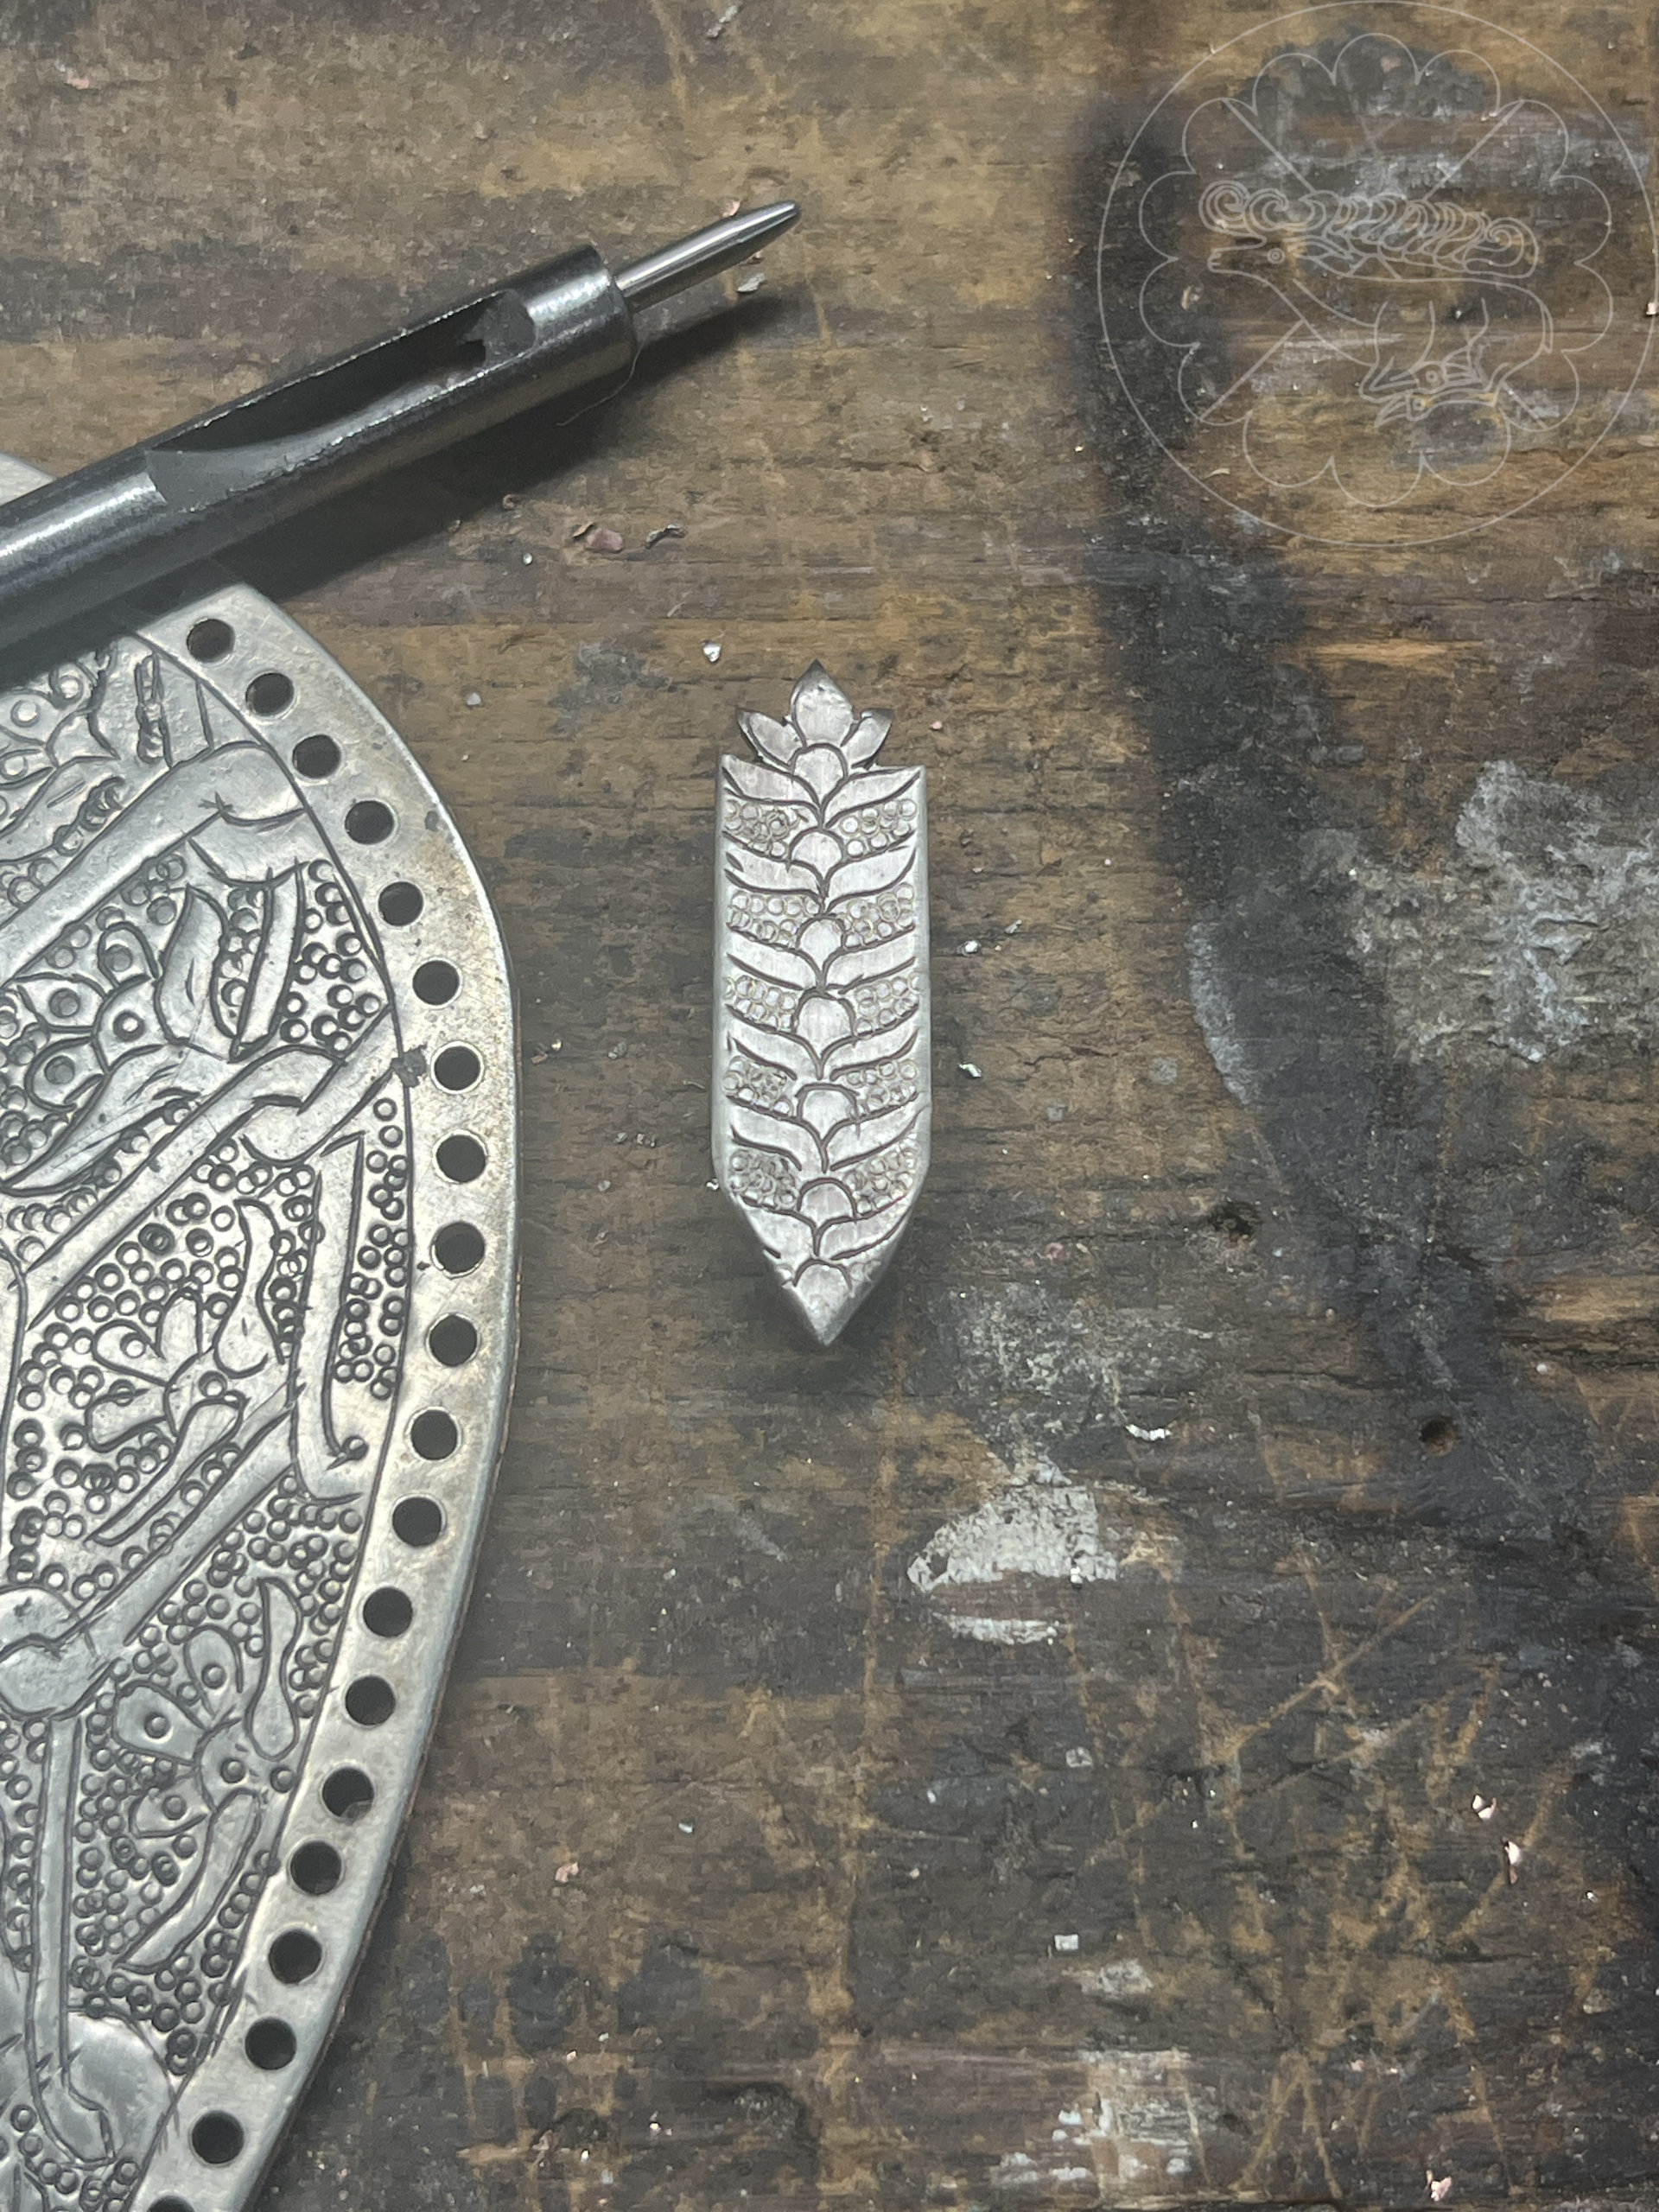
Next, I fabricated a strap end, as well as a loop for the clasp and a backing plate for the clasp from 20 gauge nickel silver.

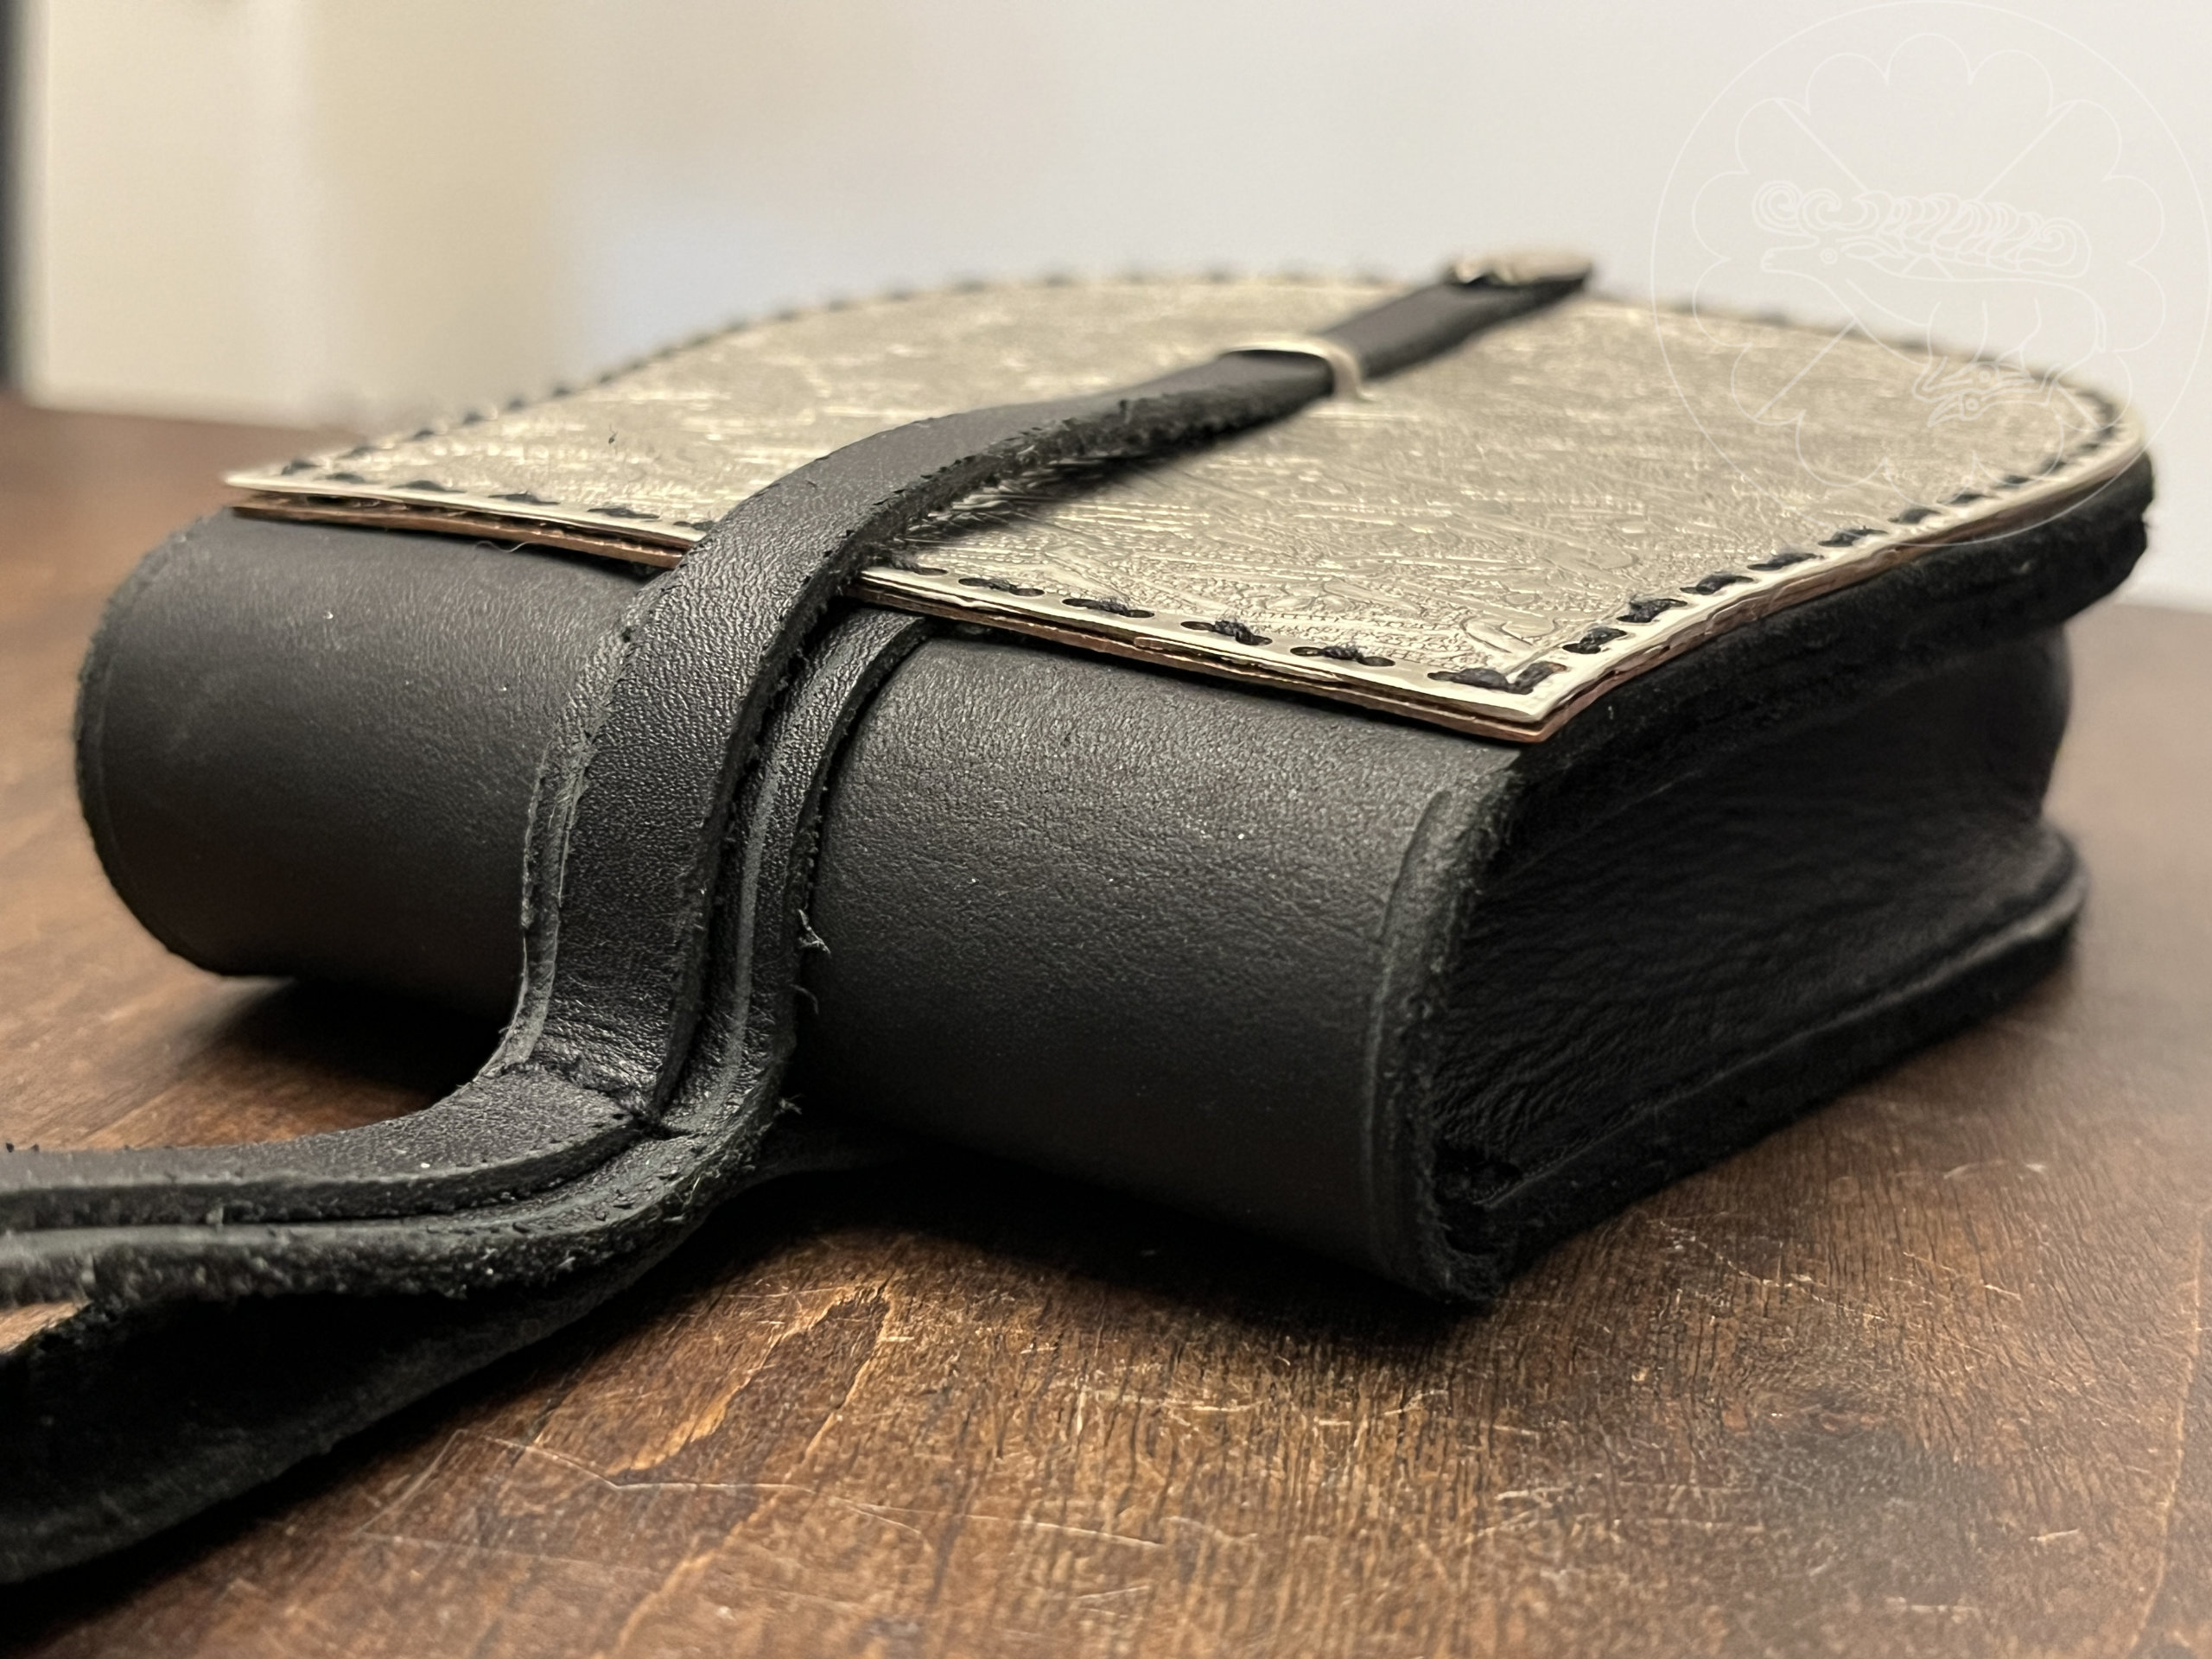
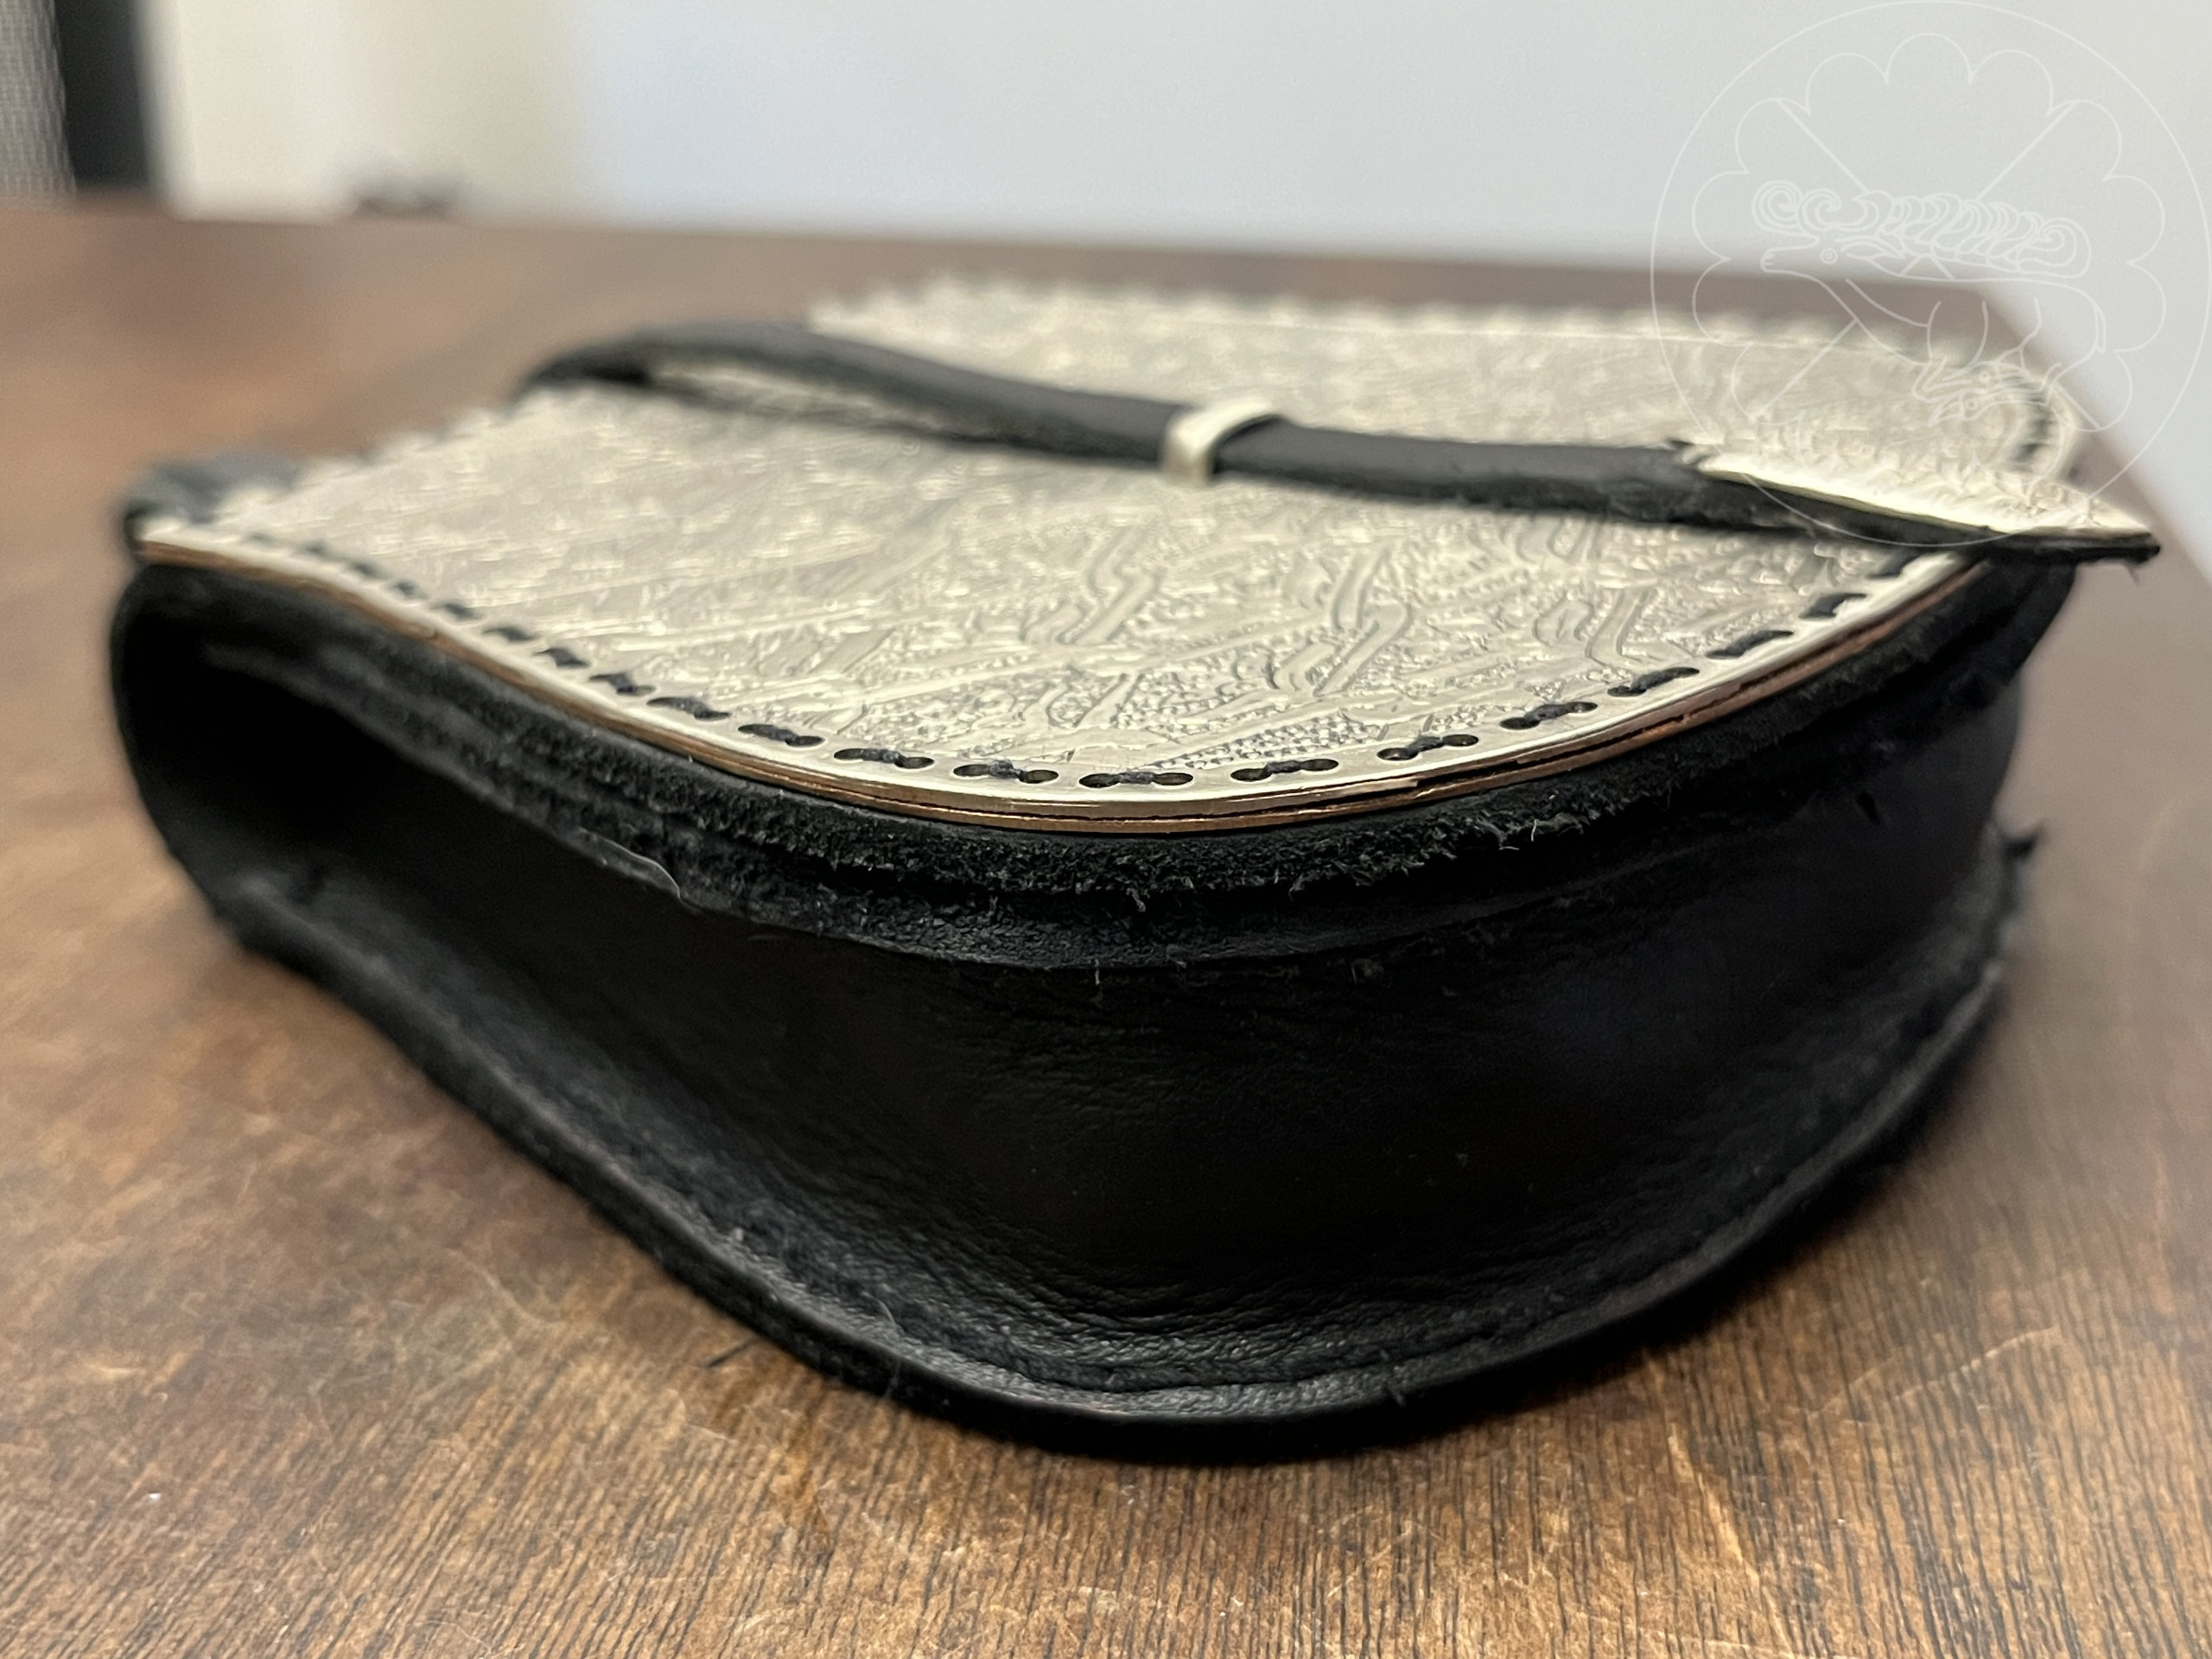
Finally, I cut and sewed a pouch, and attached the plate to the flap. I chose black as I felt it best accentuated the tarsoly plate. The loop is affixed through the leather to the backing plate with small brass nails used as rivets.